Blog

  • Corvette C8 Coupe unboxing #1

    Corvette C8 Coupe unboxing #1

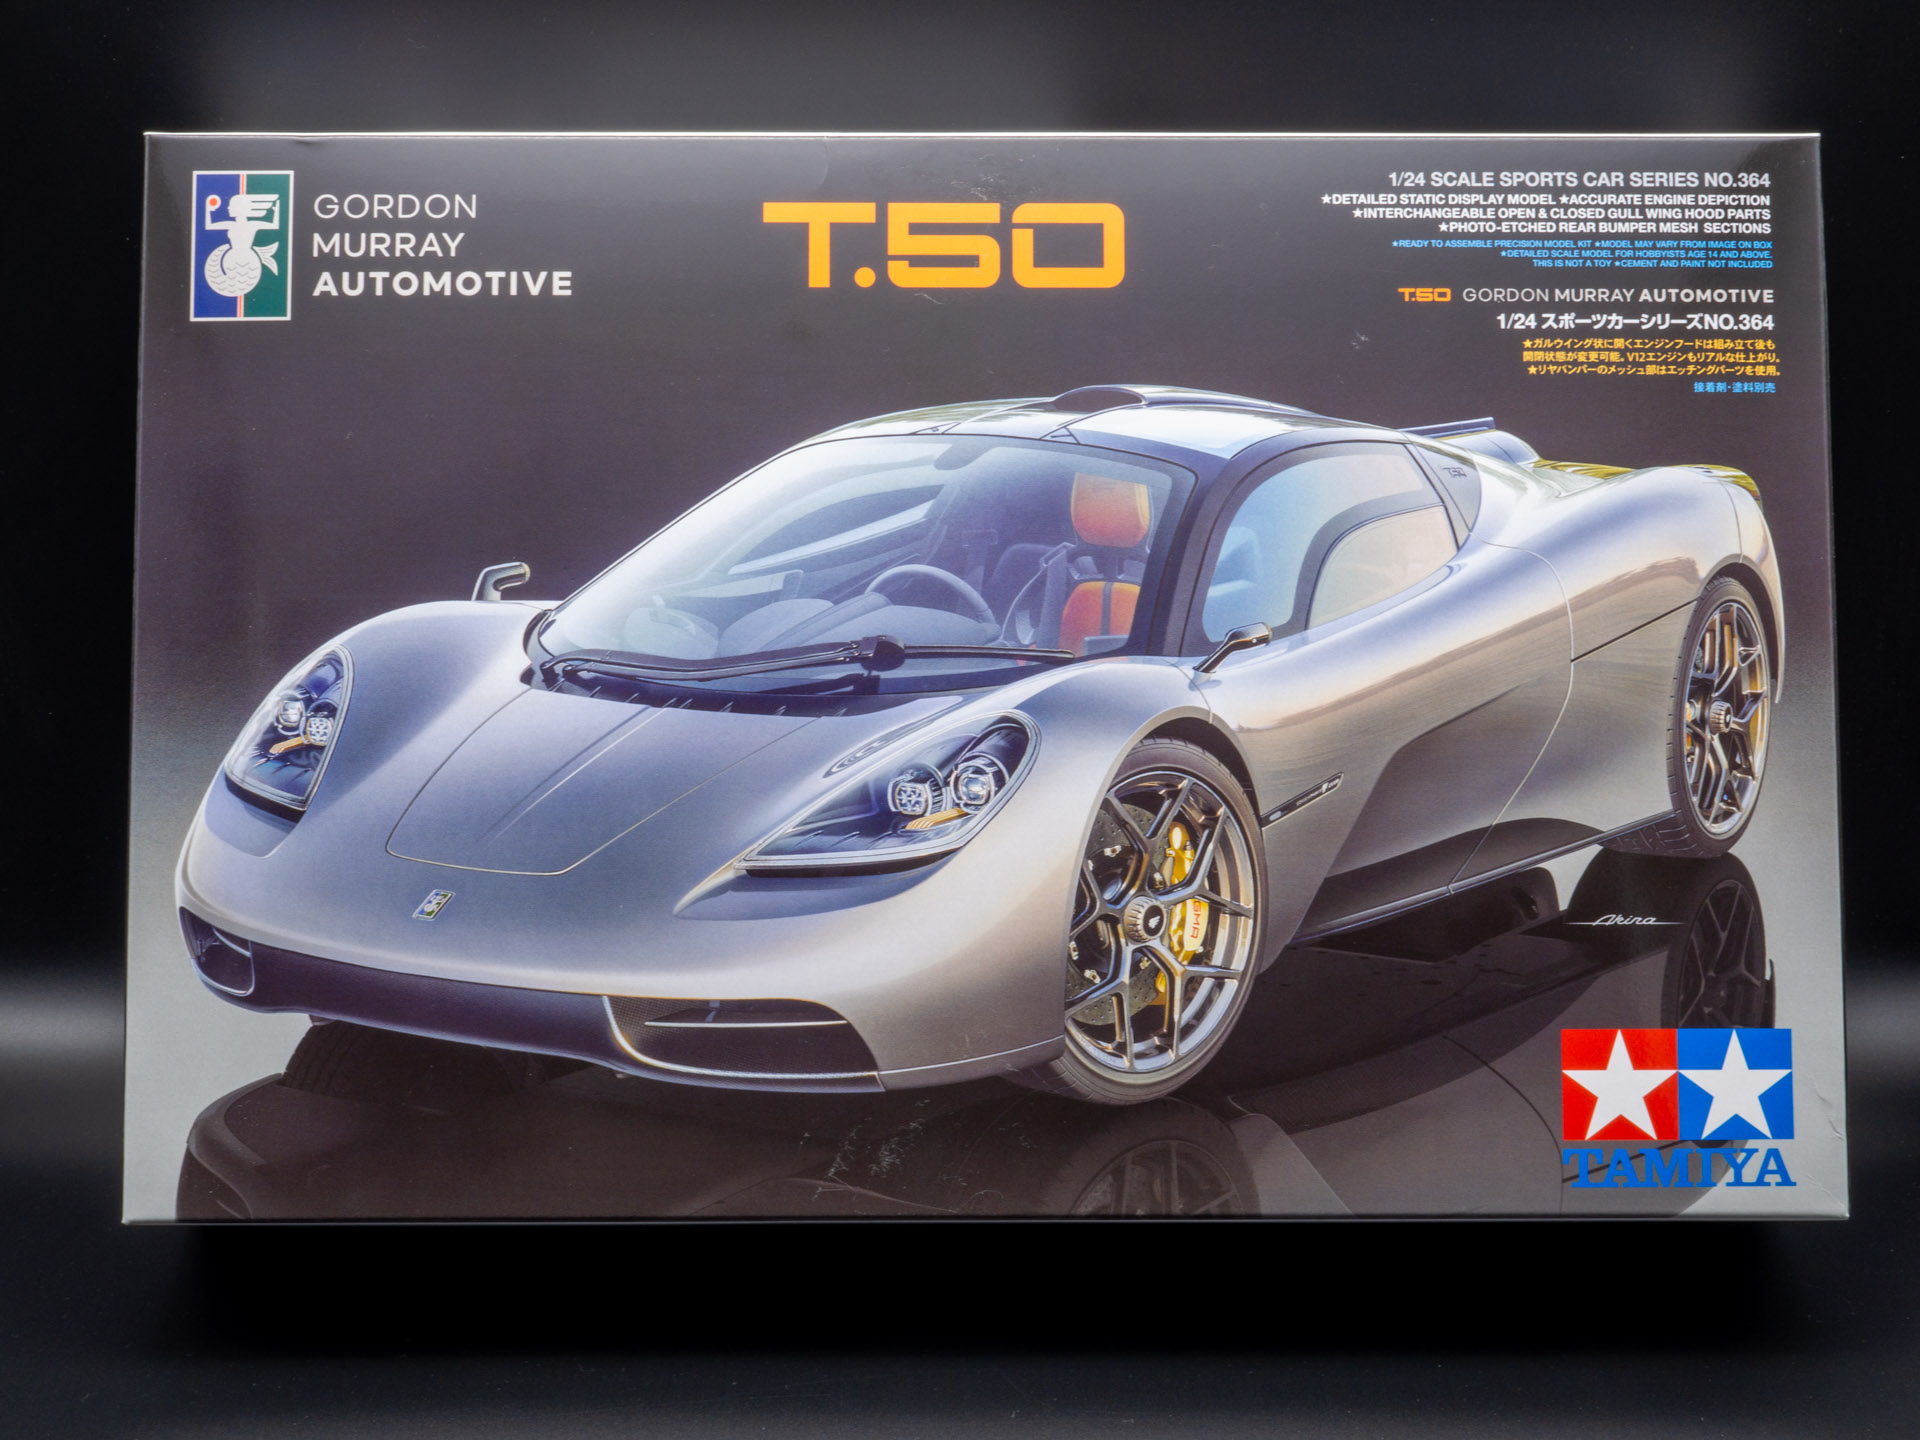
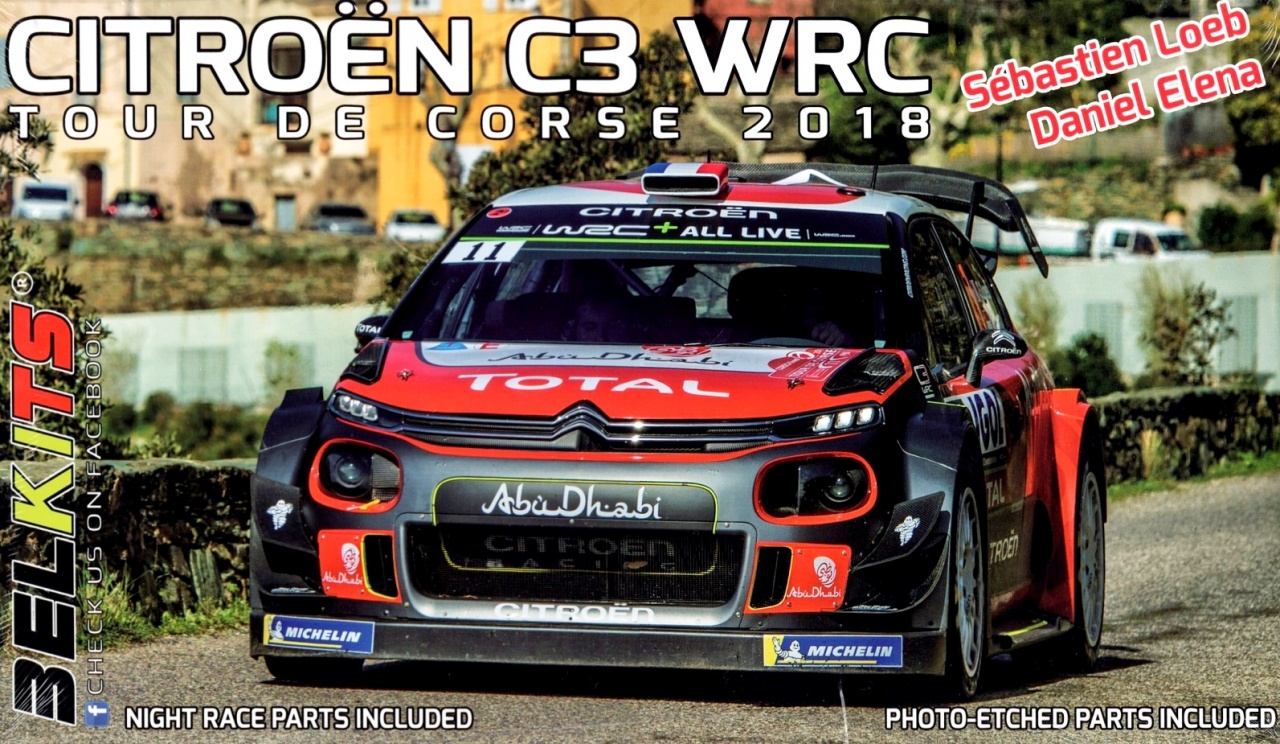
    Some days ago got this box. This is a brand new kit from Revell with new molds, not a reissue or repack, new design and production. Scale 1:25, a lot of details, 144 is indicated on the box, but it feels like a lot more. I suggest you look at what’s inside and watch a quick dry assembly, check how the Revell kits looks in in 2024.

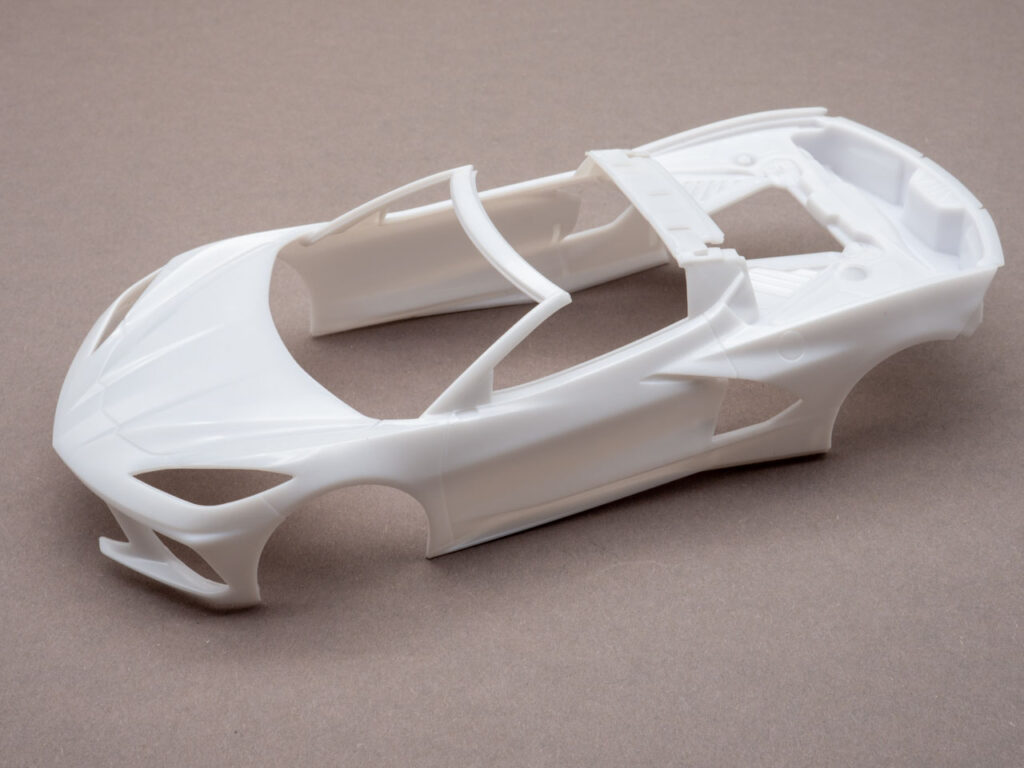
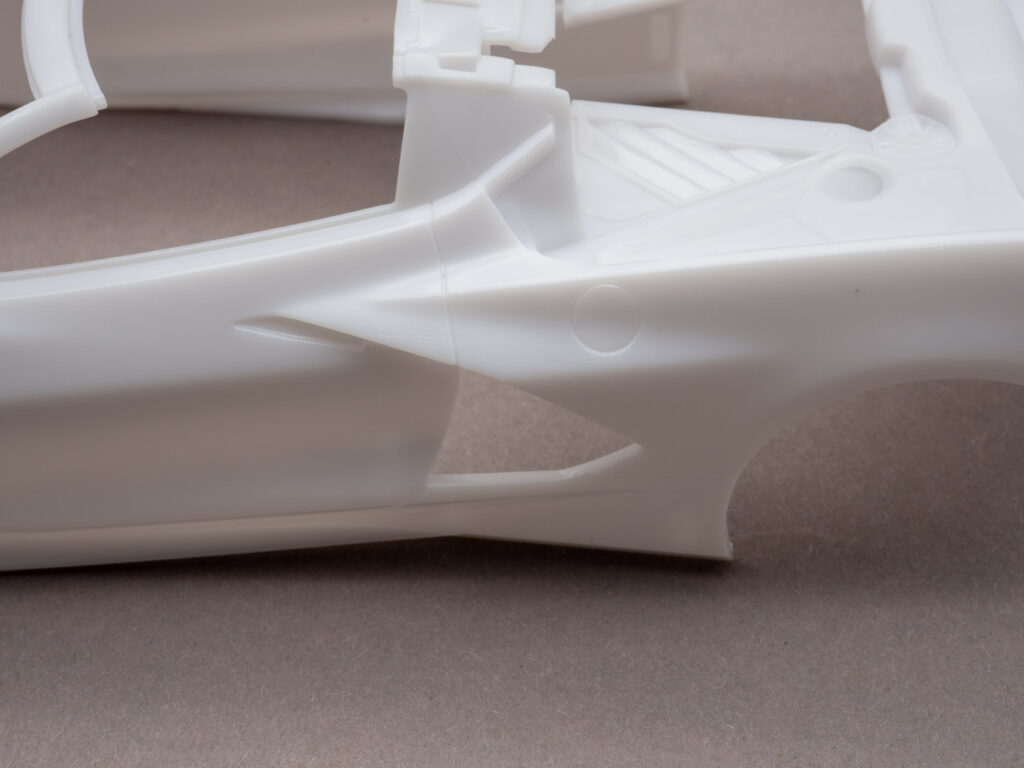
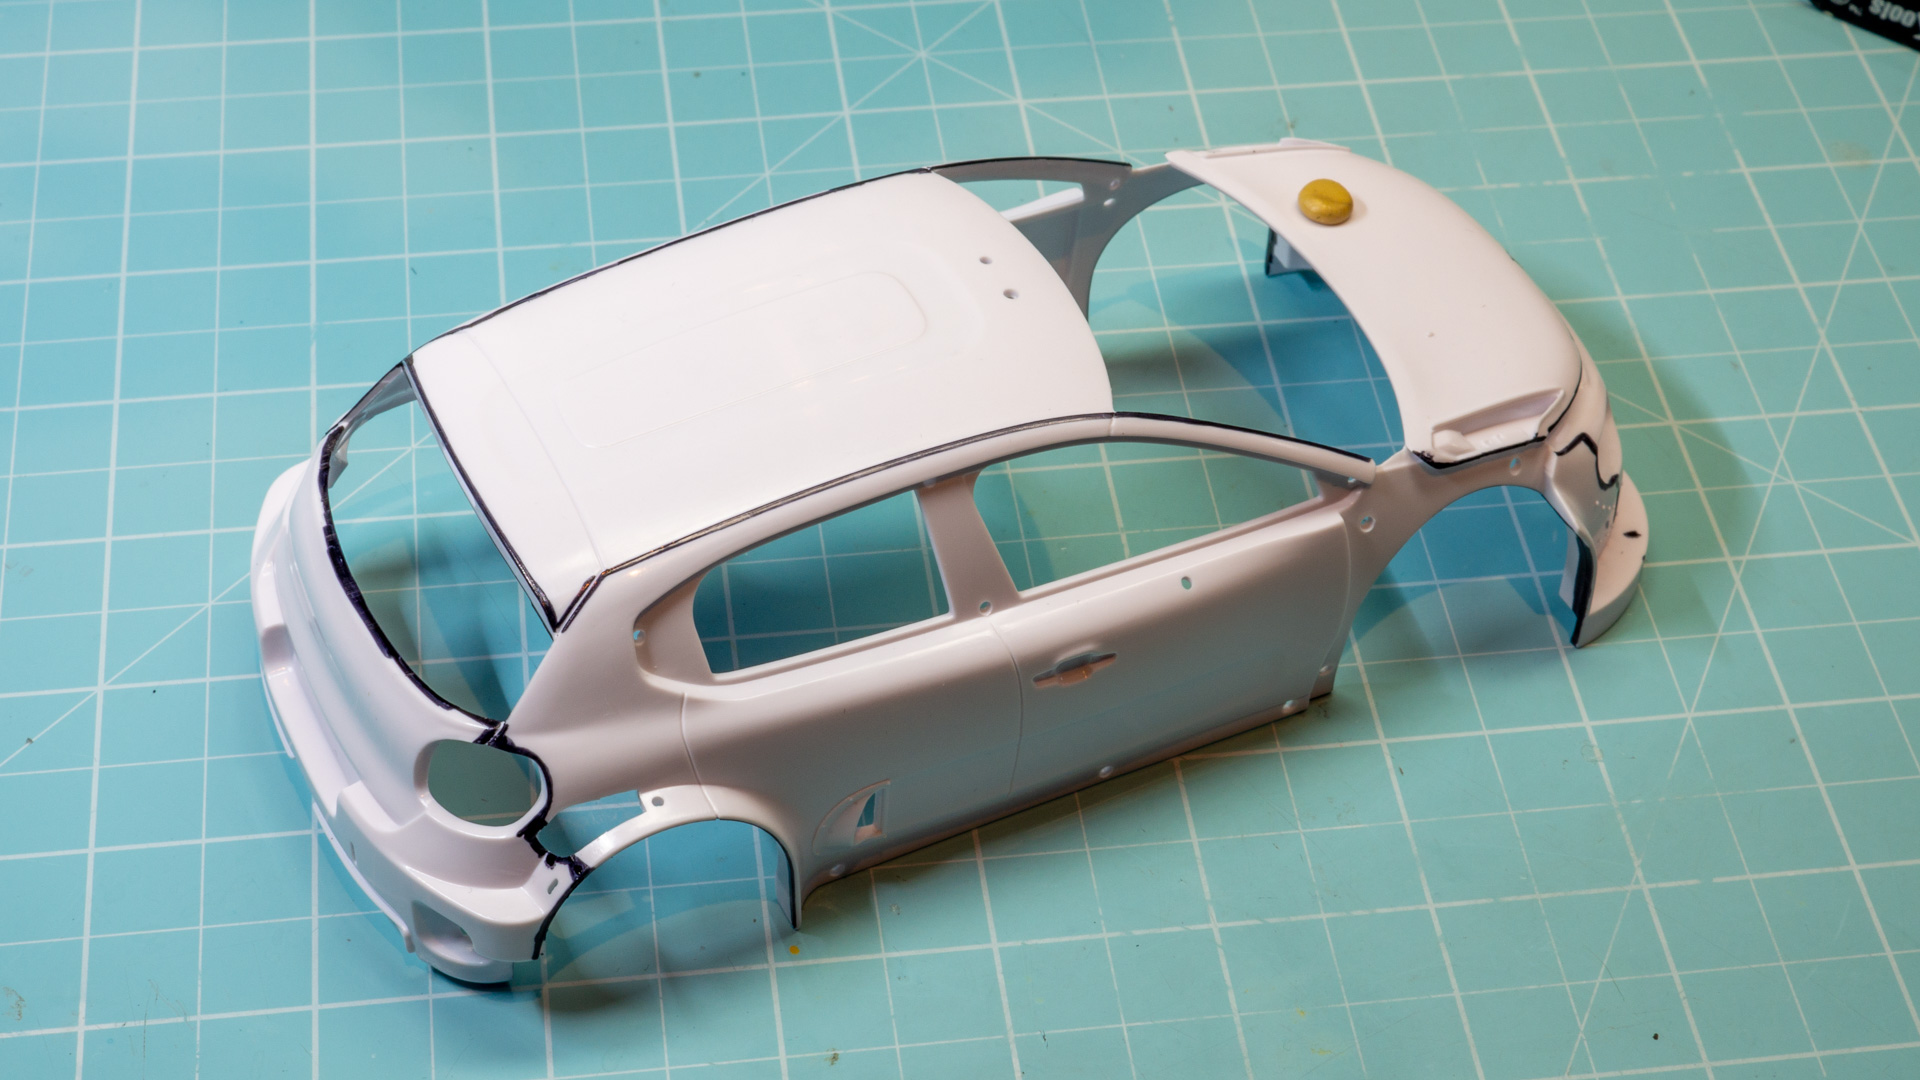
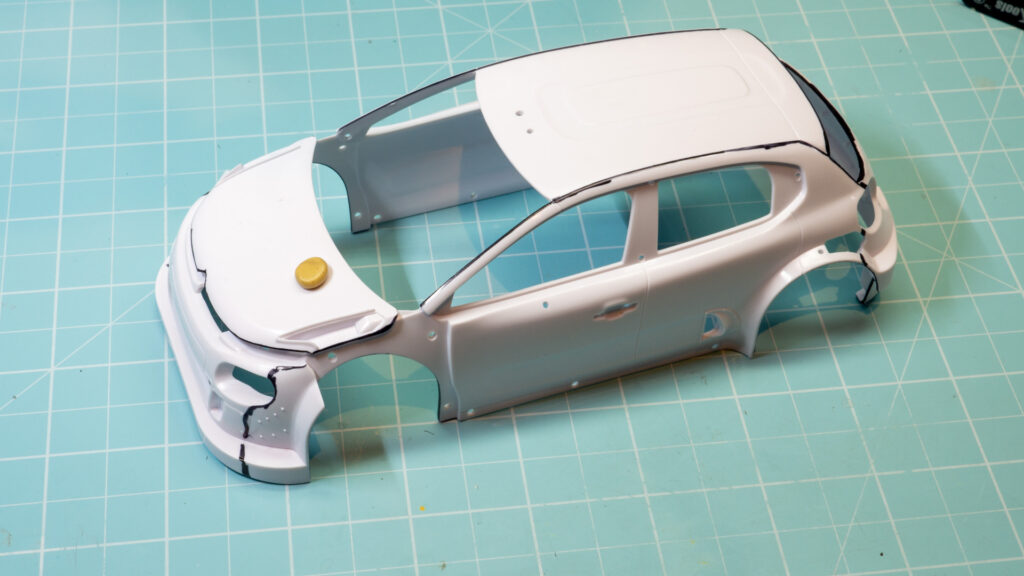
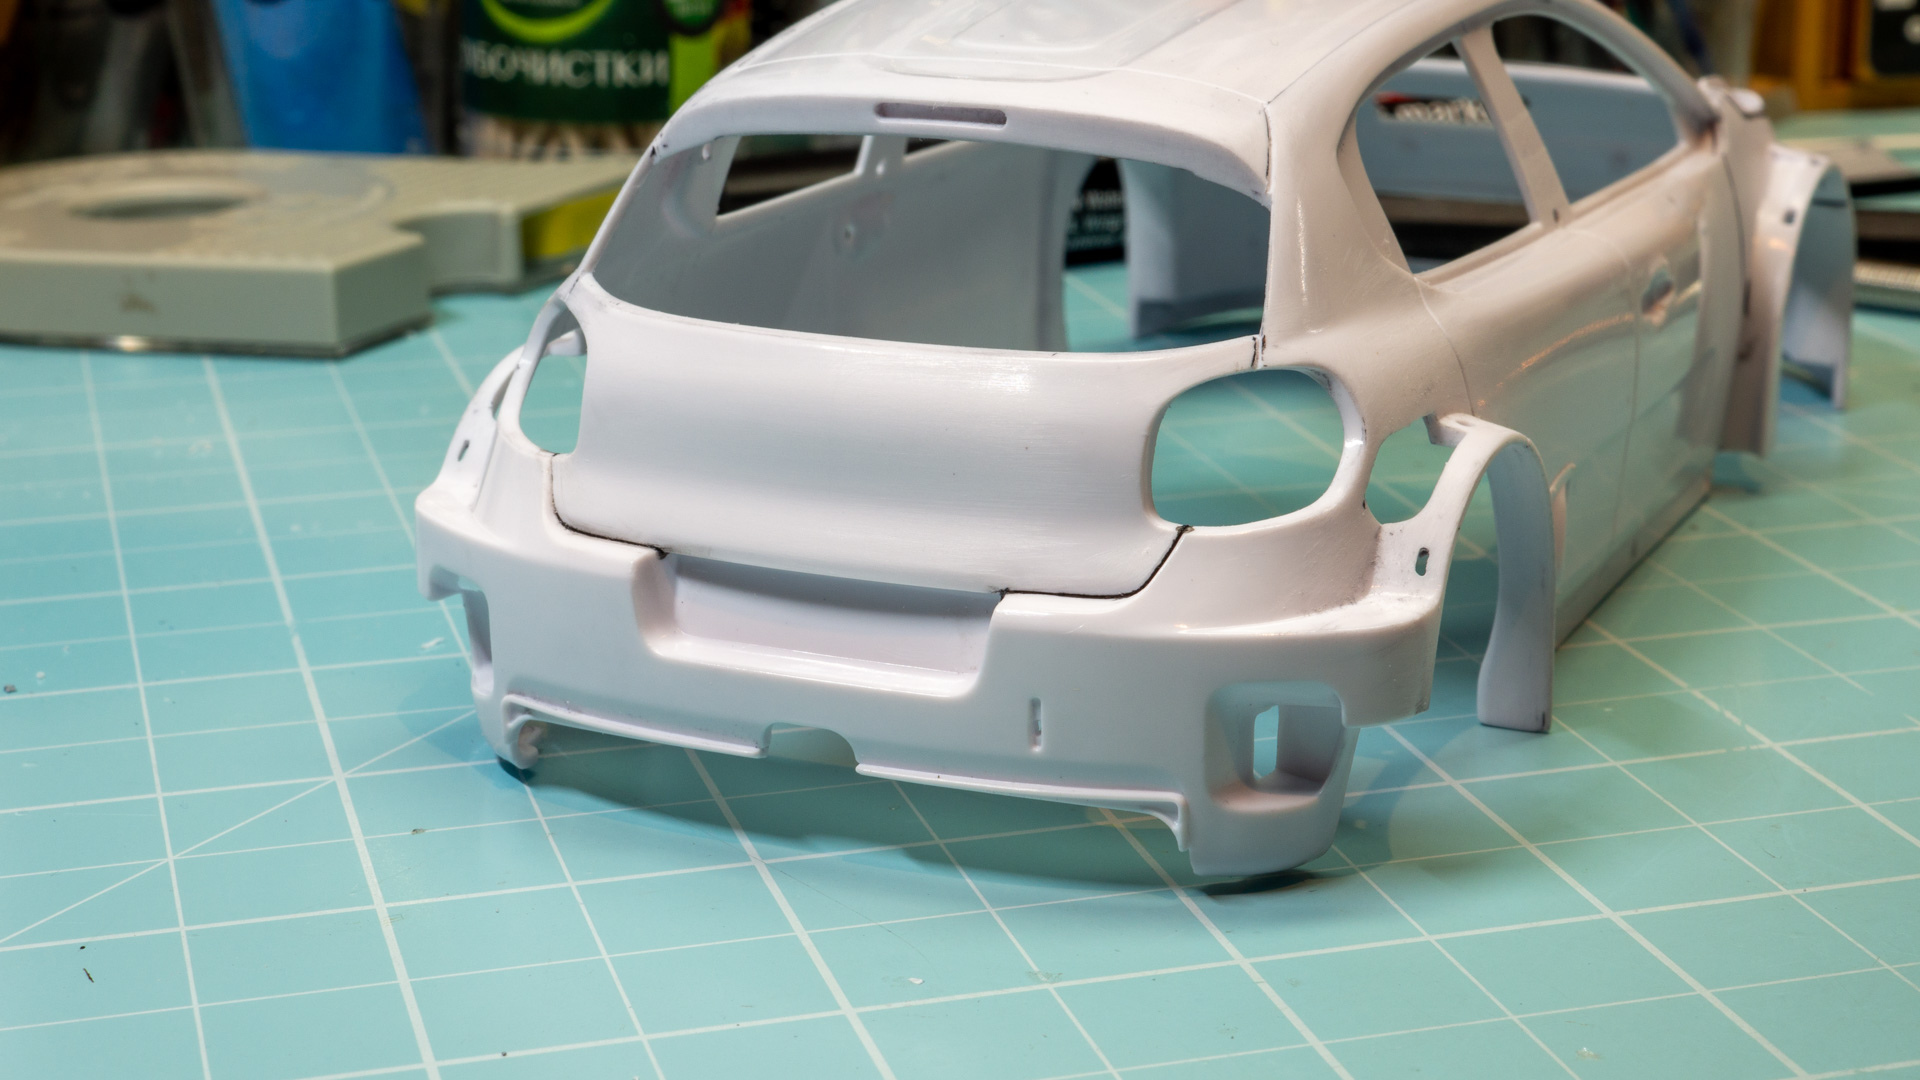
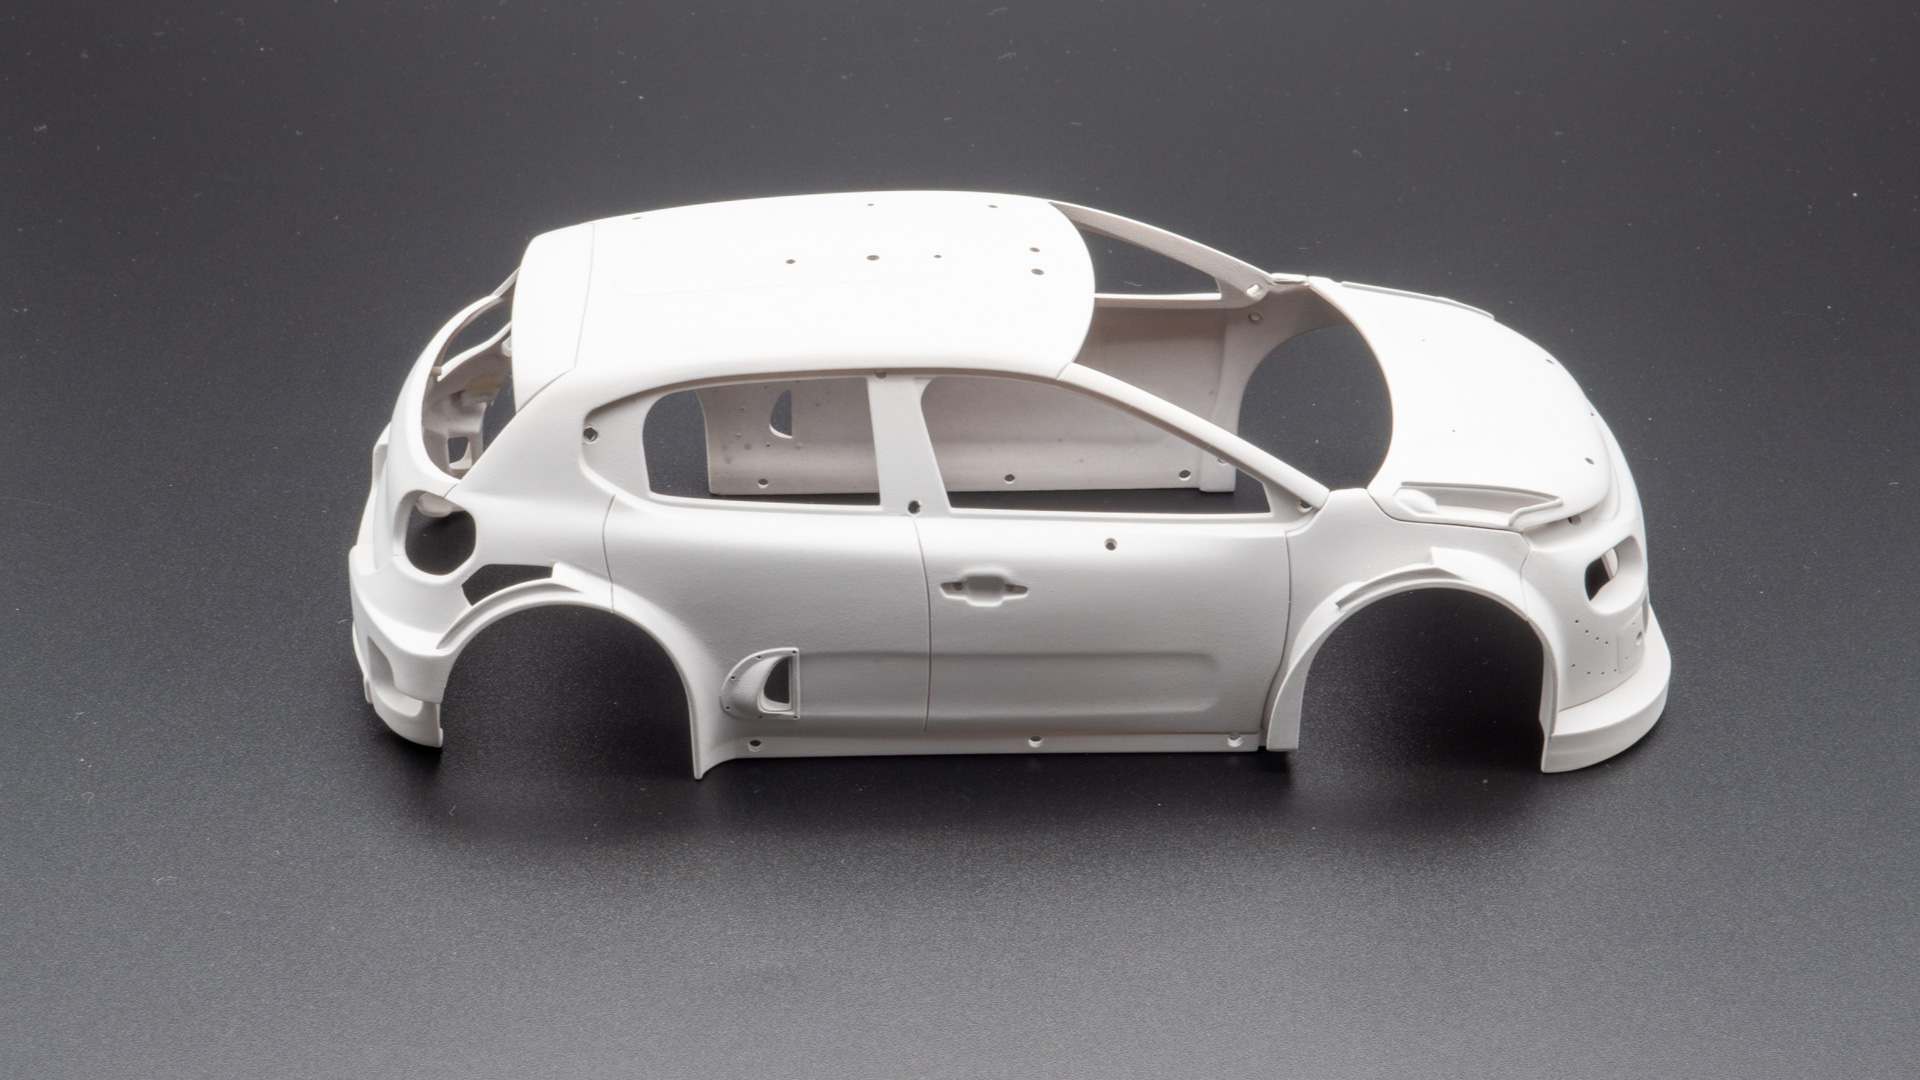
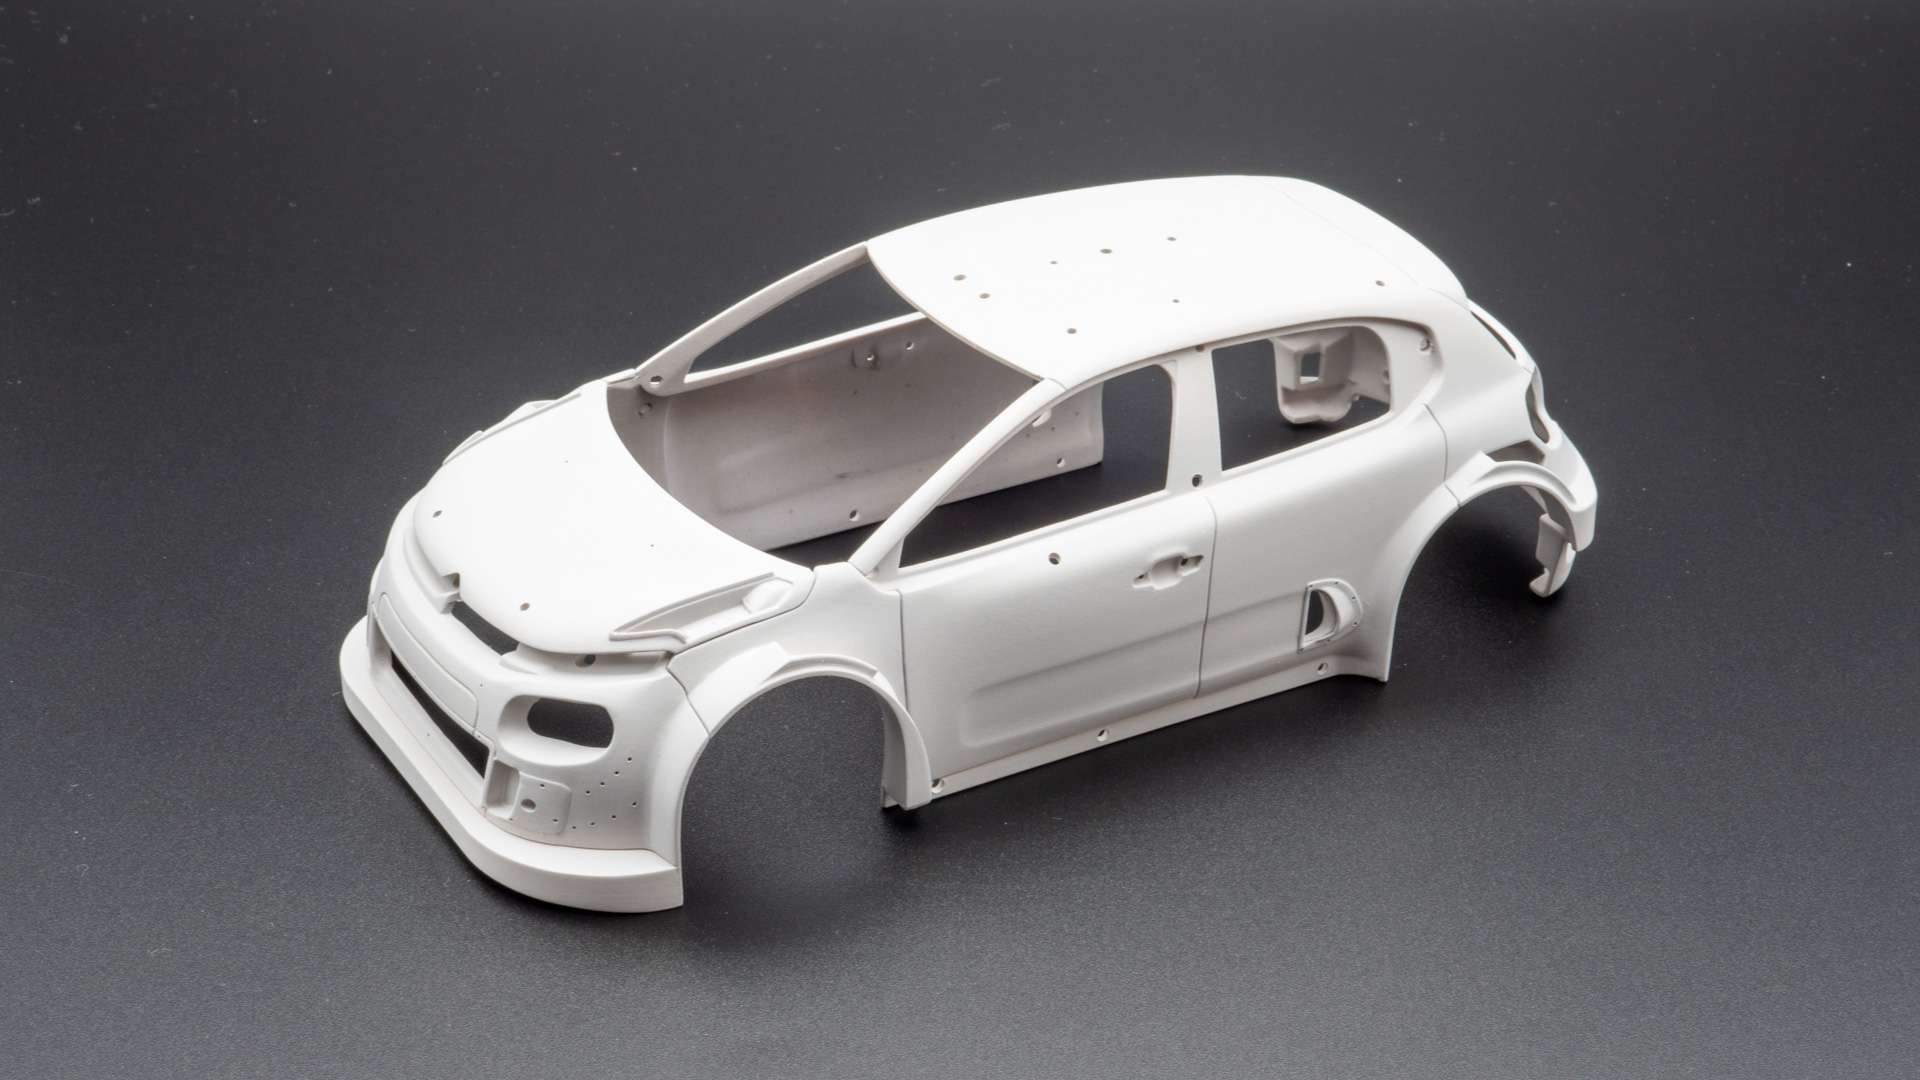
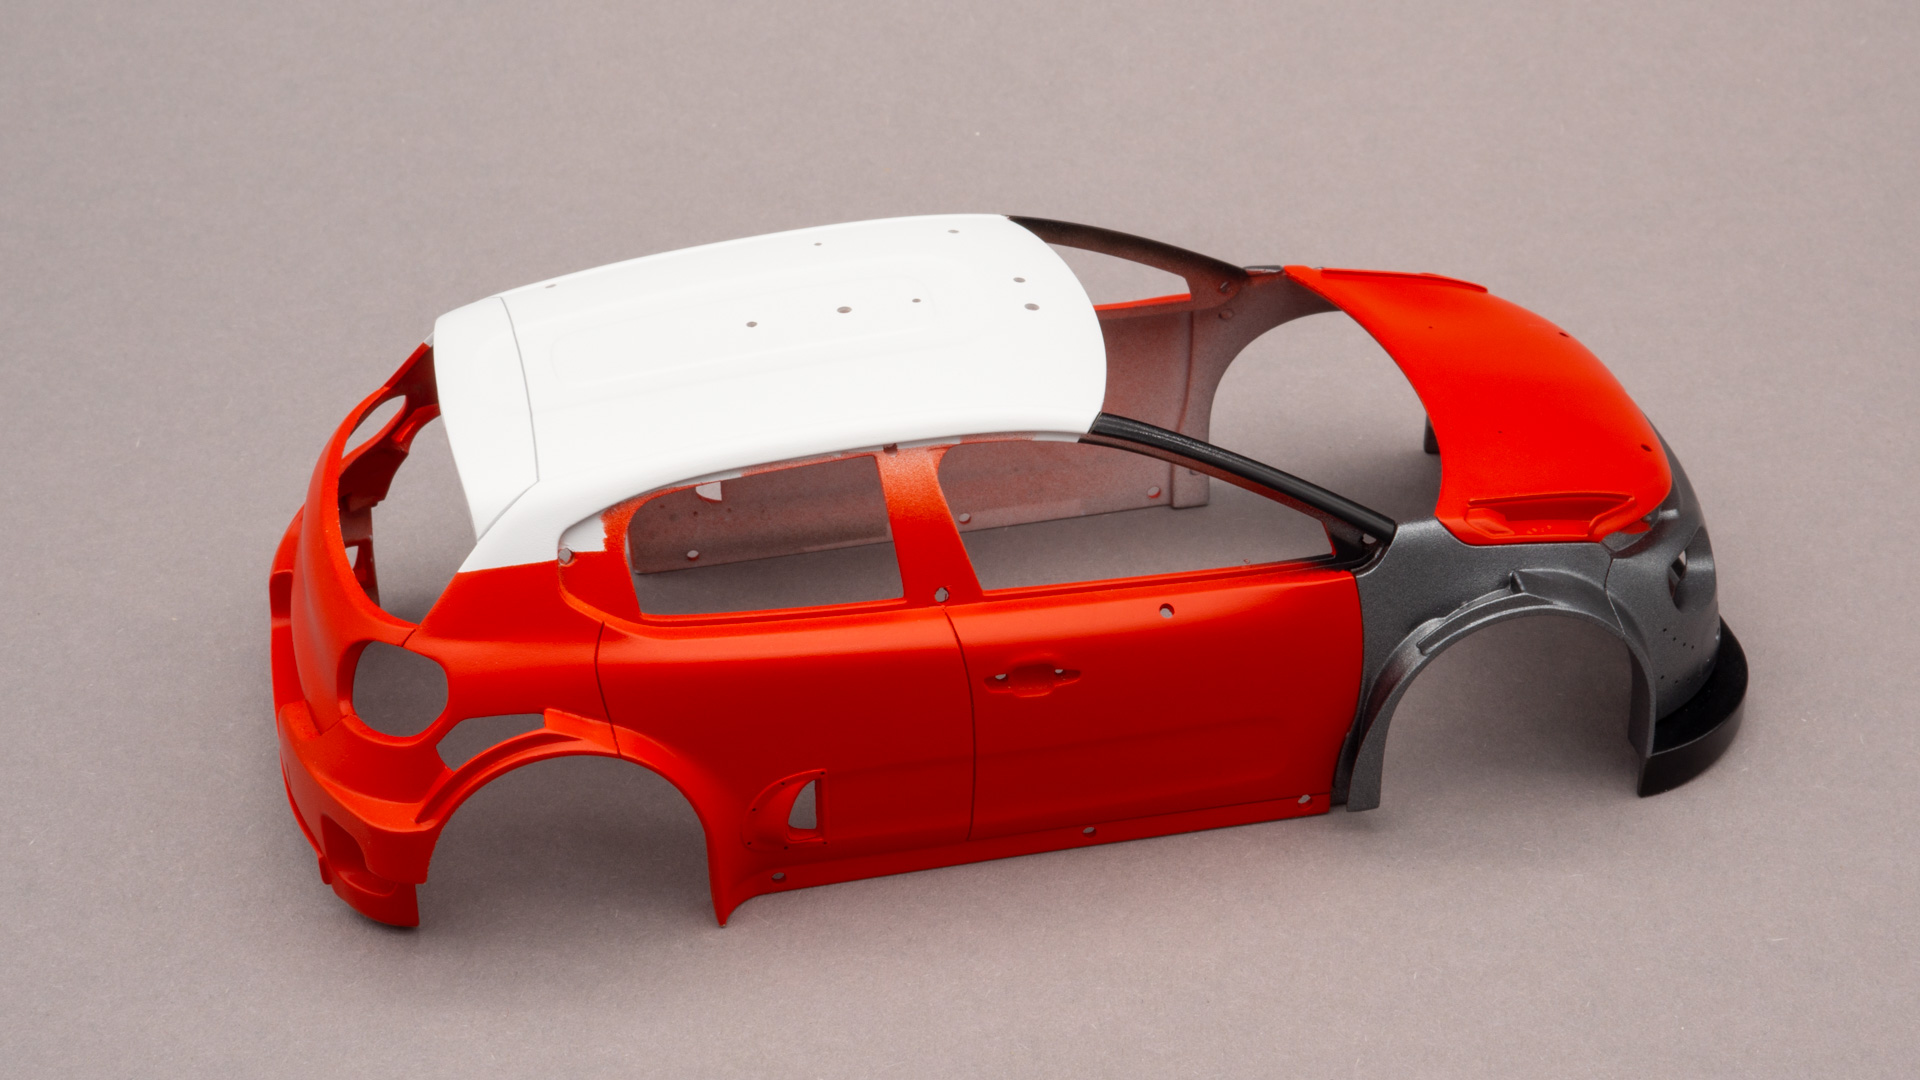
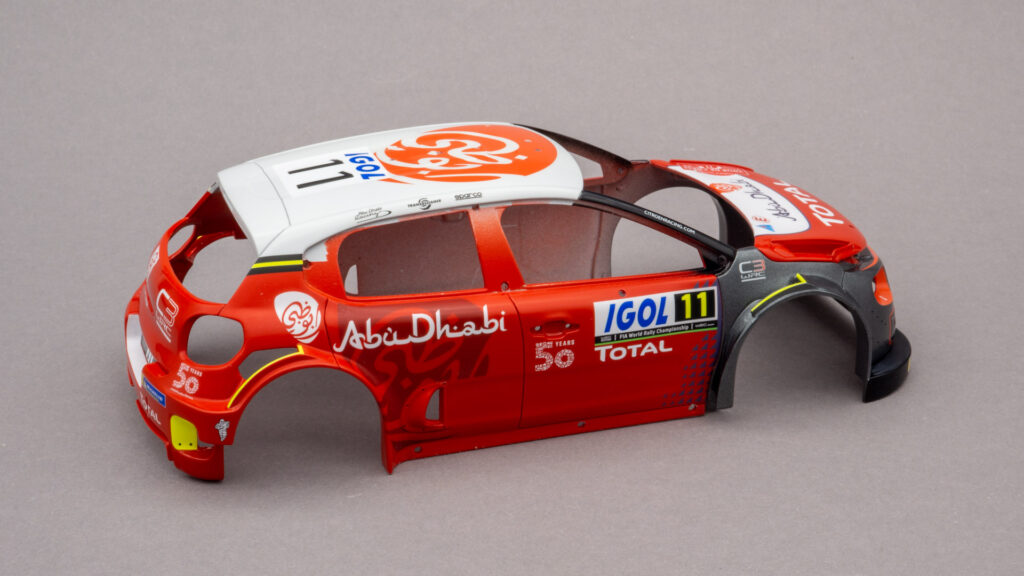
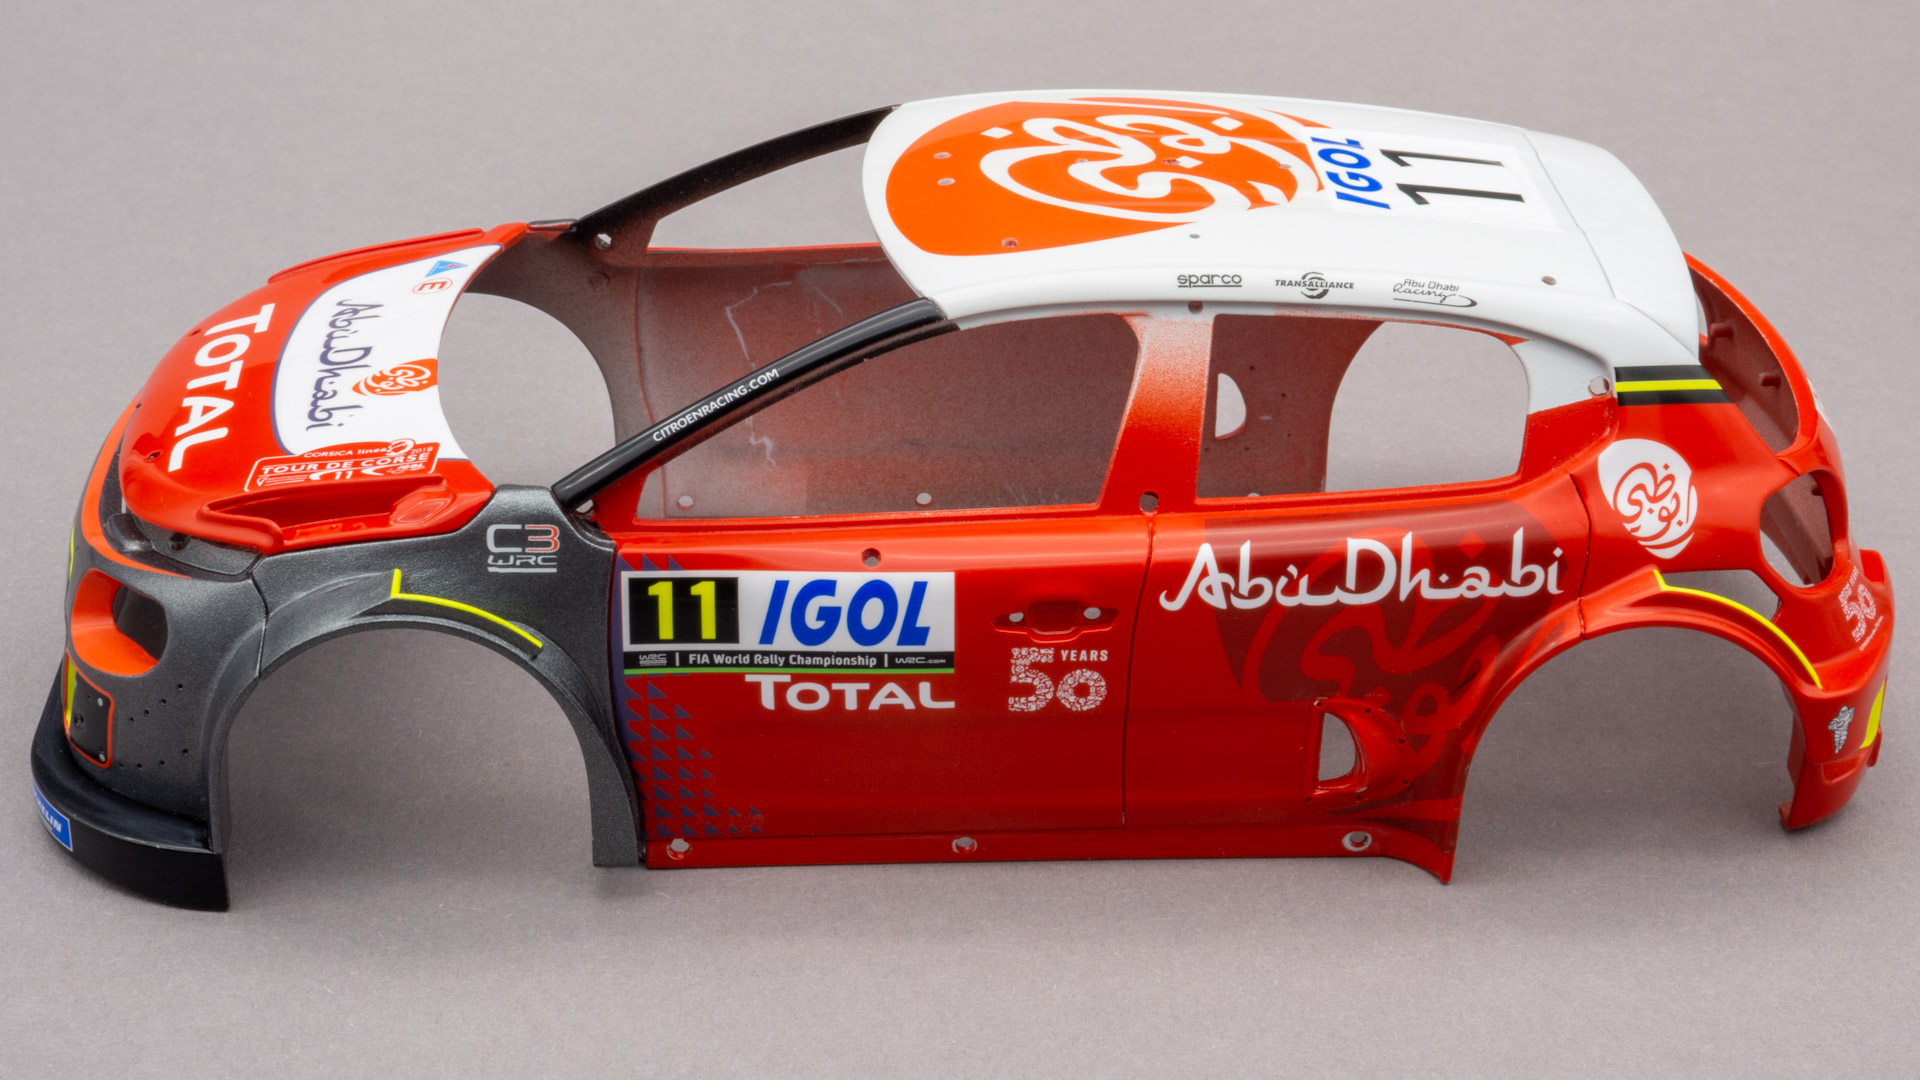
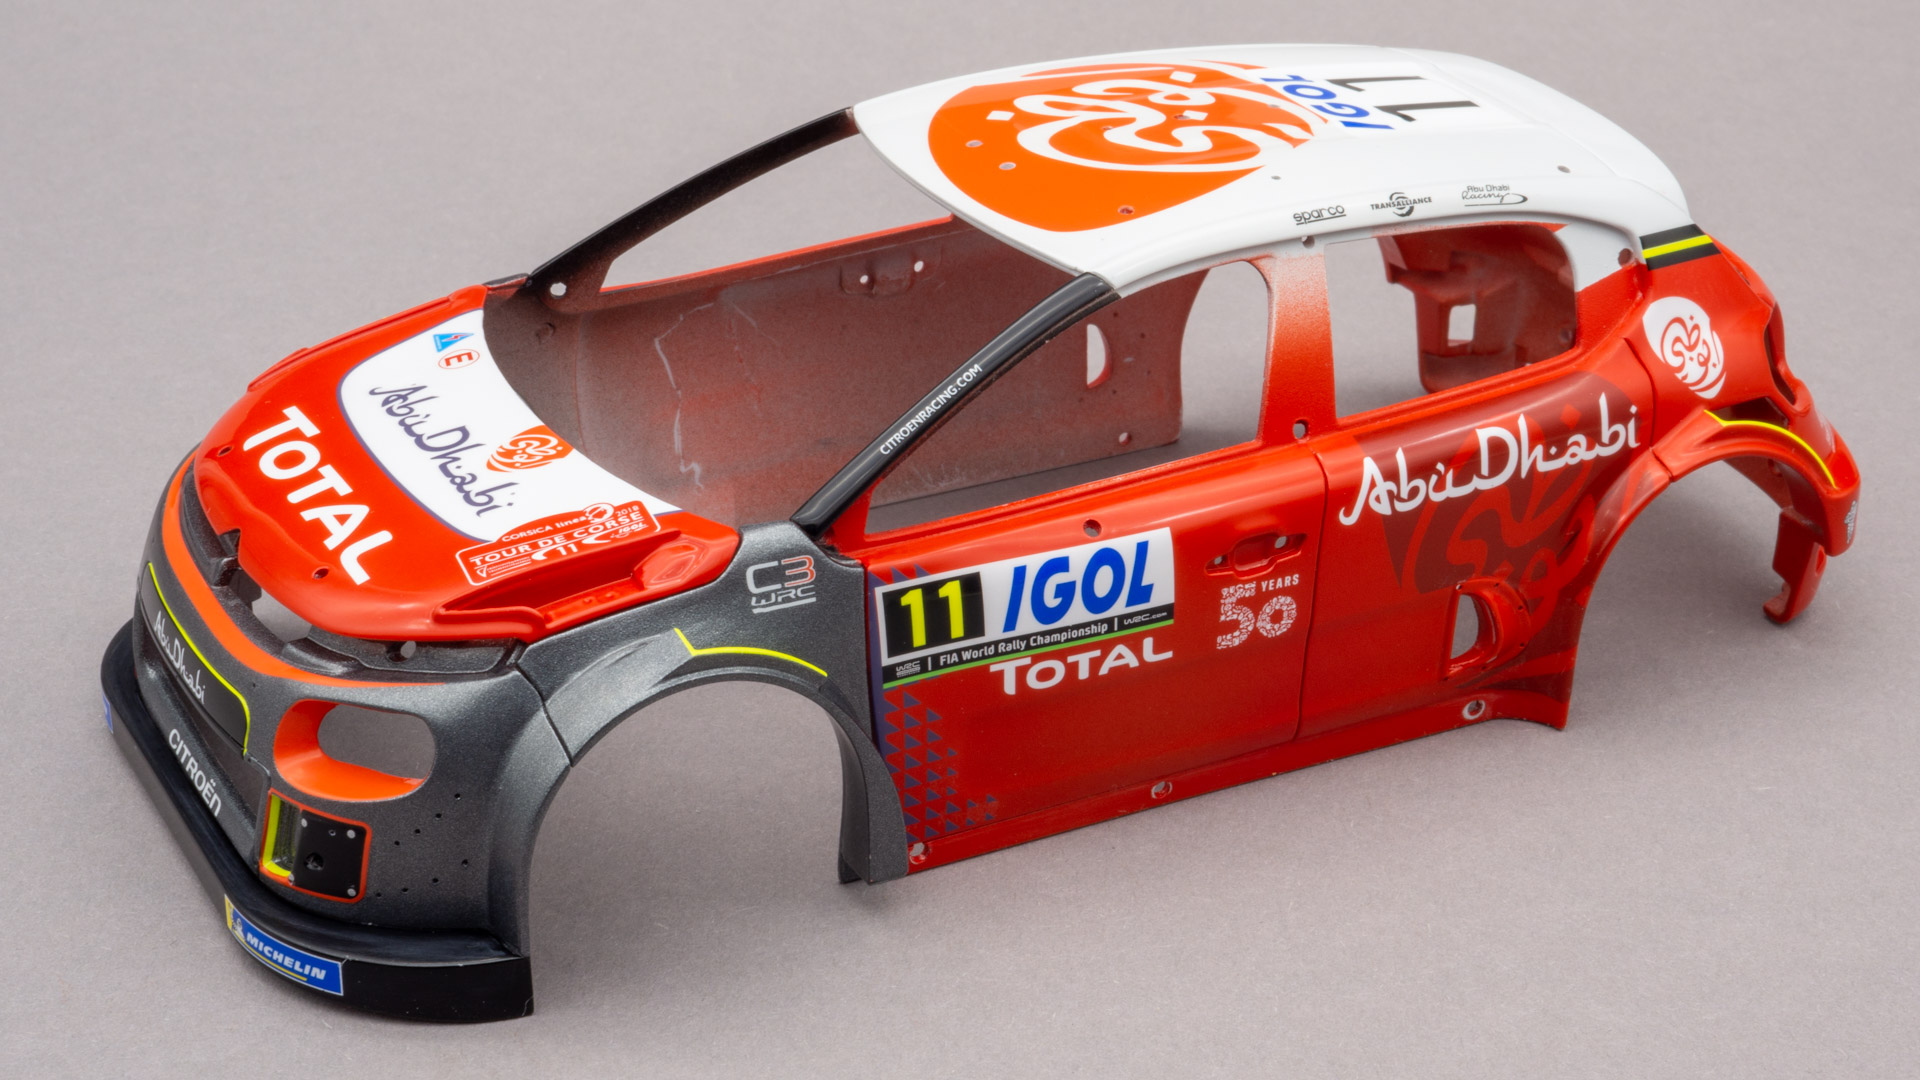
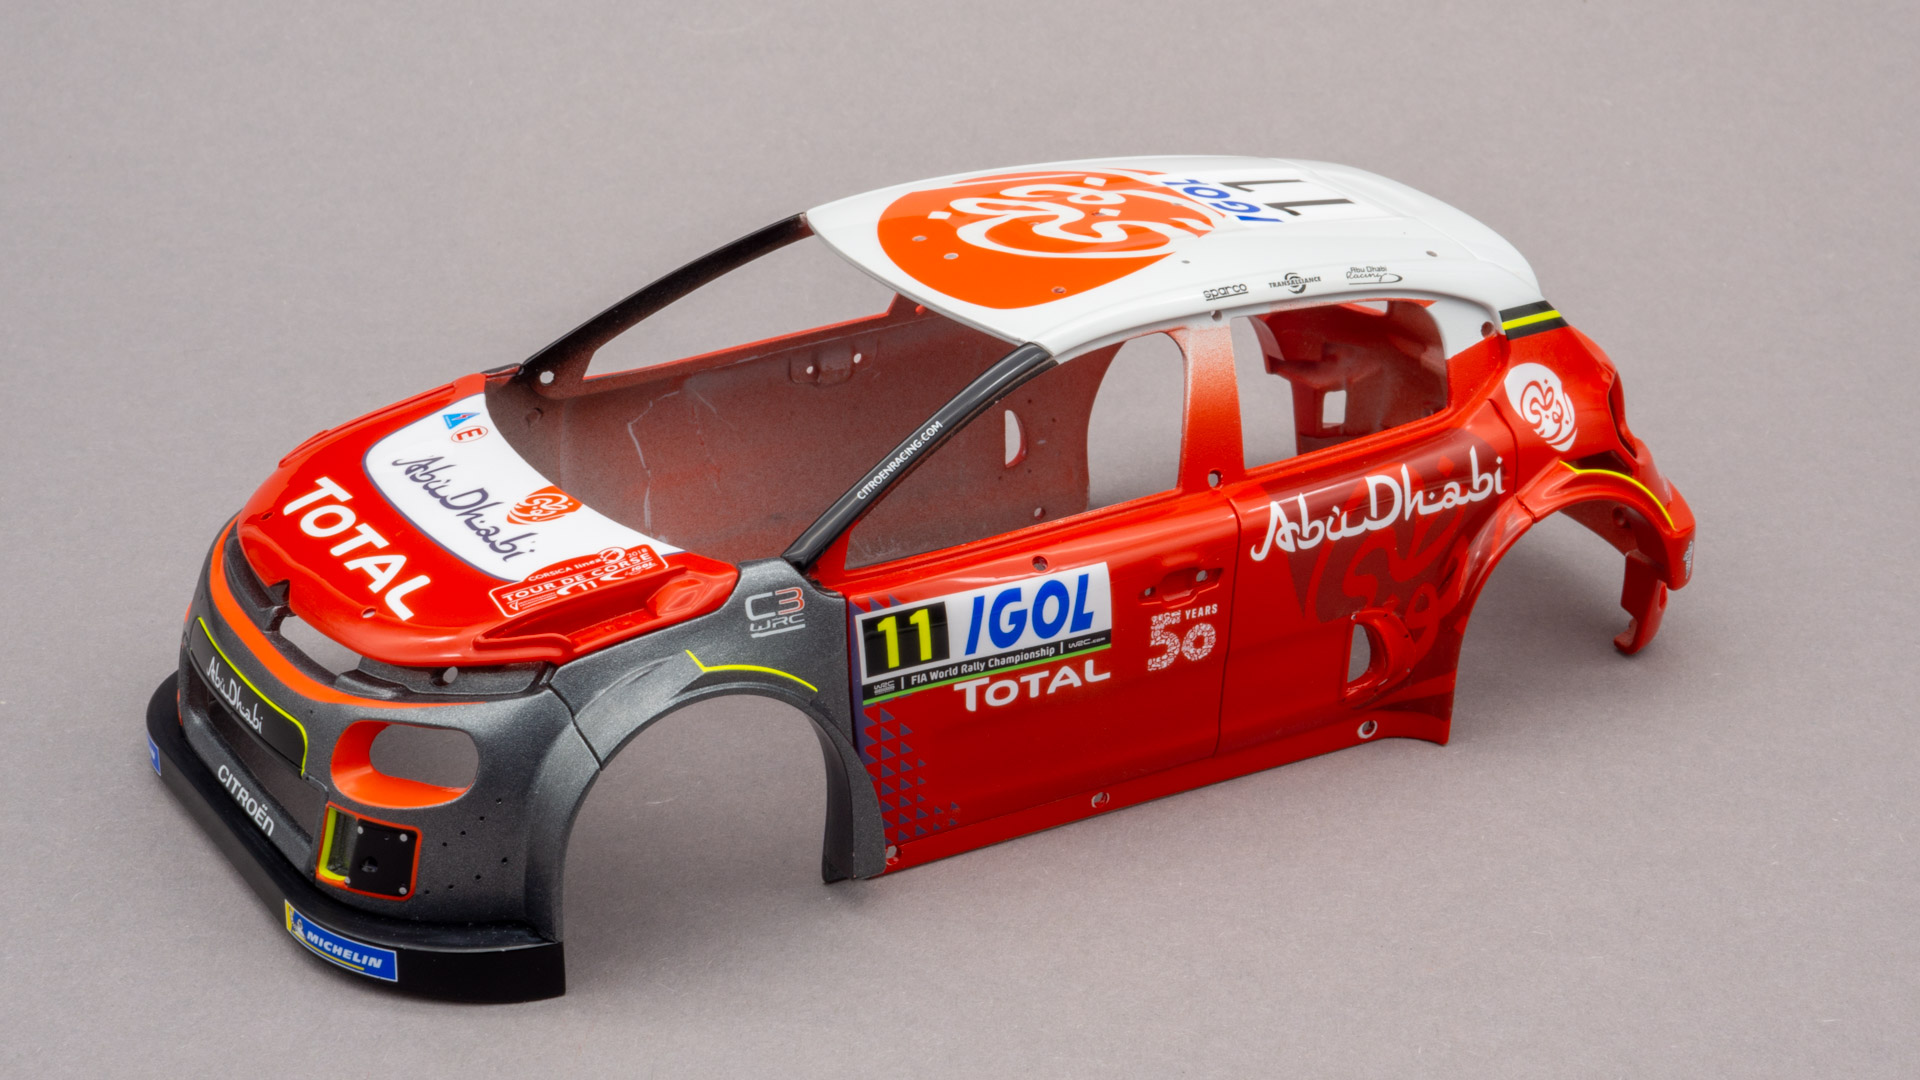
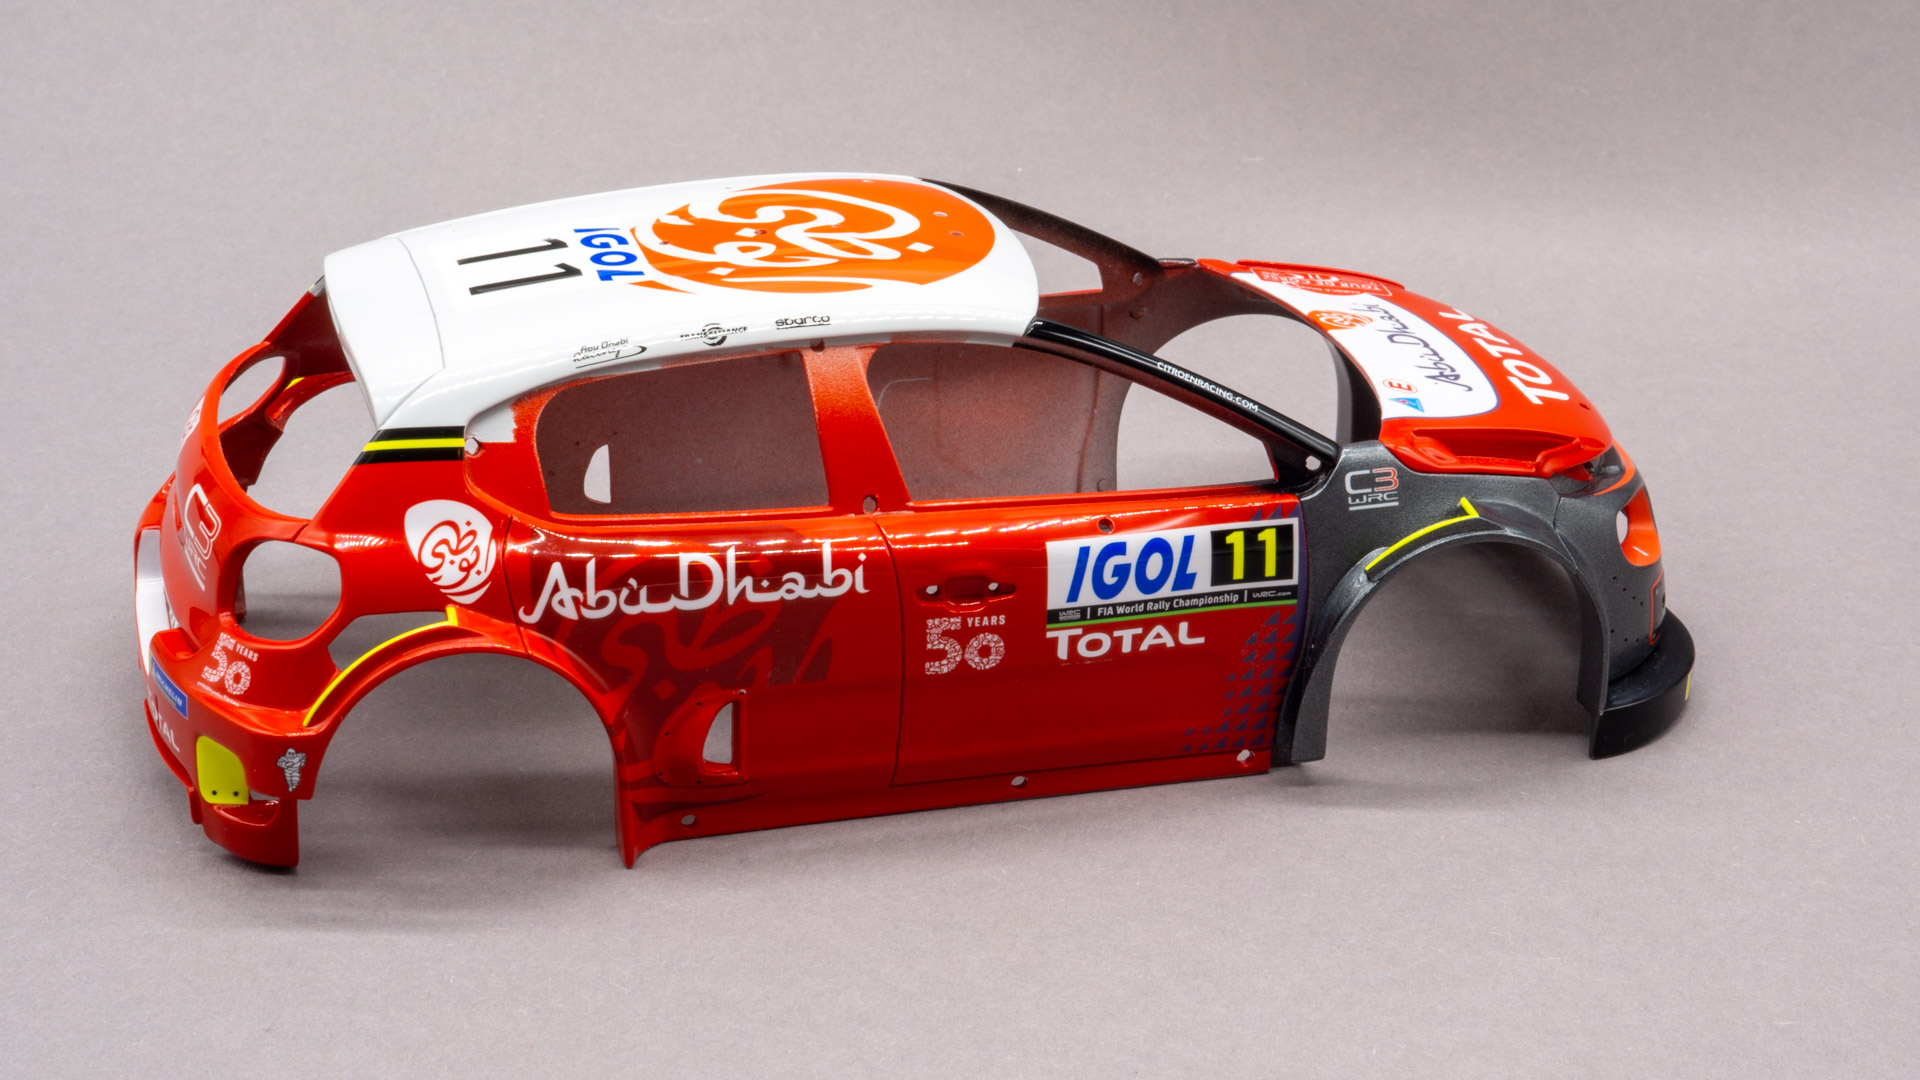
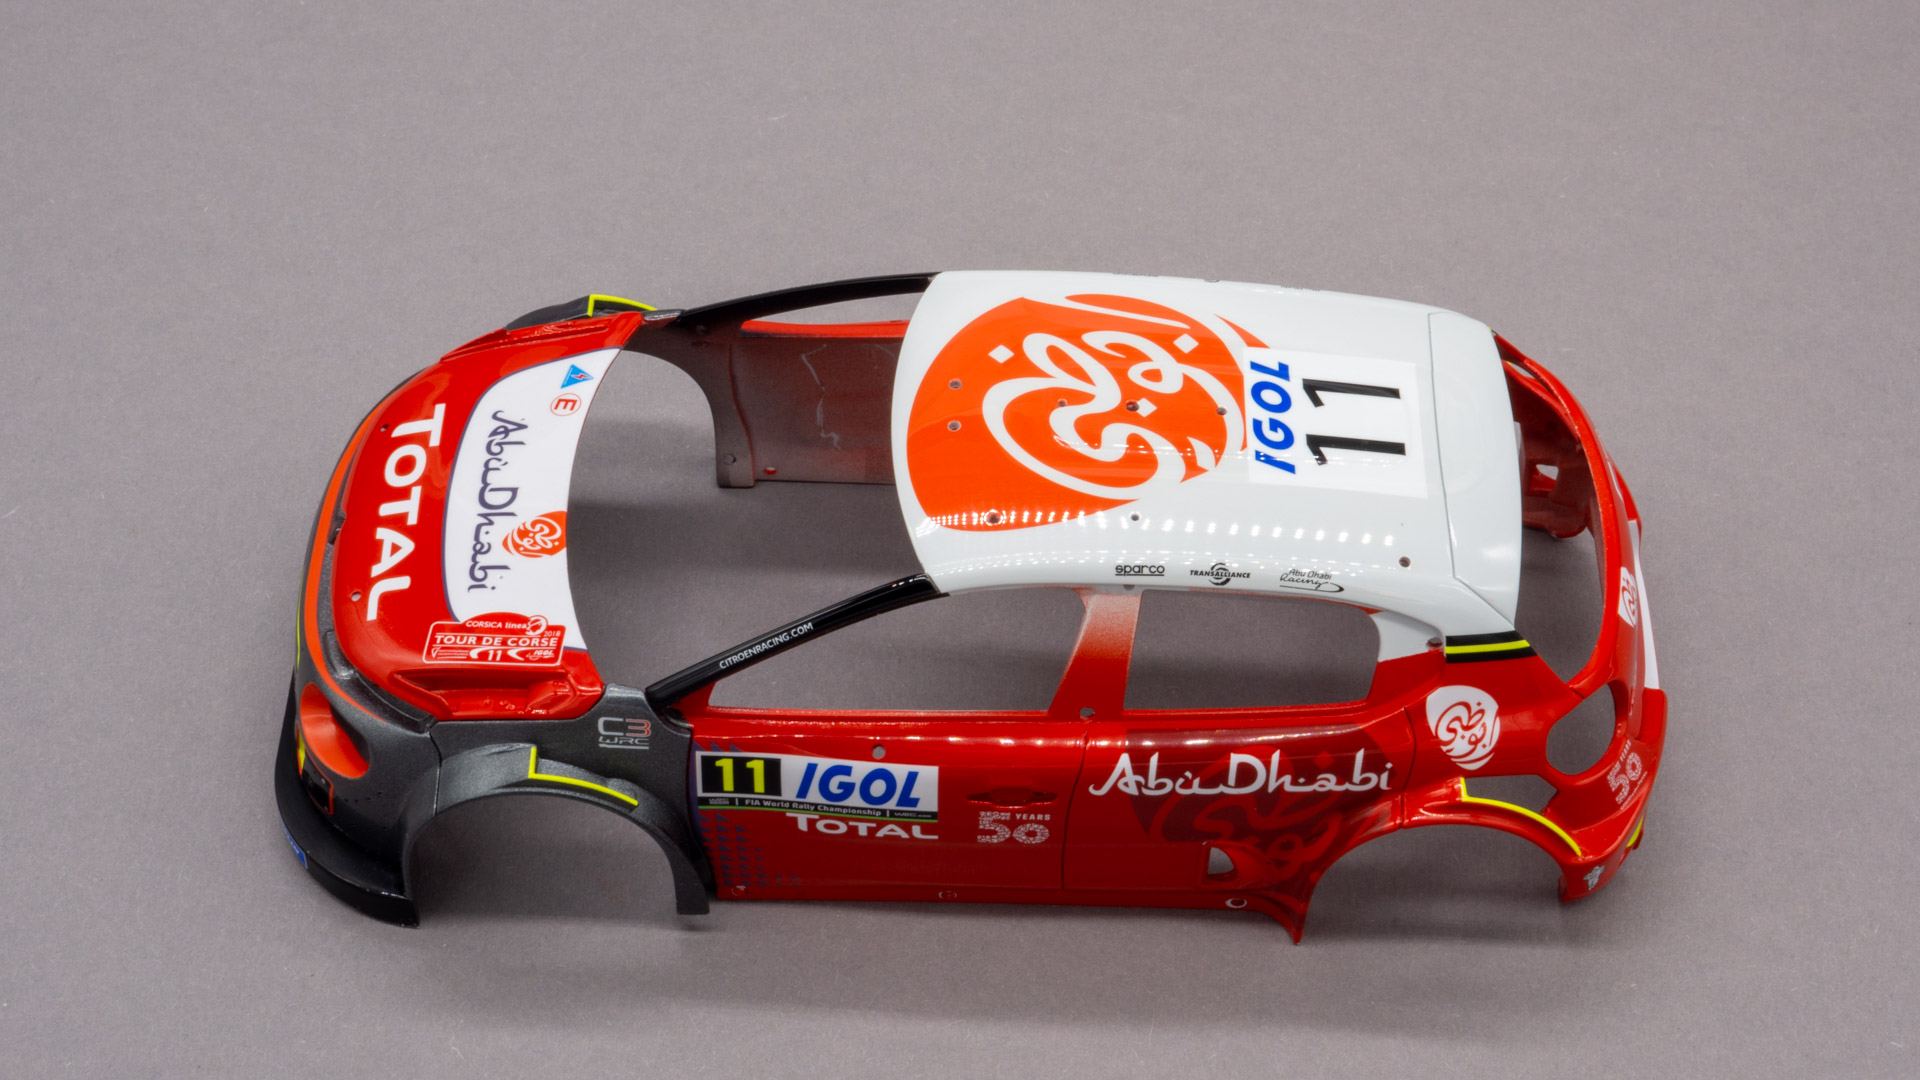
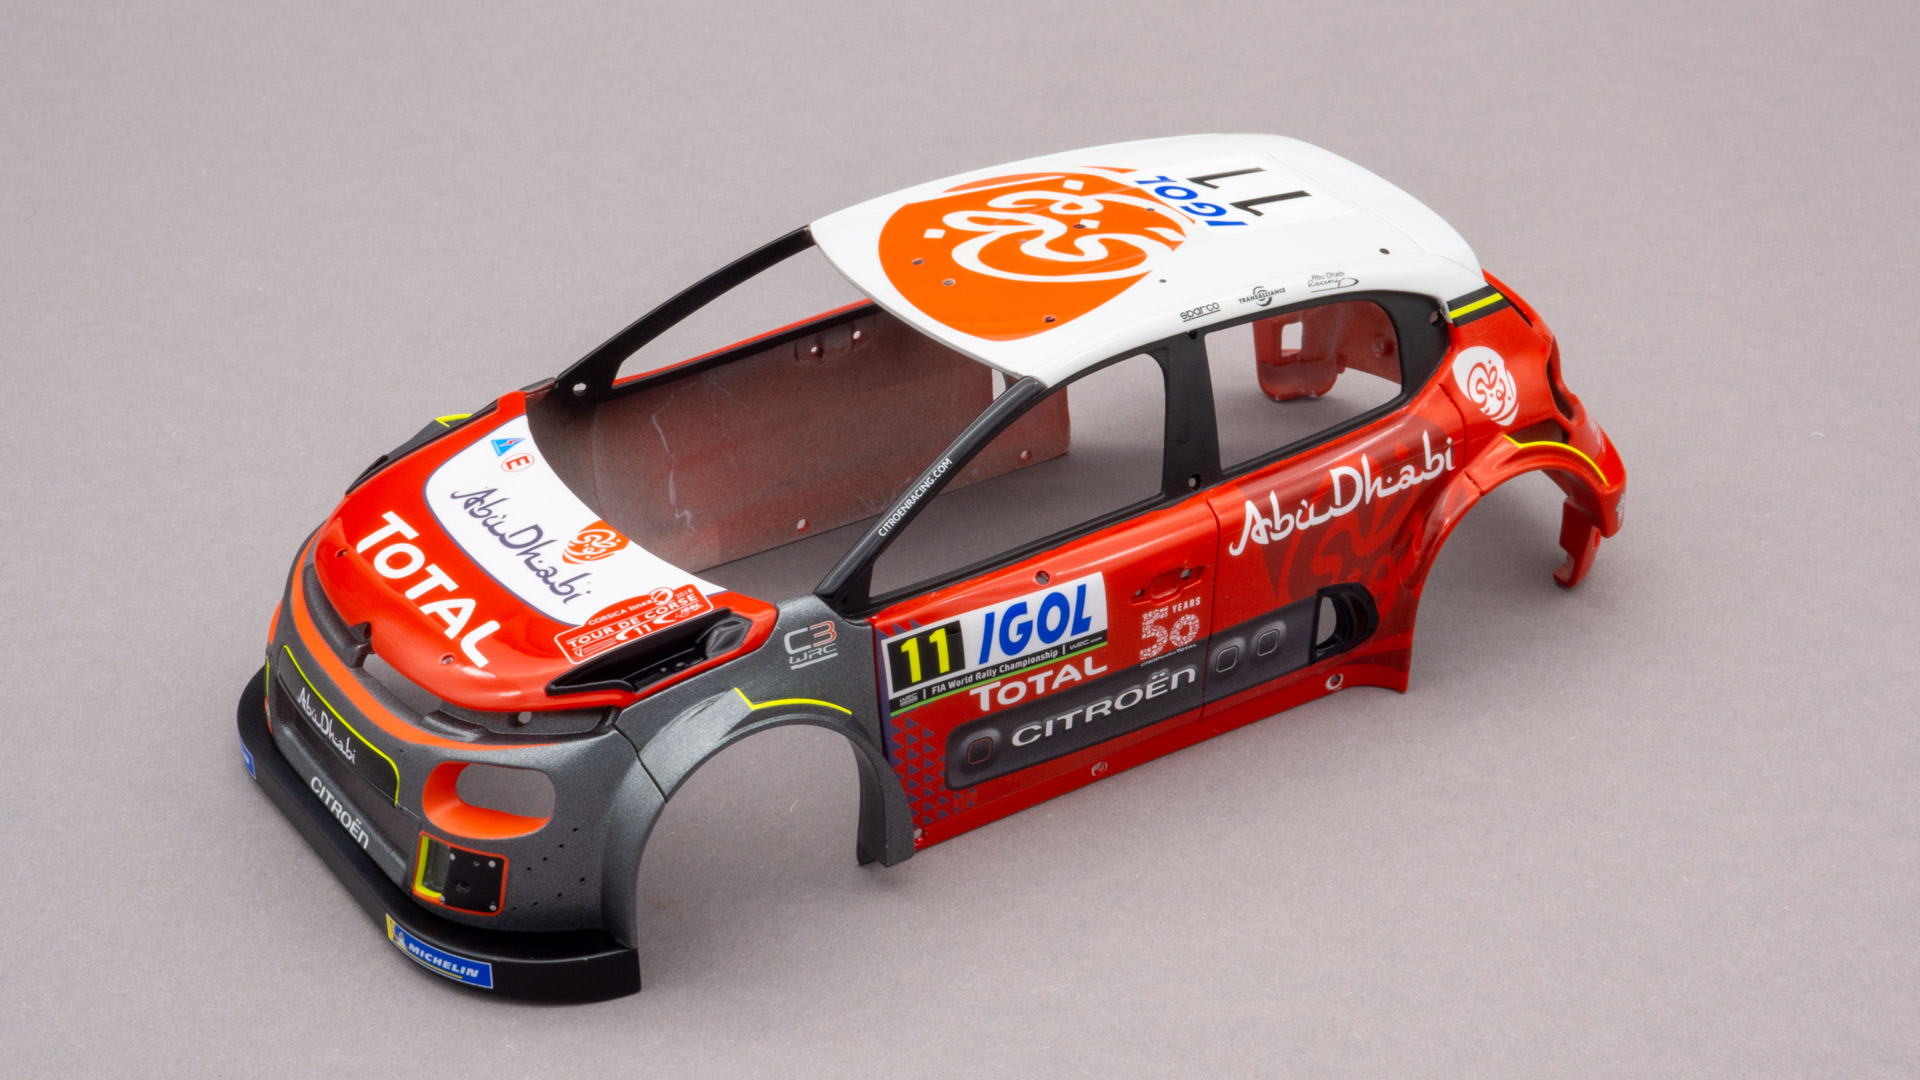
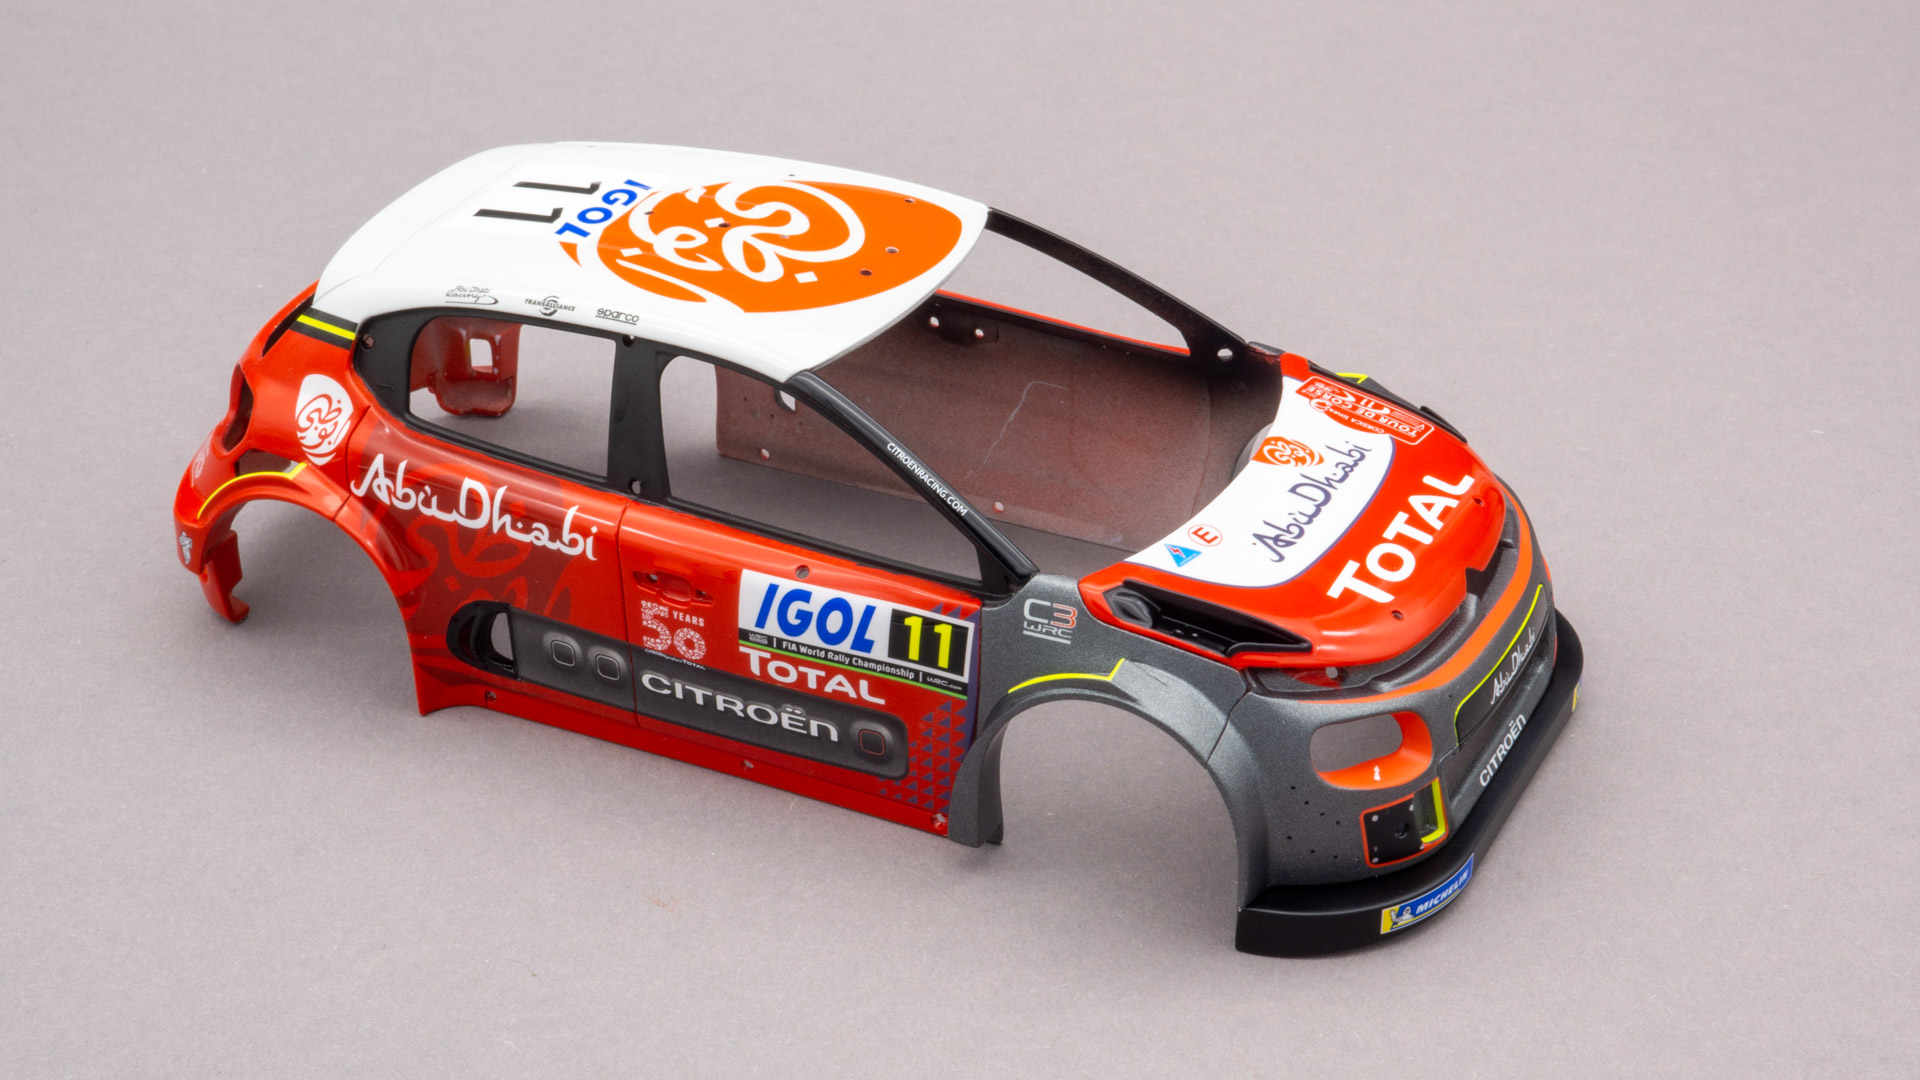
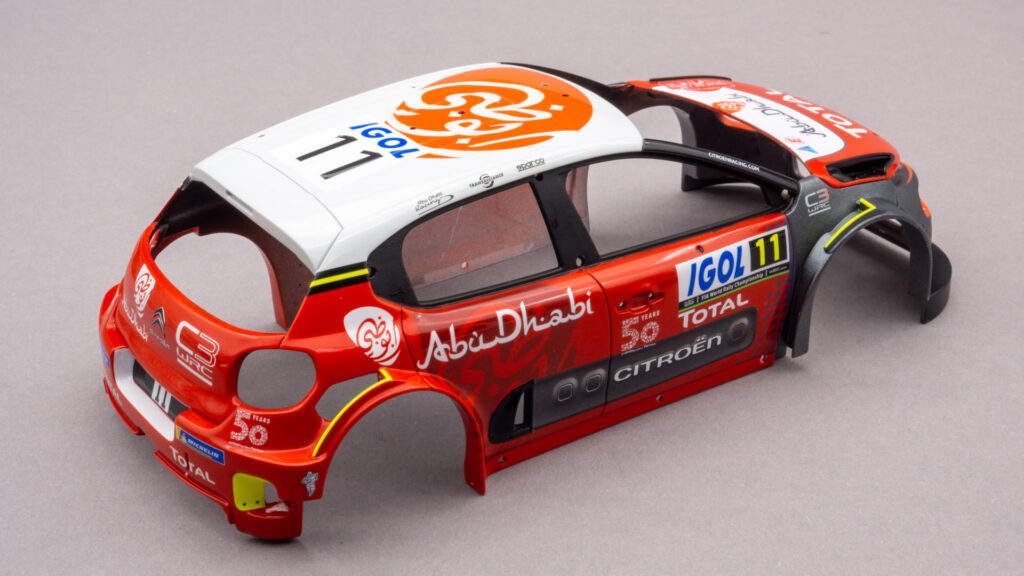
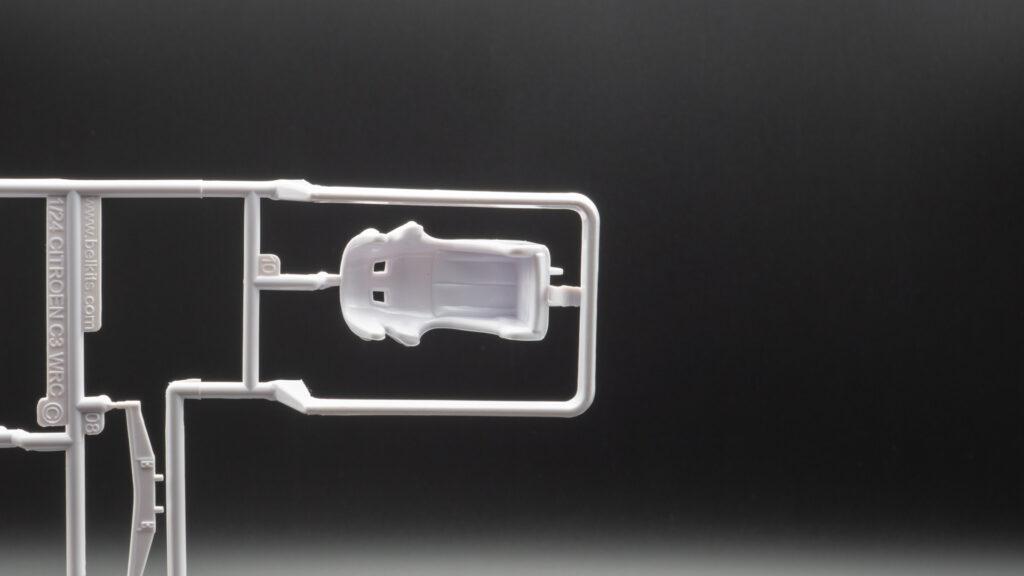
    Body part. Plastic is standard for all Revell kits. I don’t really like it, it’s very soap-like. It is difficult to consider the quality of the surface; all the issues will be shown after the first layer of primer.

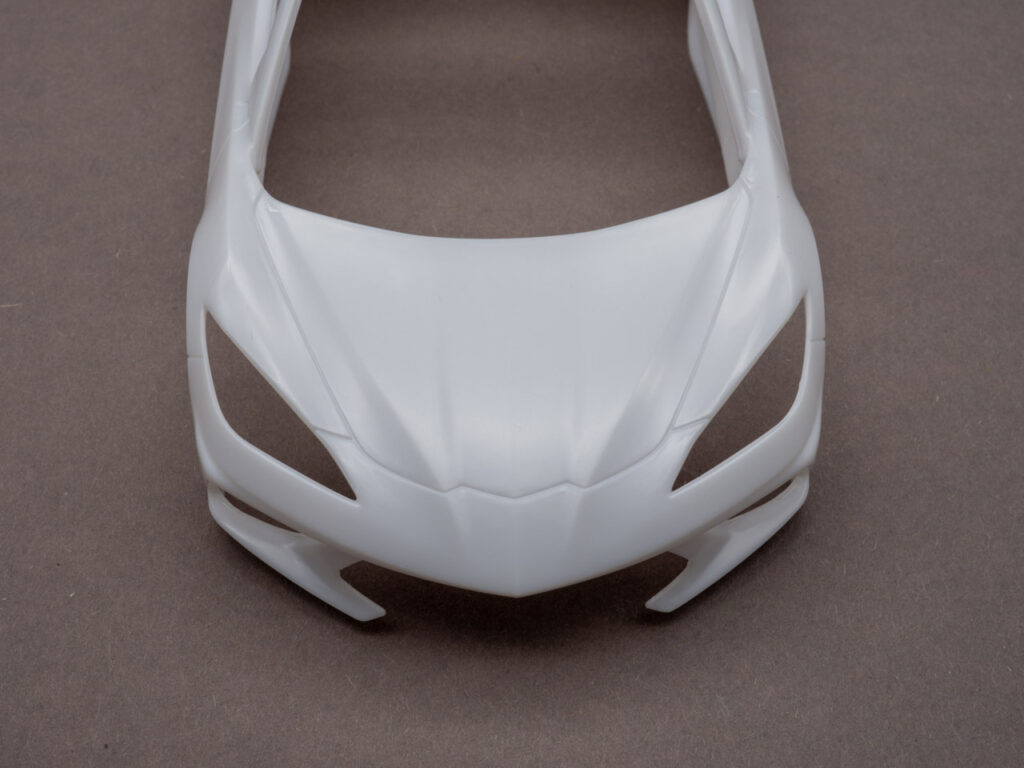
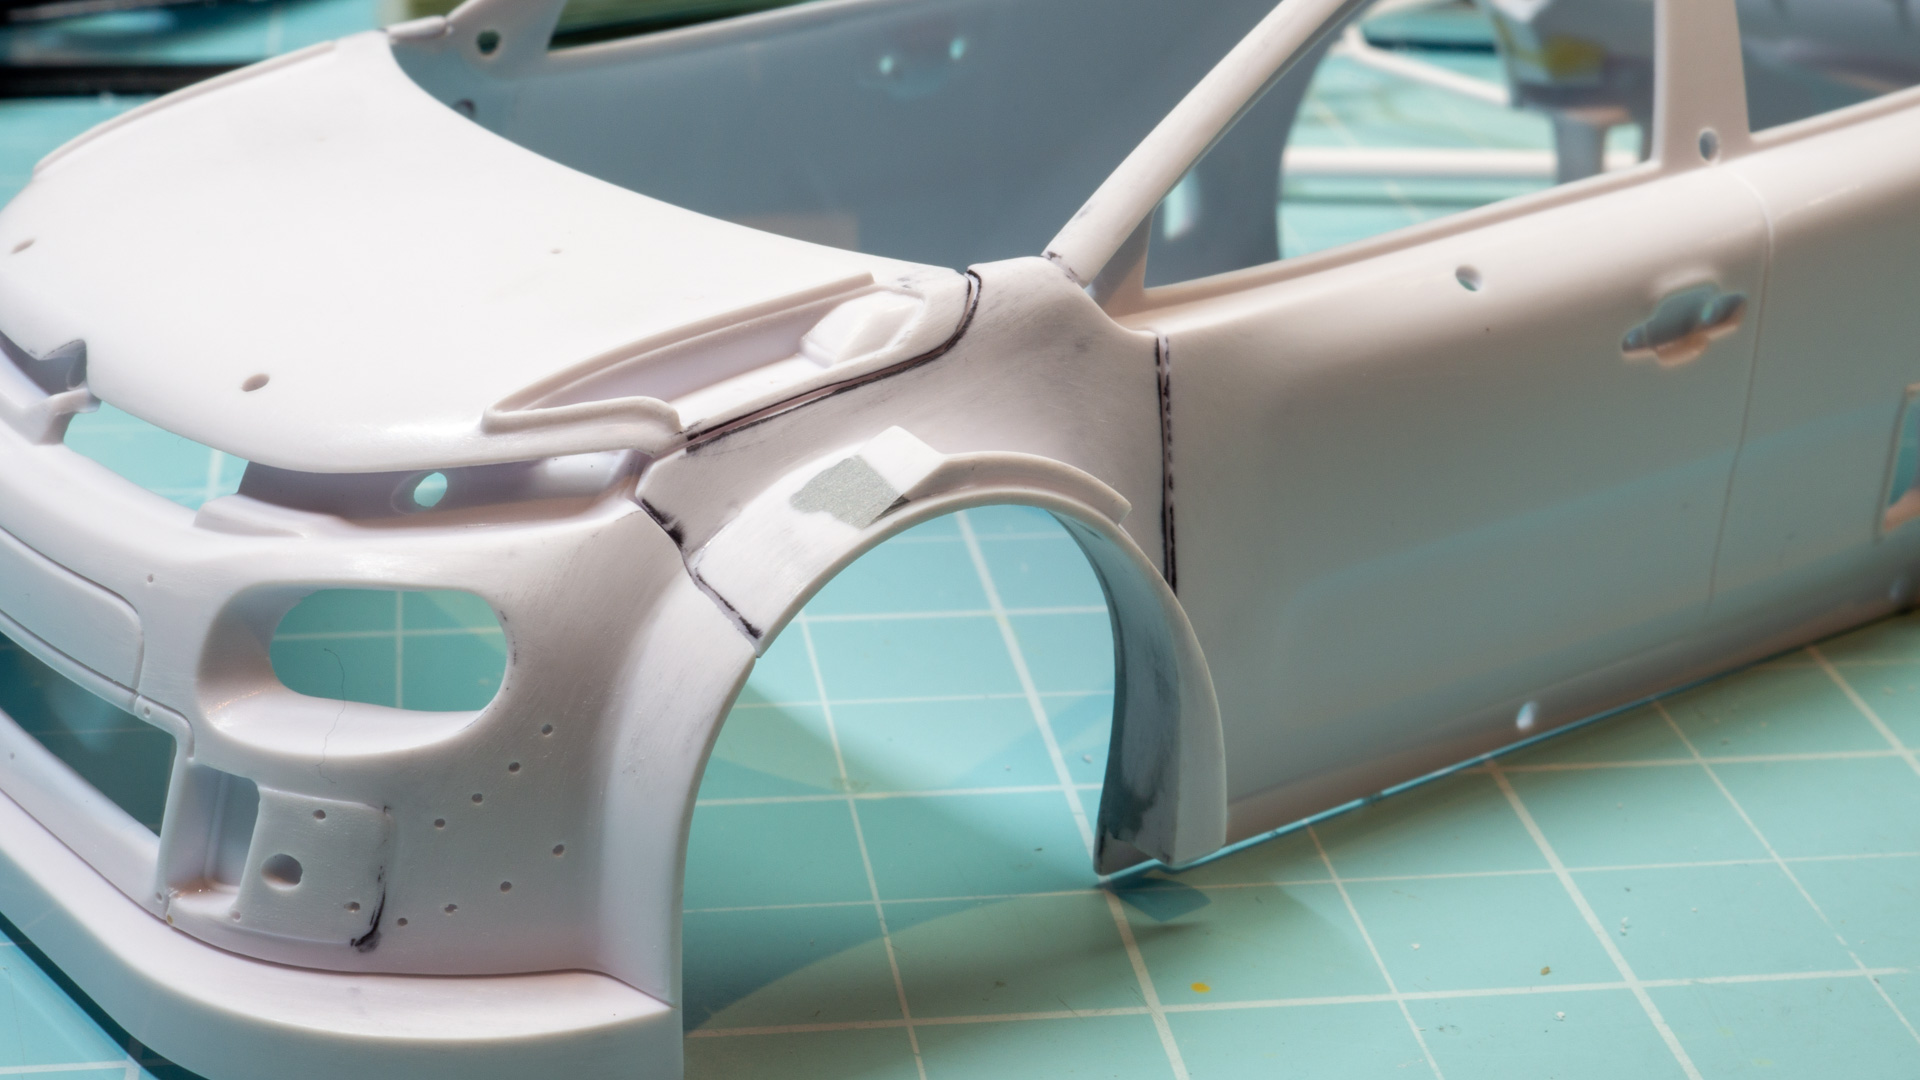
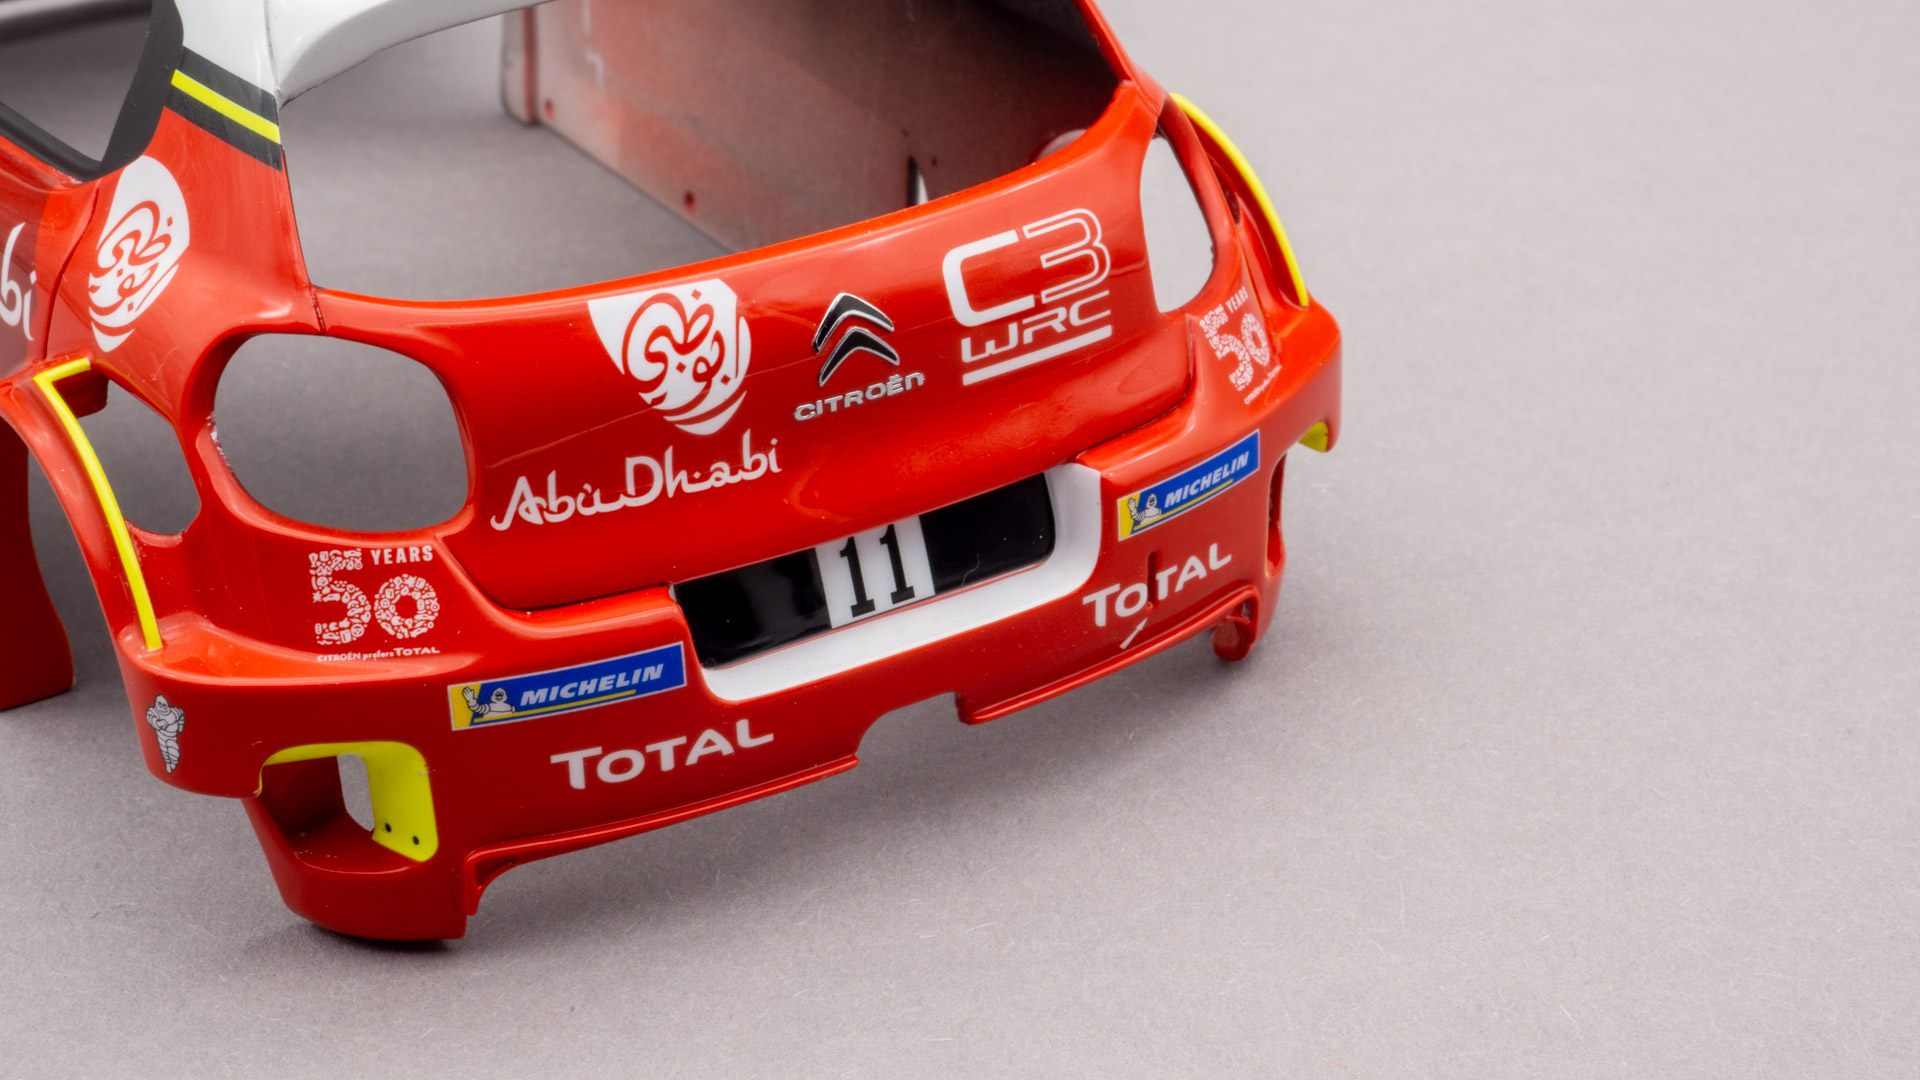
    Example of hood panel lines. It’s wide, but that’s ok. It must be deepened and it will take all layers of paintwork.

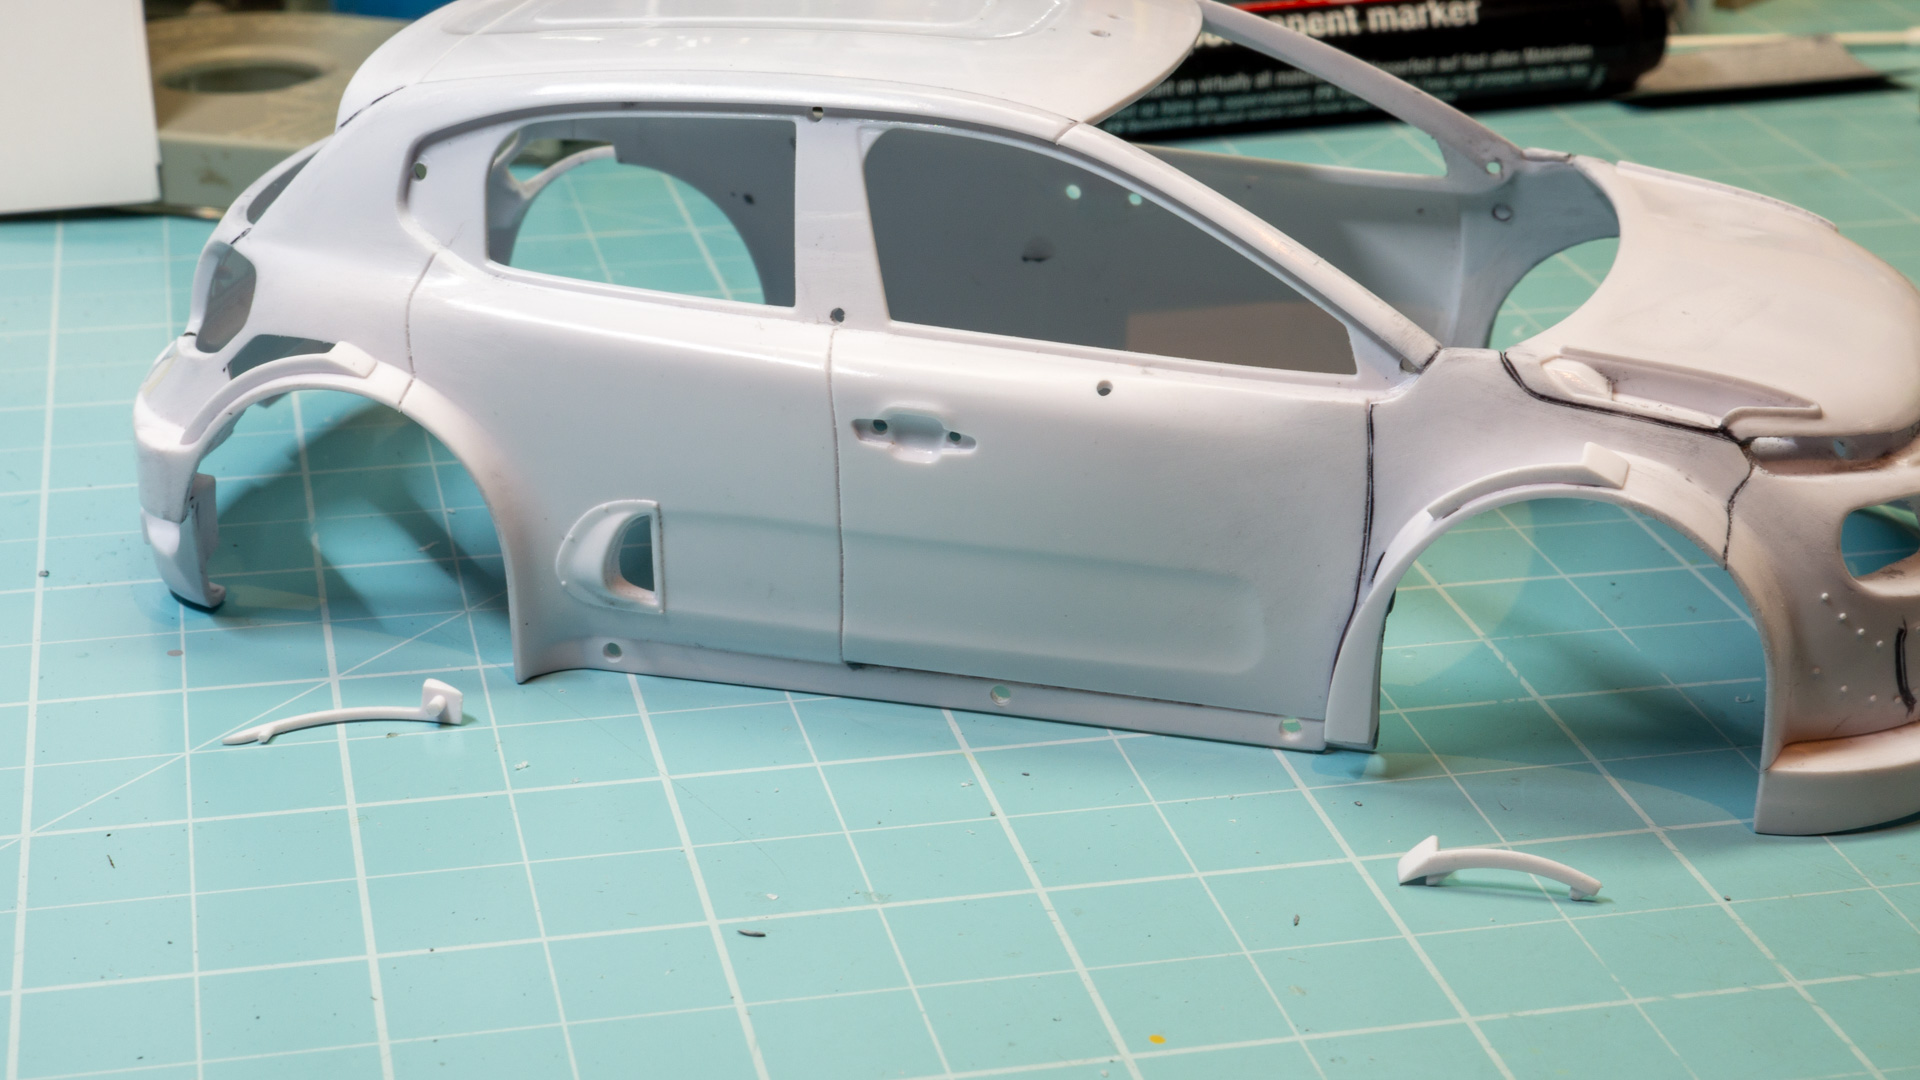
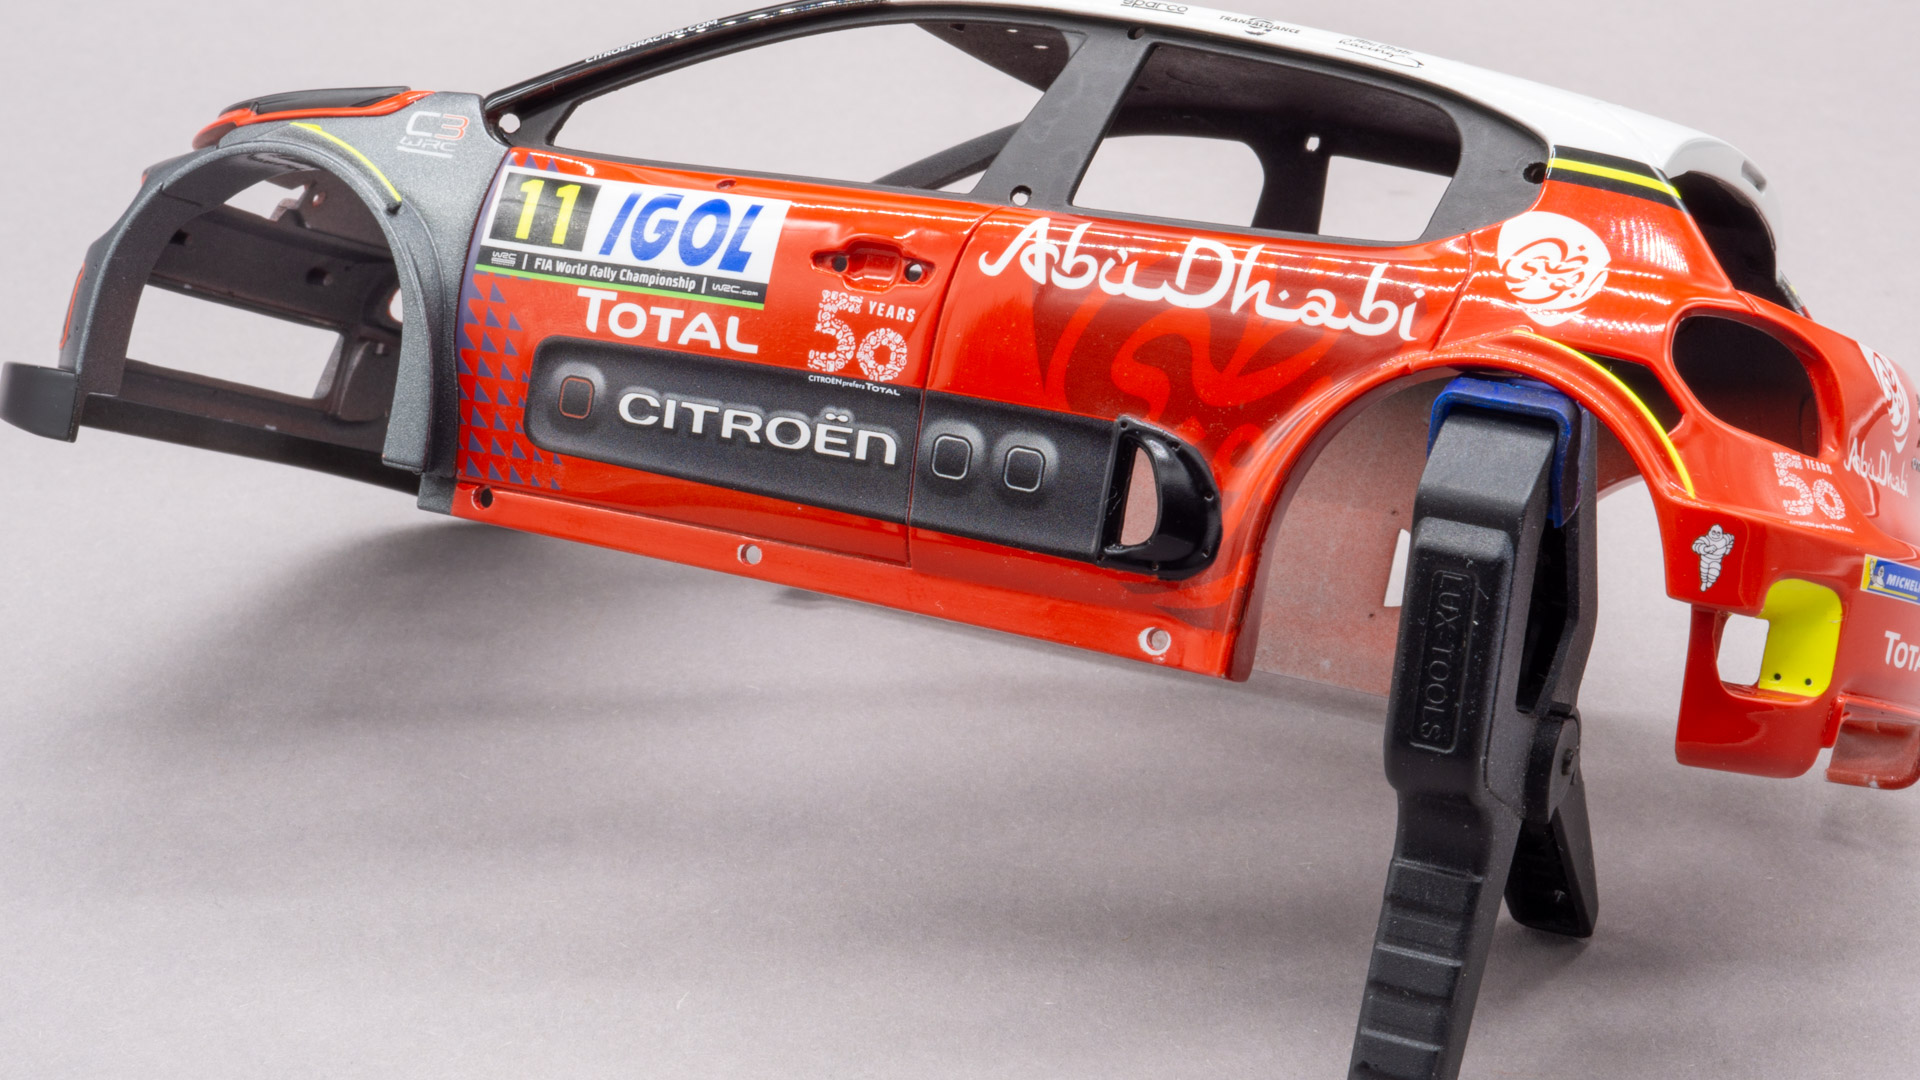
    A little more panel lines at the door. I don’t see any visible flaws on the body, such as sink marks or waves.

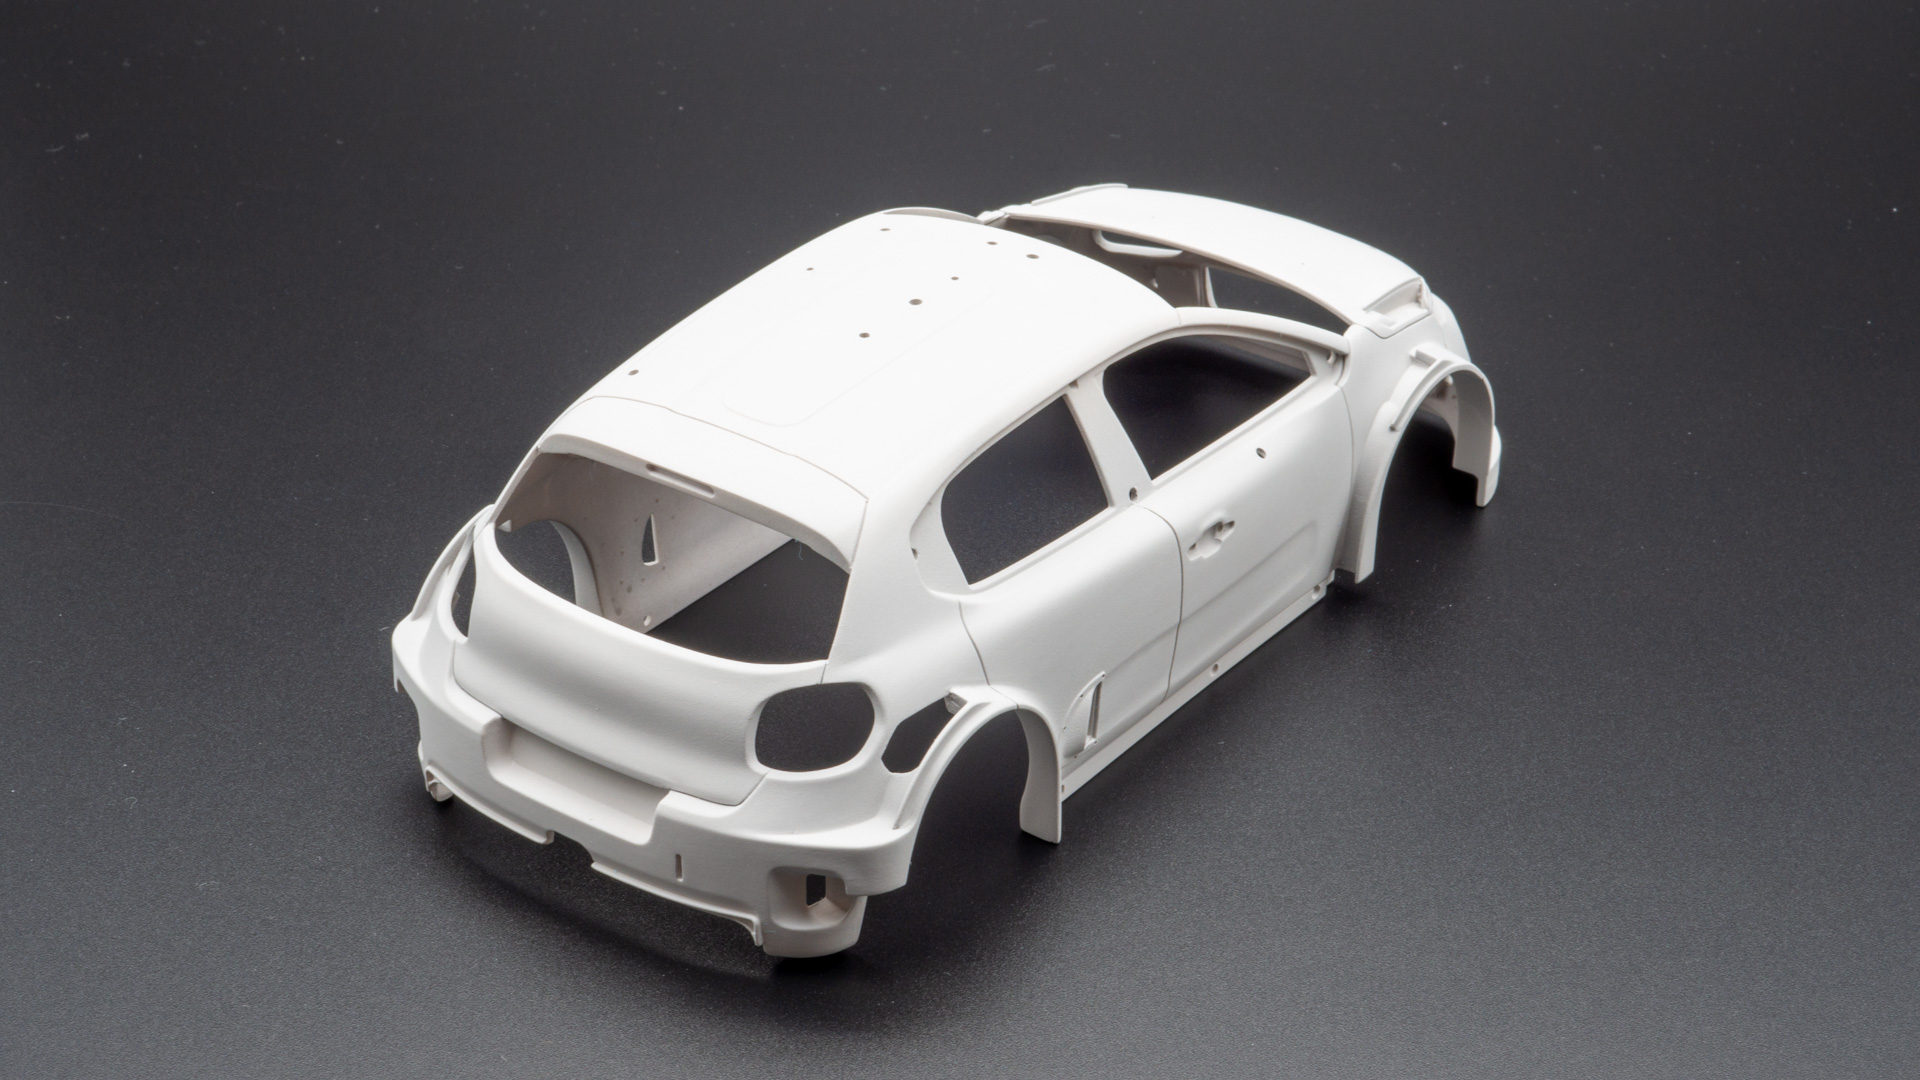
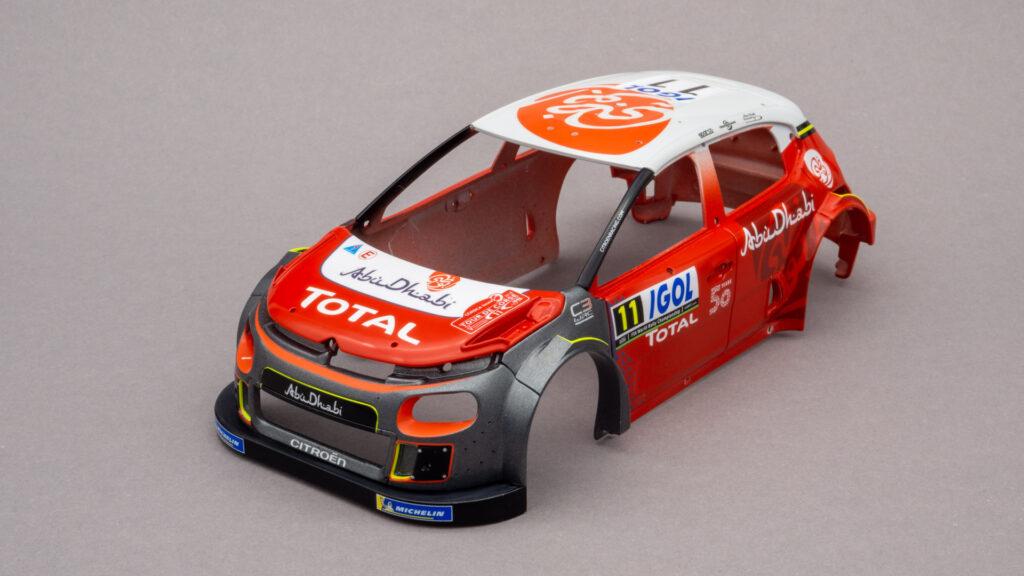
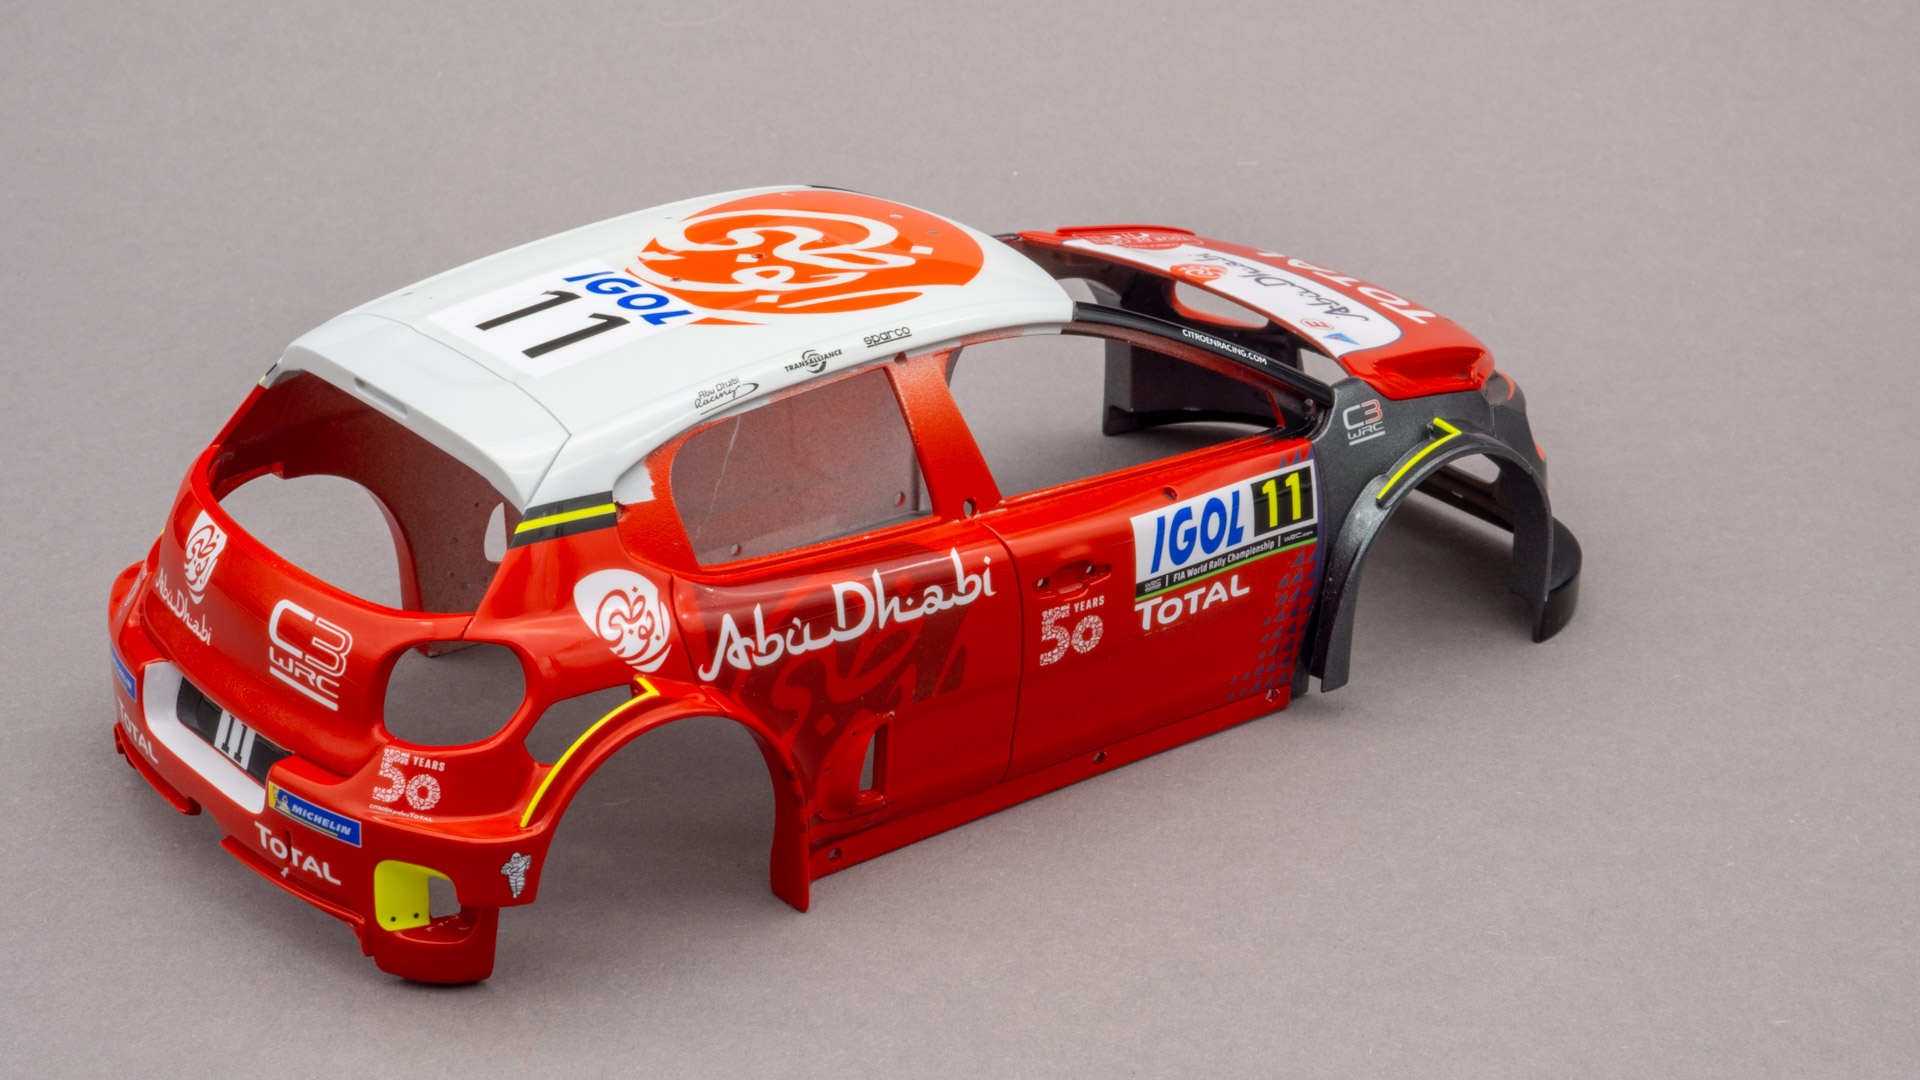
    Engine and luggage compartment. Screw and other details are well and clearly molded.

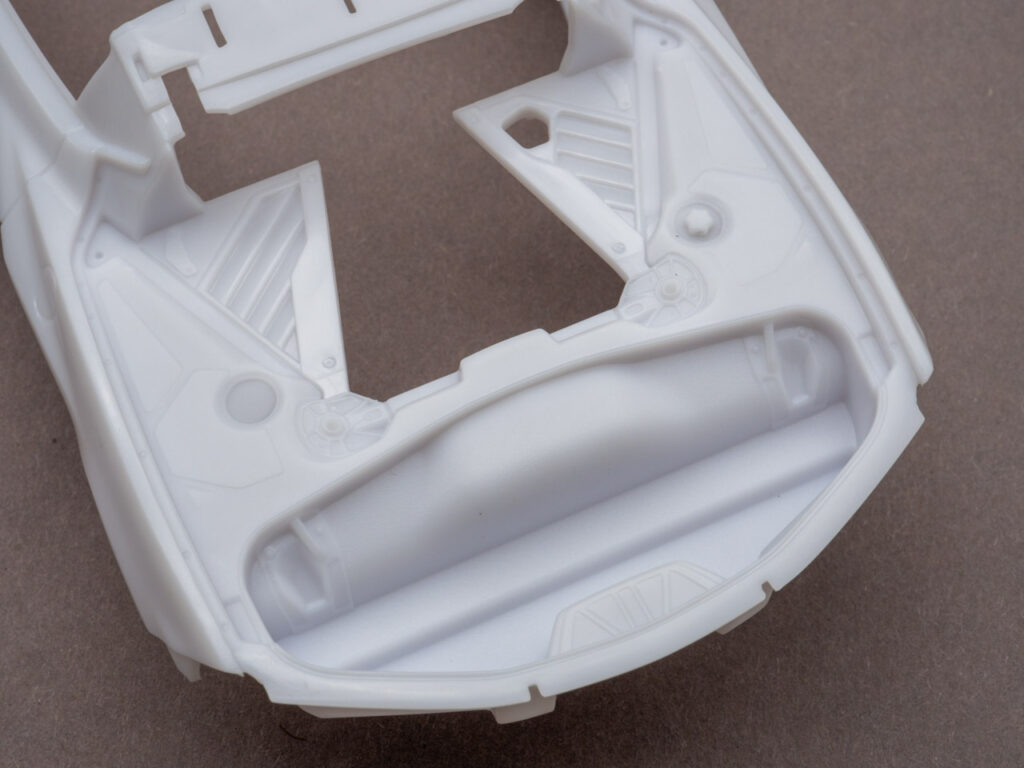
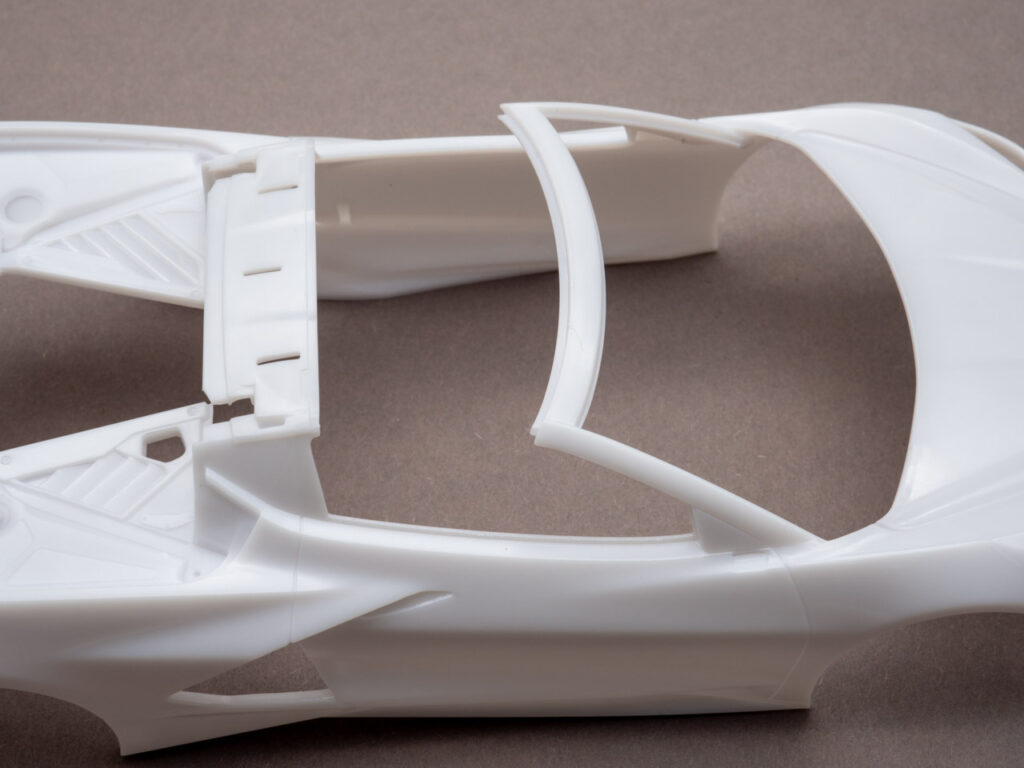
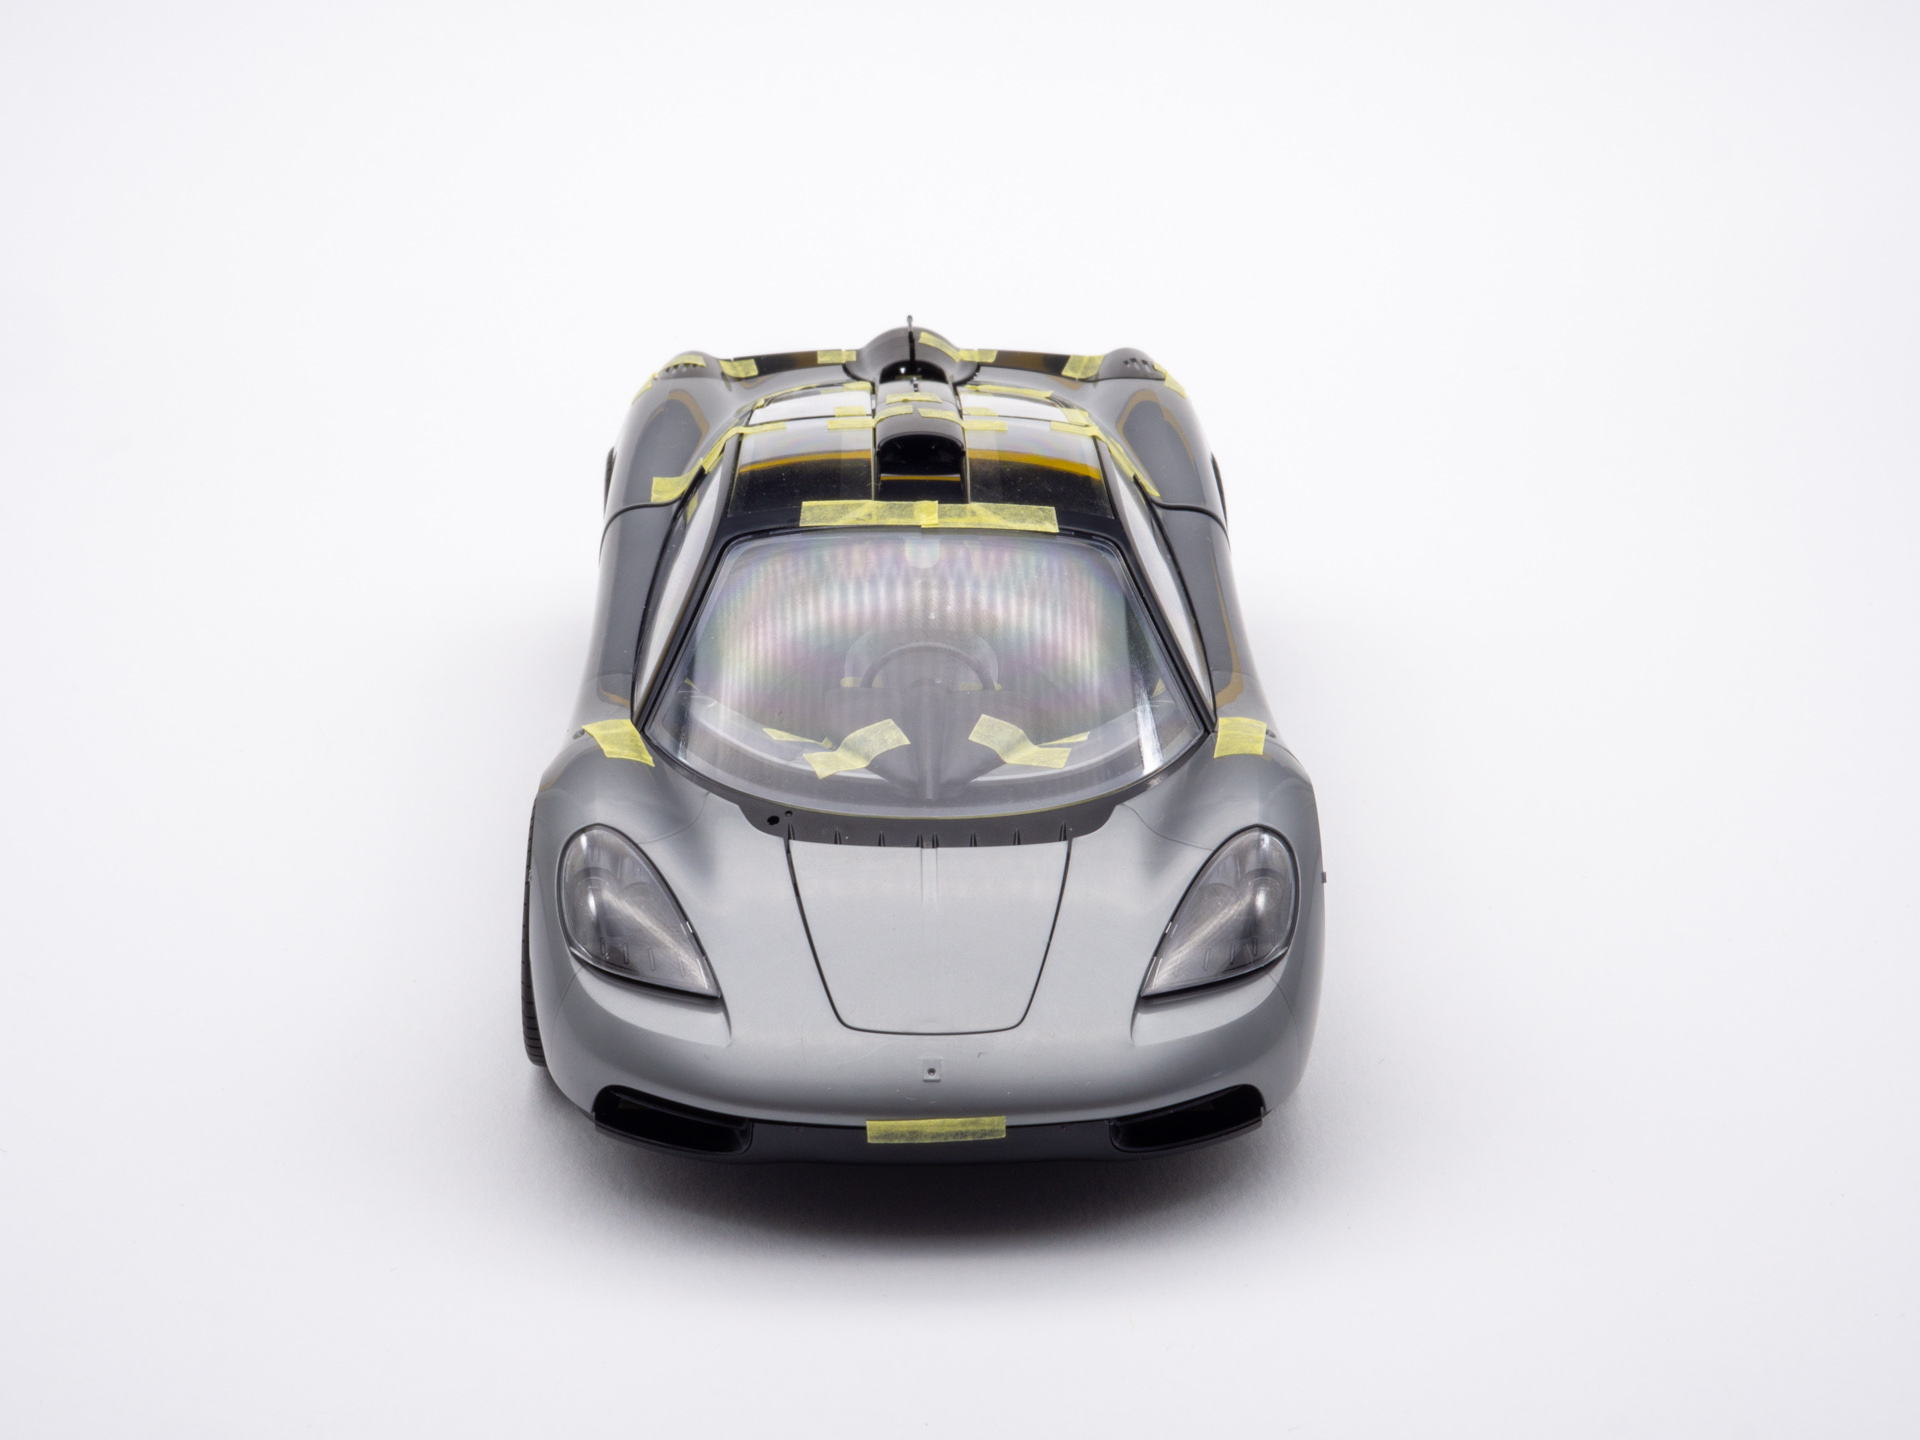
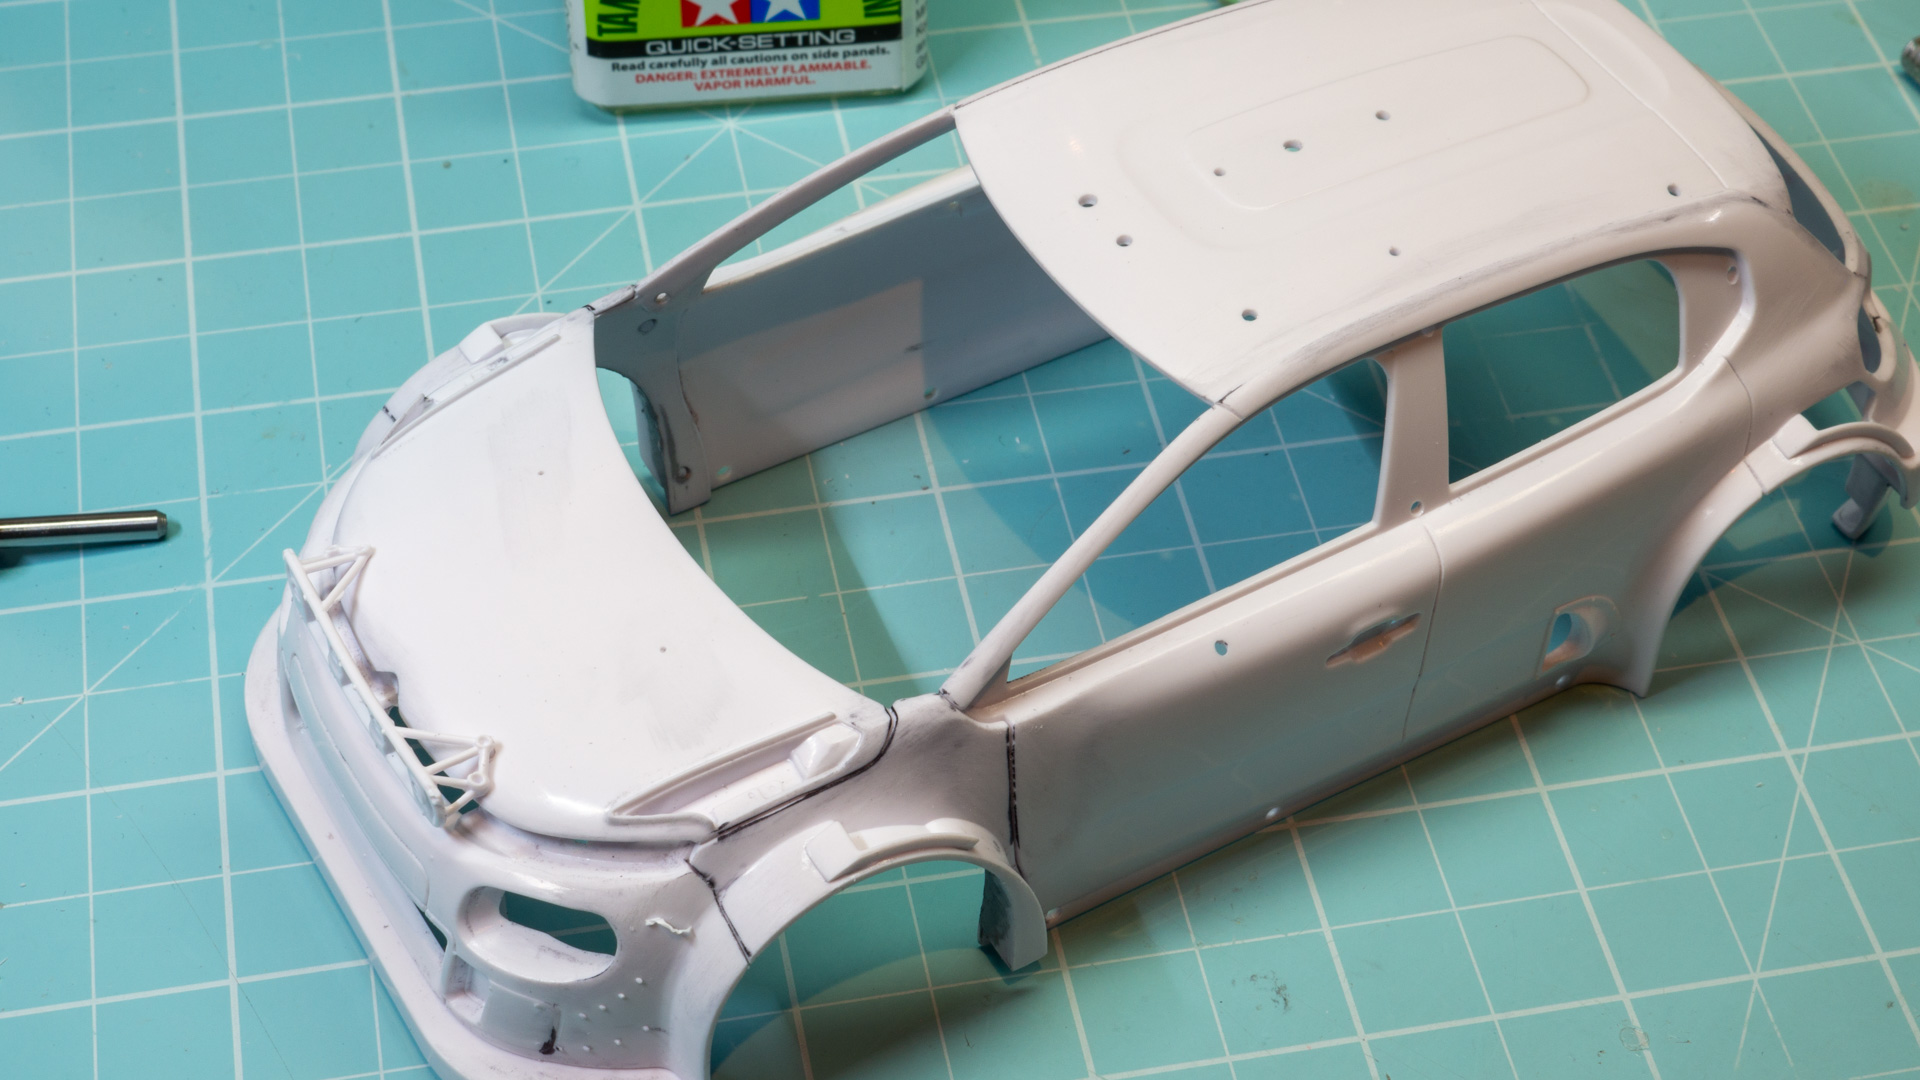
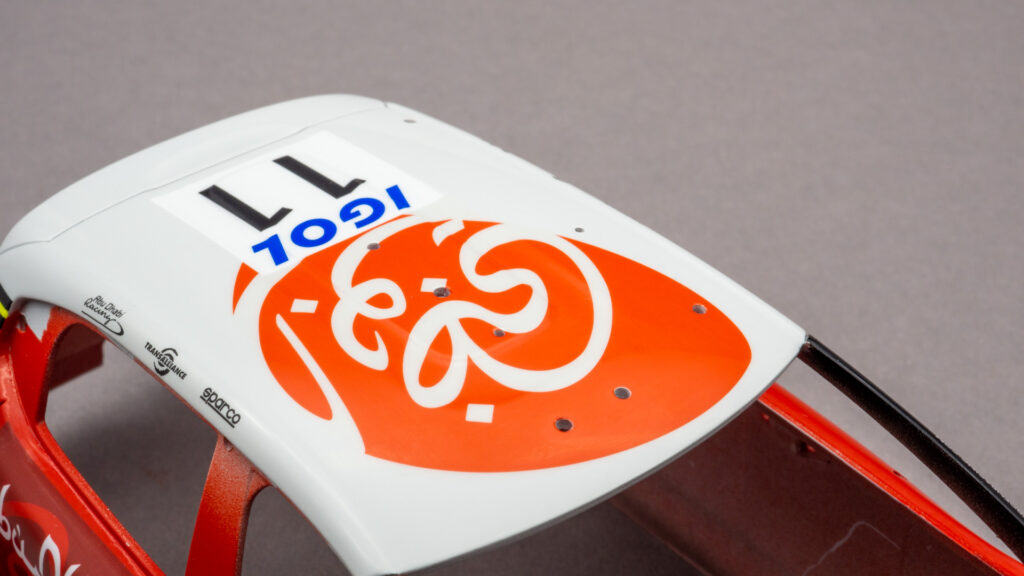
    The roof should be removable, engine cover can be opened as well.

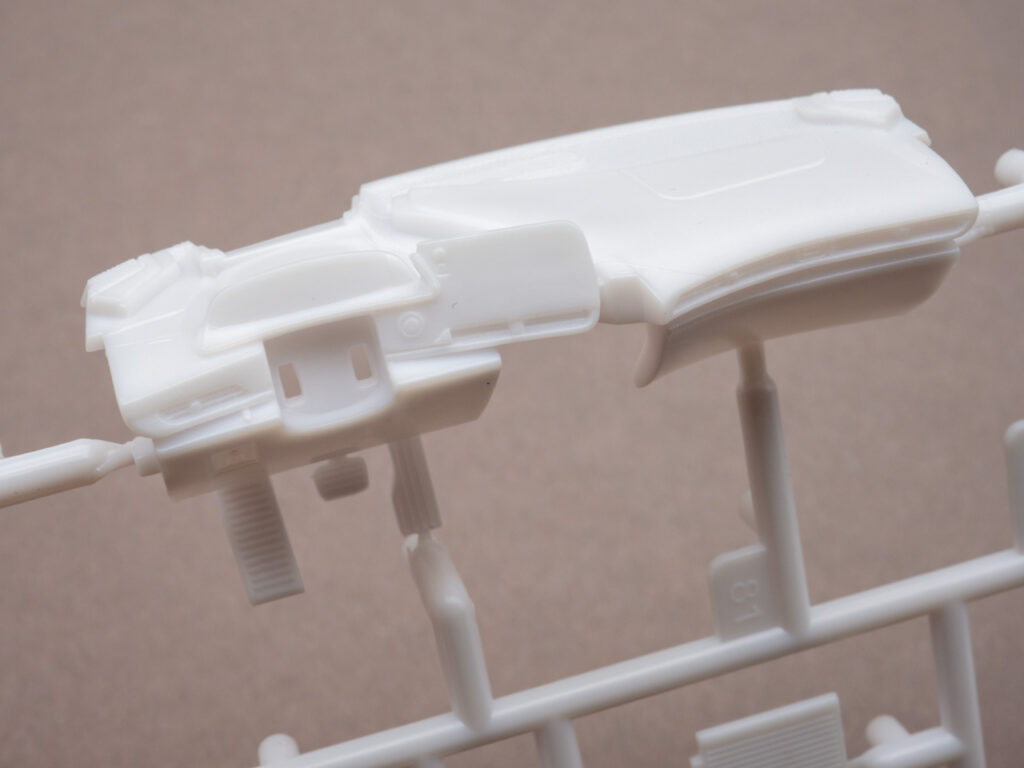
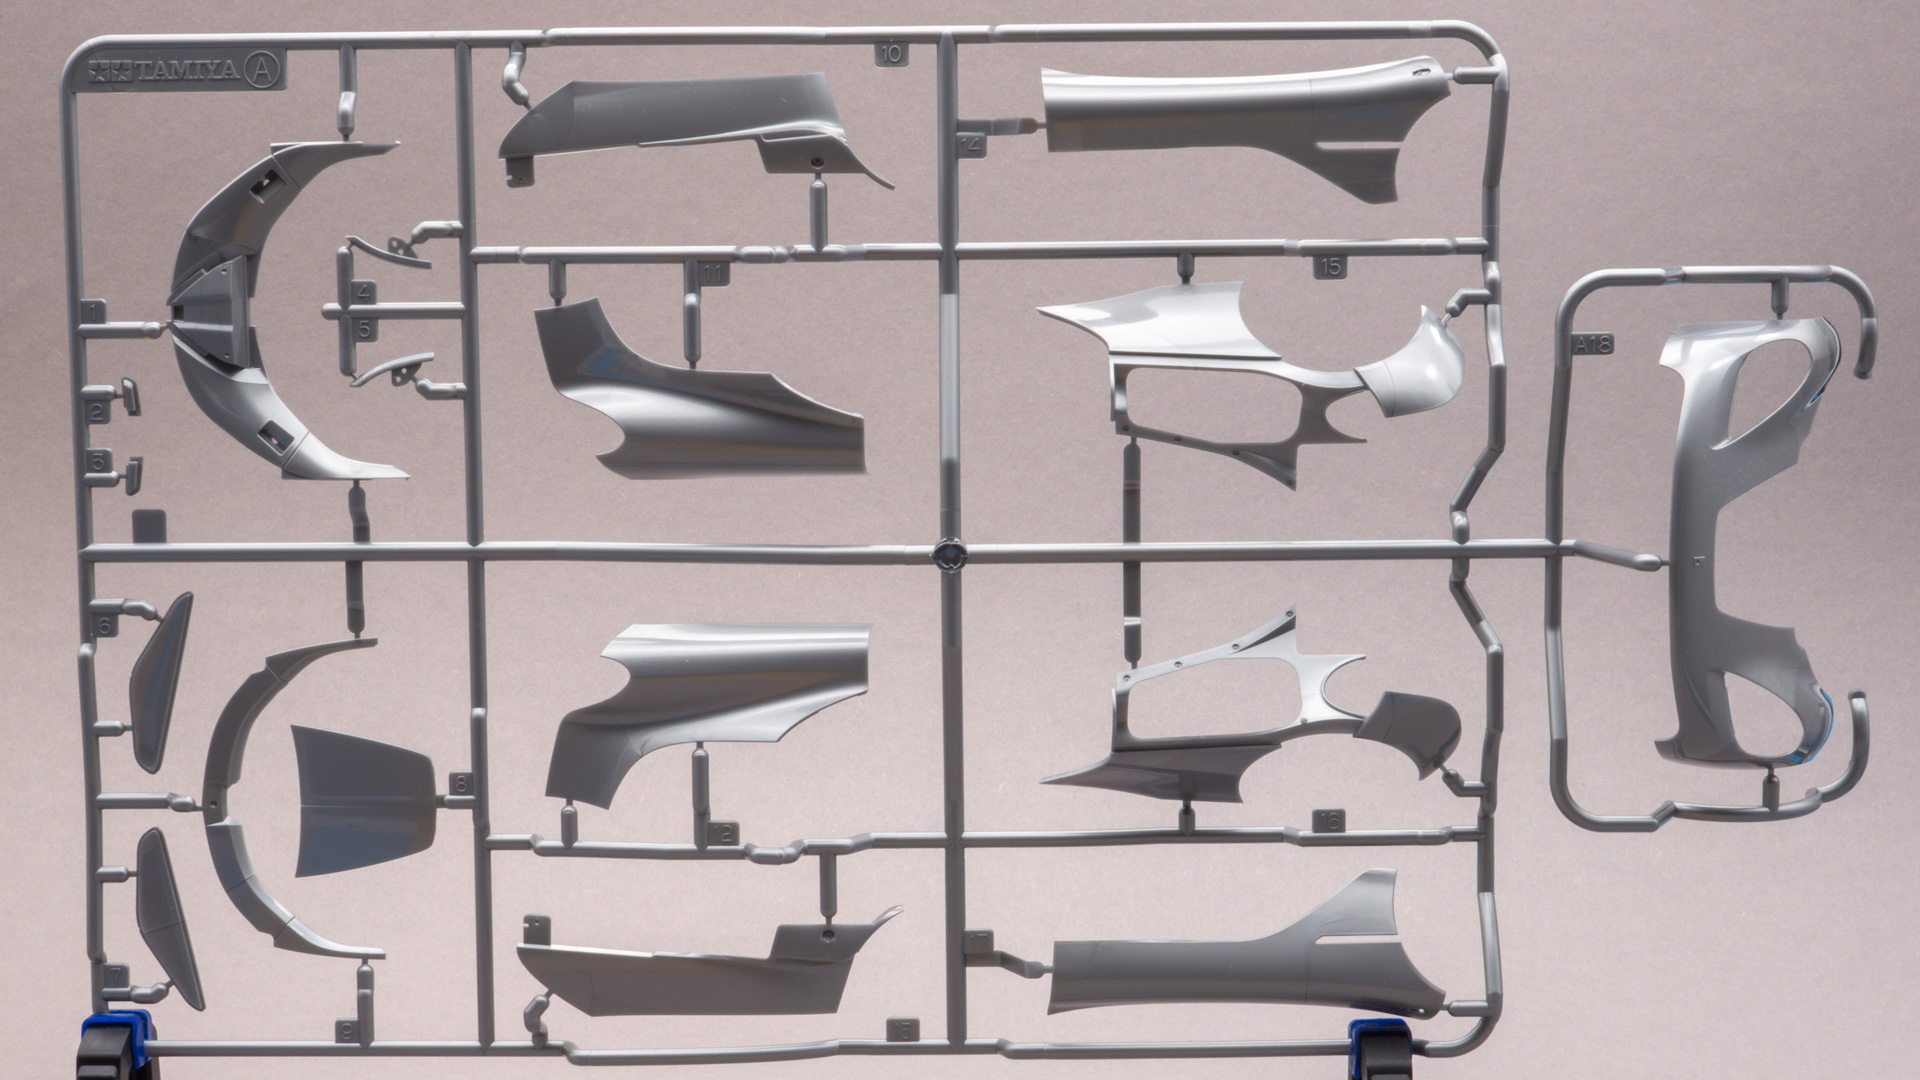
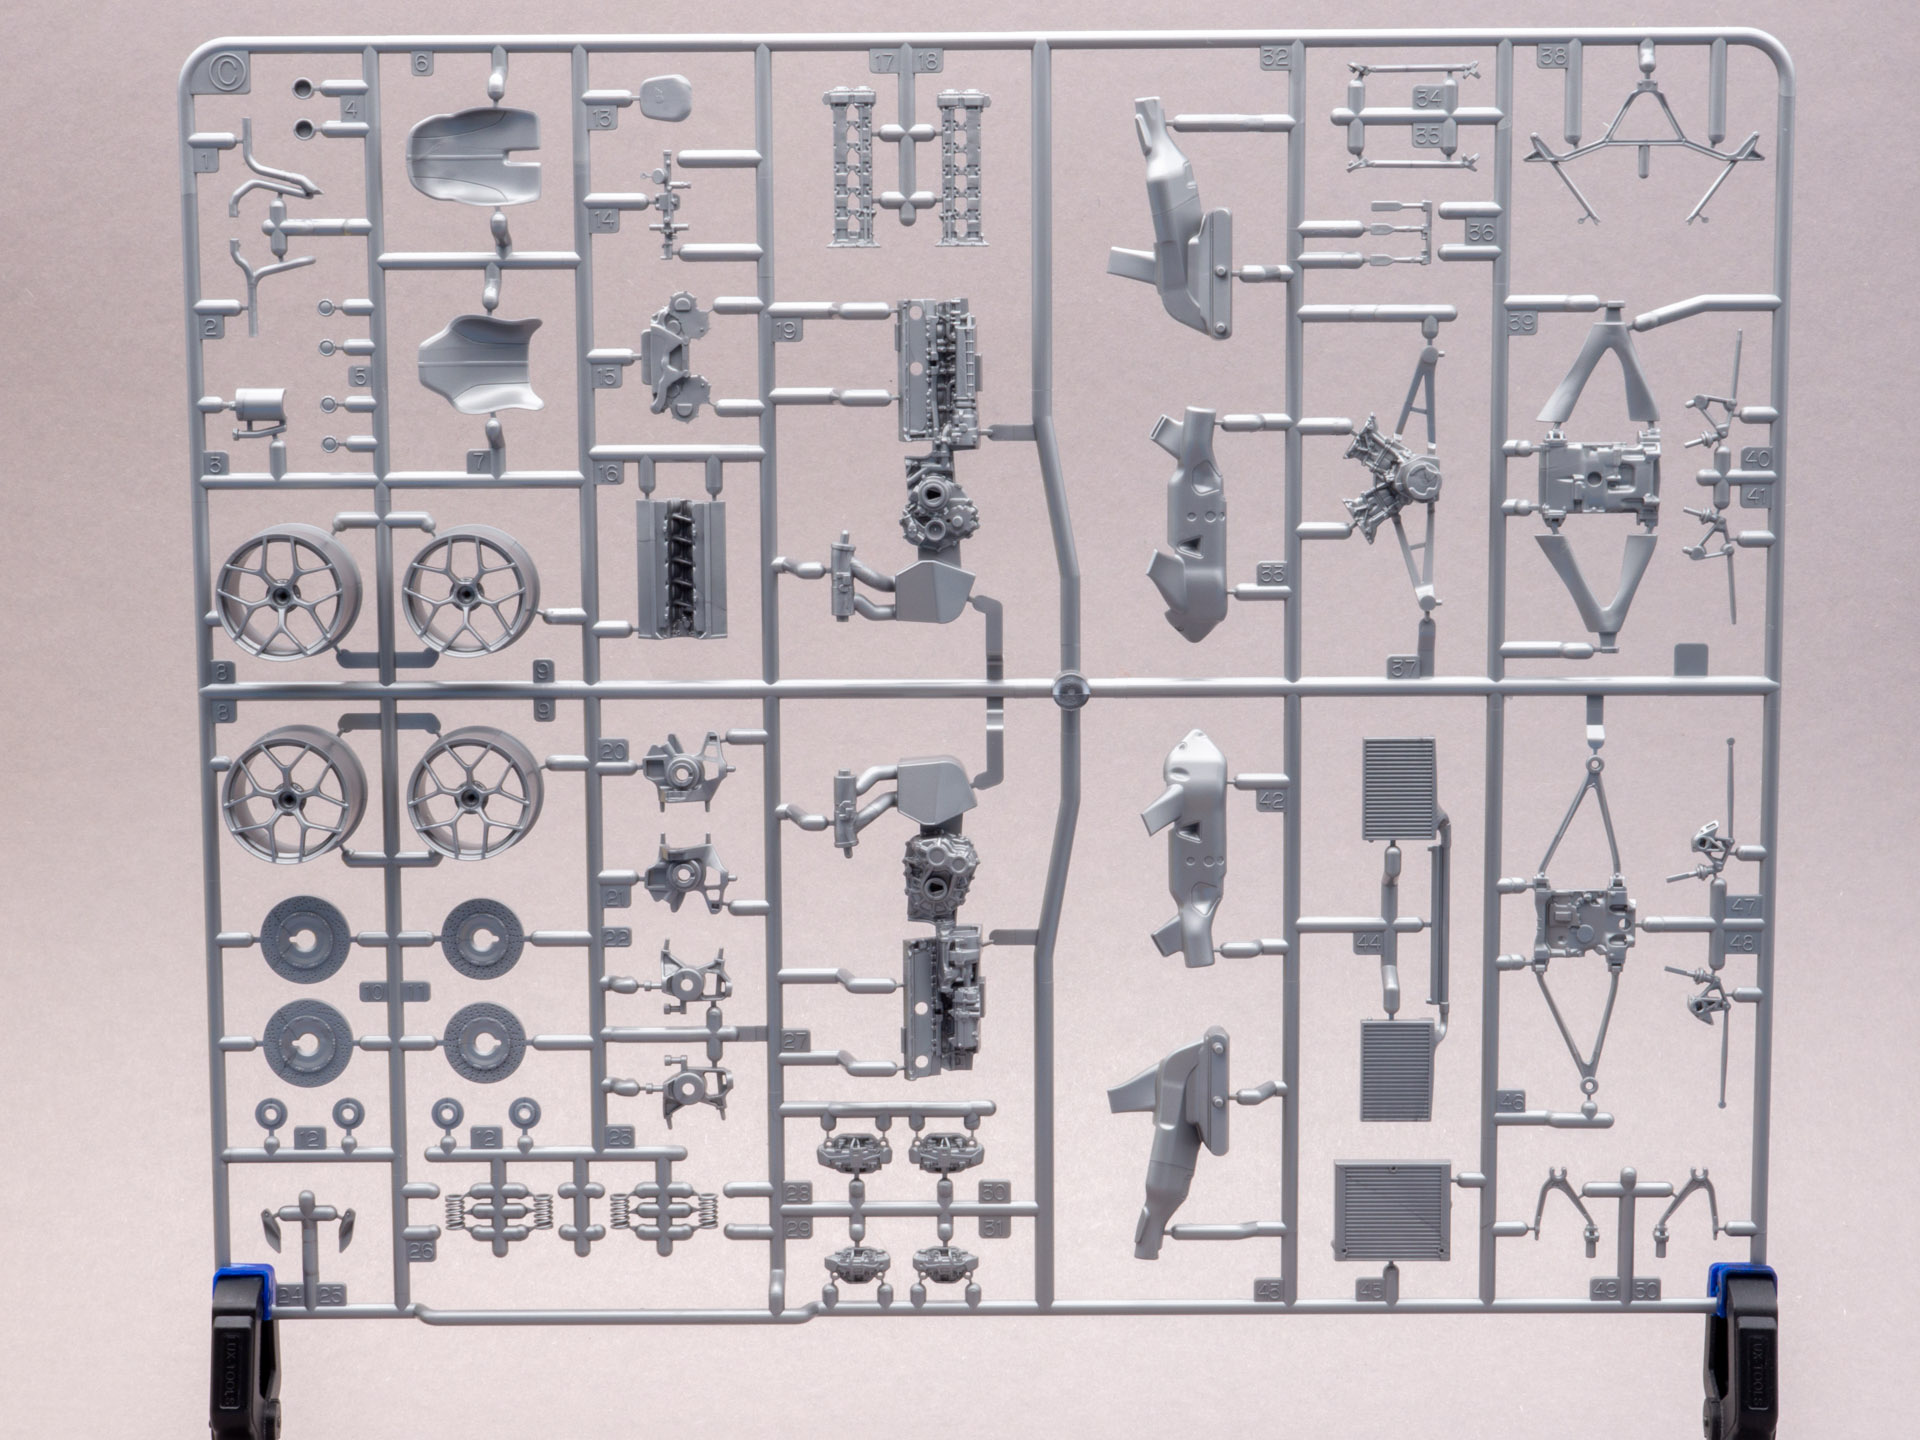
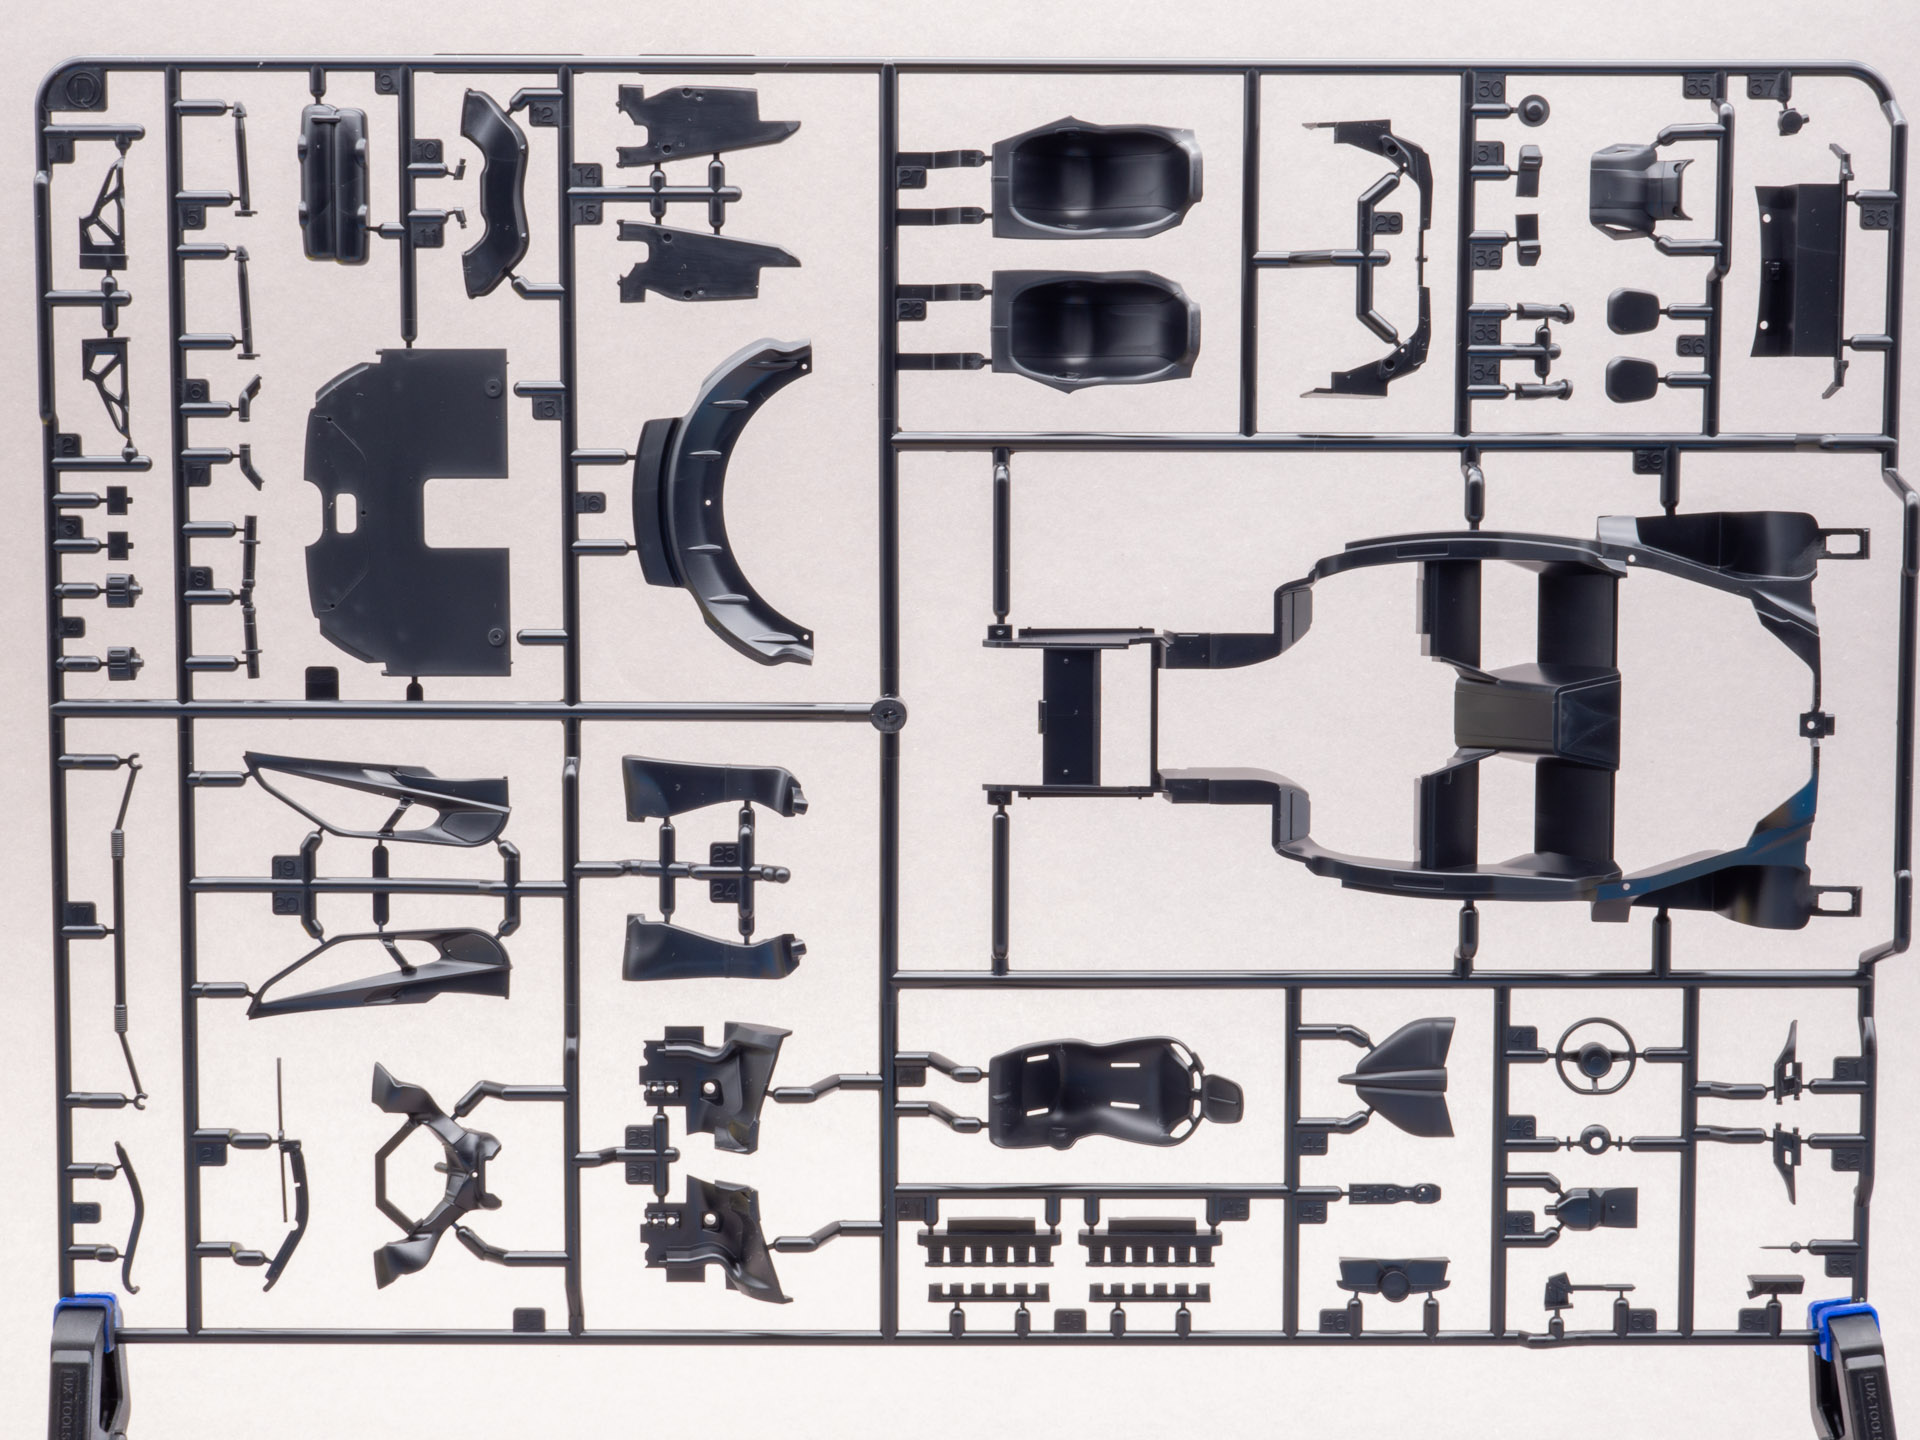
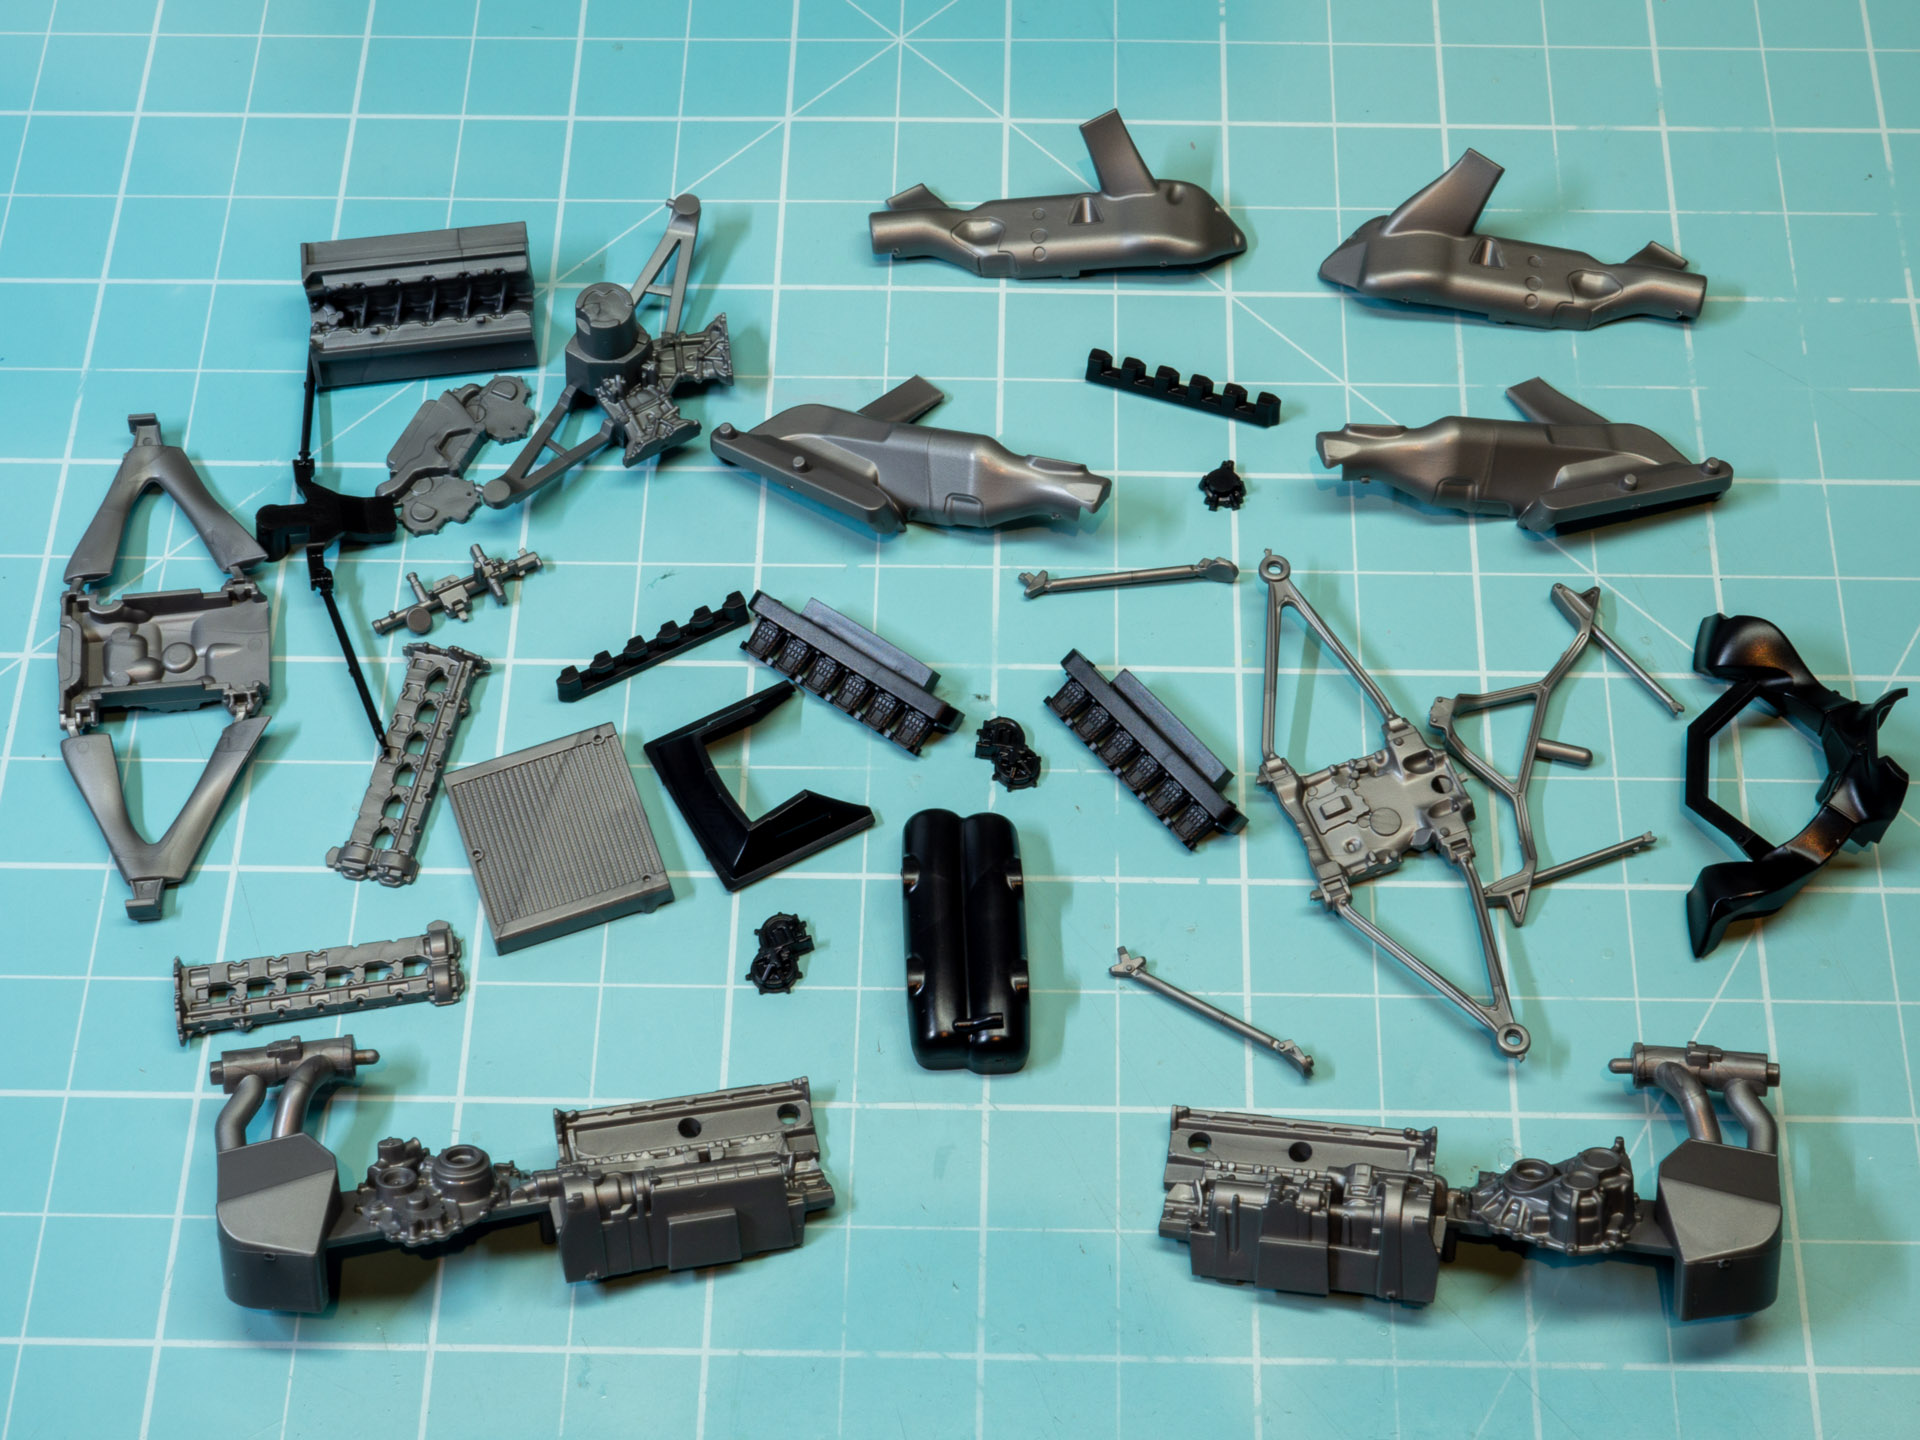
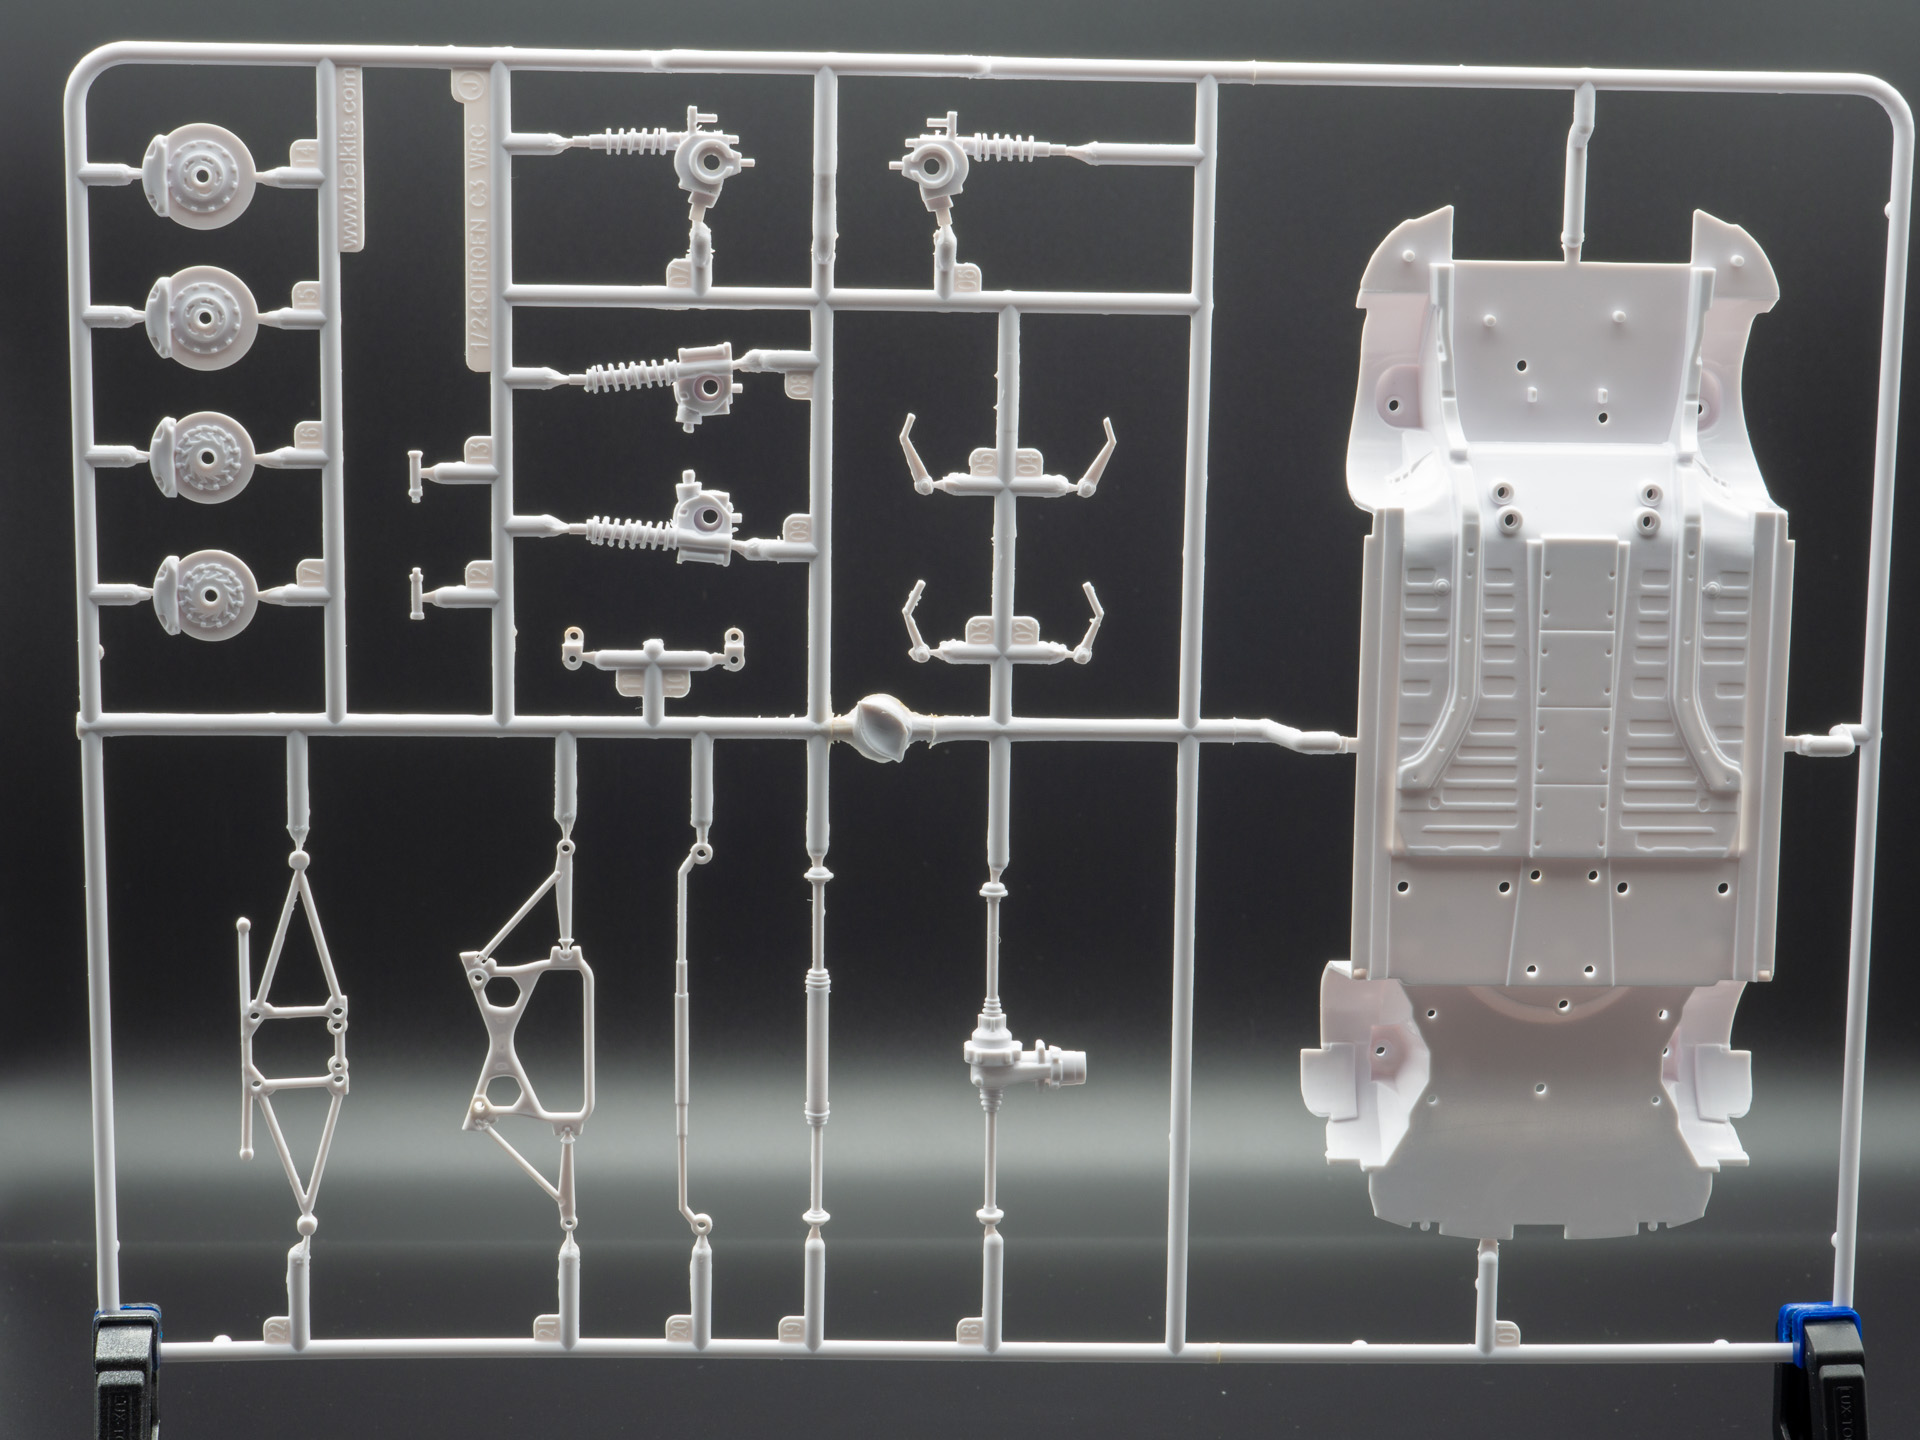
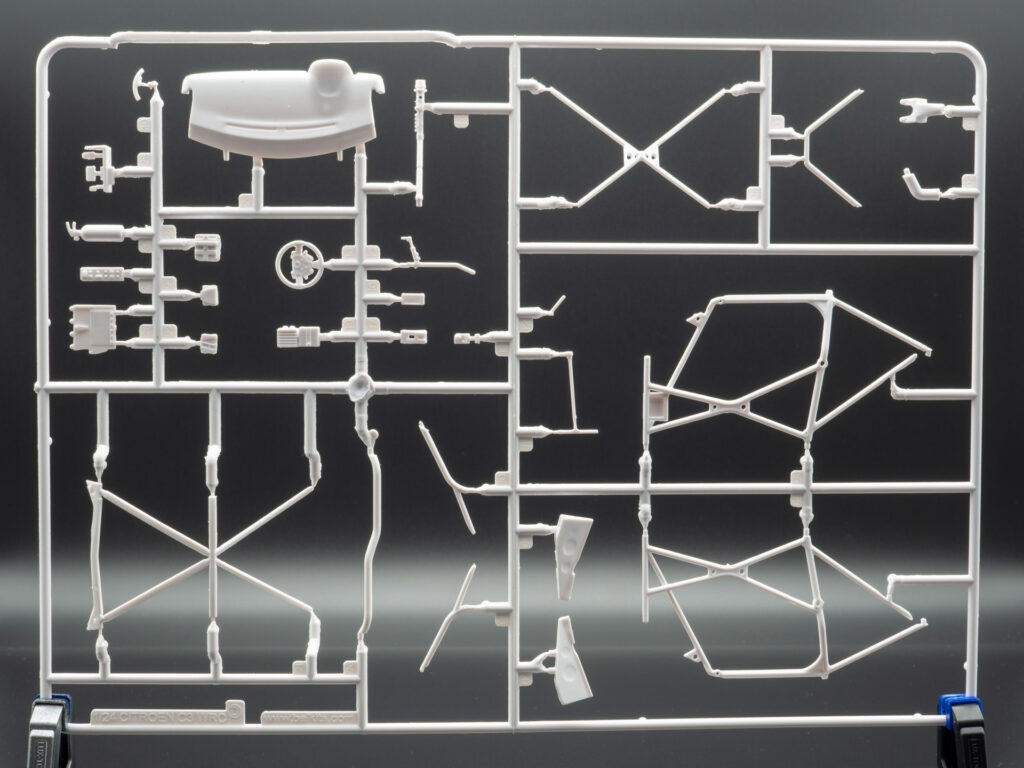
    Now on to the sprues. Everything is made of white plastic. Here are the engine parts and the dashboard.

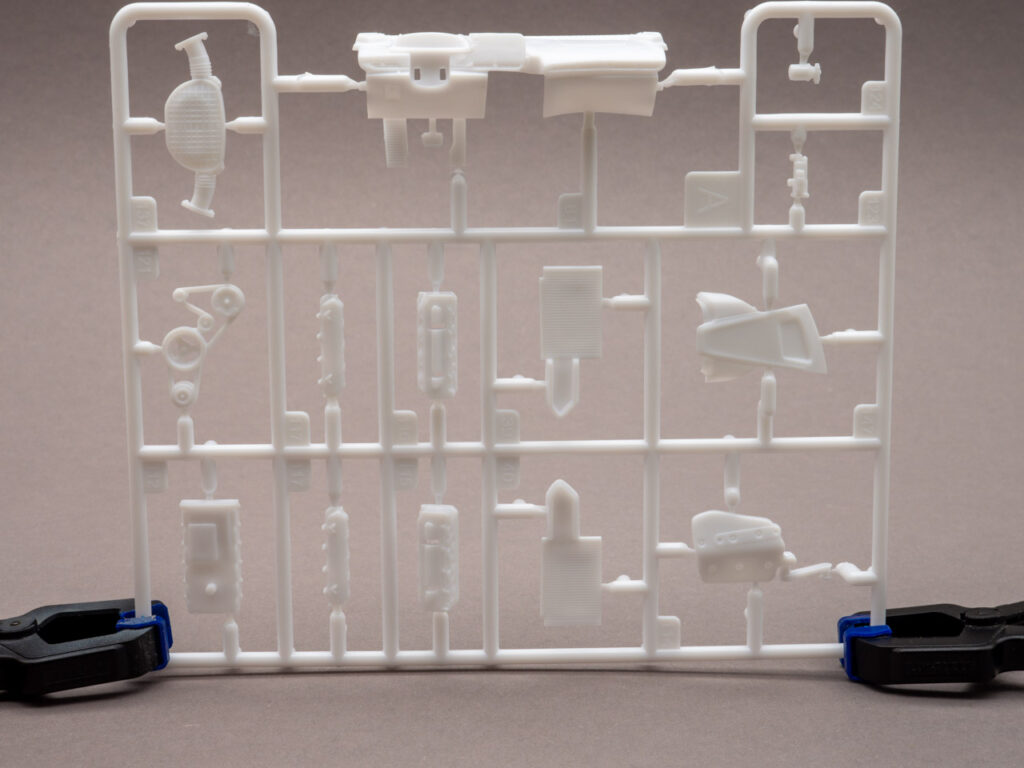
    Despite the “soapy” plastic, the parts seem sharp.

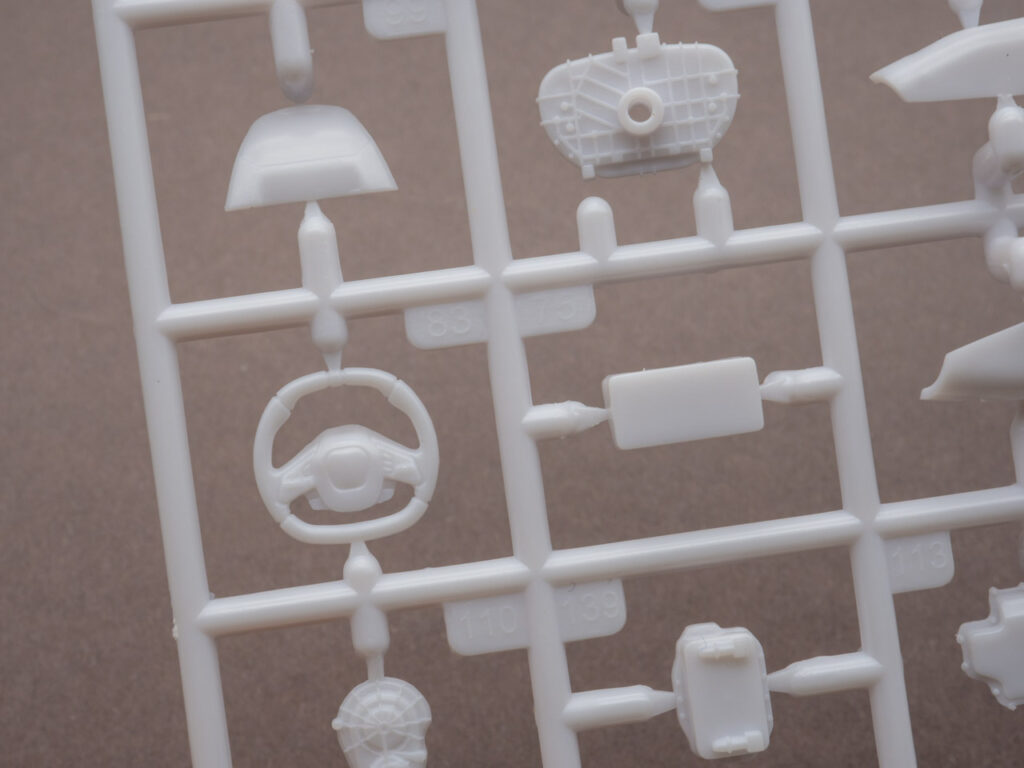
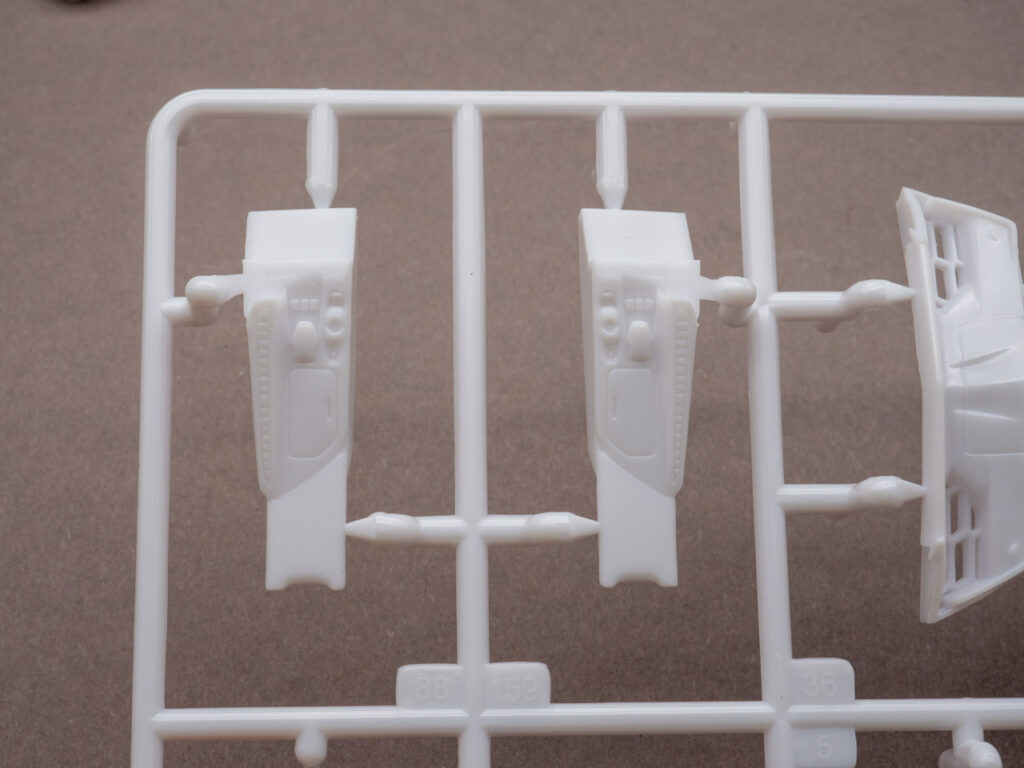
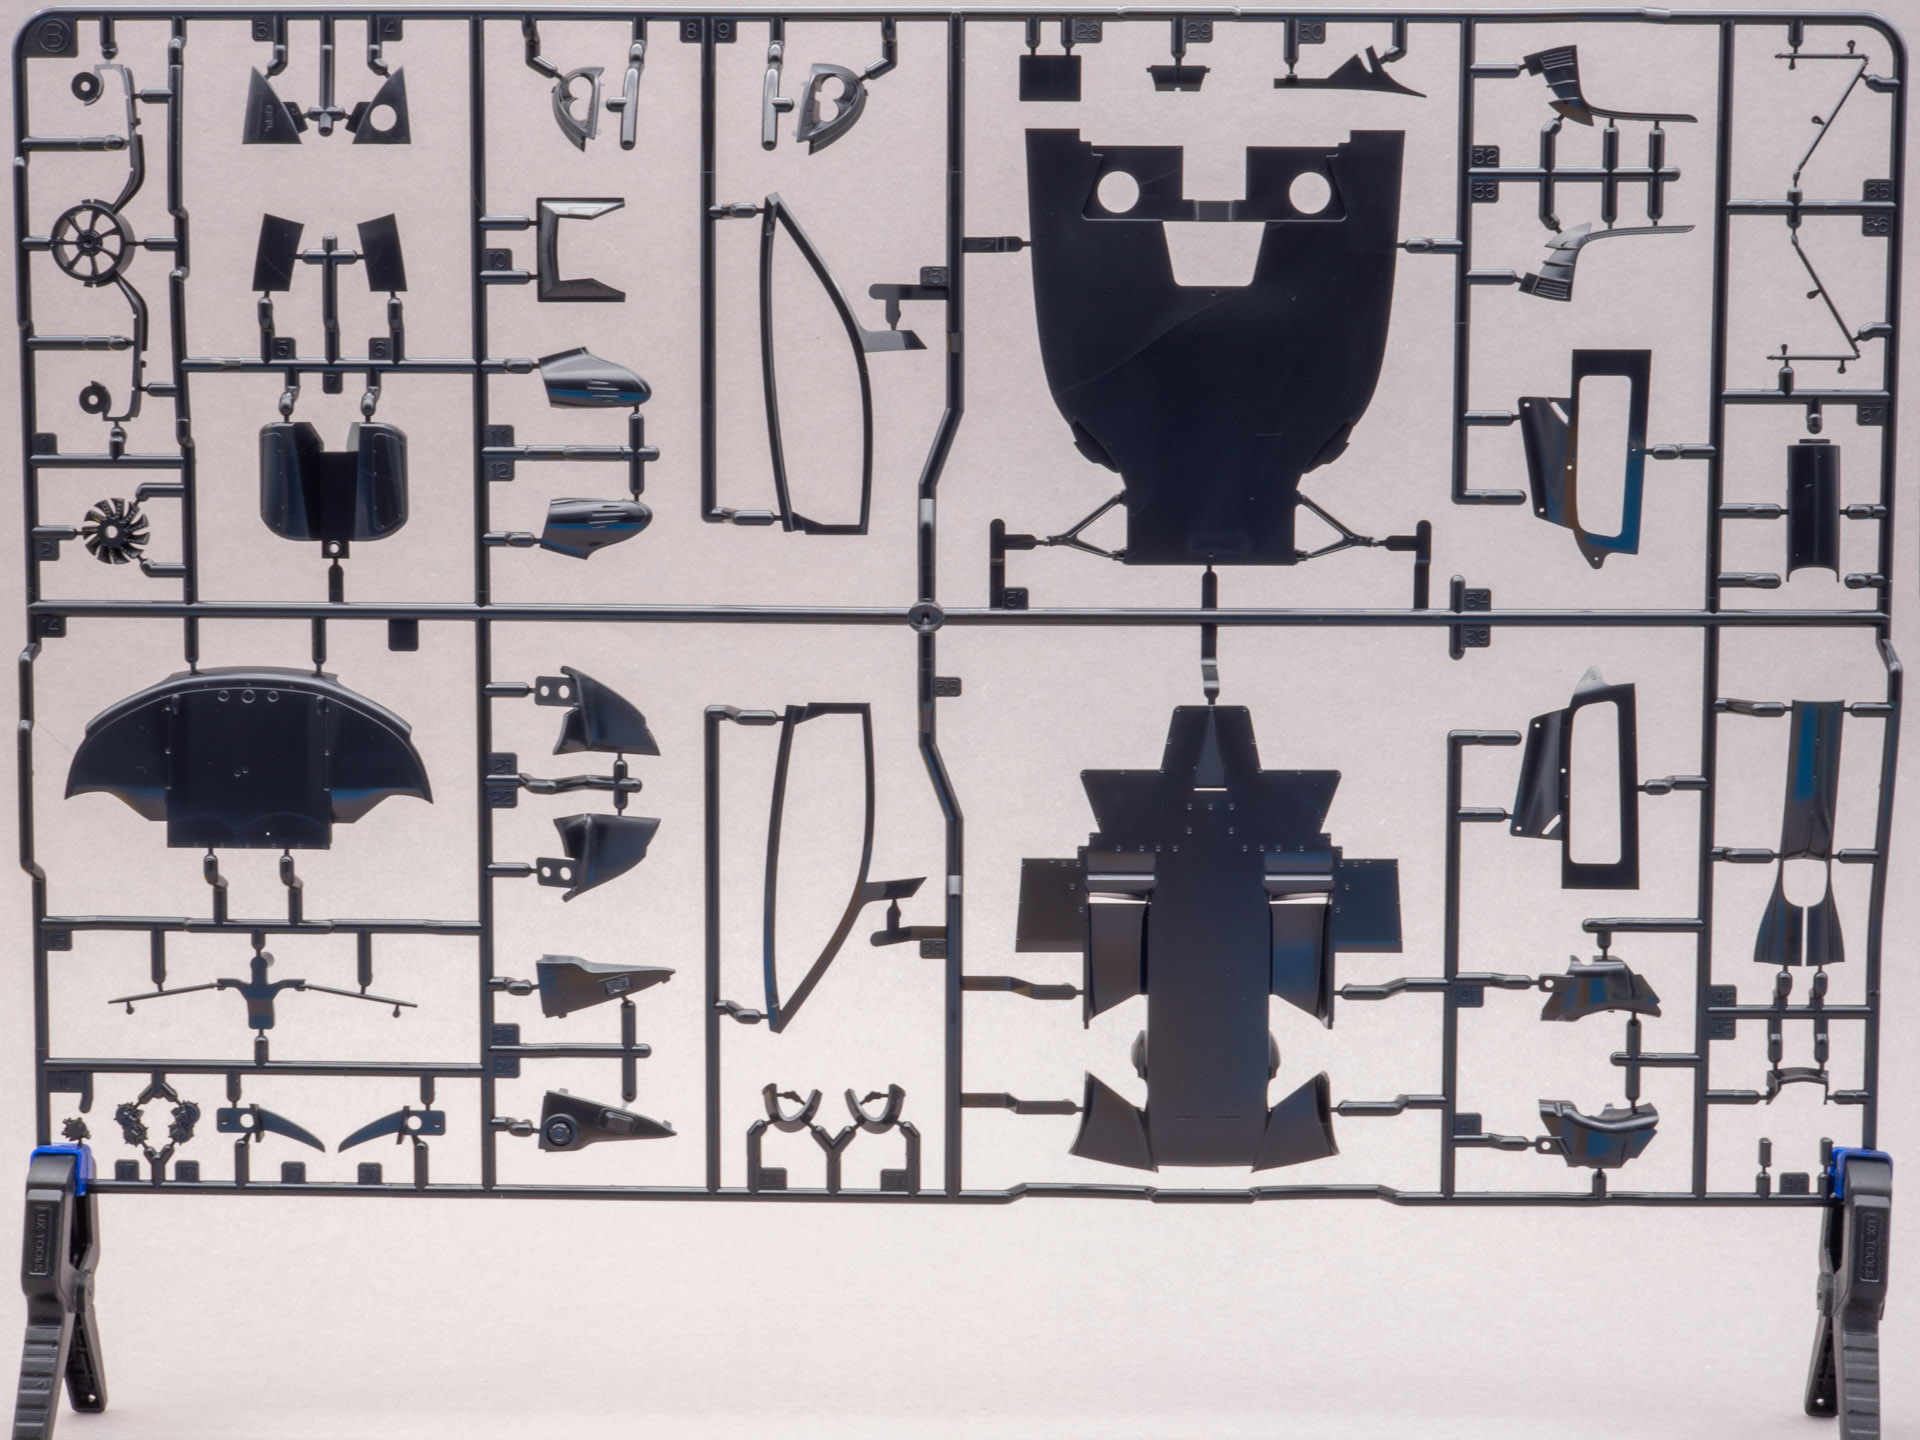
    Next sprue. Also engine parts and other small things. Right-hand drive dashboard.

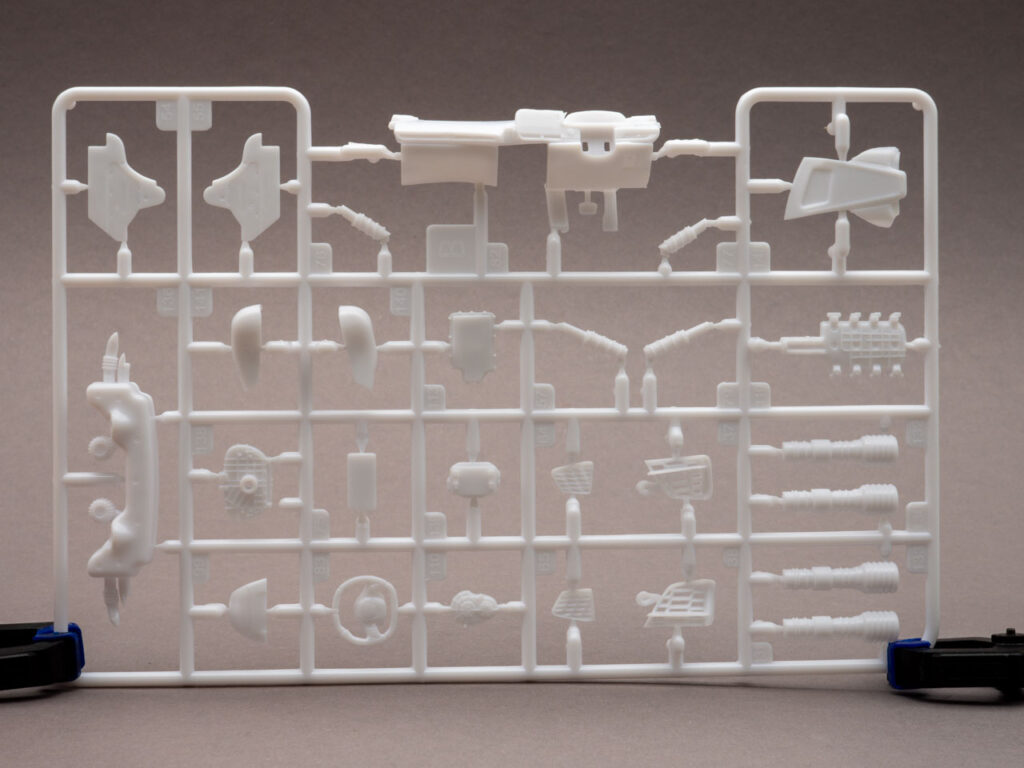
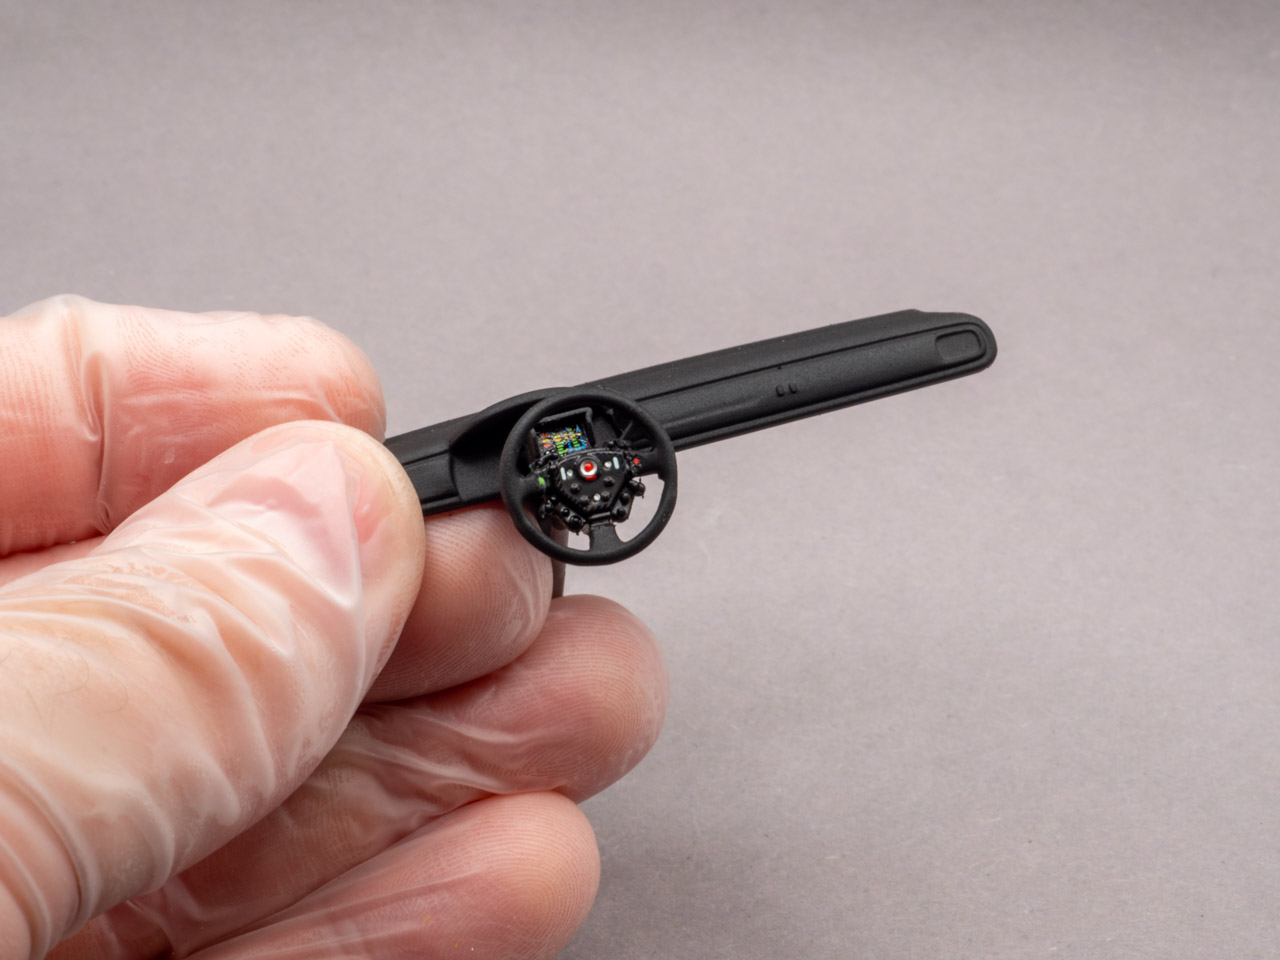
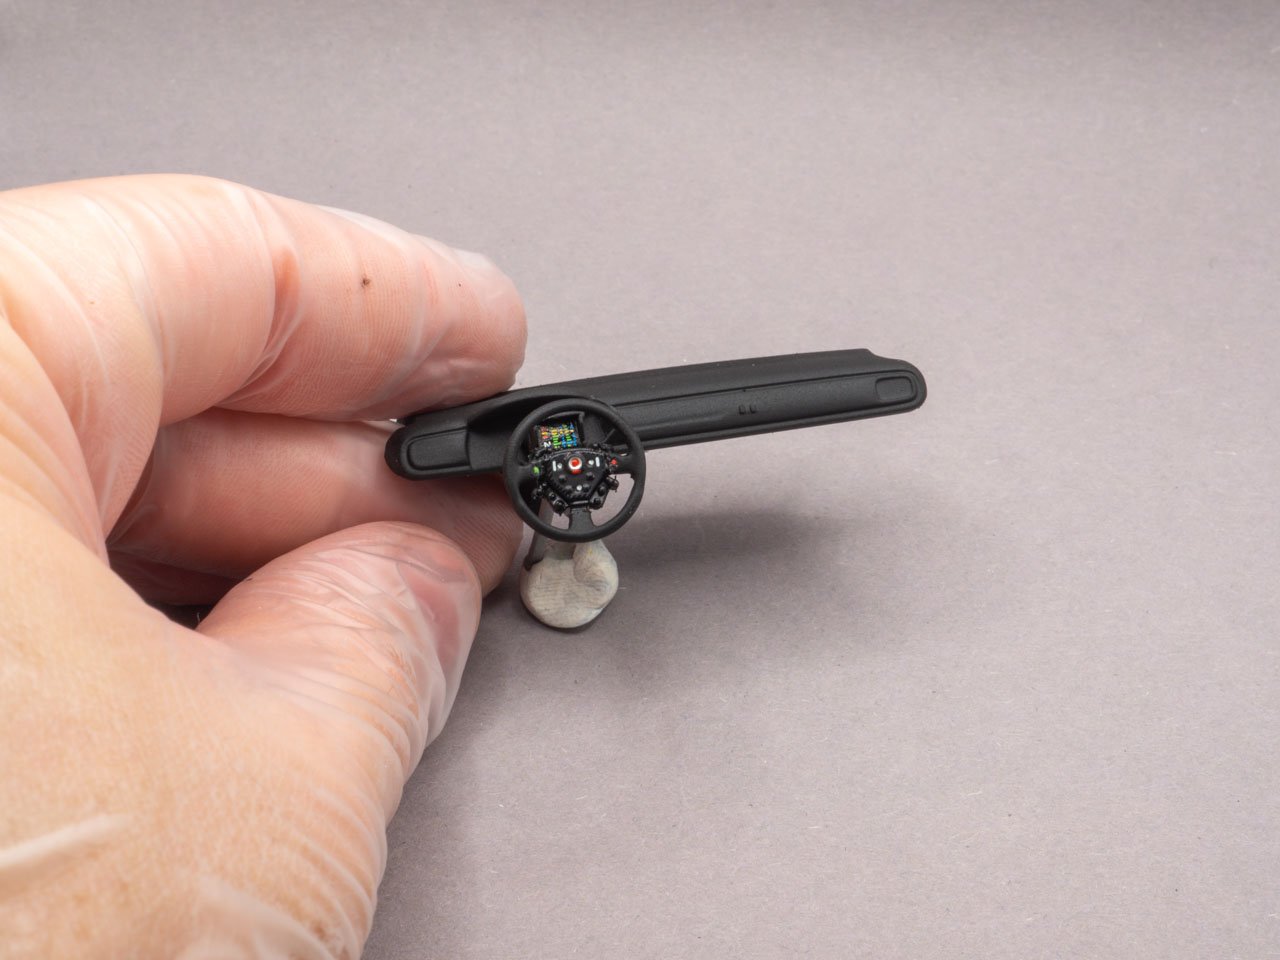
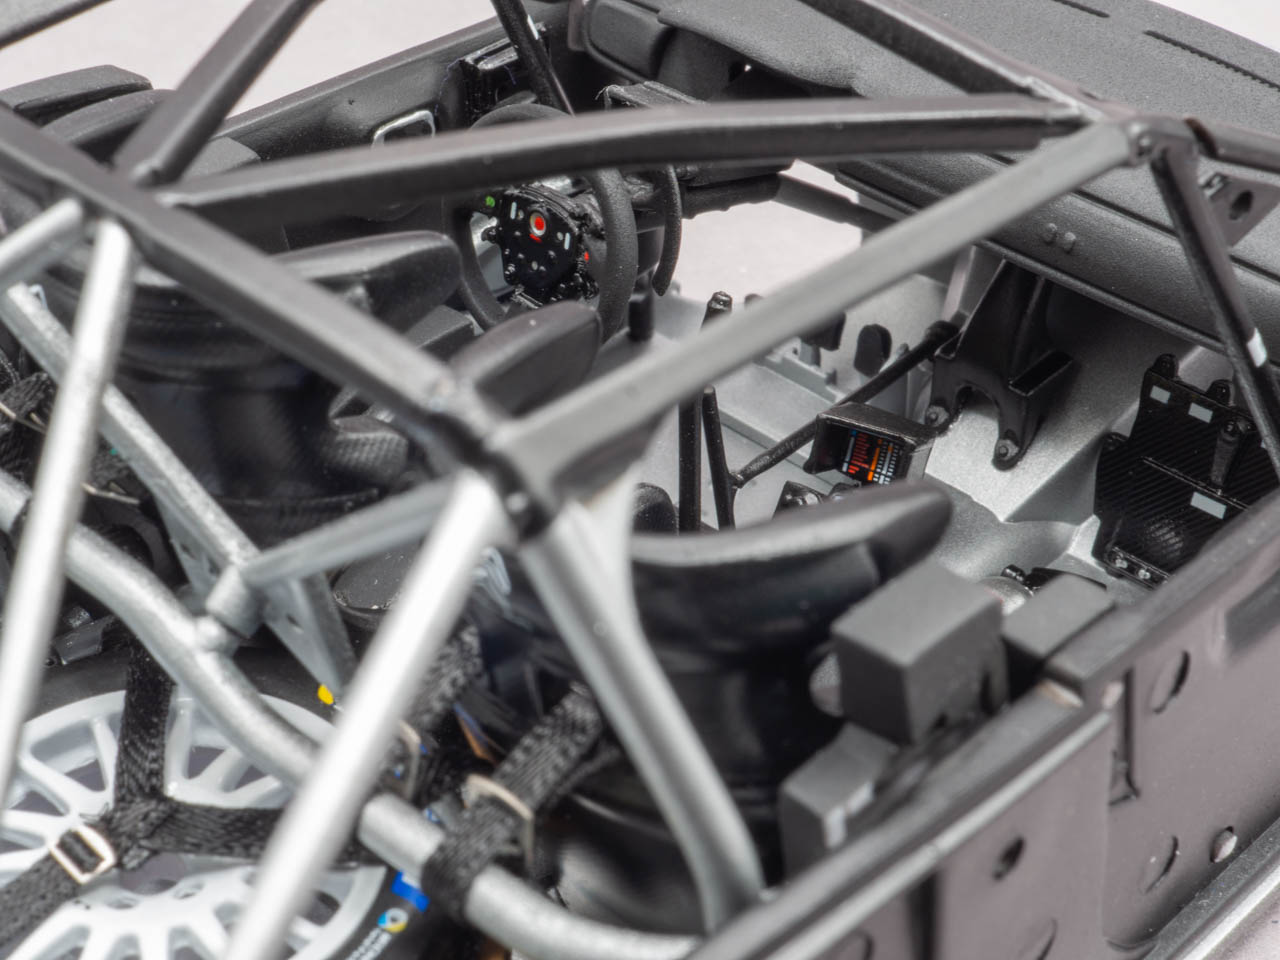
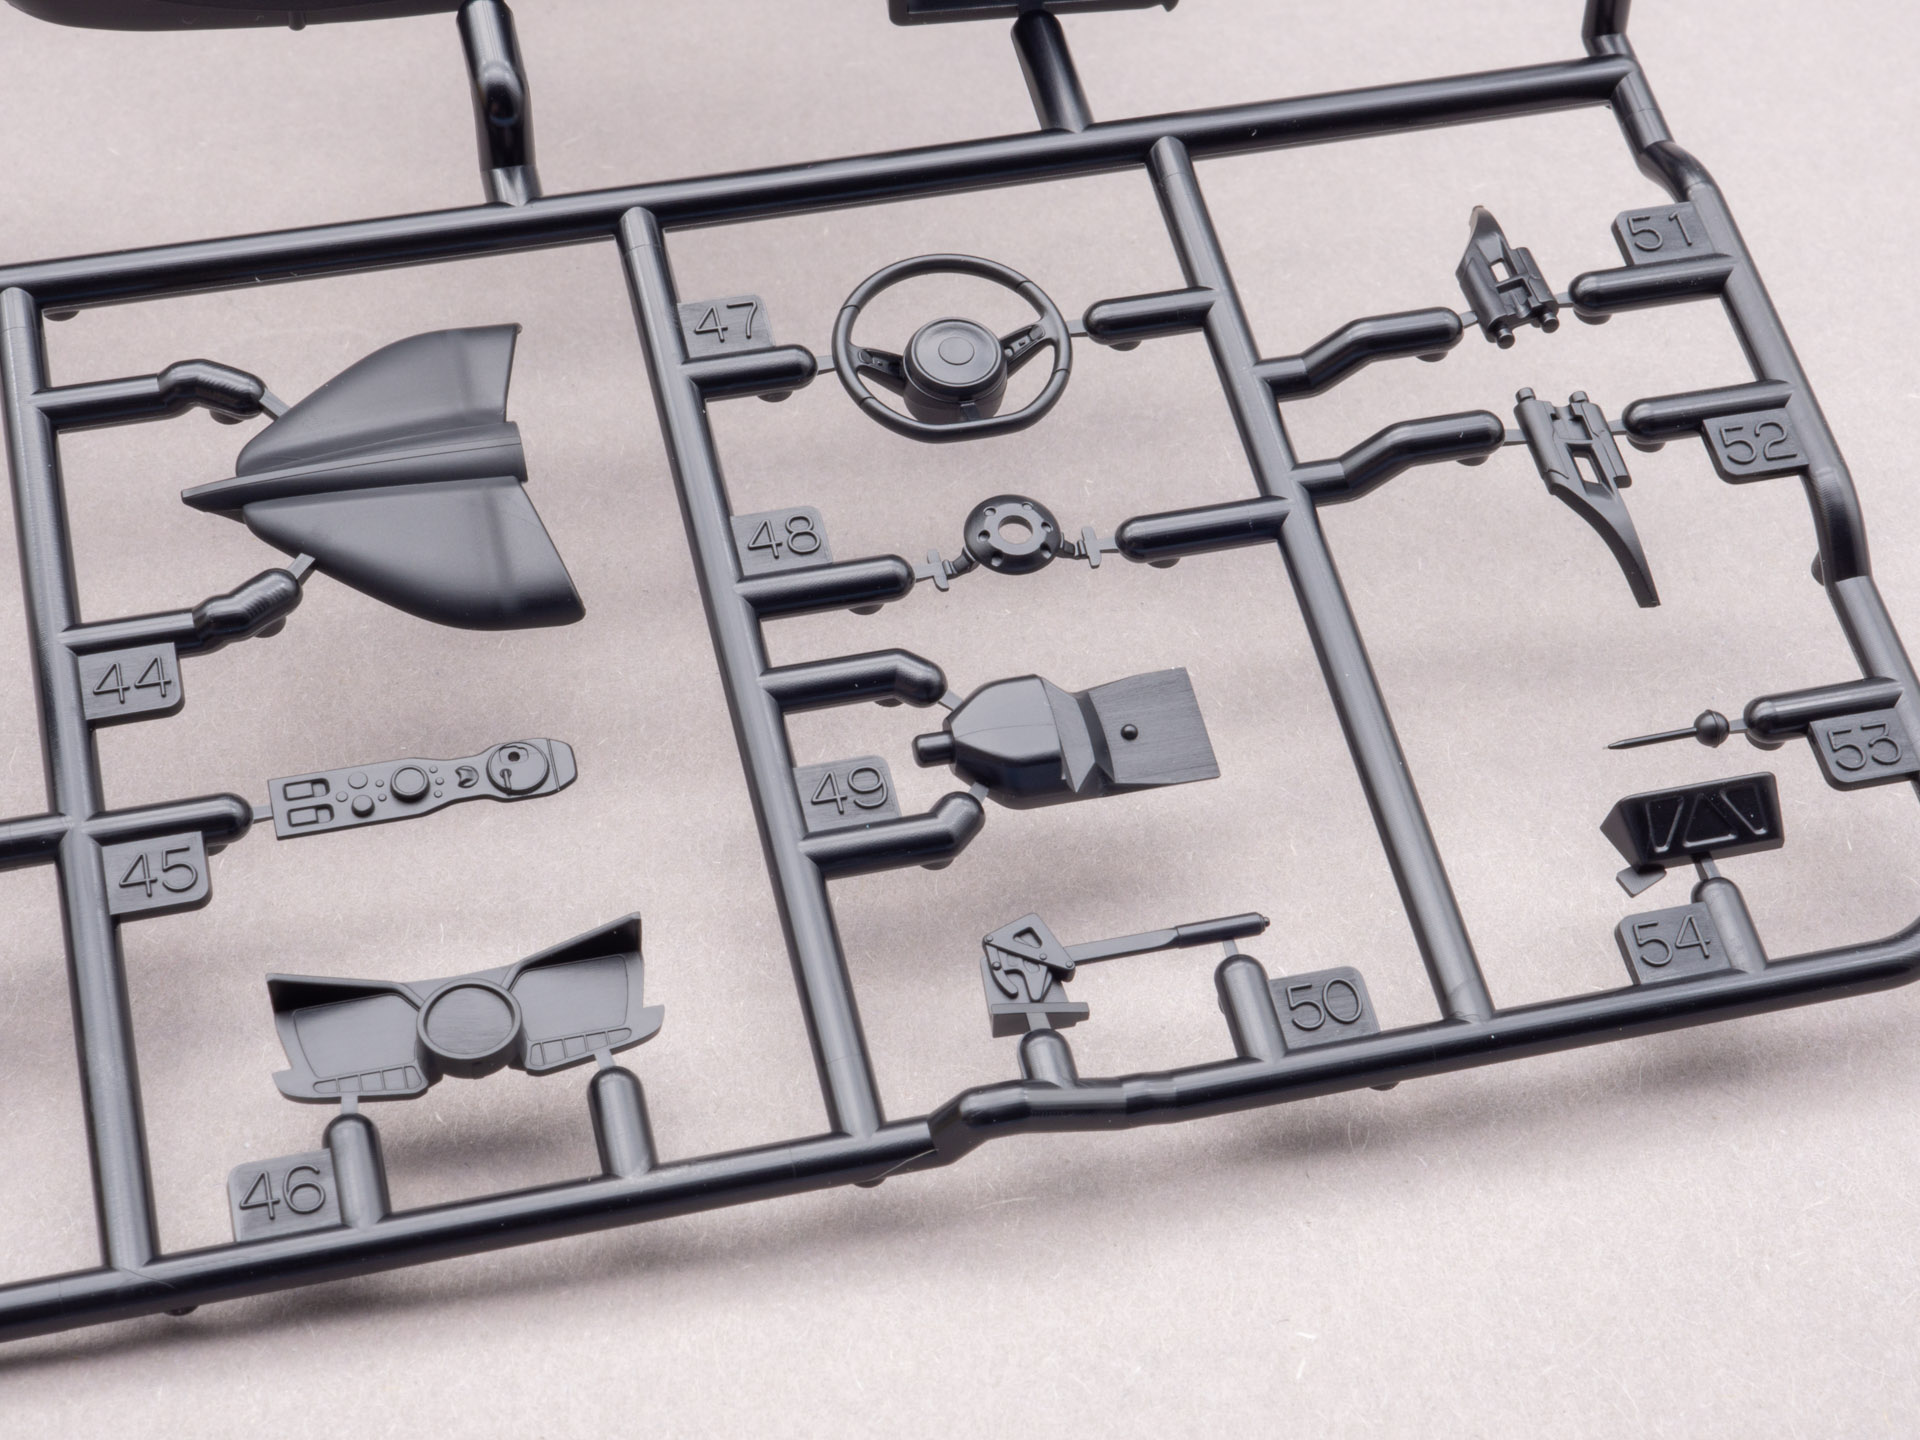
    All buttons are clearly visible on the steering wheel, and such details as ribs on the engine parts.

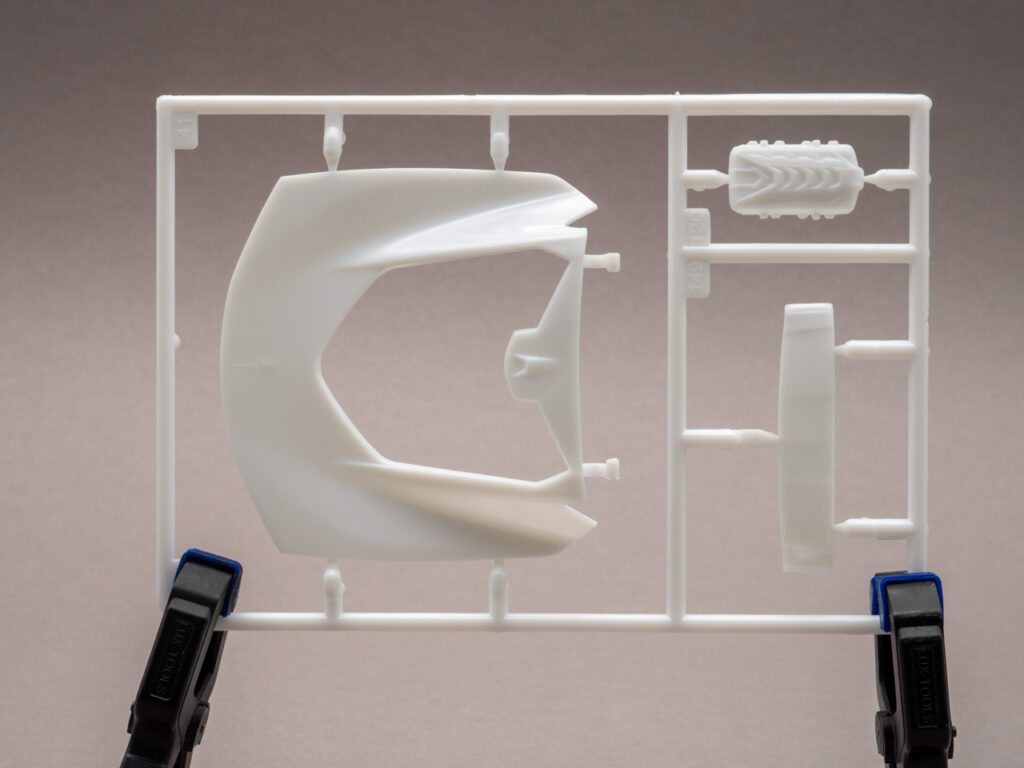
    Another sprue. You can see the exhaust pipes, the panel with sun visors and other.

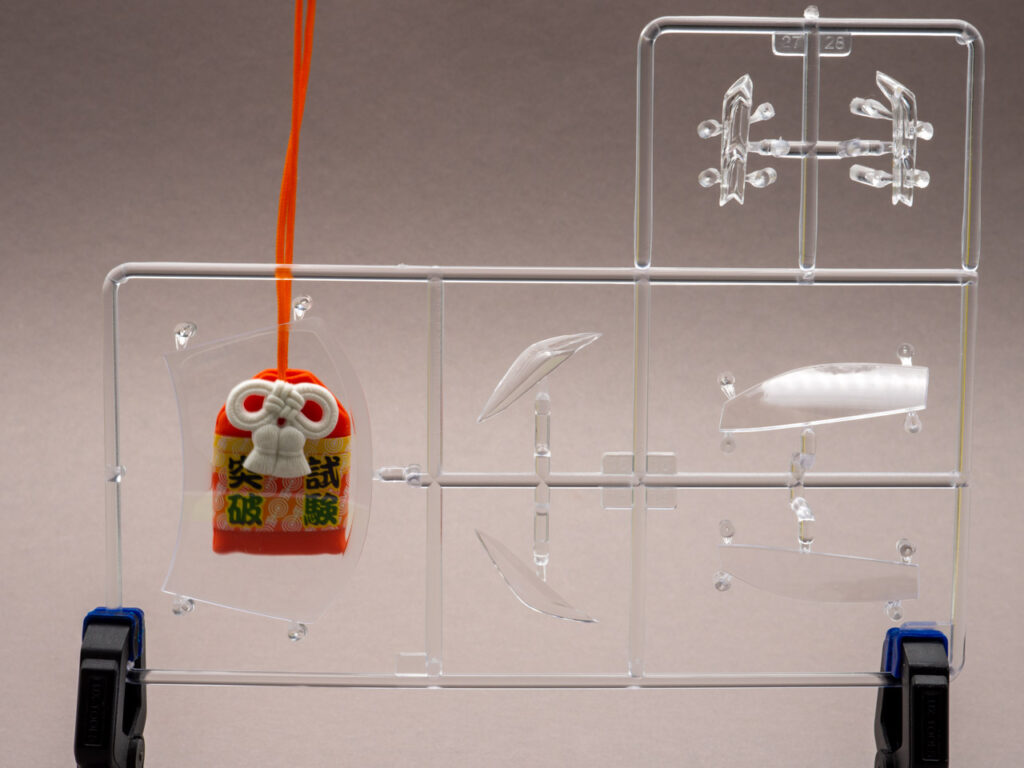
    Reflectors for headlights and taillights.

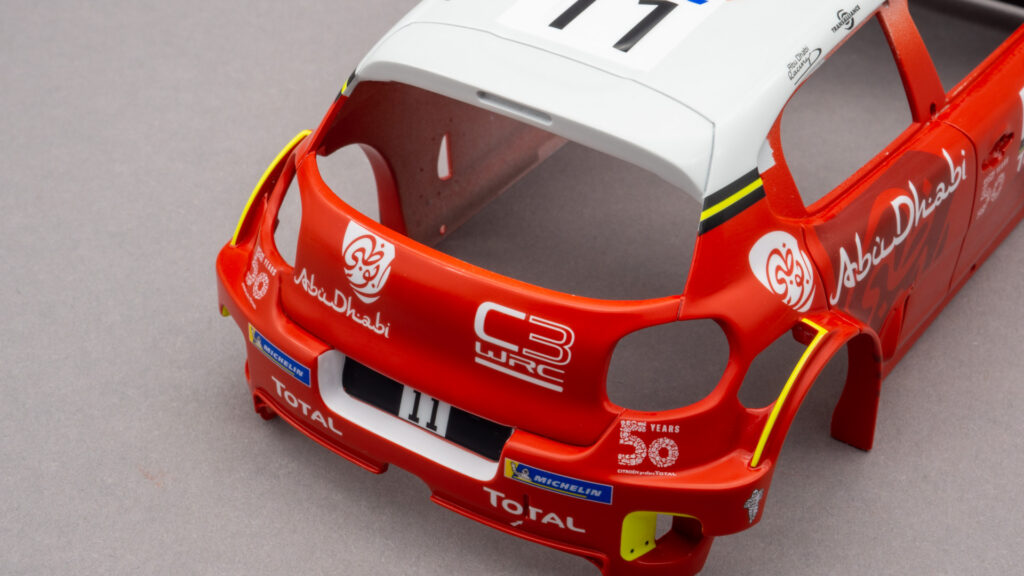
    Trunk lid. I wonder how it will fit into the body. Hopefully flawless.

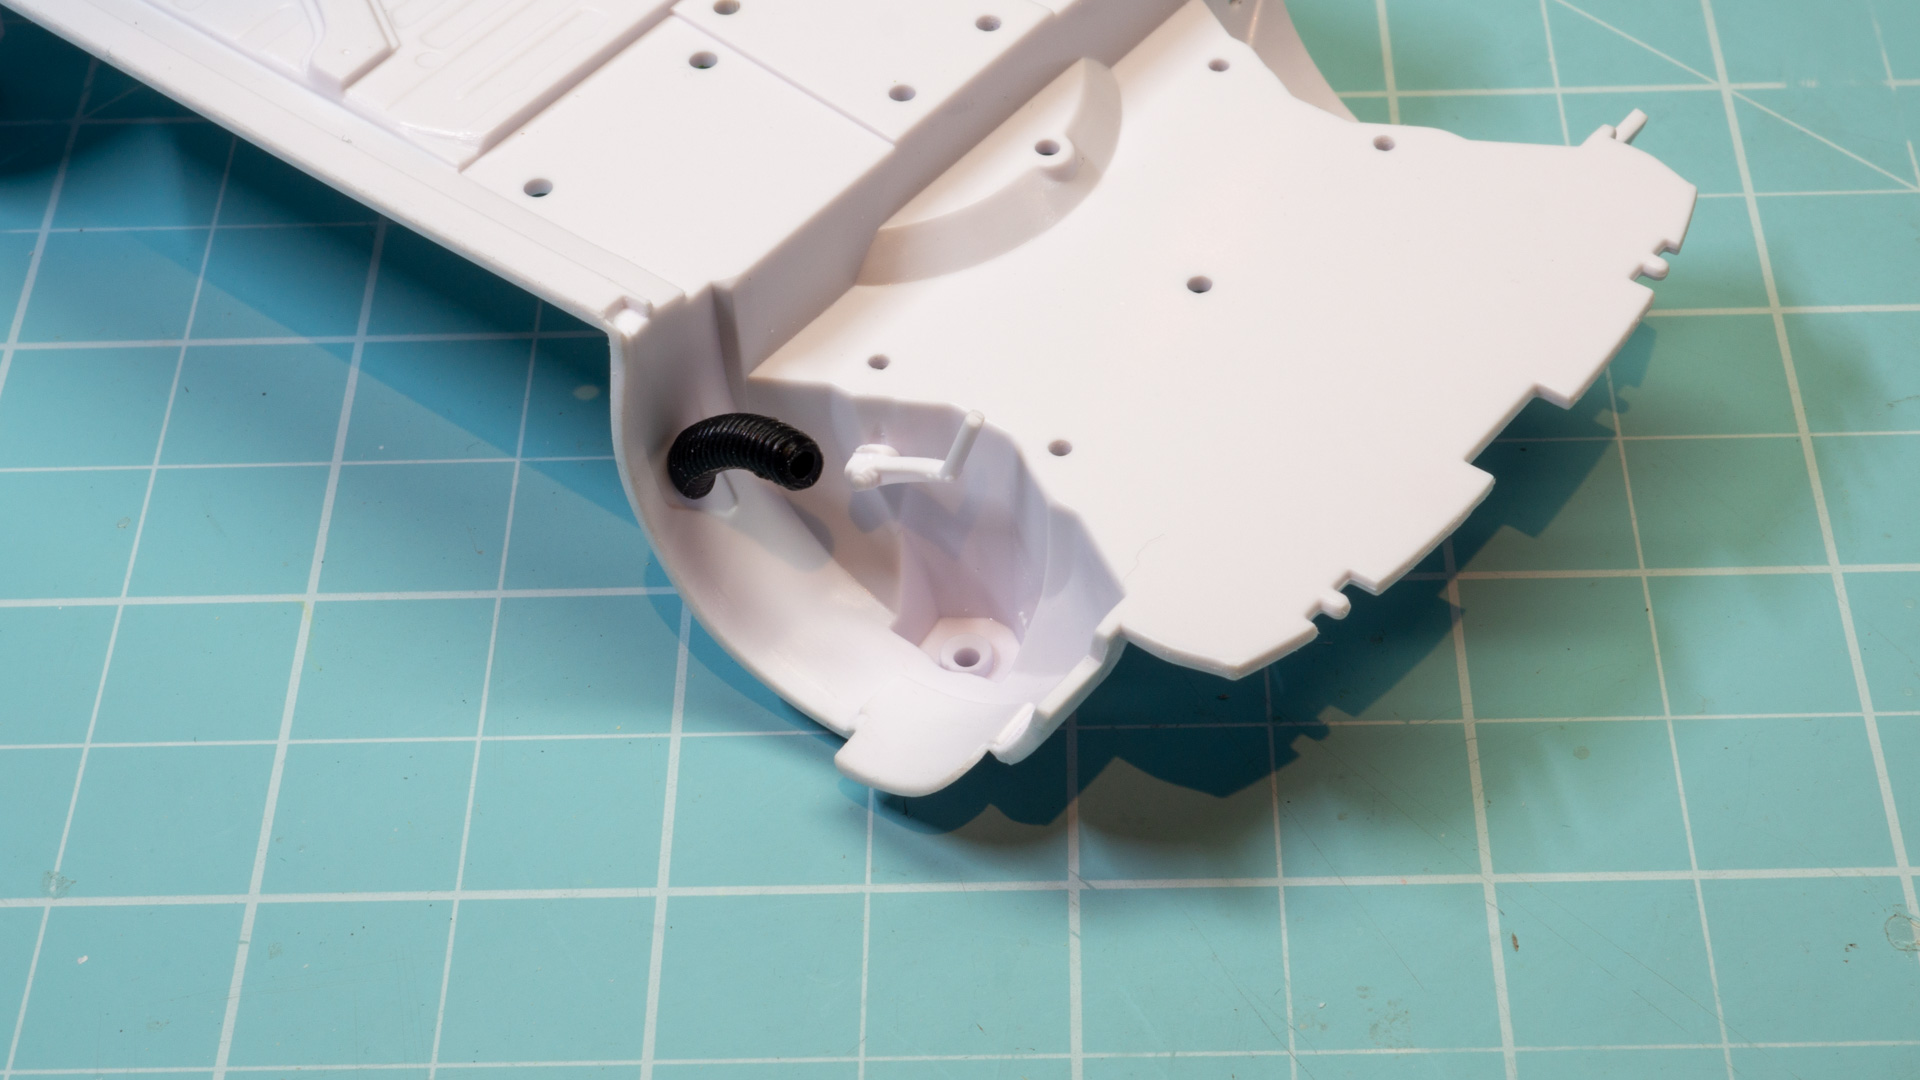
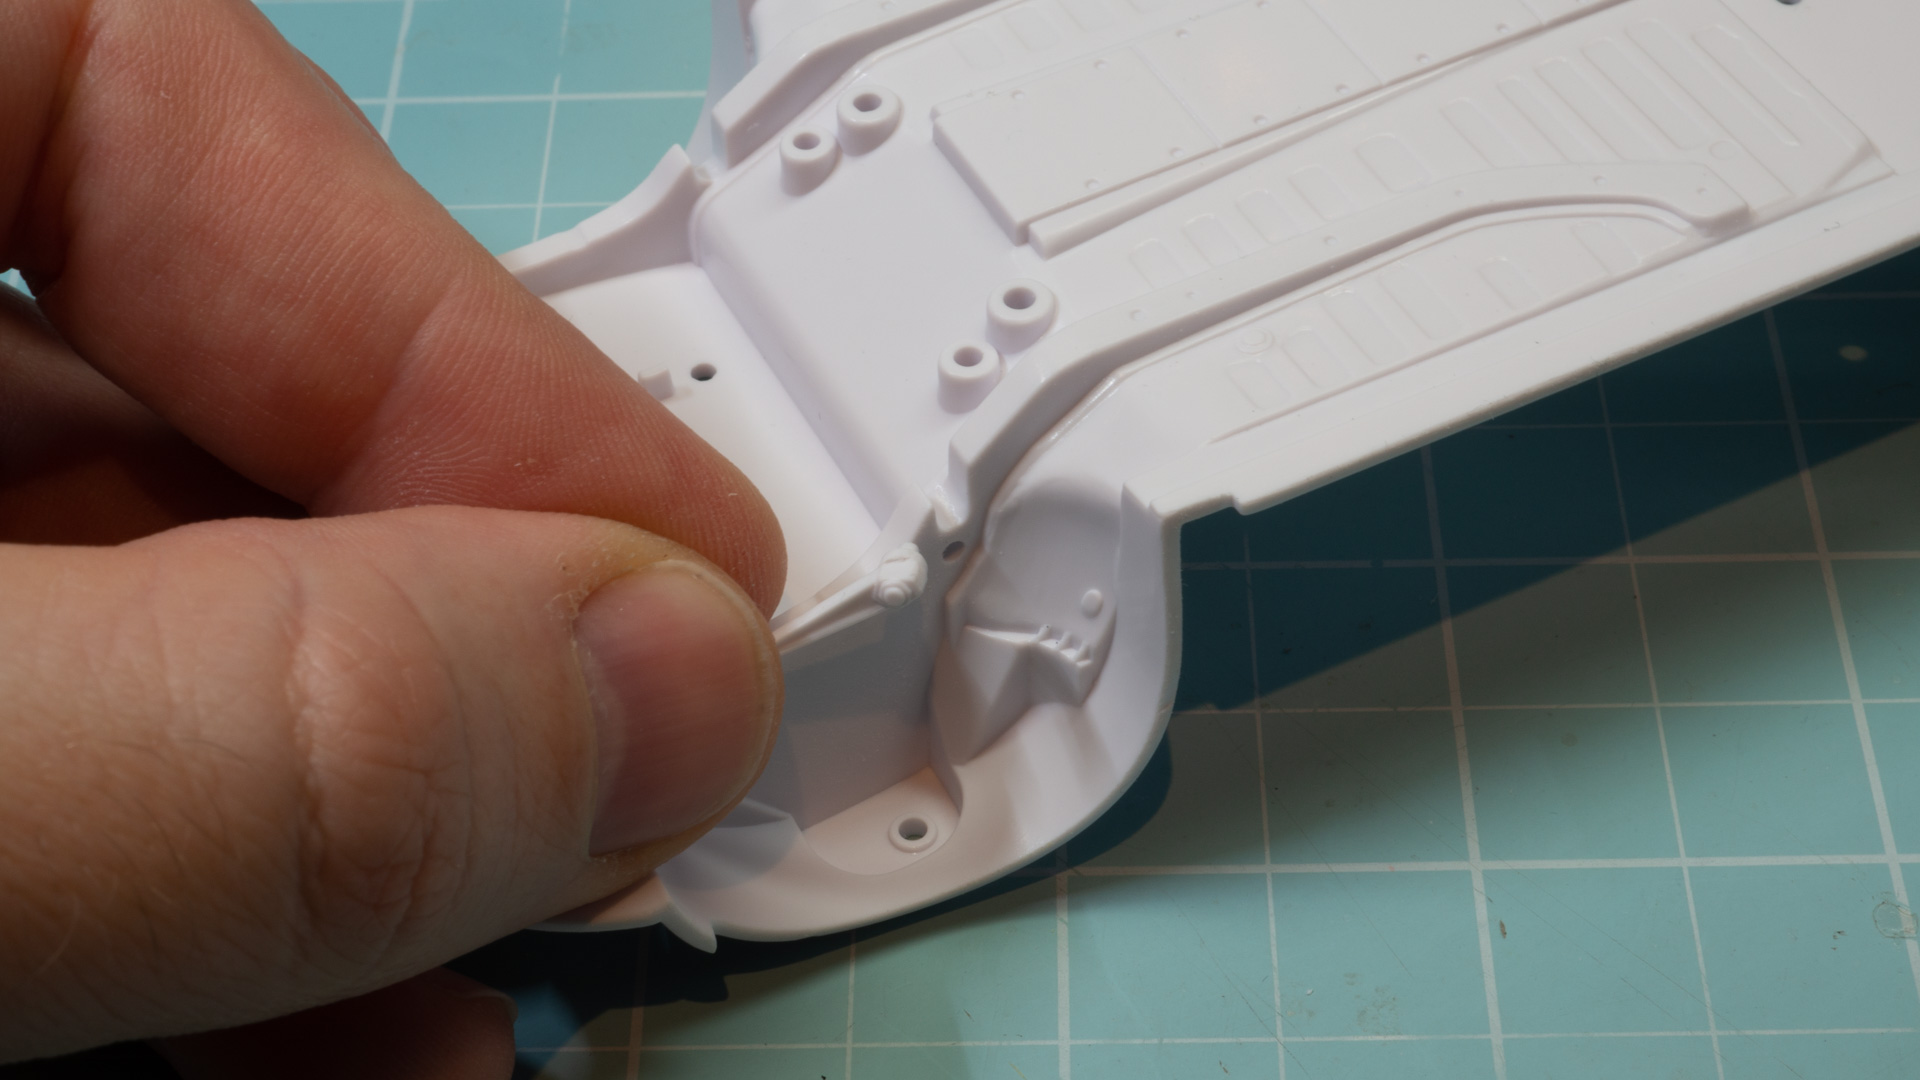
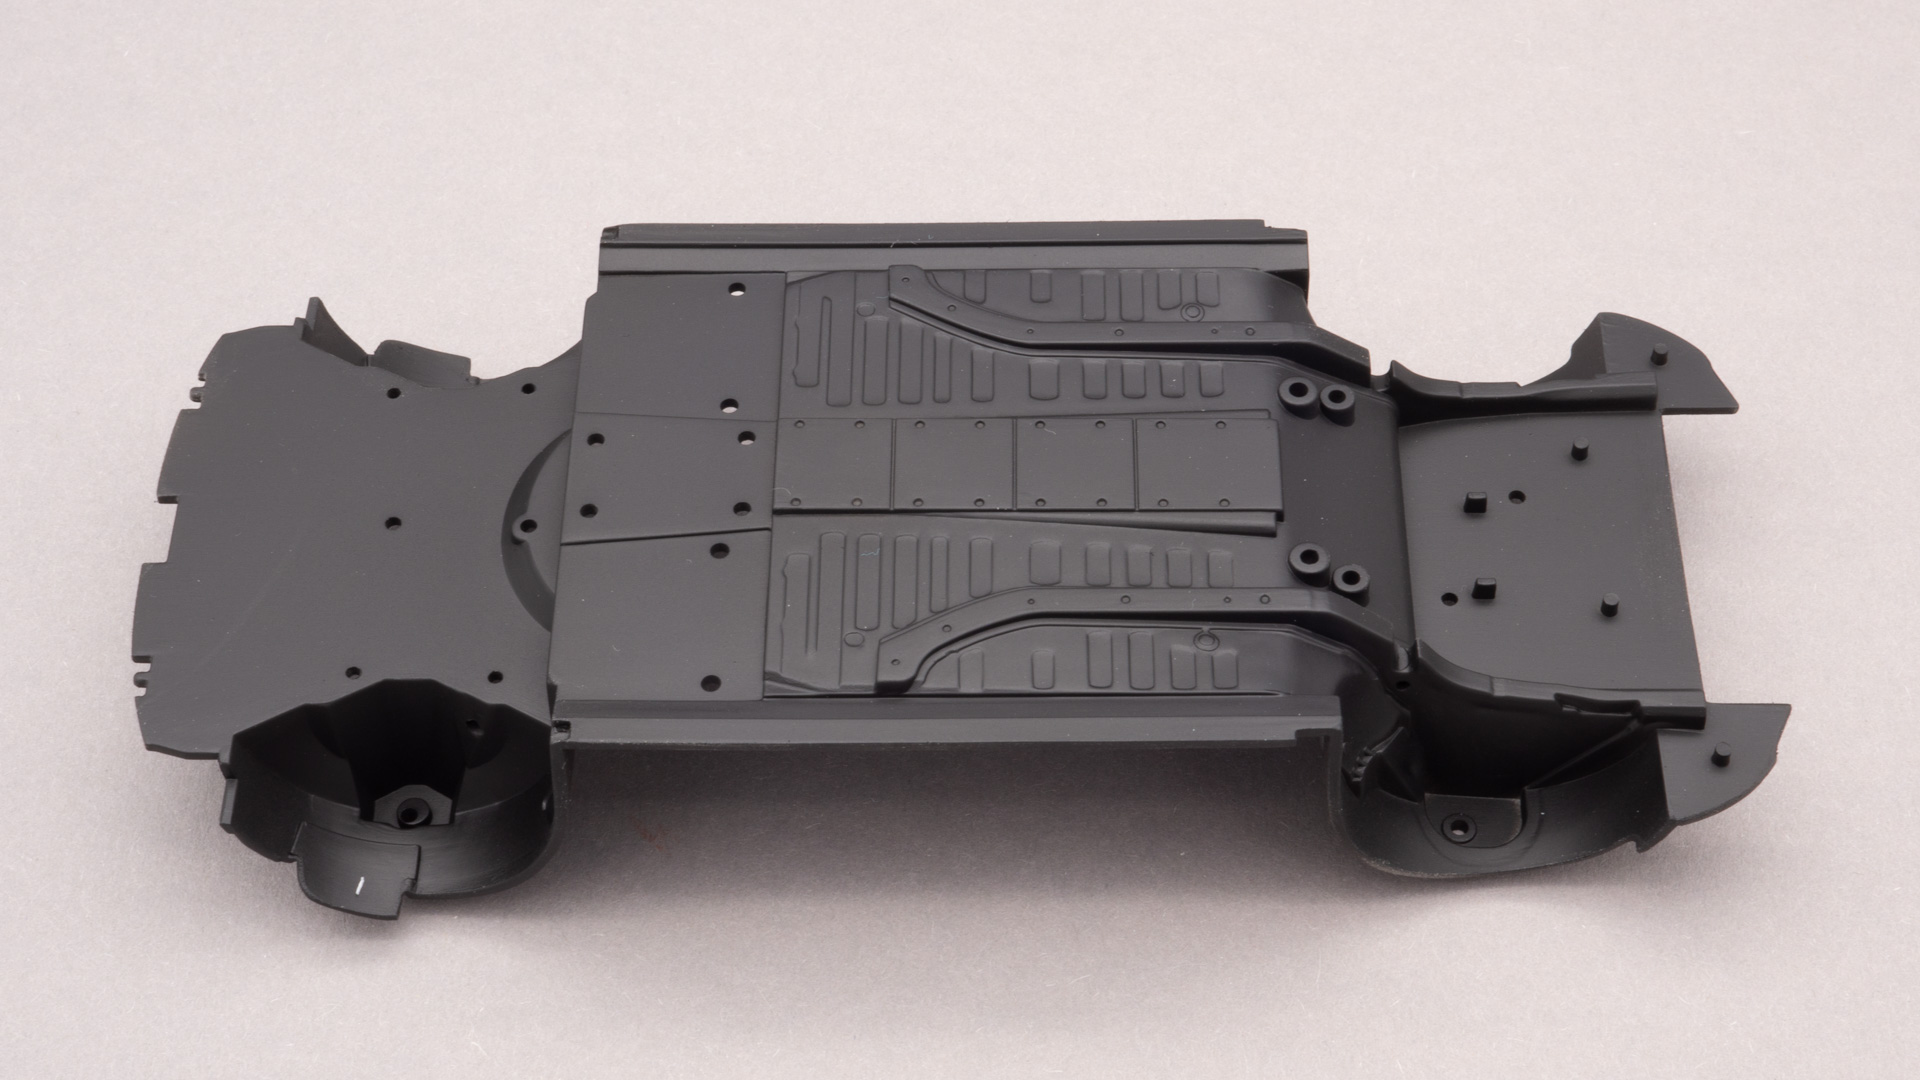
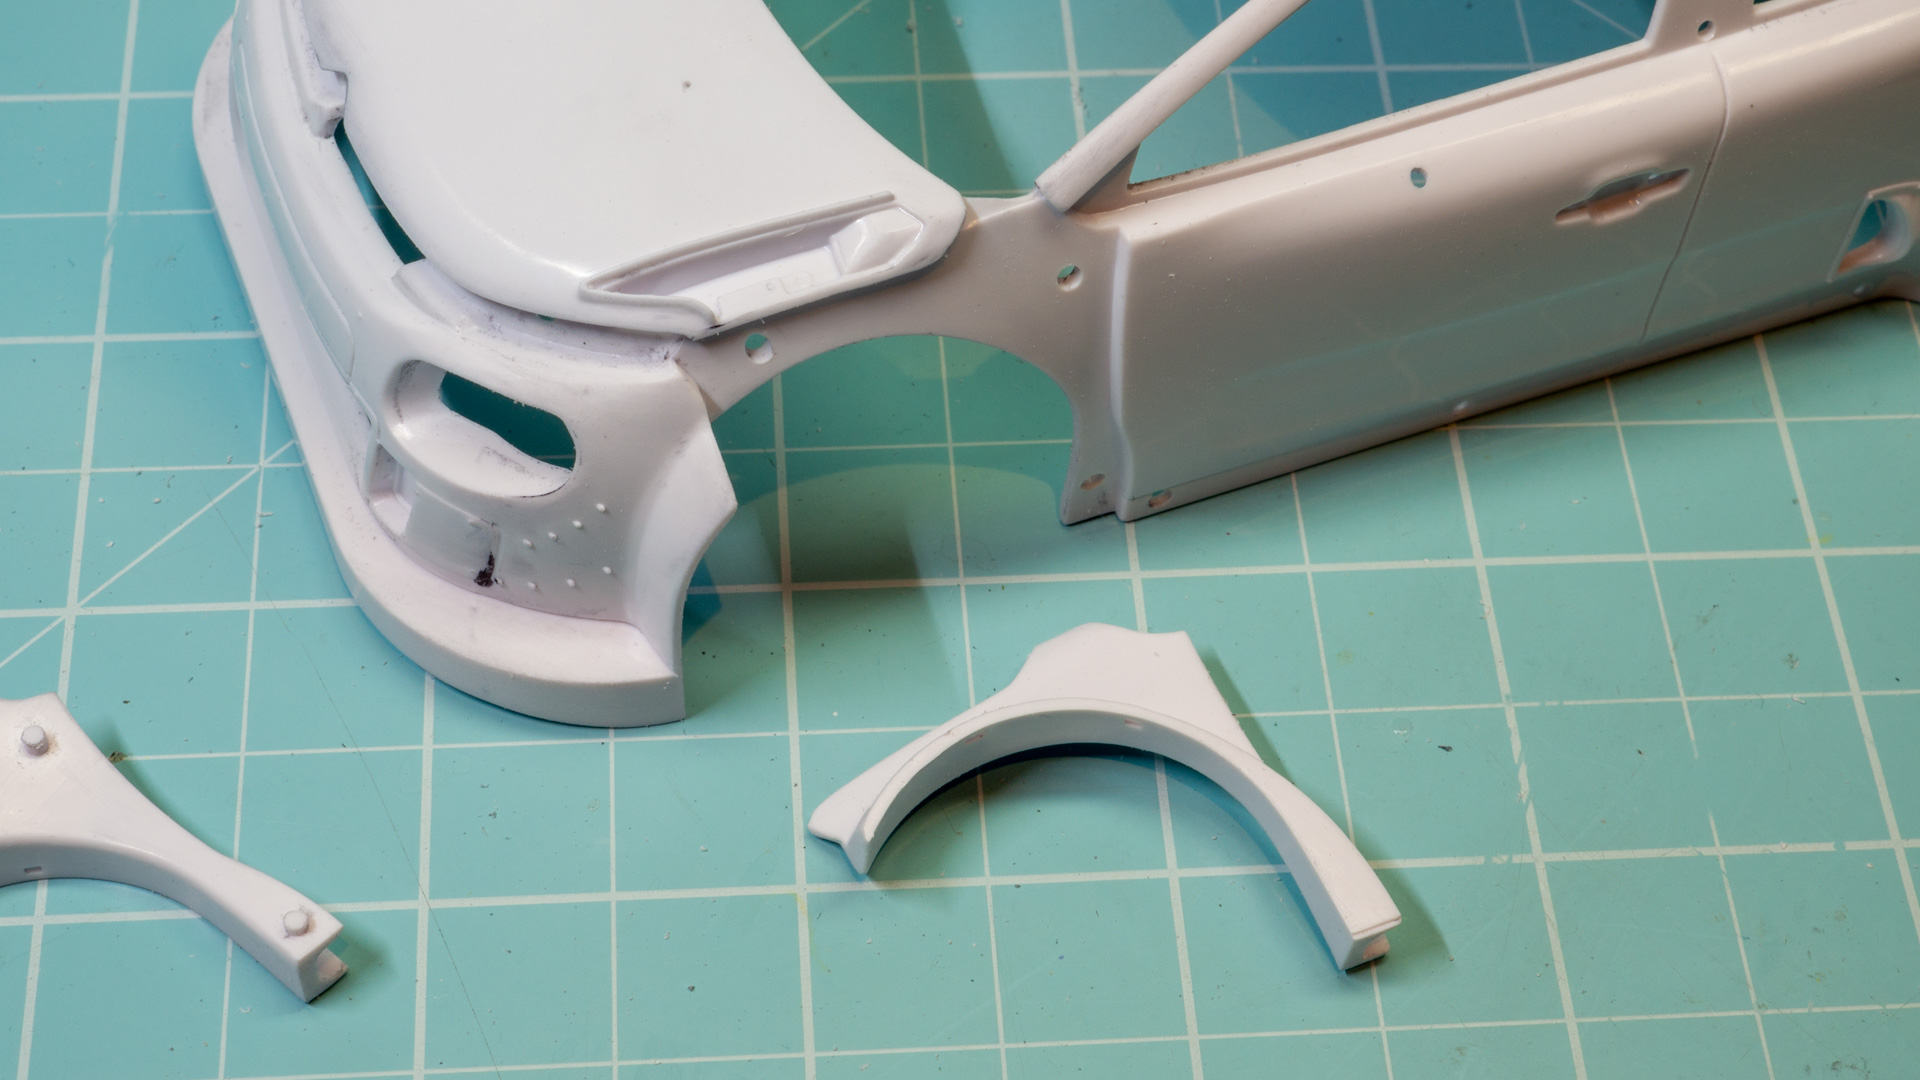
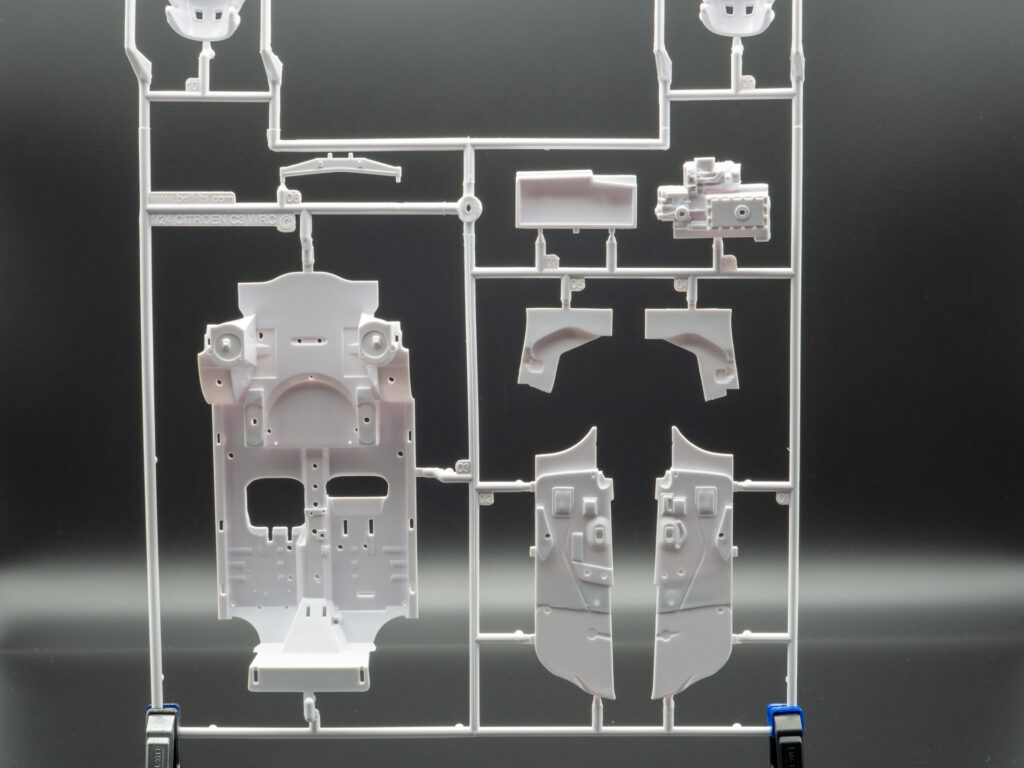
    Bottom part, arches.

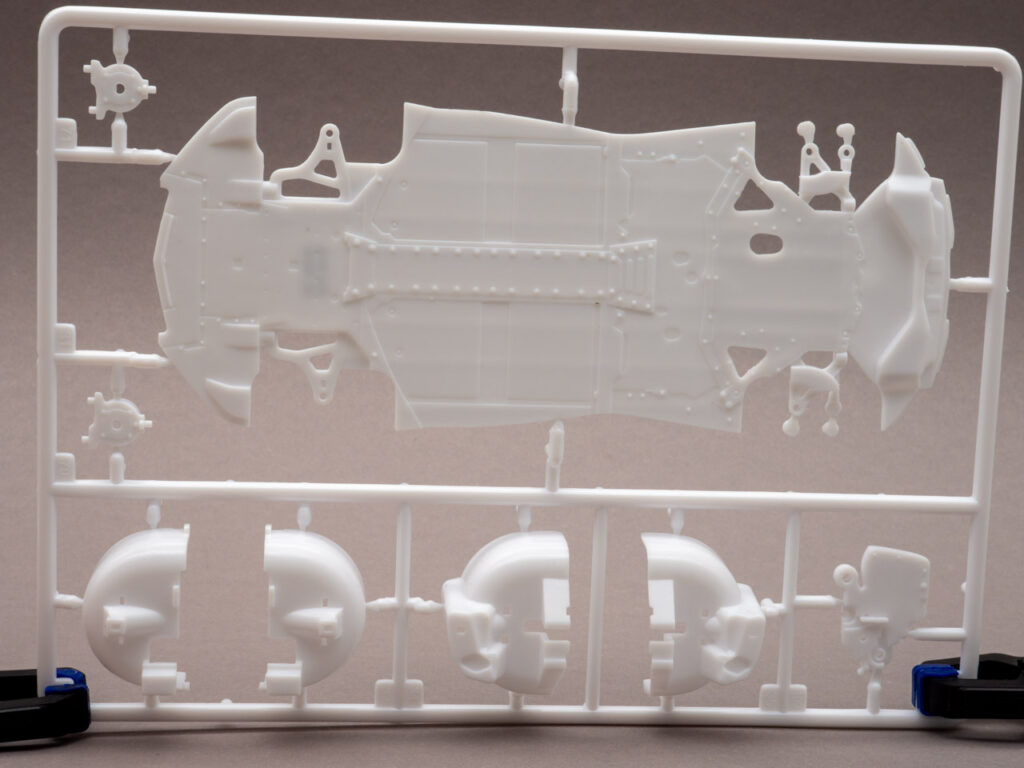
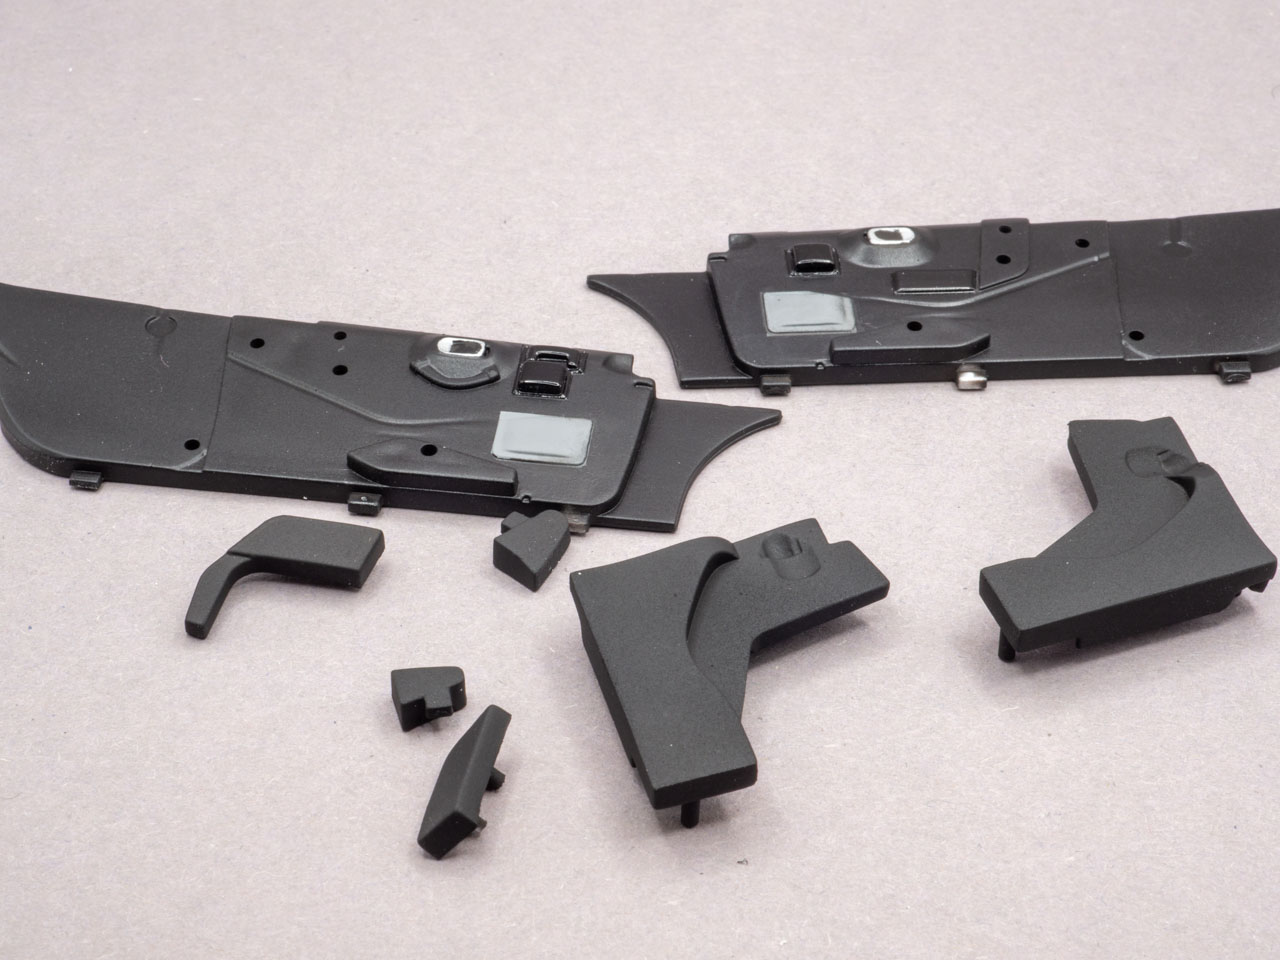
    Interior elements and engine. The tail part is given as a separate piece.

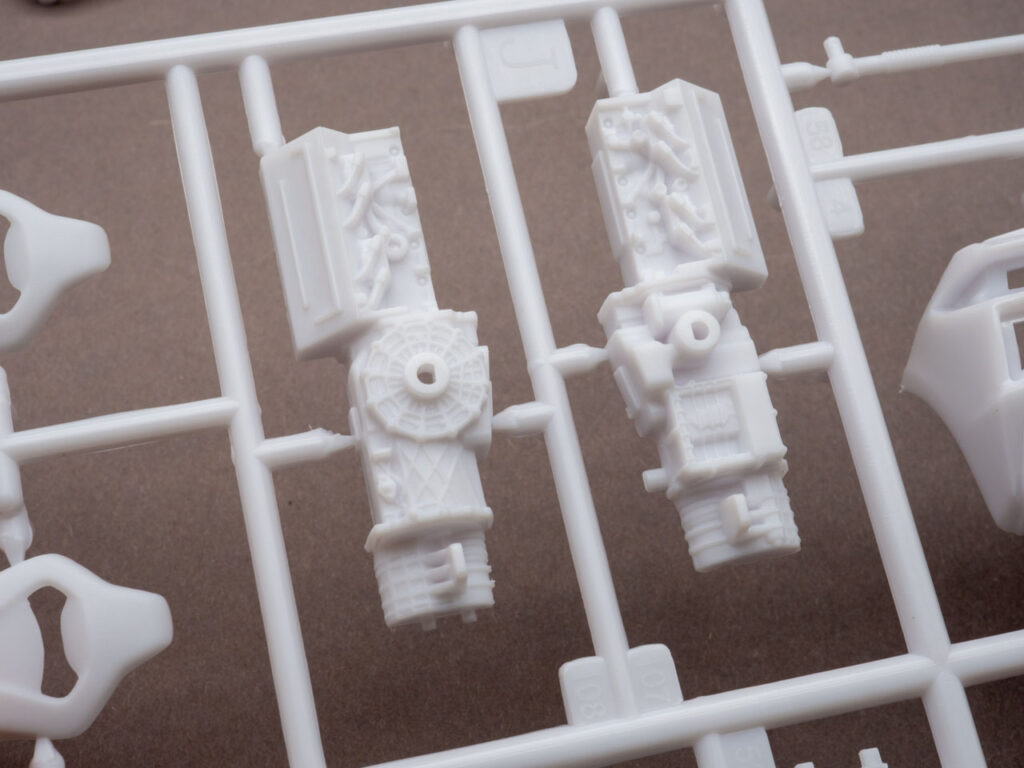
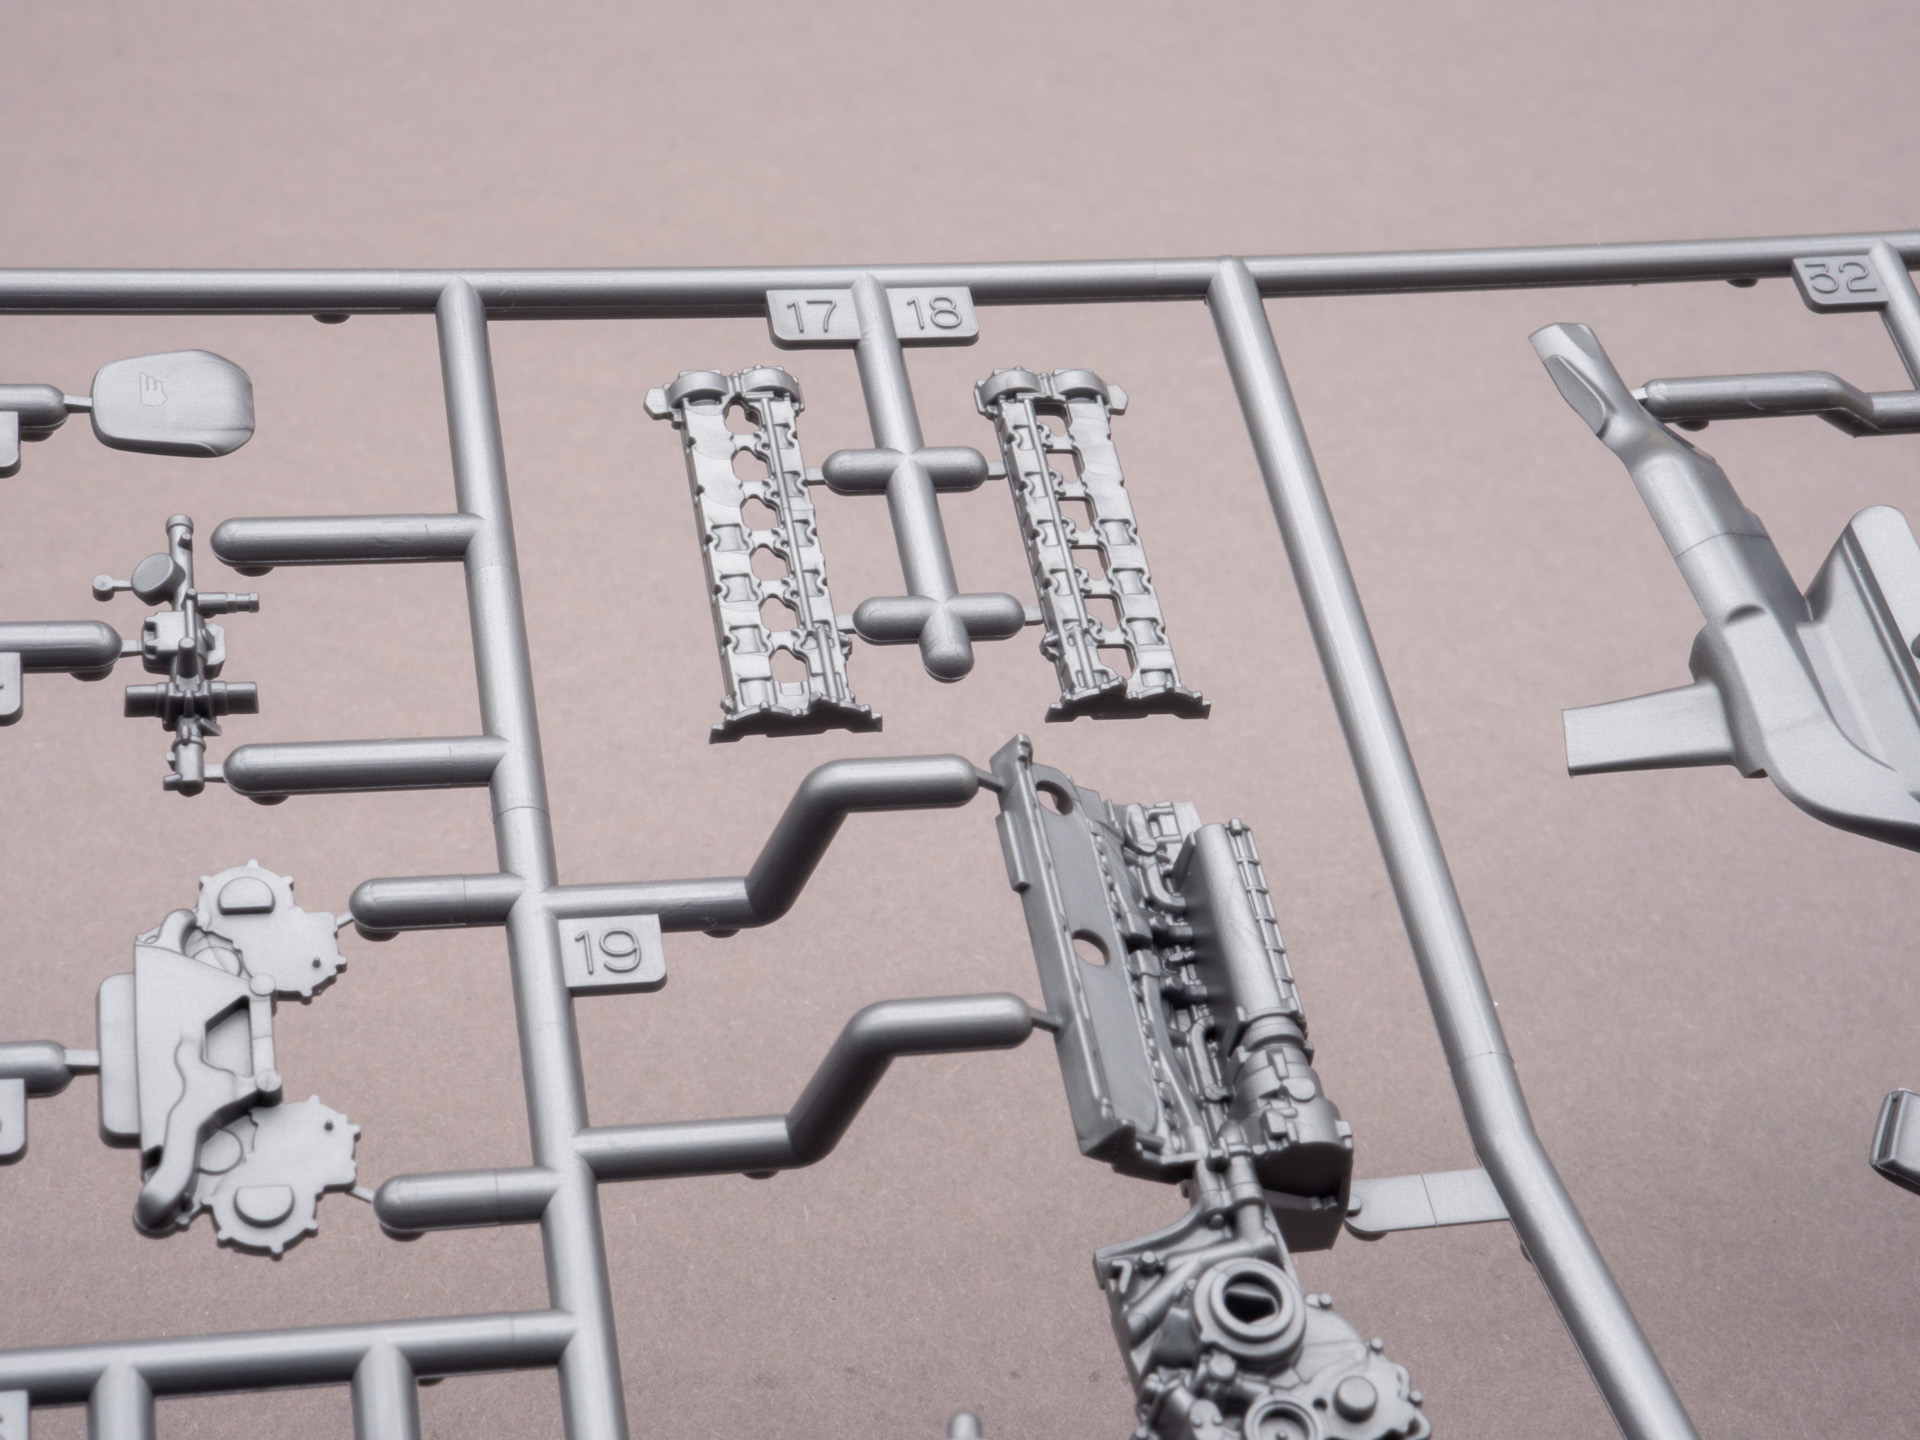
    The relief on the engine is also good detailed. Bolts and ribs of decent quality are visible. The spark plugs with HV wires are molded into the block; it will be possible to slightly improve the detail and cut them off, replacing them with normal wires.
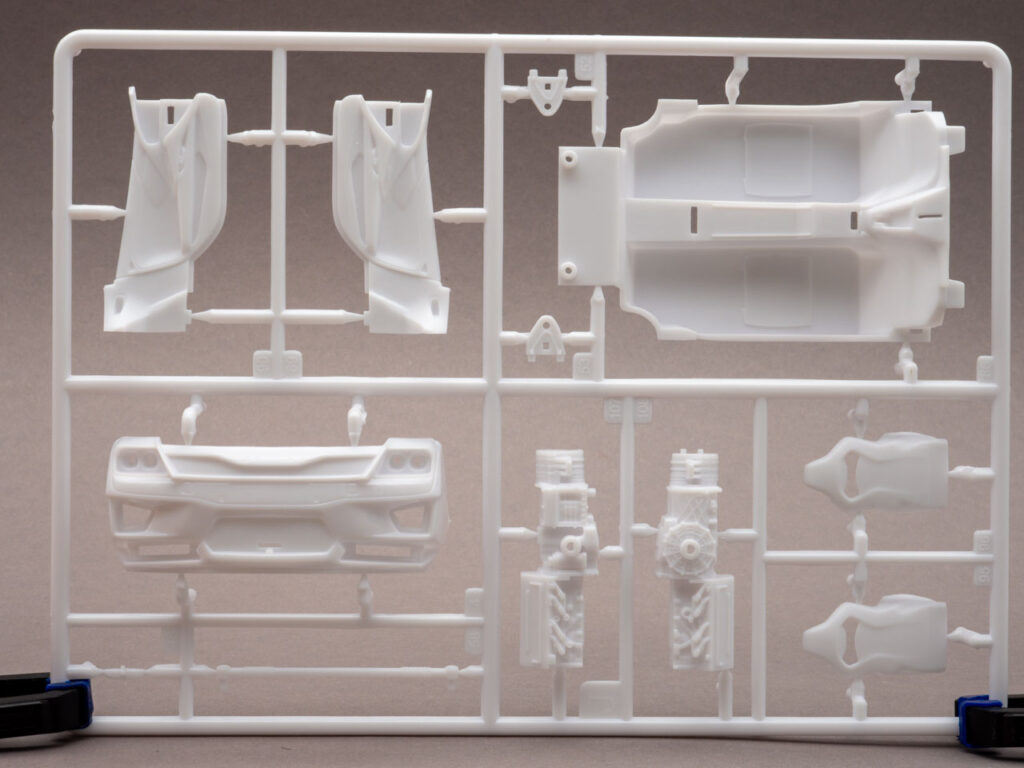
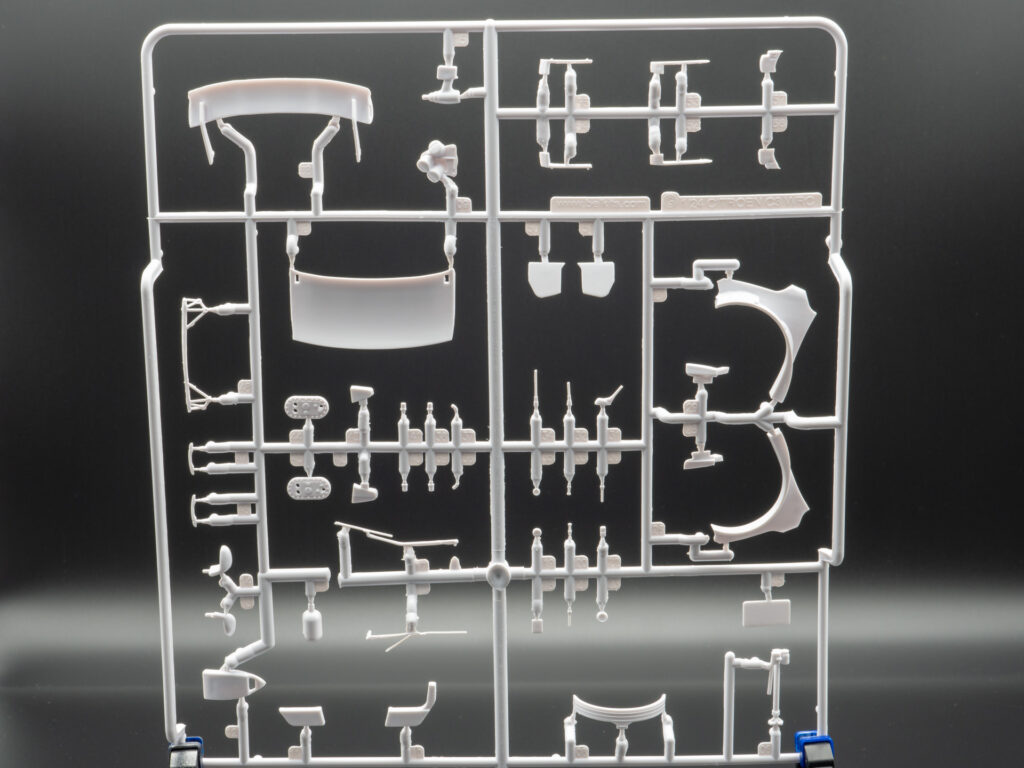
    Next sprue.

    Center console for left and right hand drive. Optional.

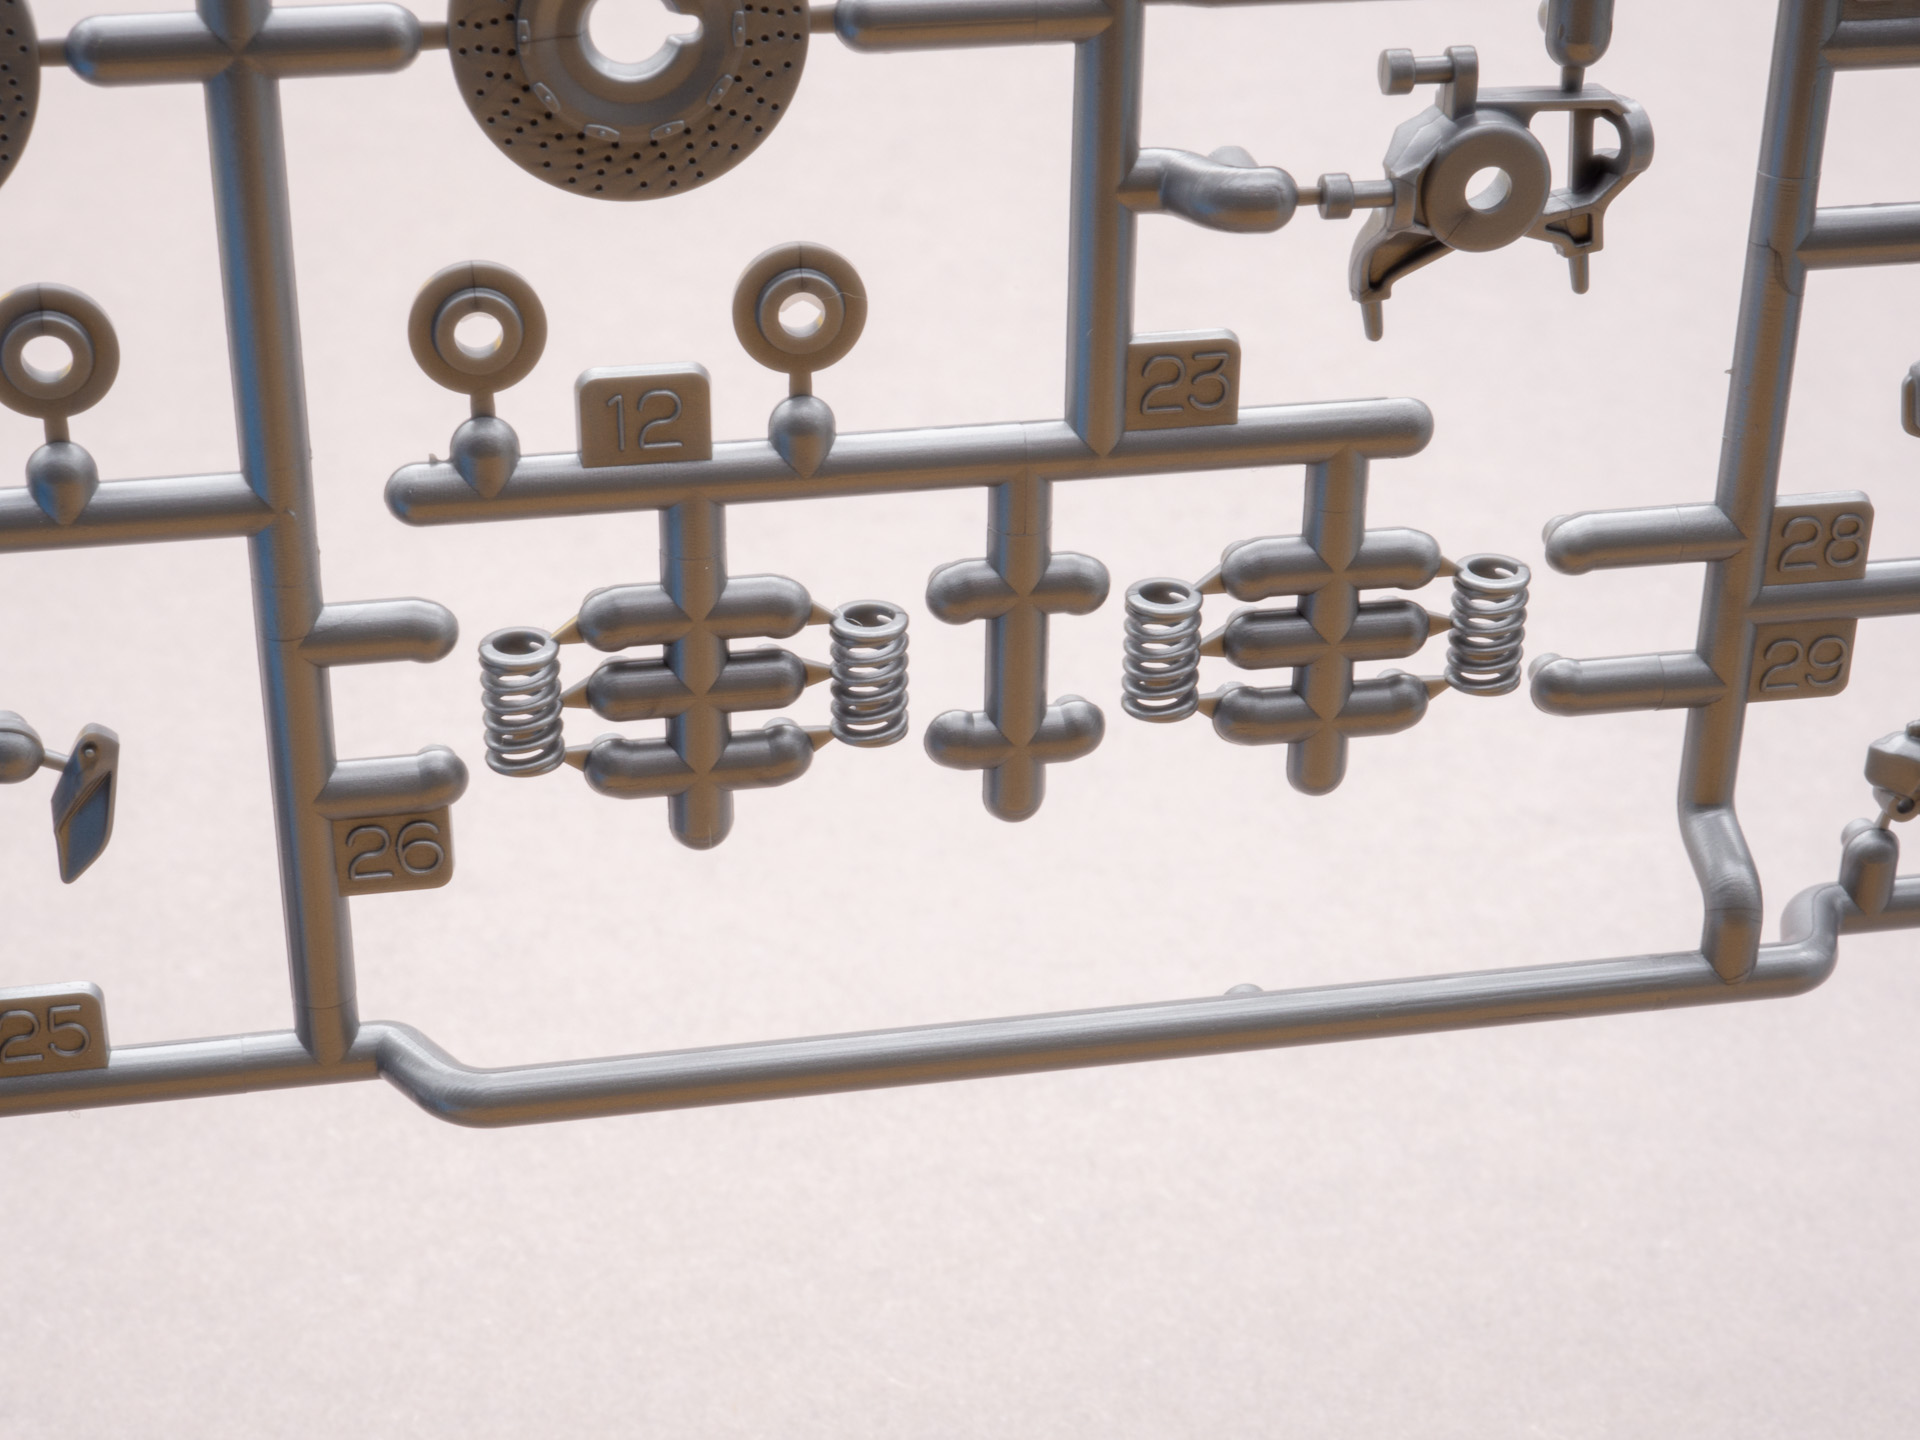
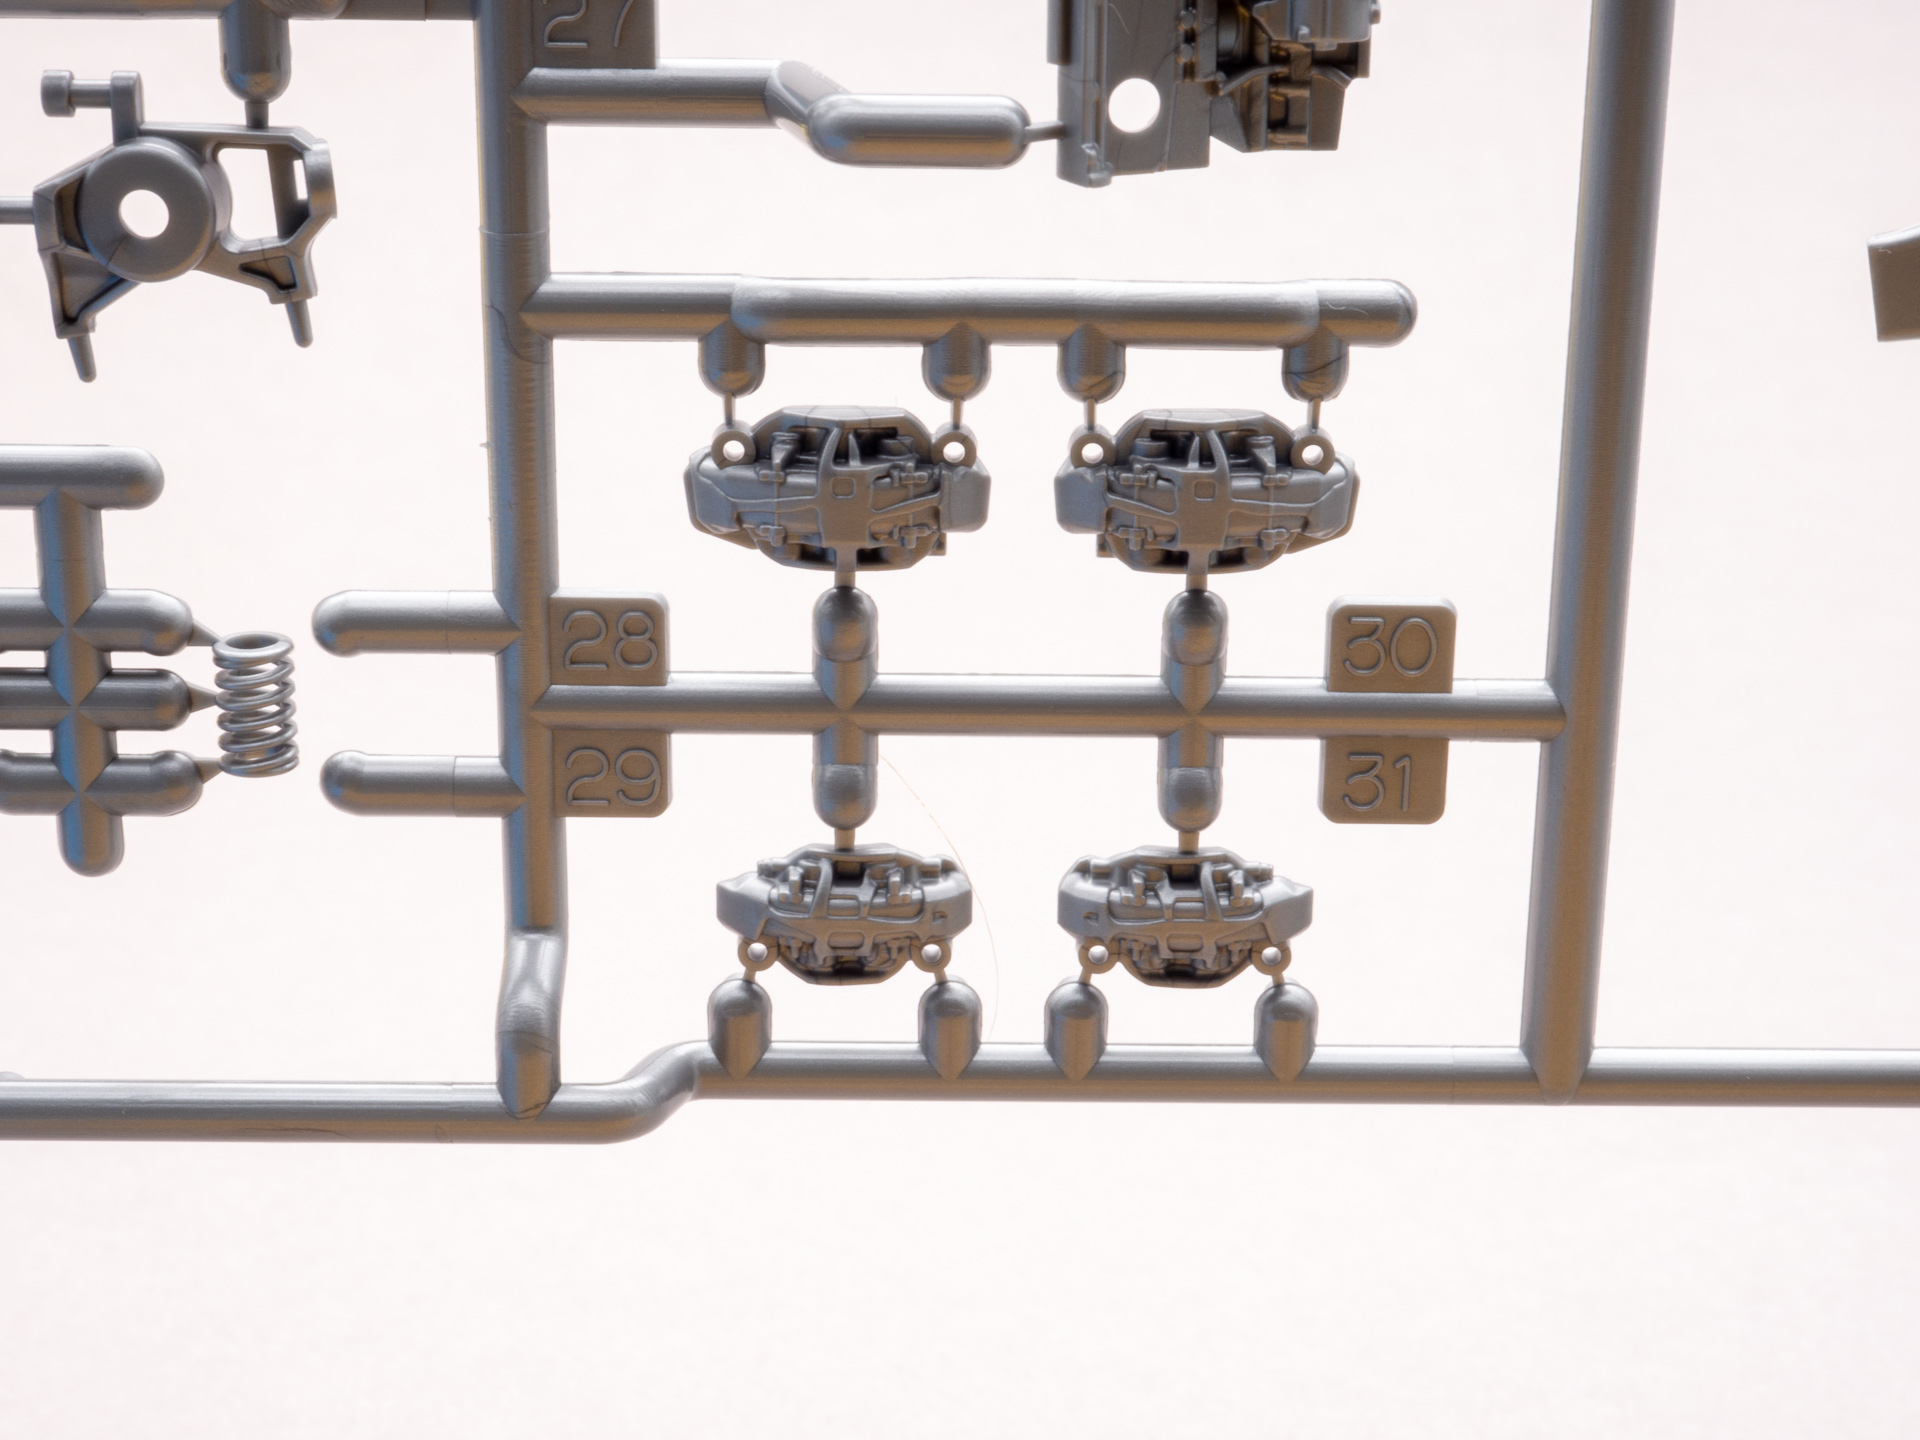
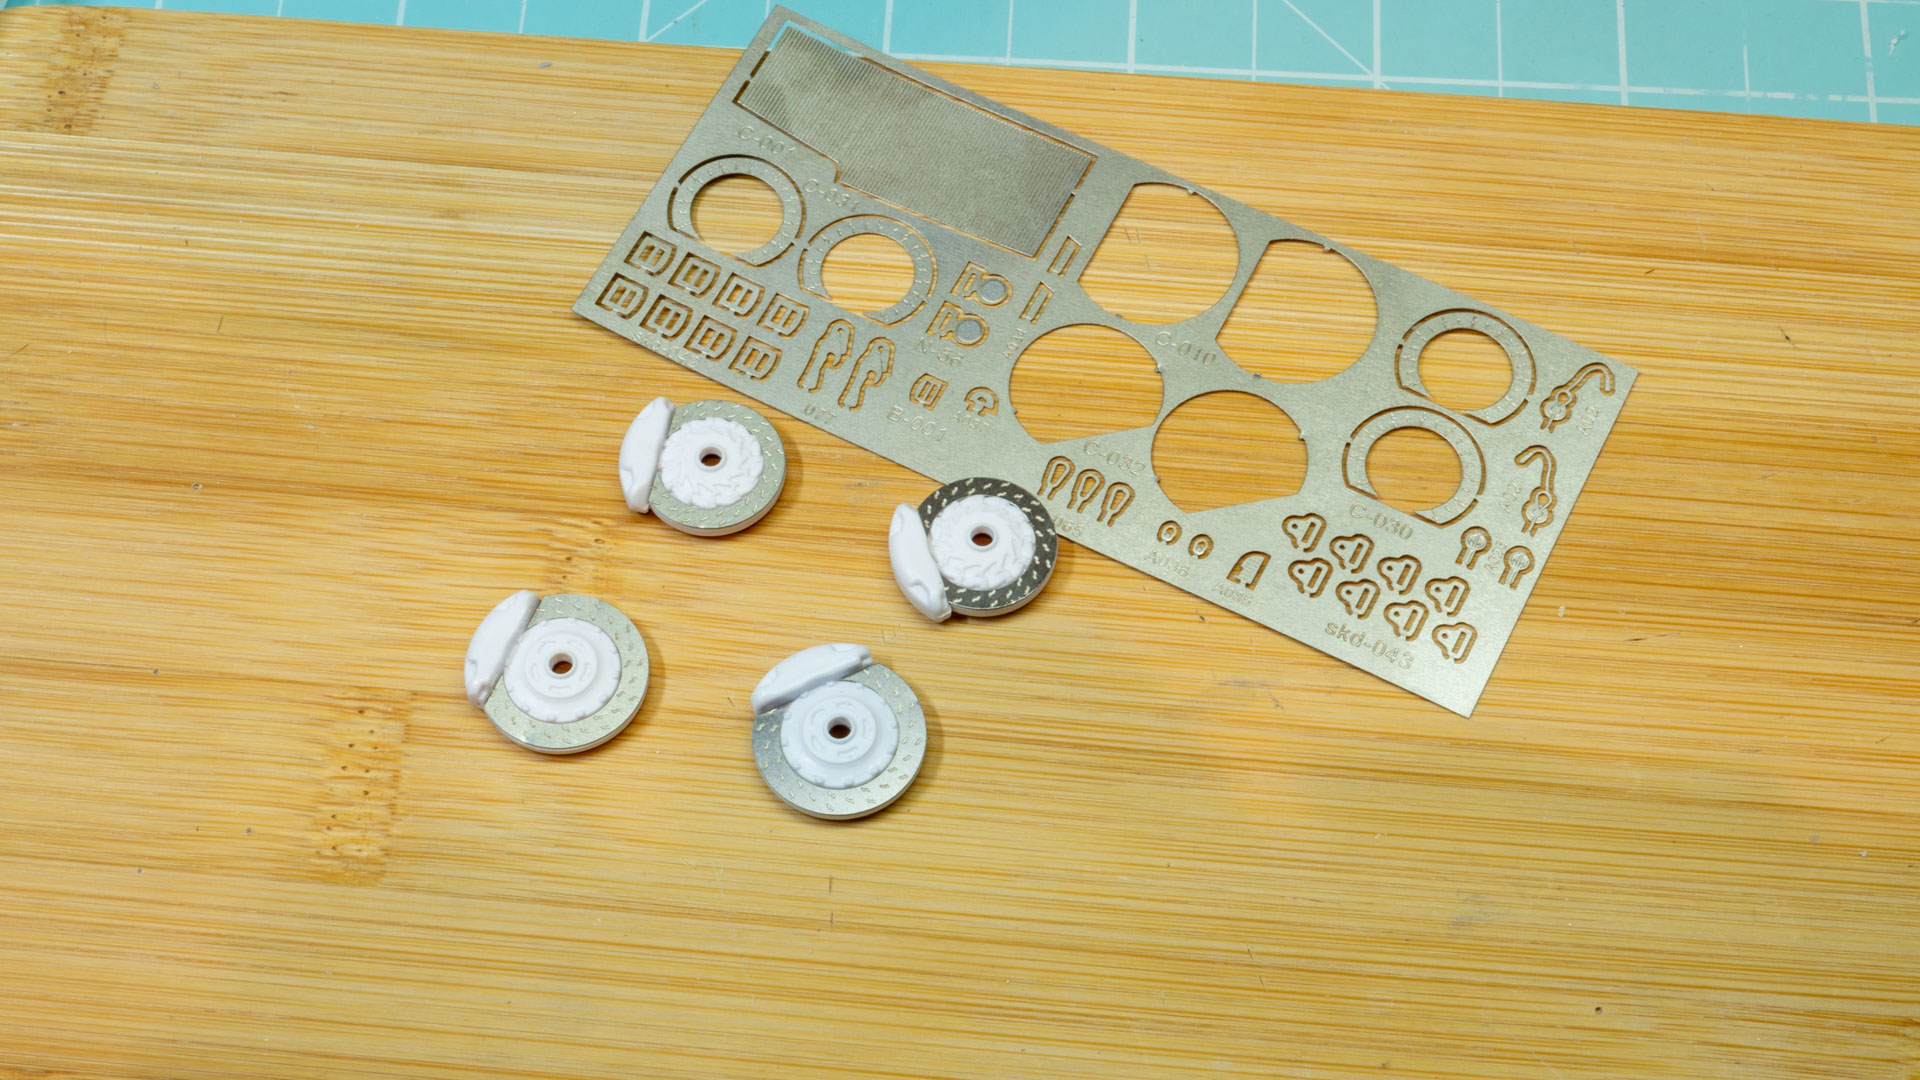
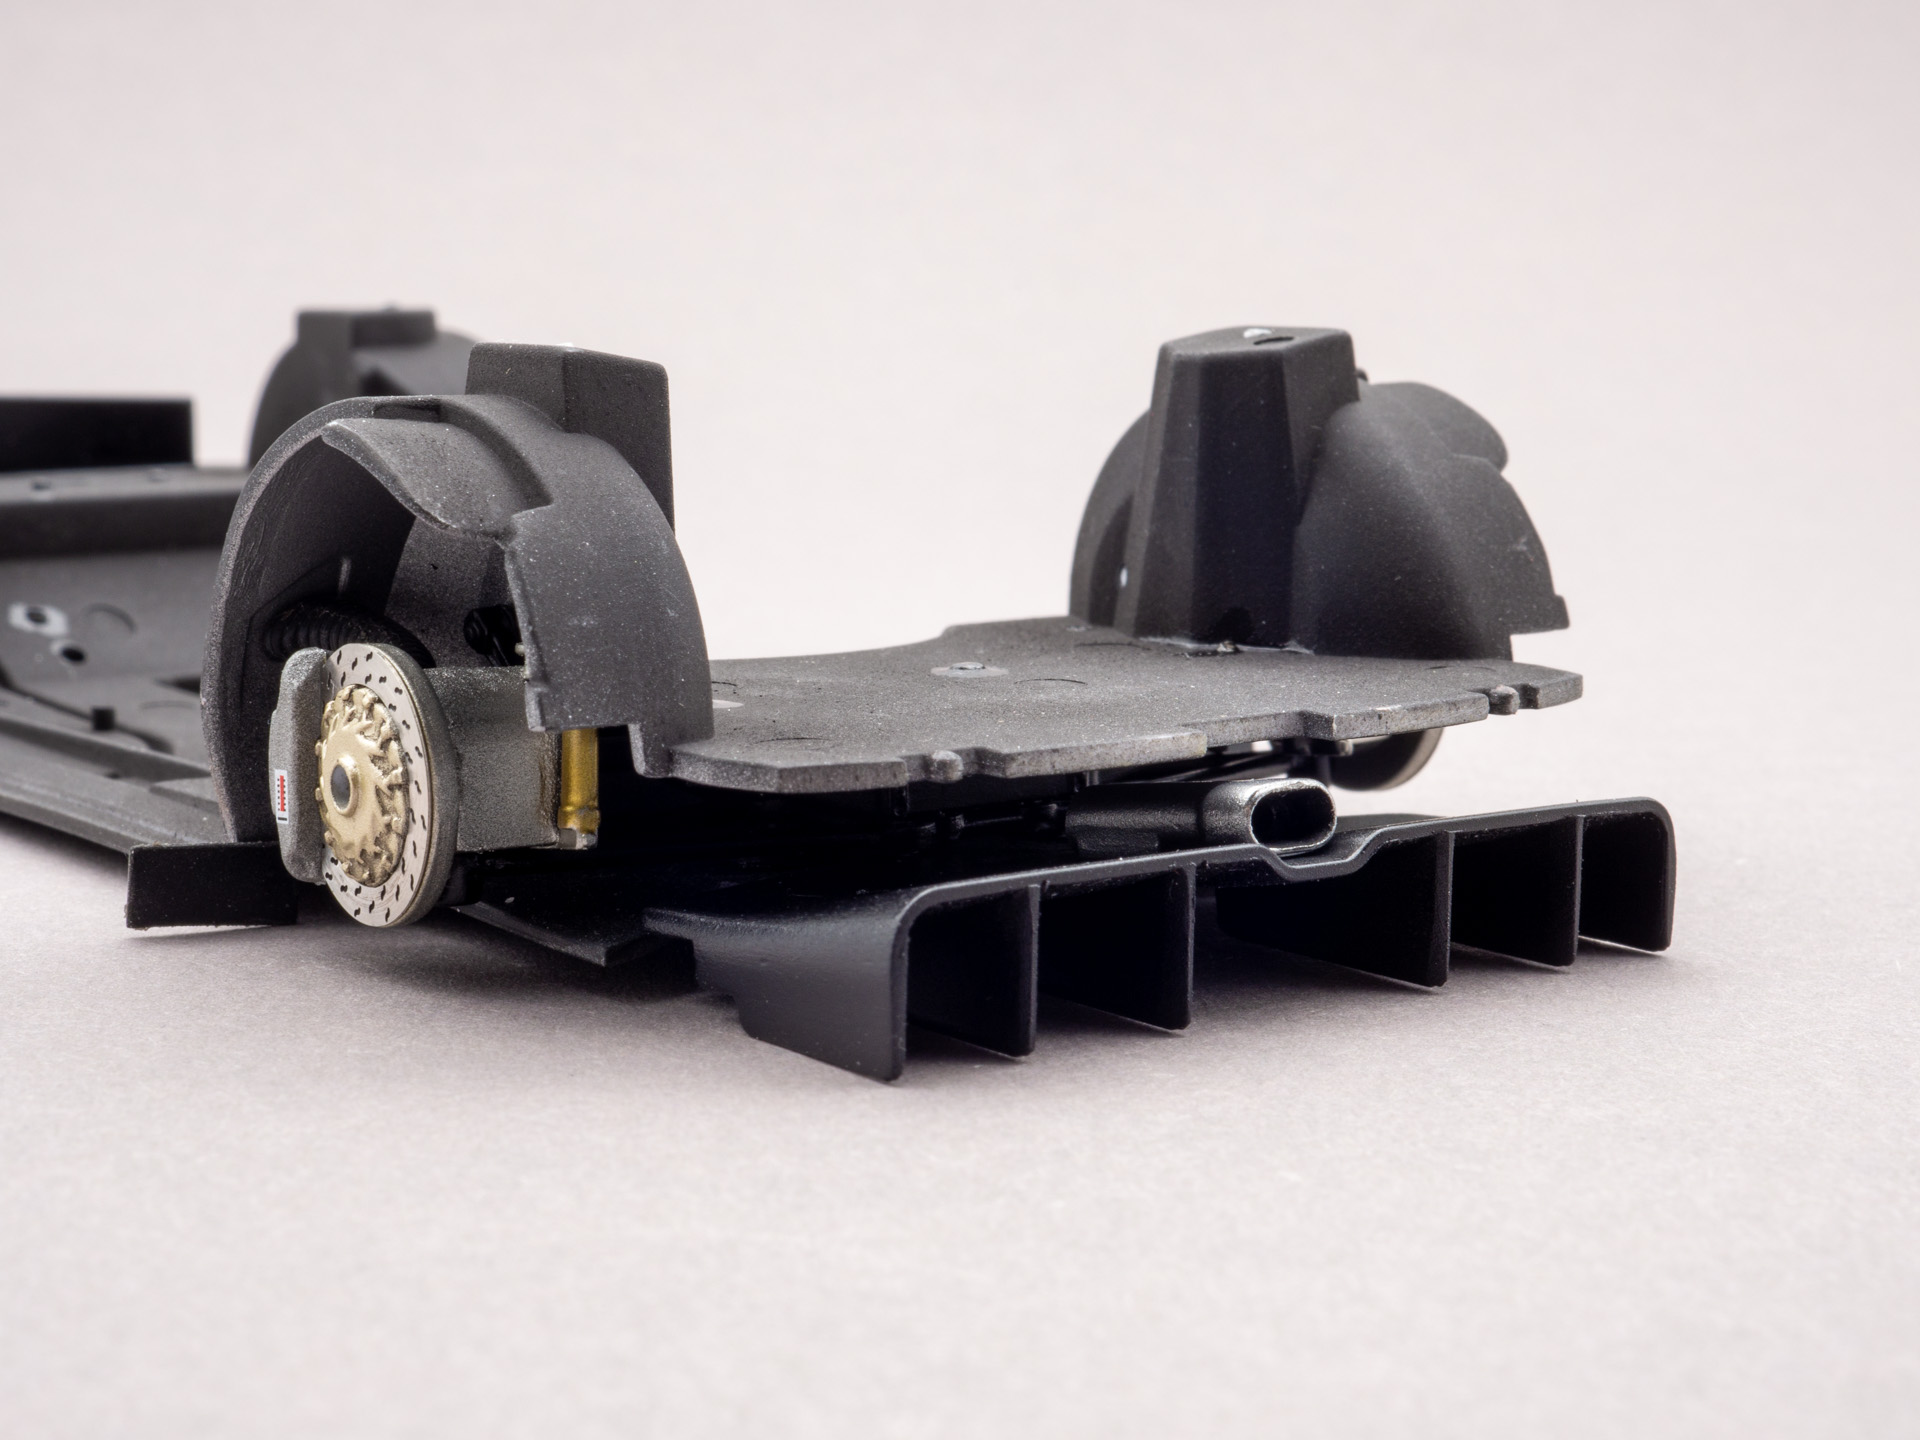
    Brake discs with flat calipers. I plan to cut it off and replace it with my own 3D printed ones. But then again, even so they looks good.
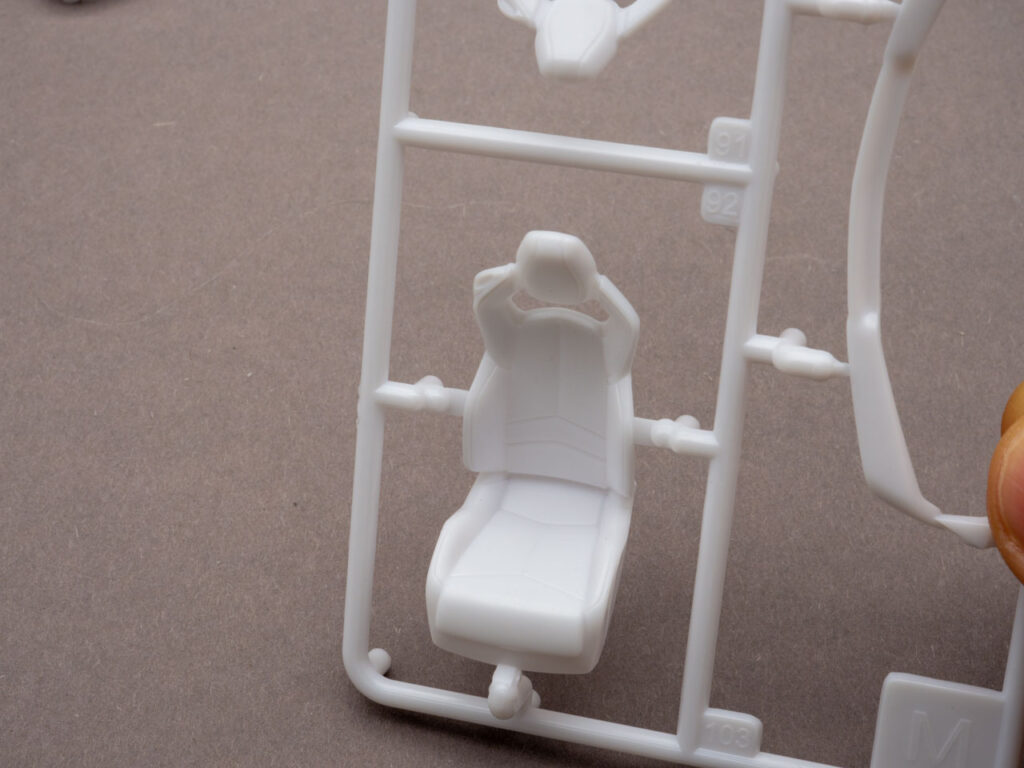
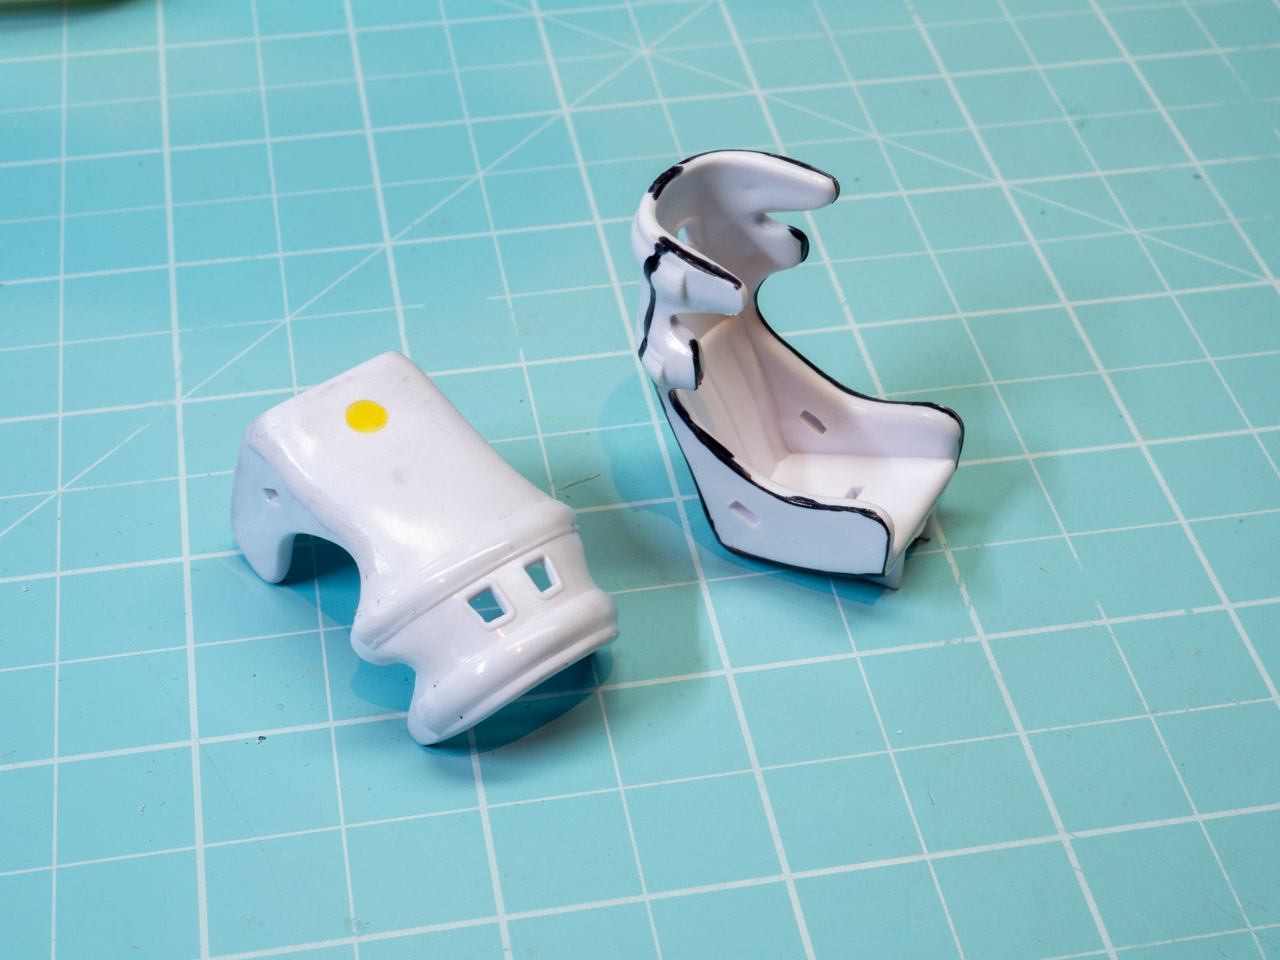
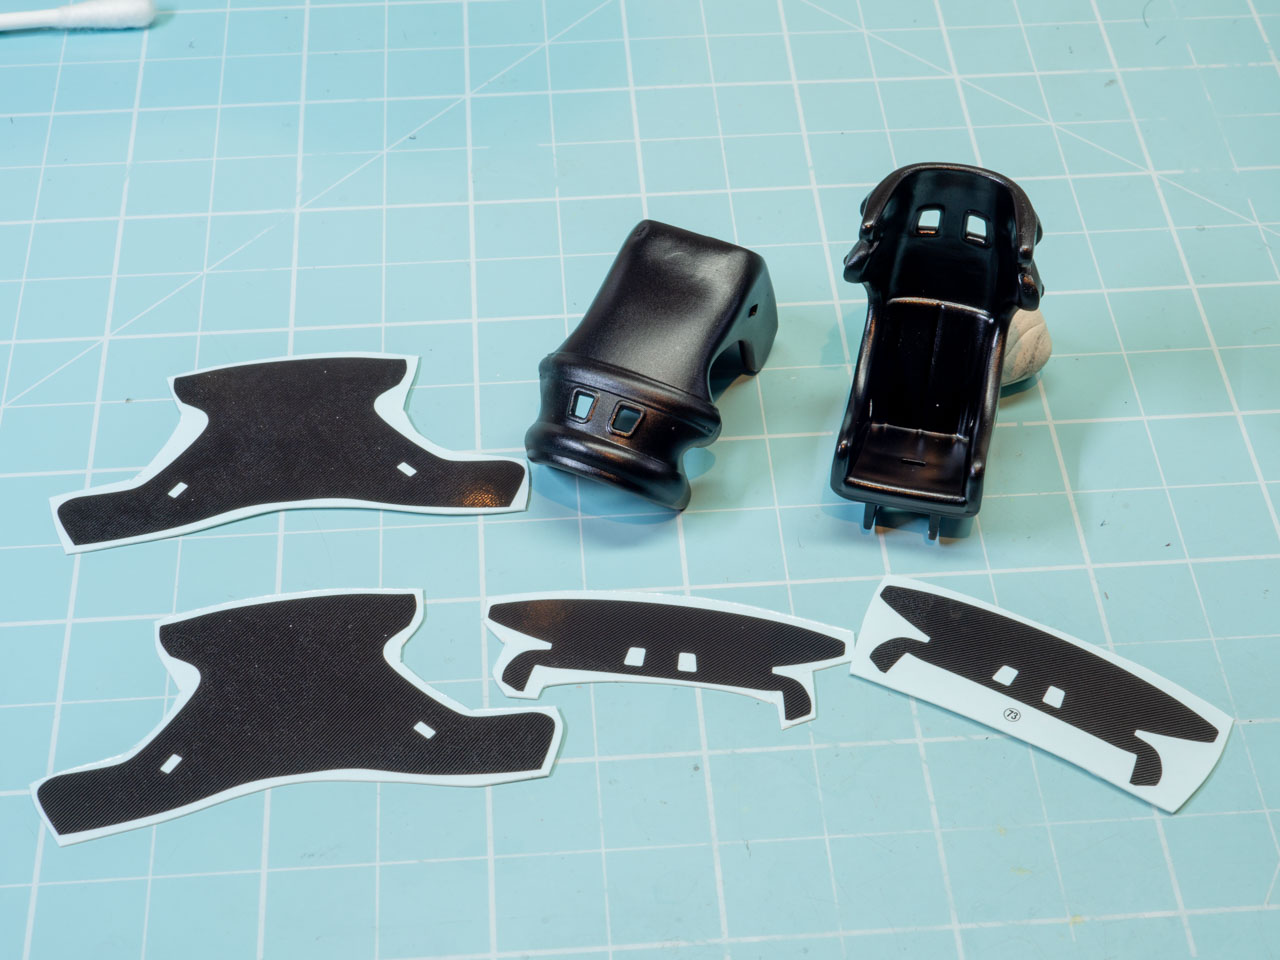
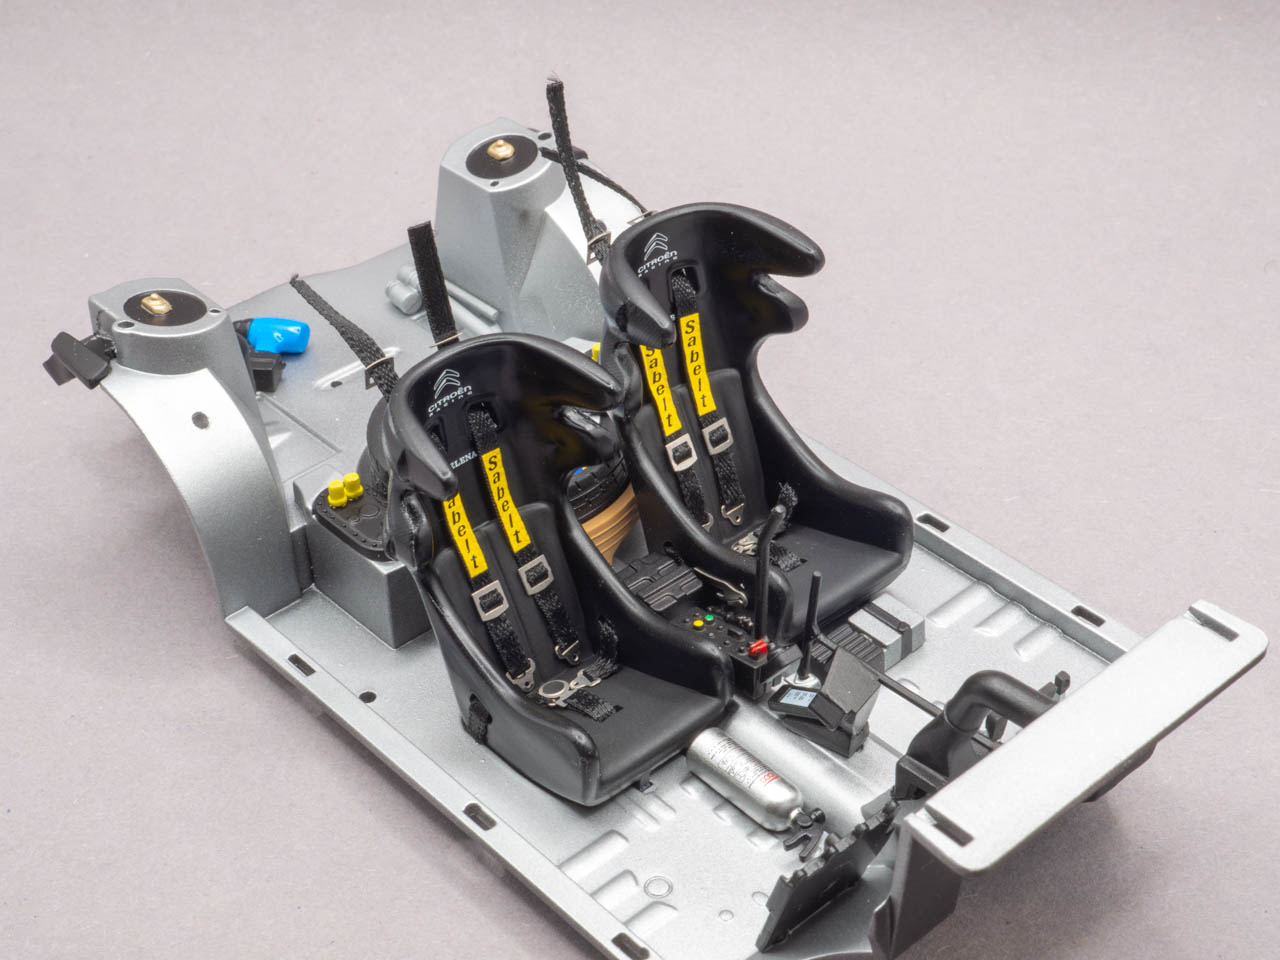
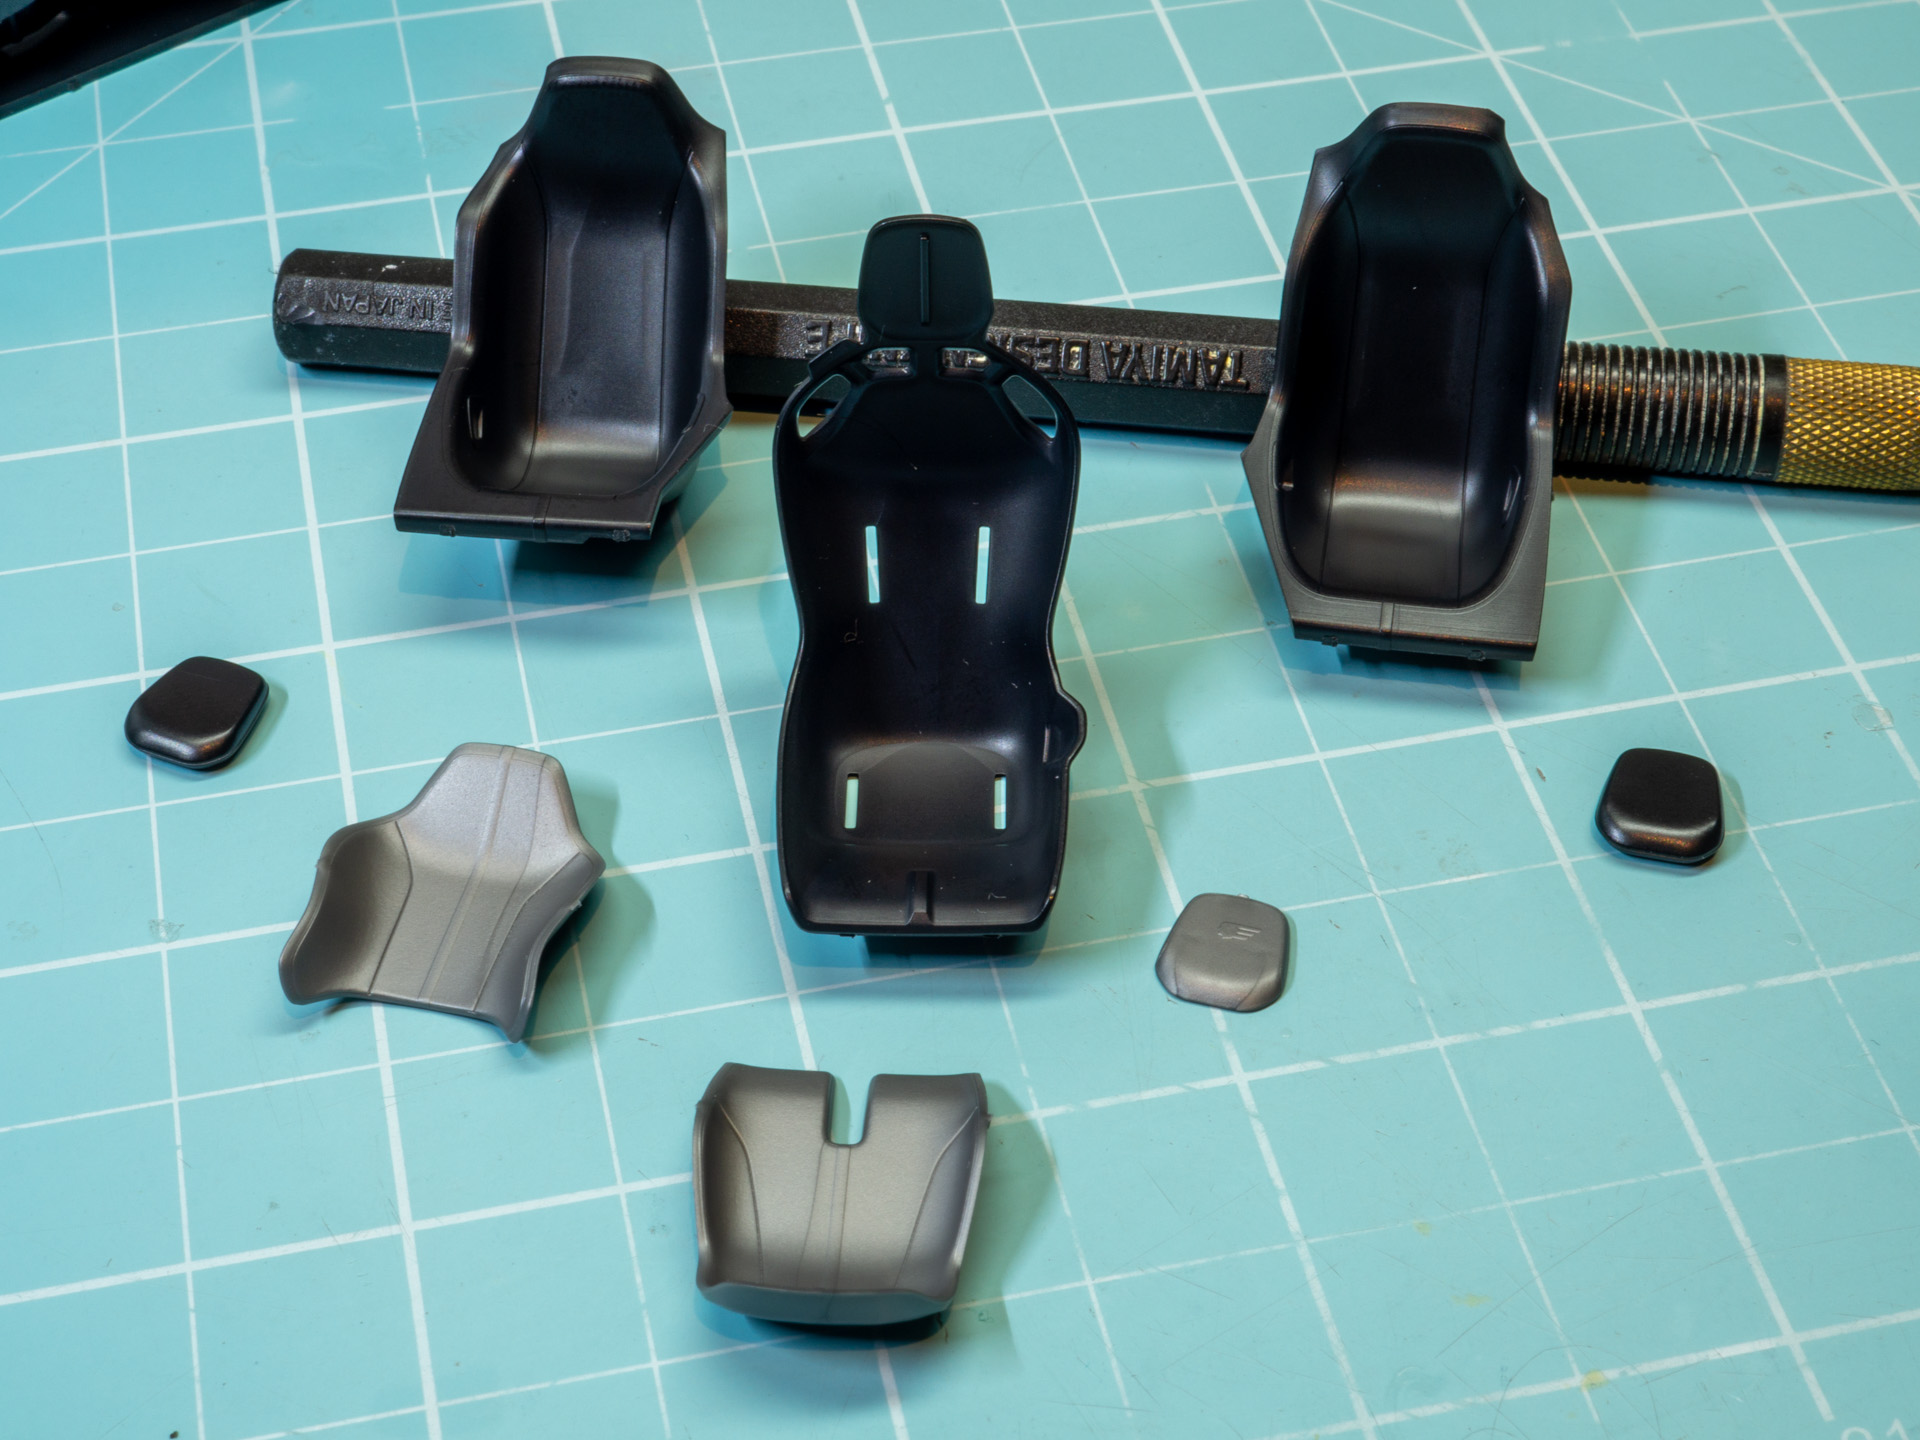
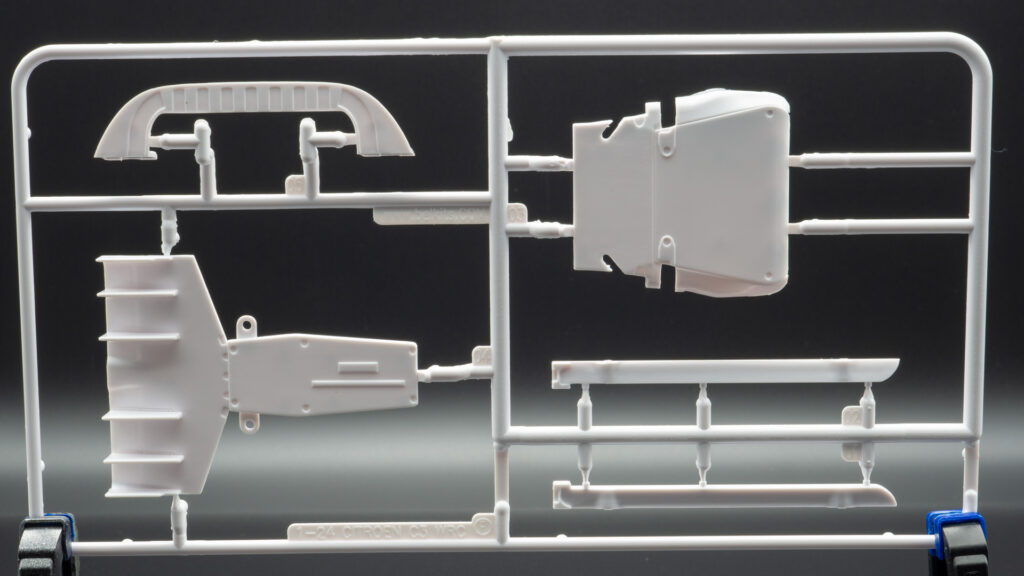
    Seats and spoiler.

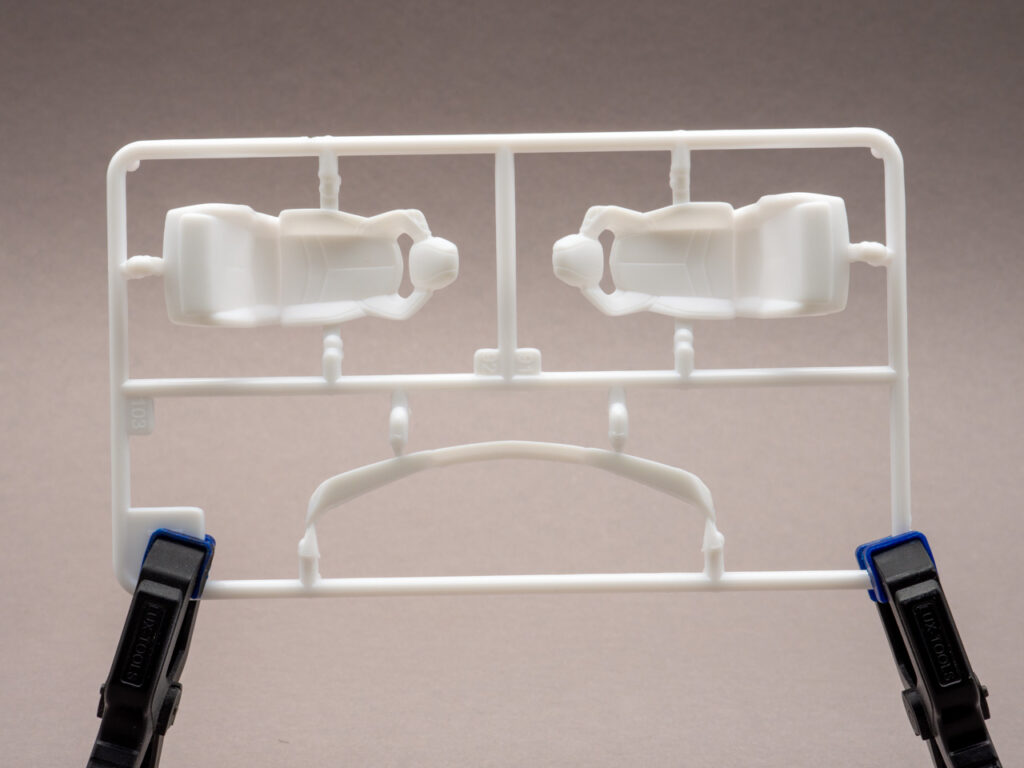
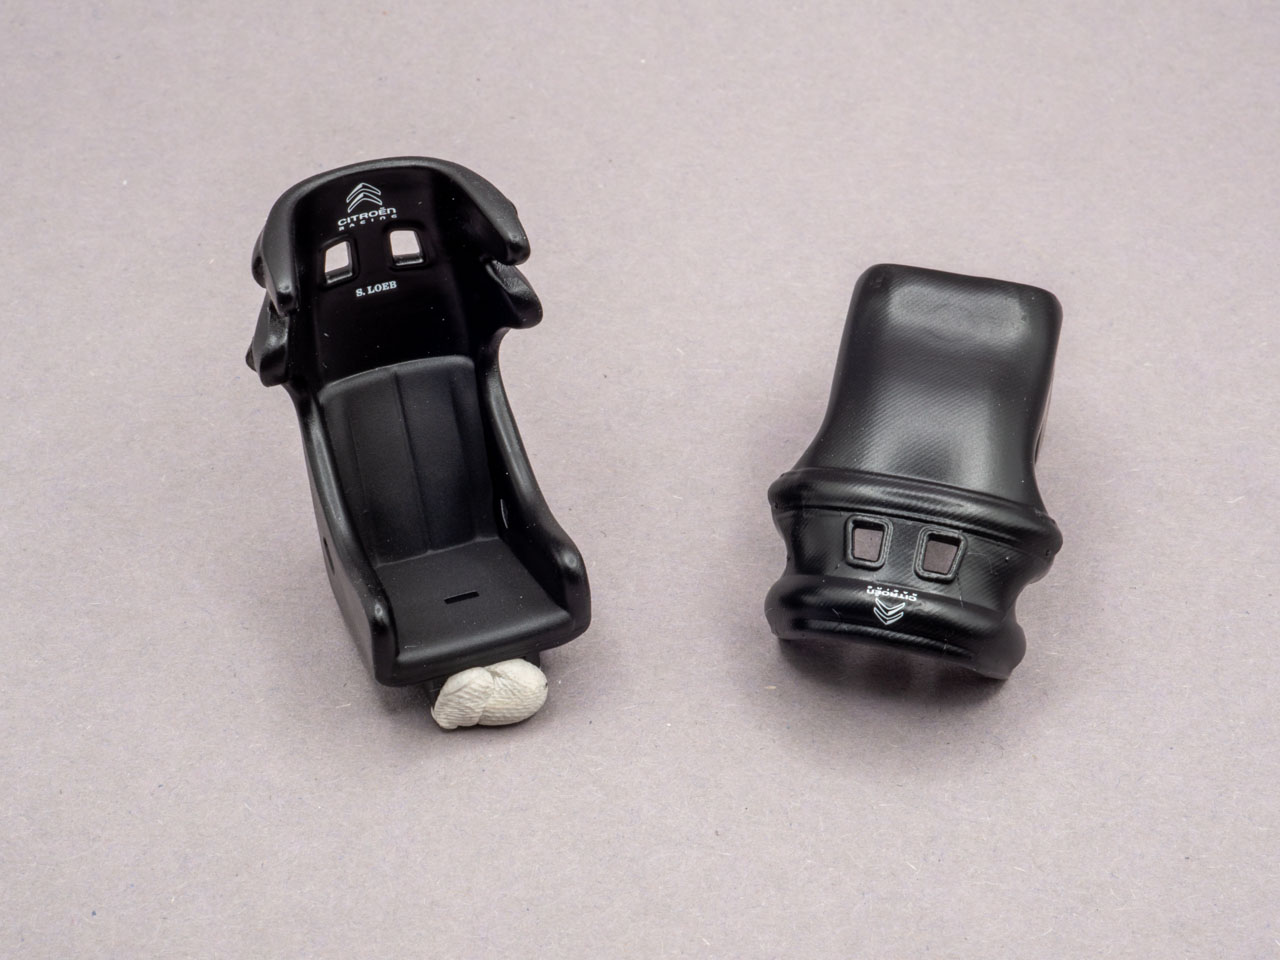
    The chairs have absolutely no any sink marks. Because they made of two parts – front and back.

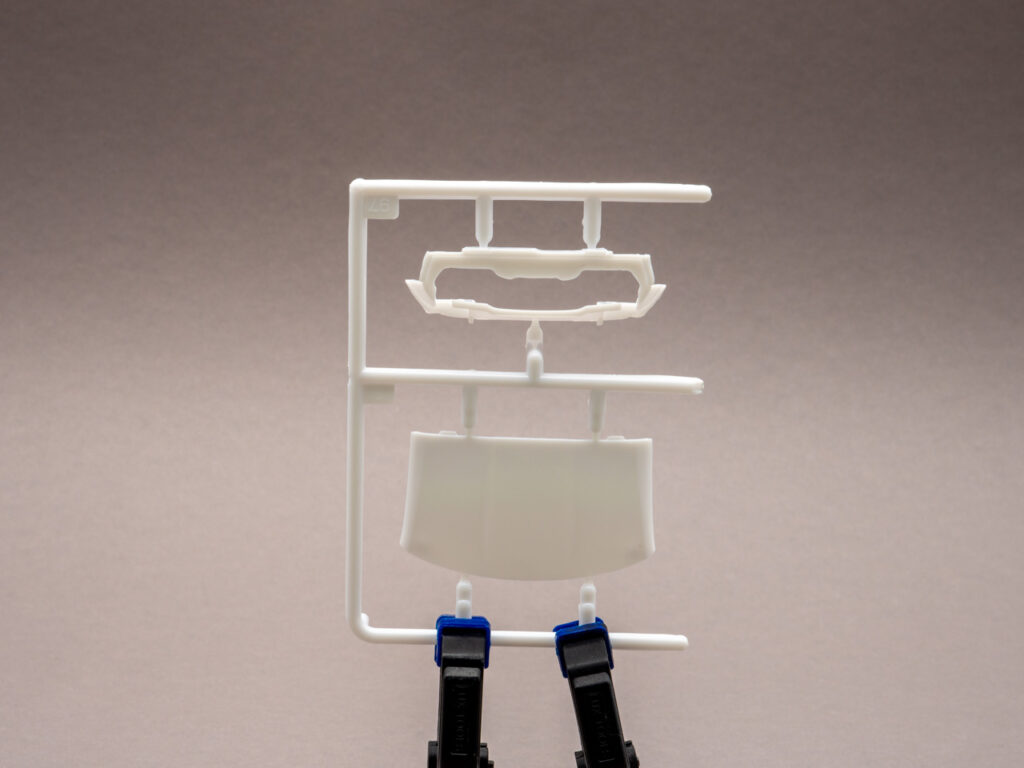
    Removable roof and interior shield for the engine compartment.

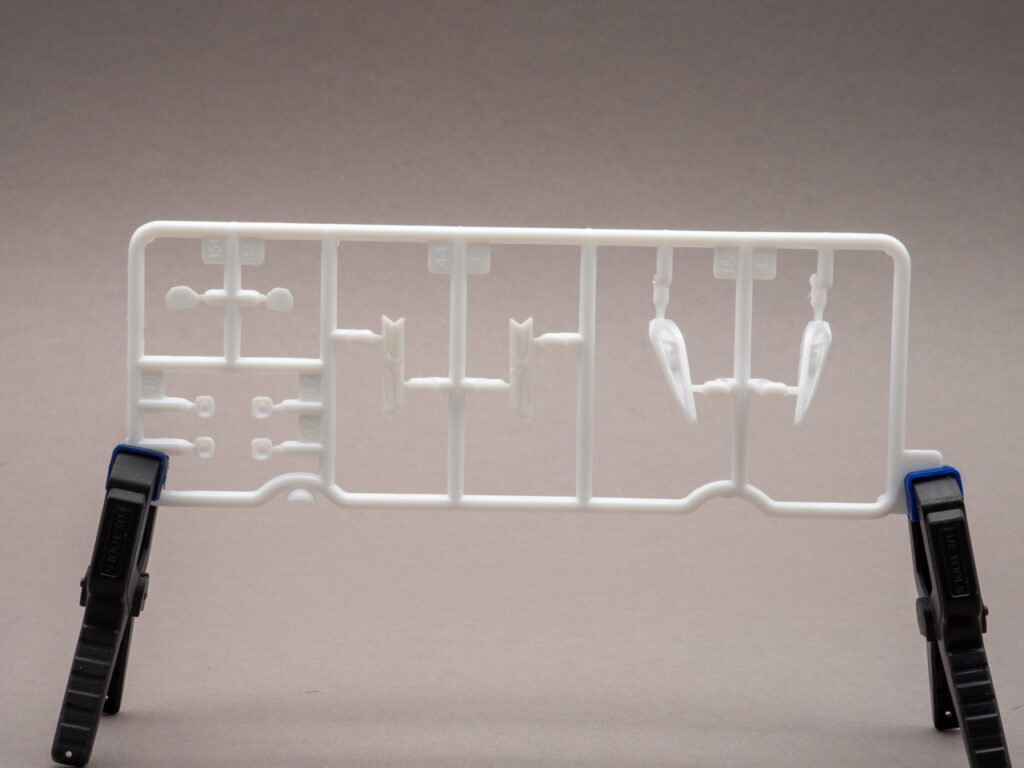
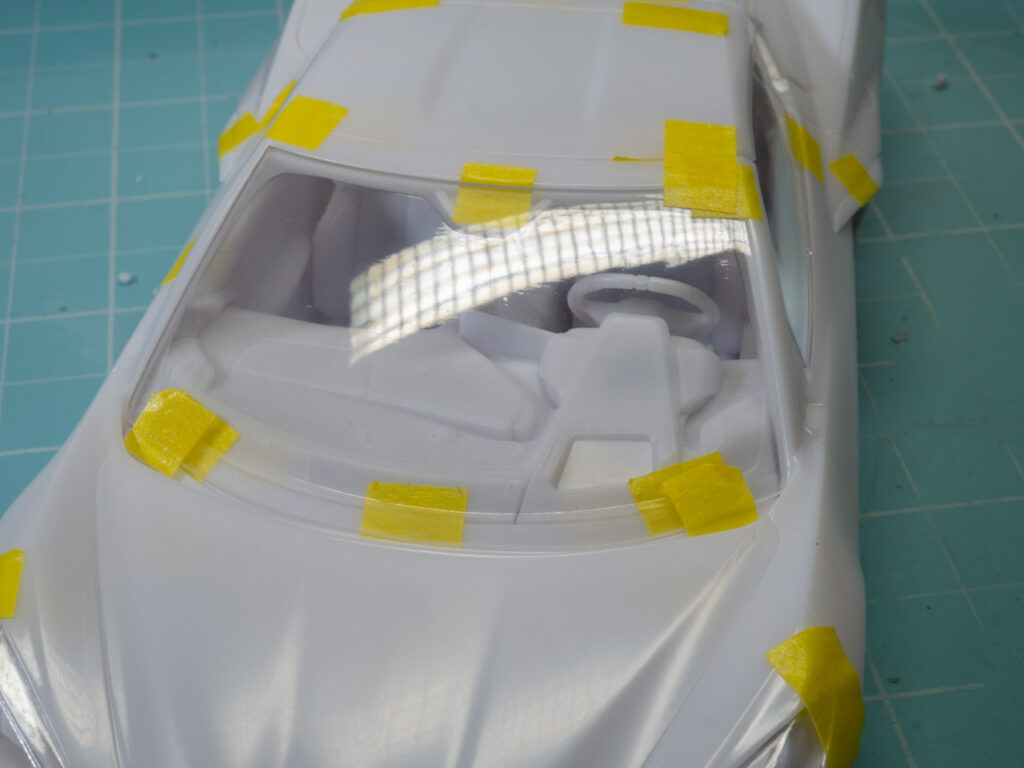
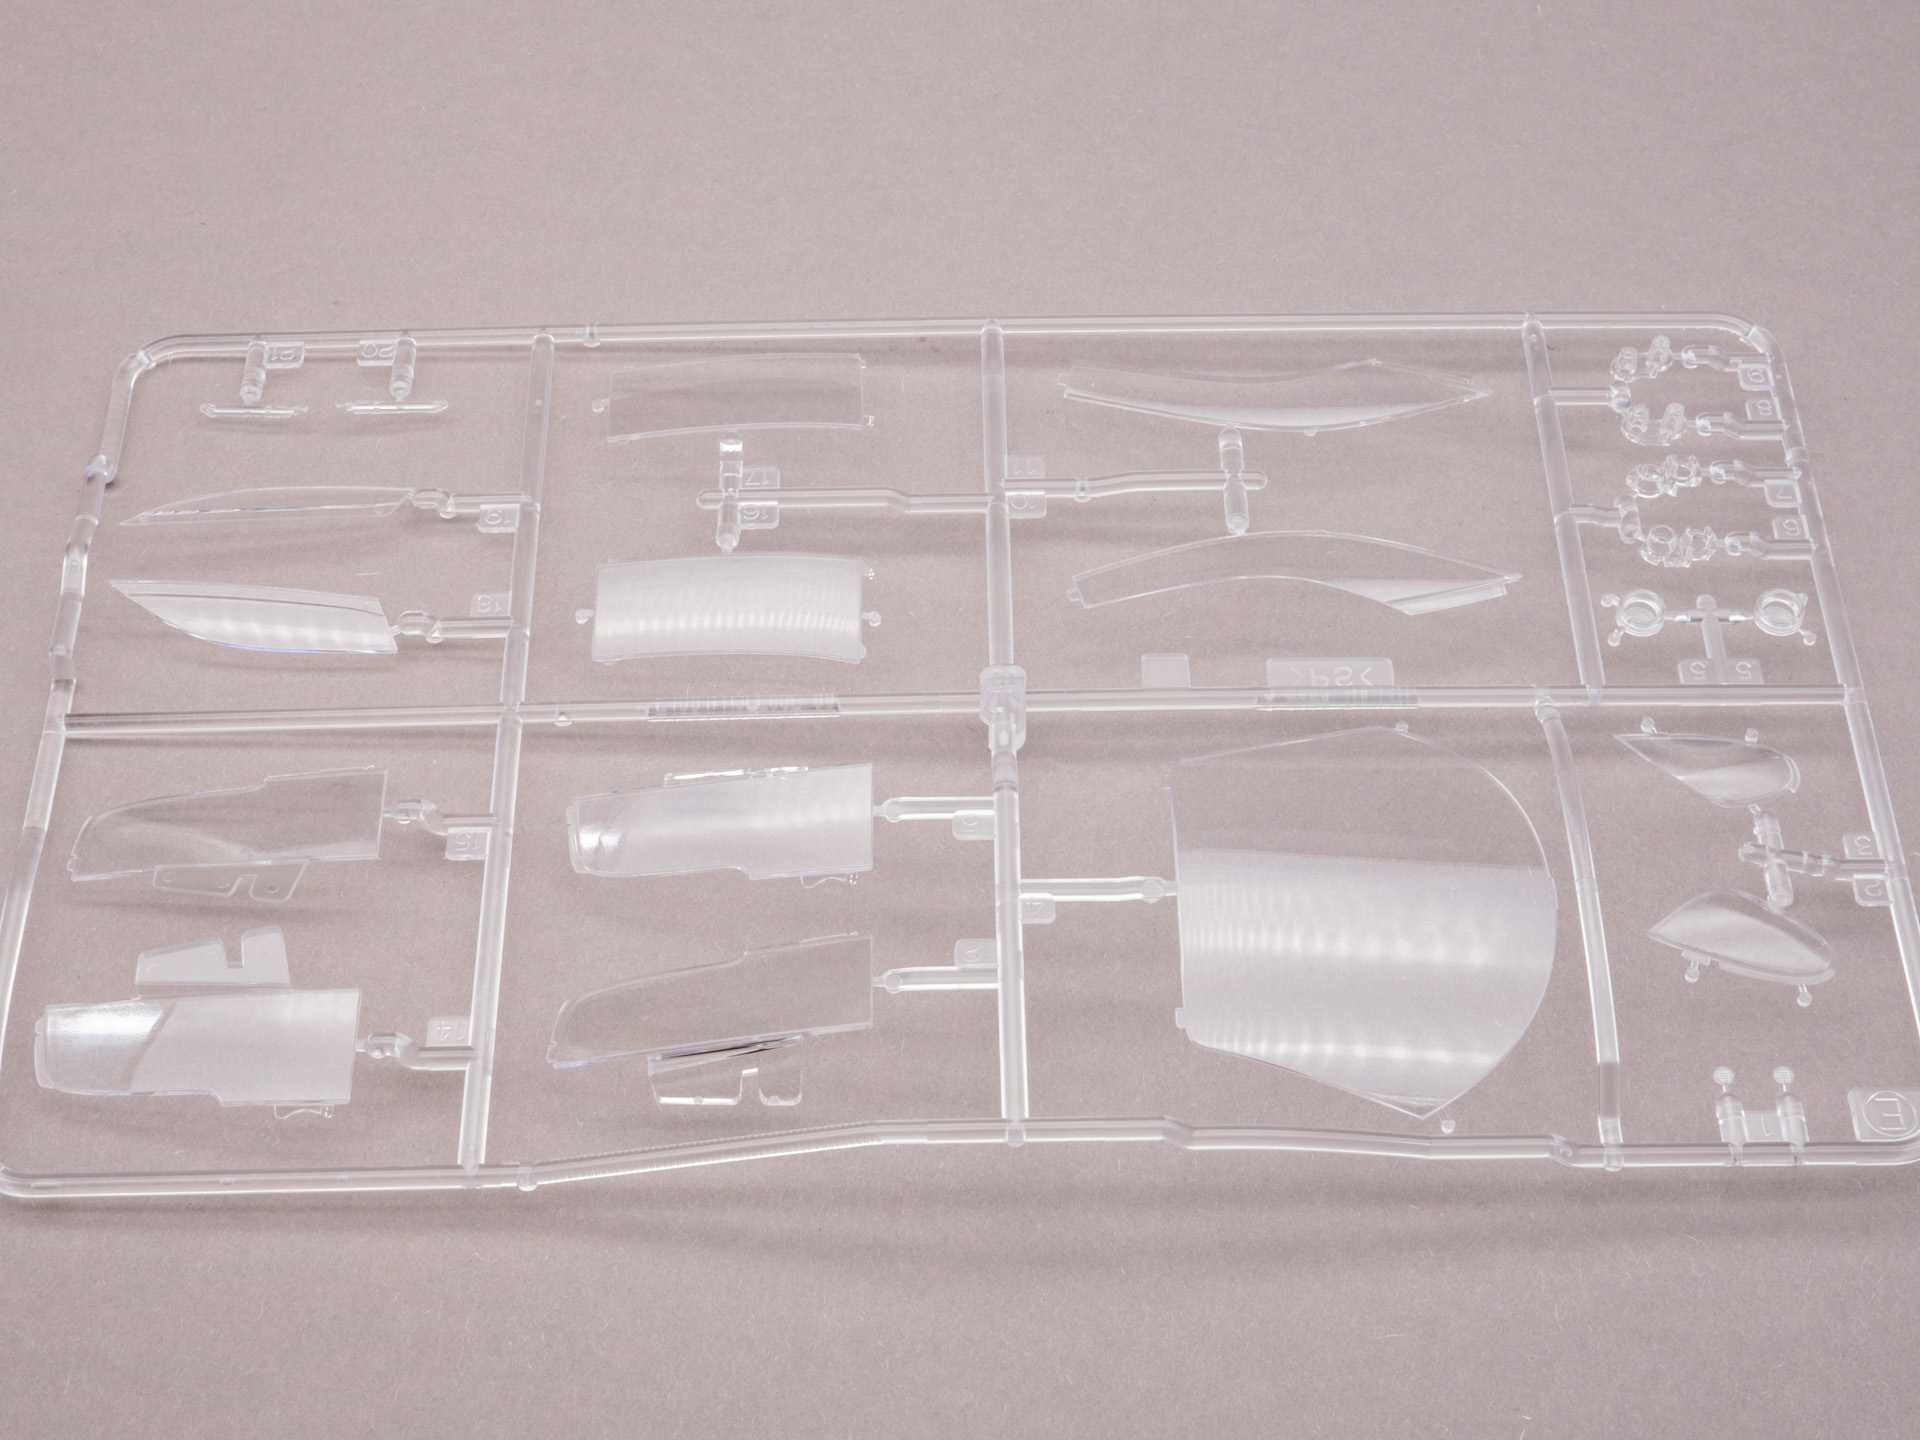
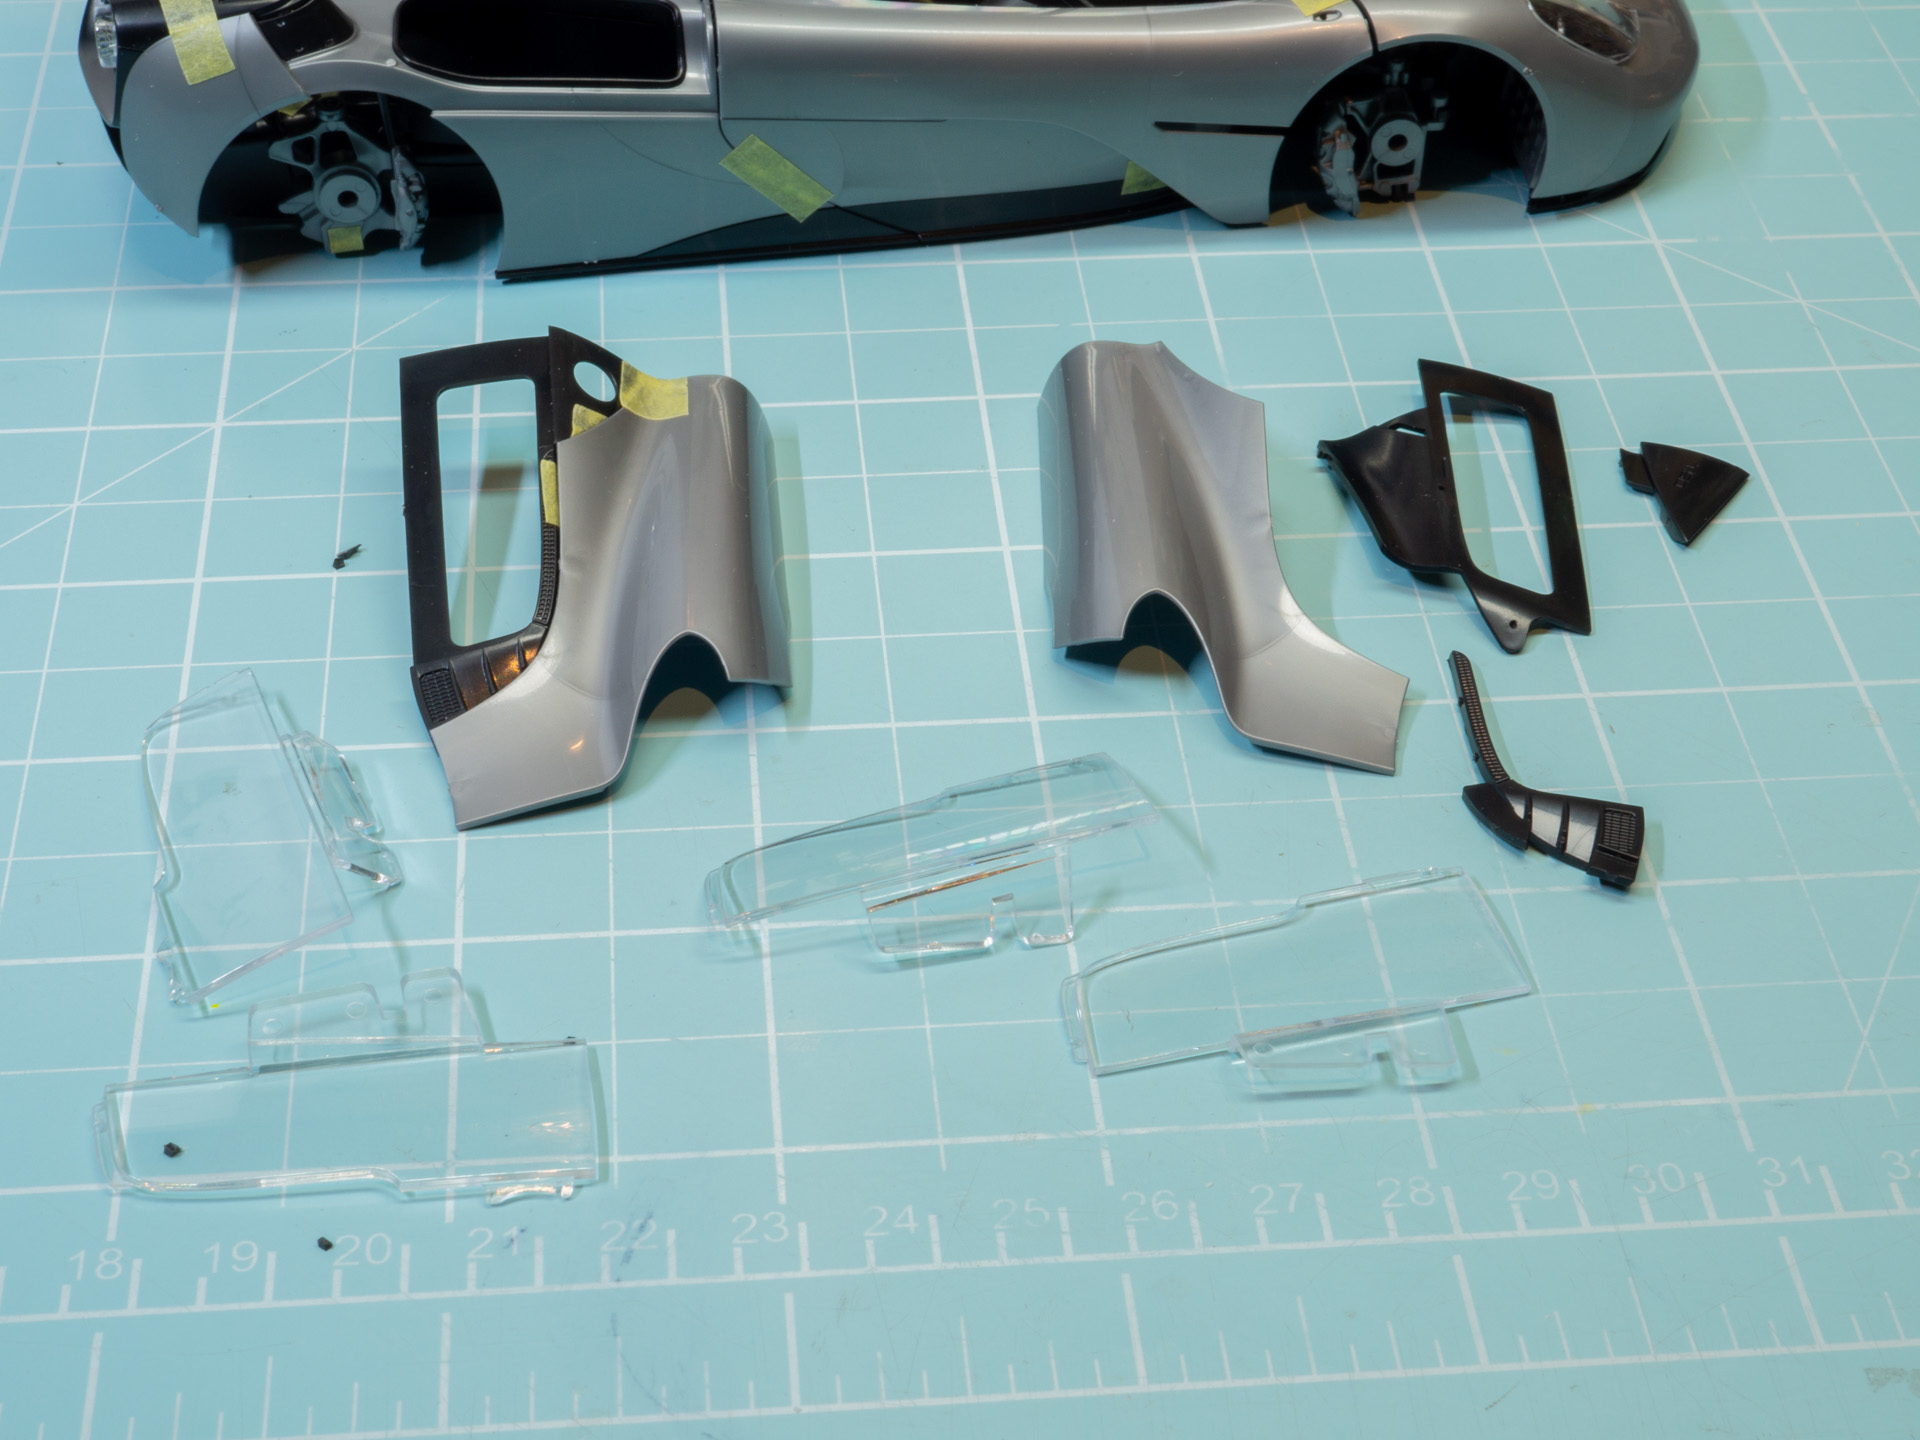
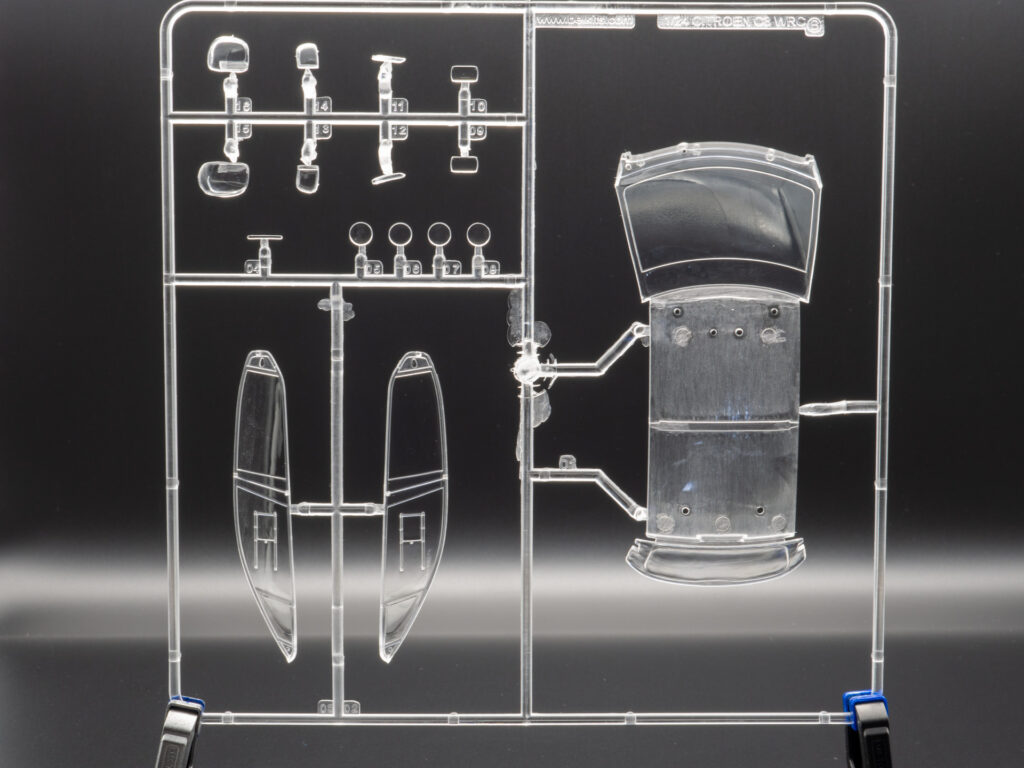
    And here are the transparent parts. Very clear and do not refract the image. But because they are very thin, like the latest Tamiya kits. I like.

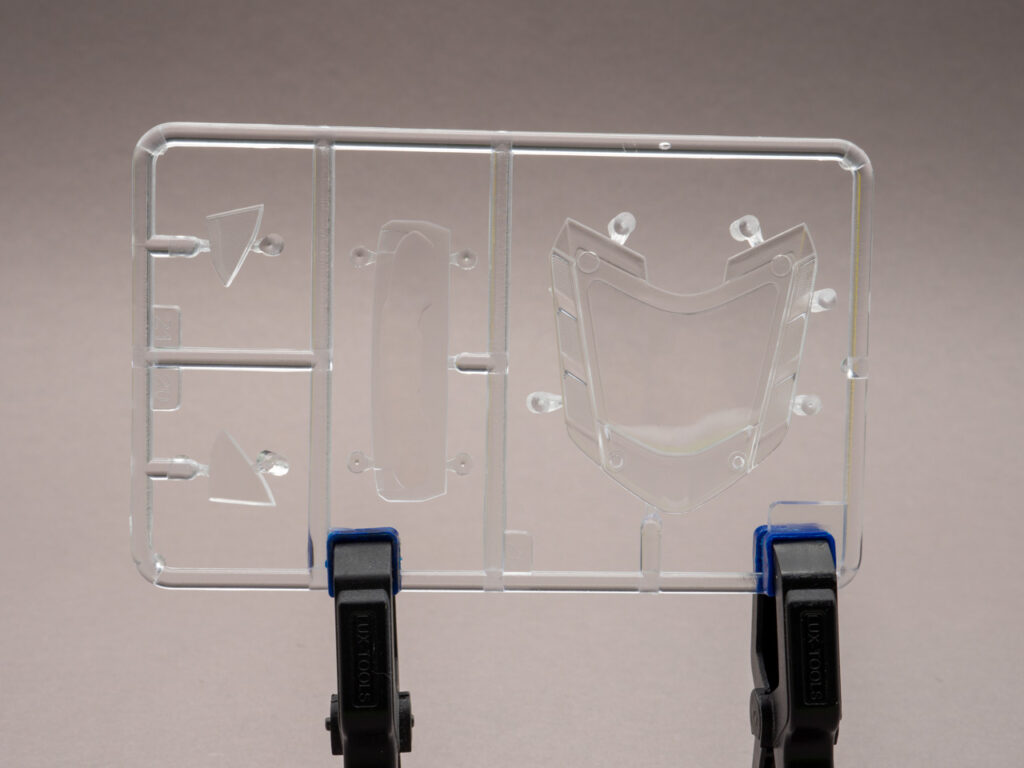
    More transparent parts. Need to mask, but there are no masks in the box. A very strange move, this is a big disadvantage. You’ll have to cut it out the old fashioned way with a knife.

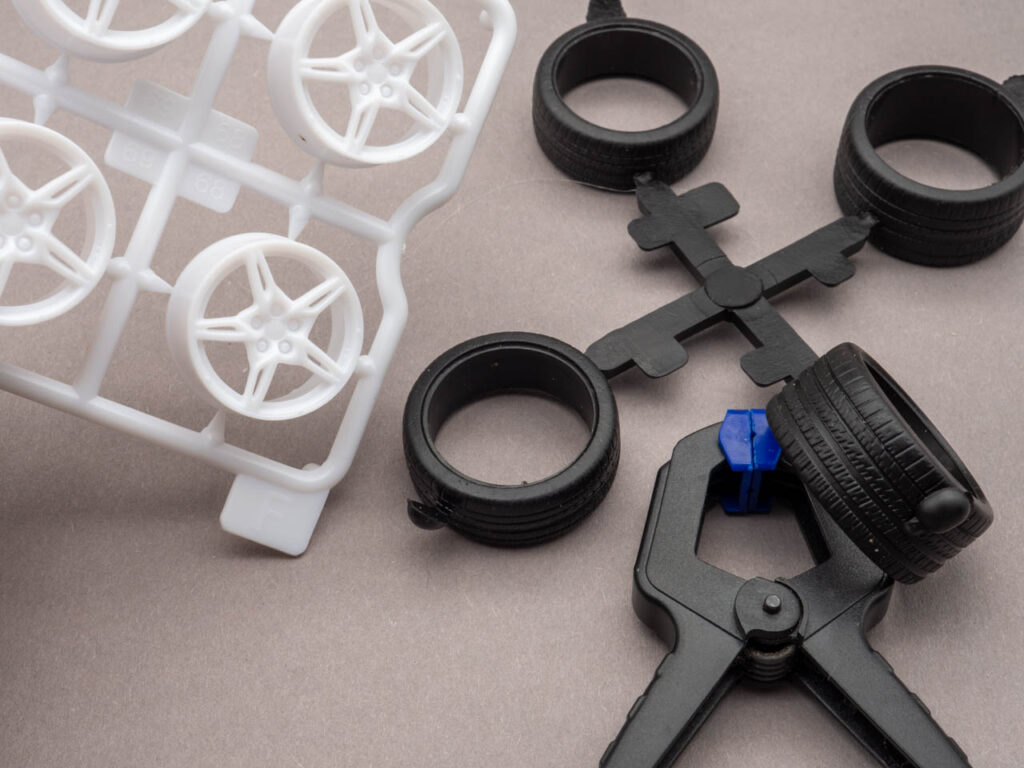
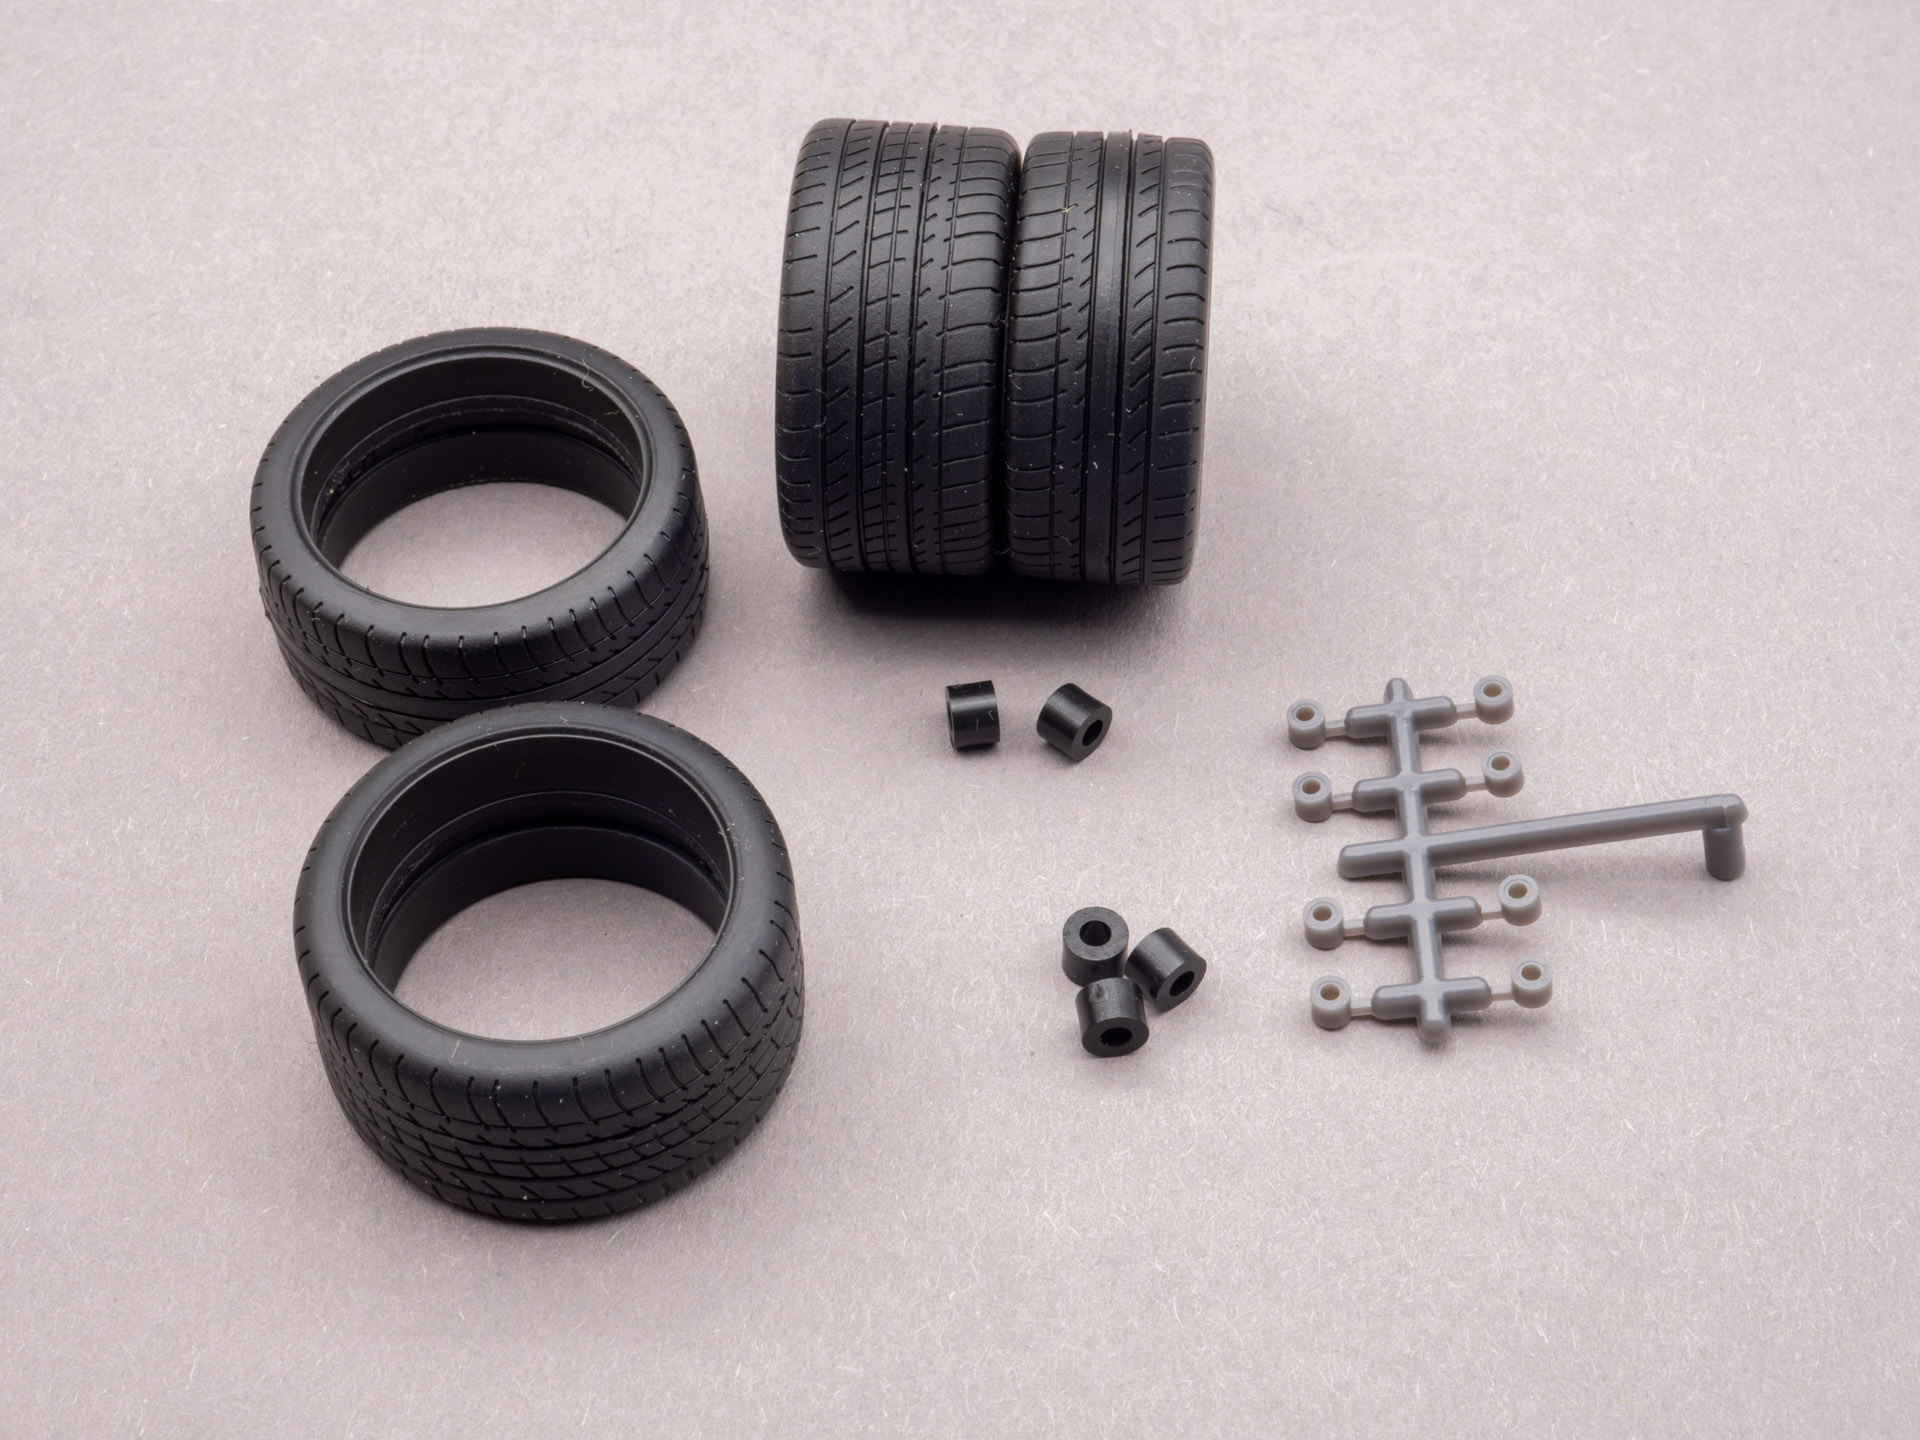
    Rubber with not clear molded protector.

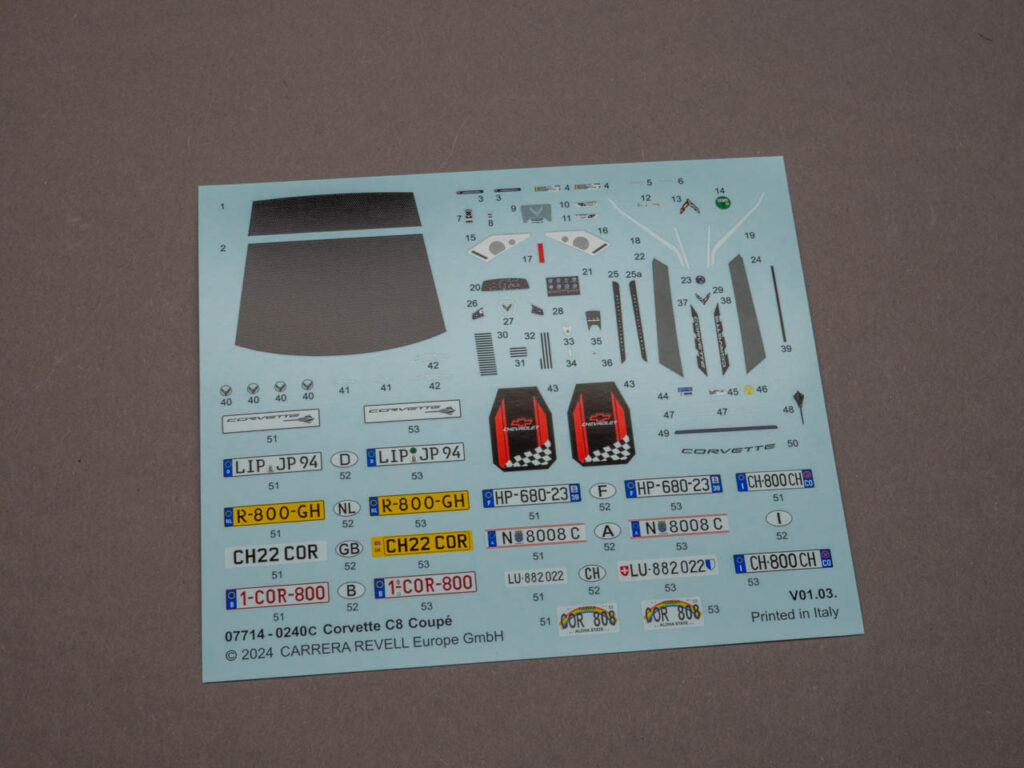
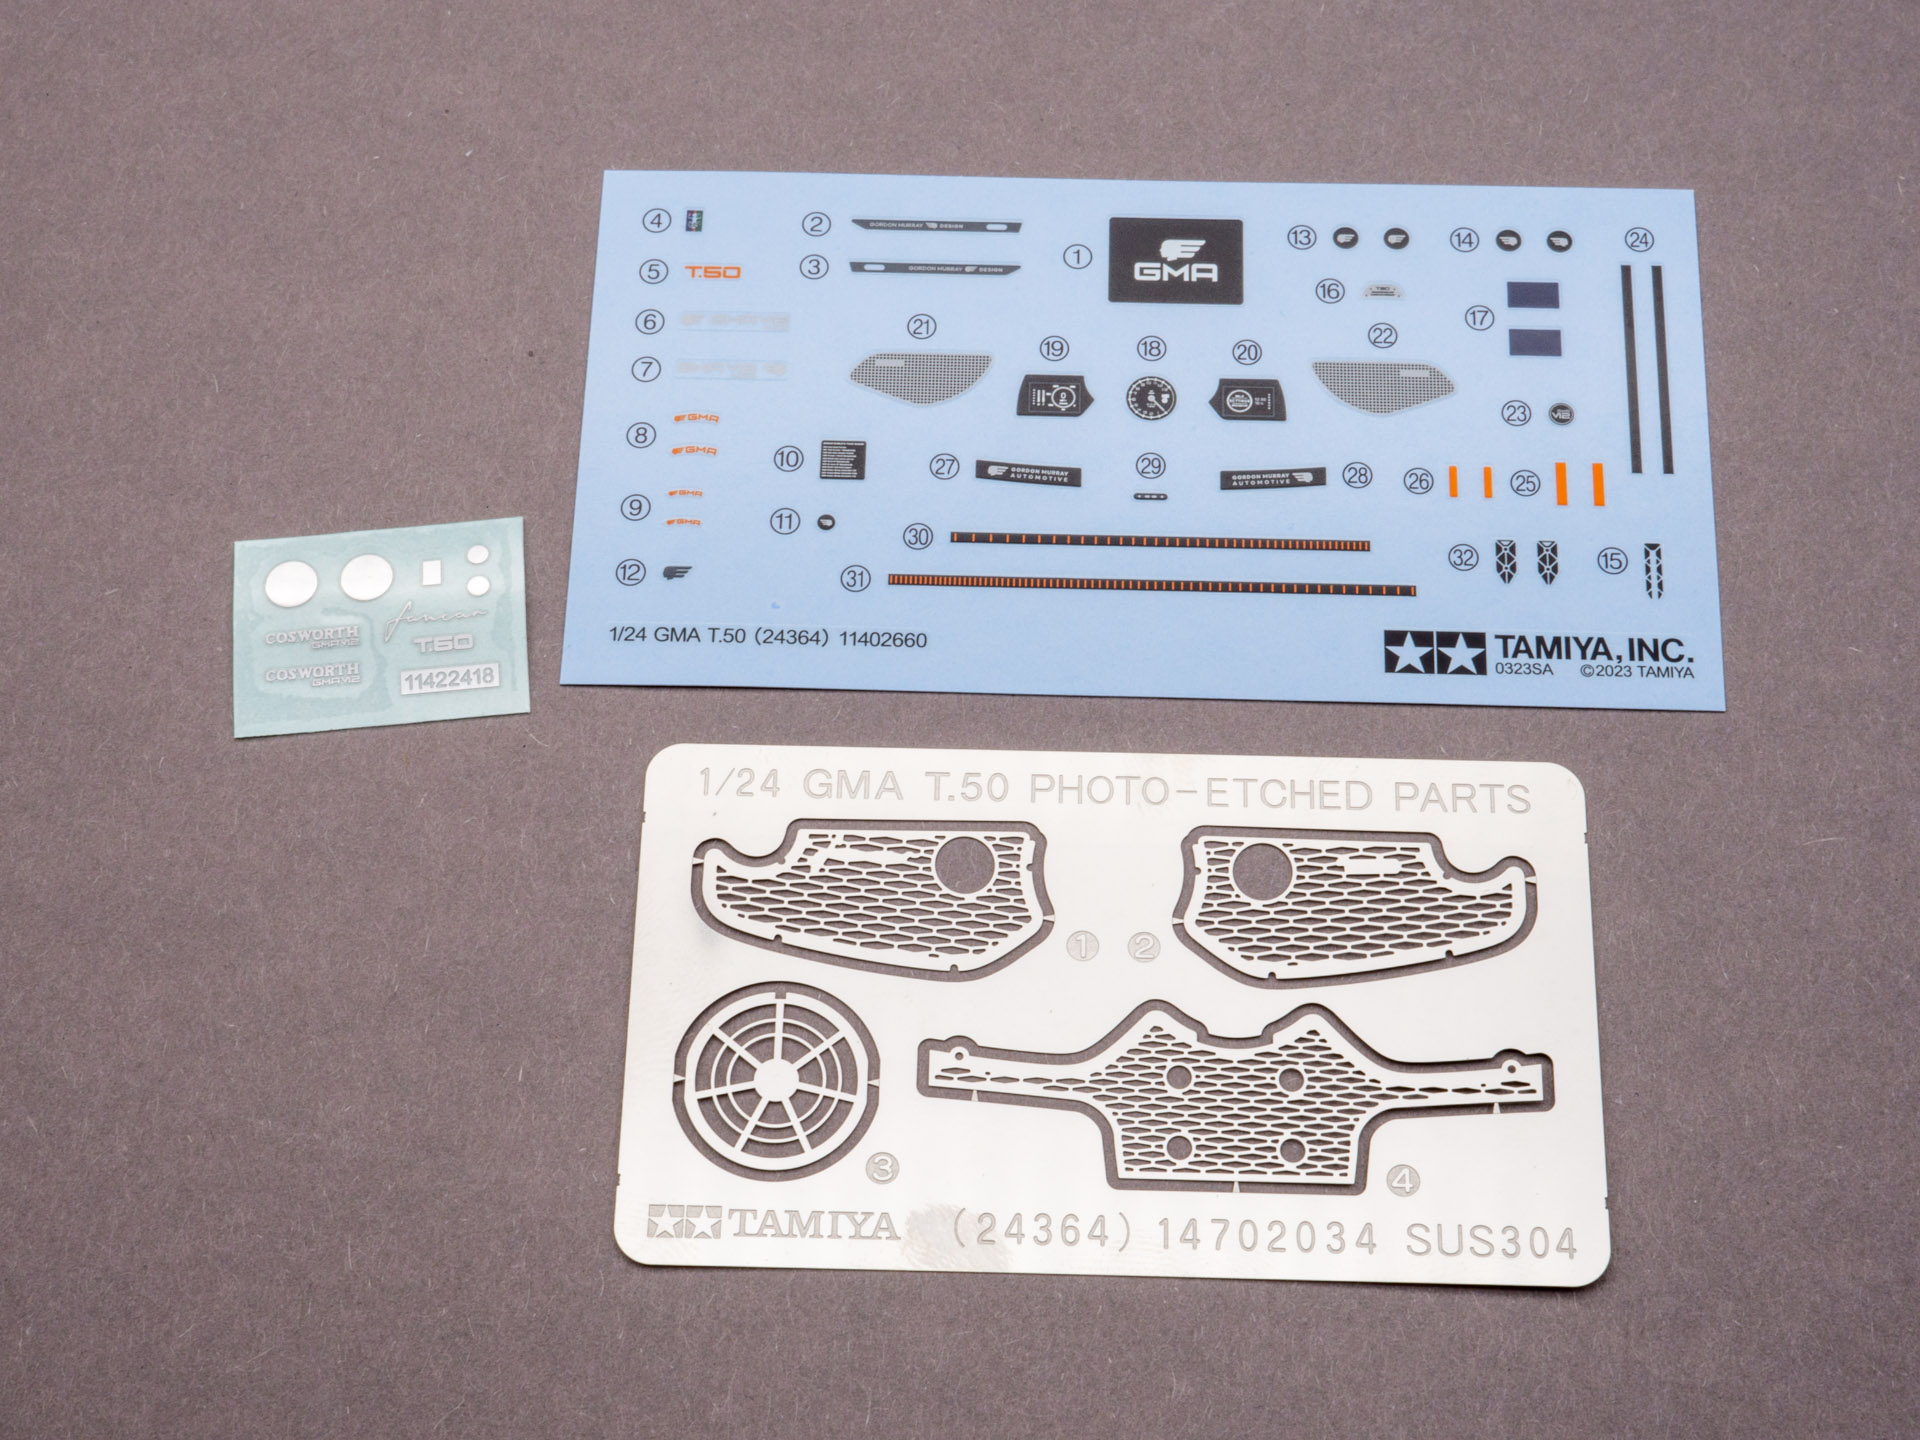
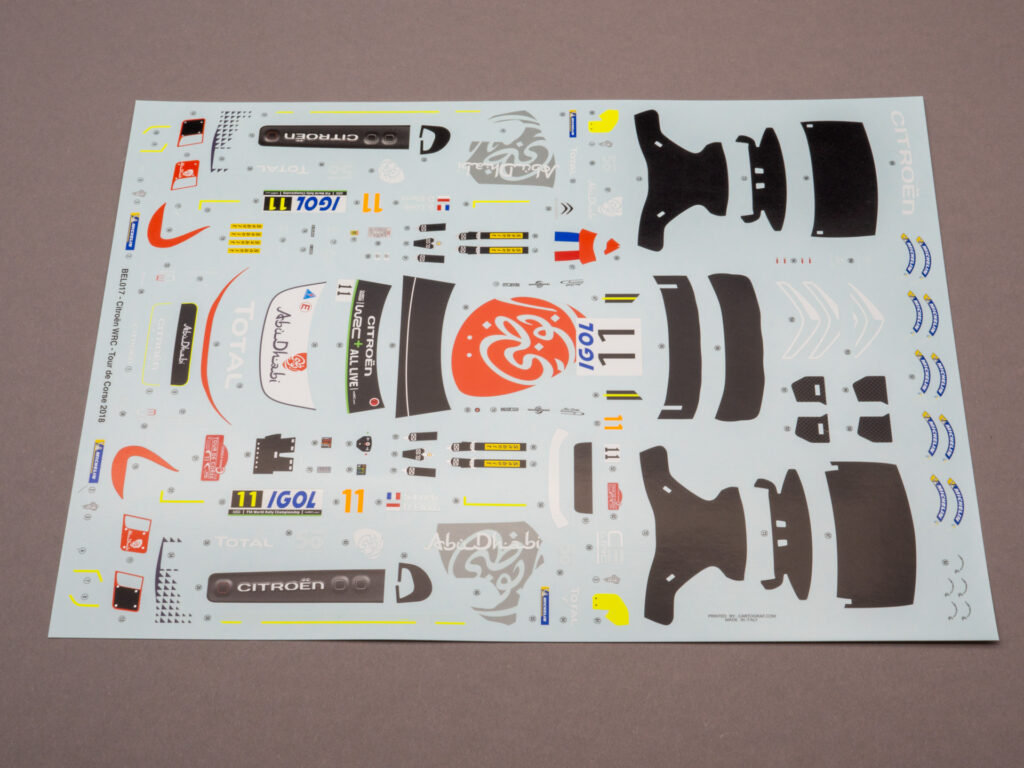
    Decals sheet. Wide selection of license plates.

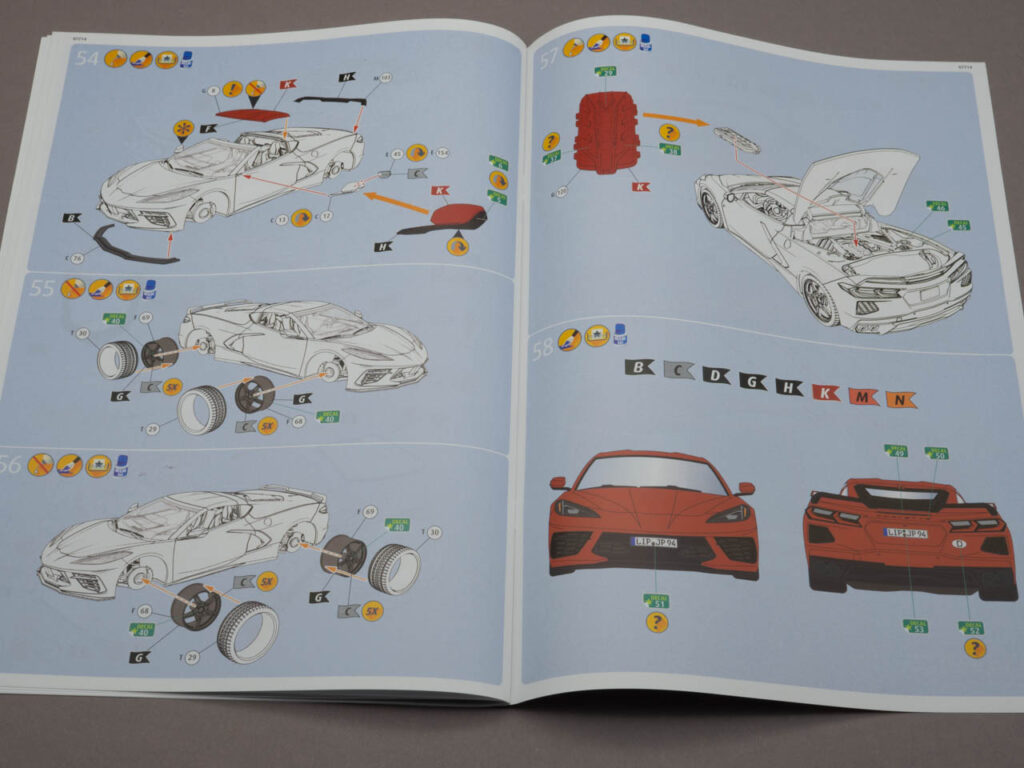
    Instructions. It is clear that attention has been paid to the motor. There are also no usual rubber caps for the wheels.

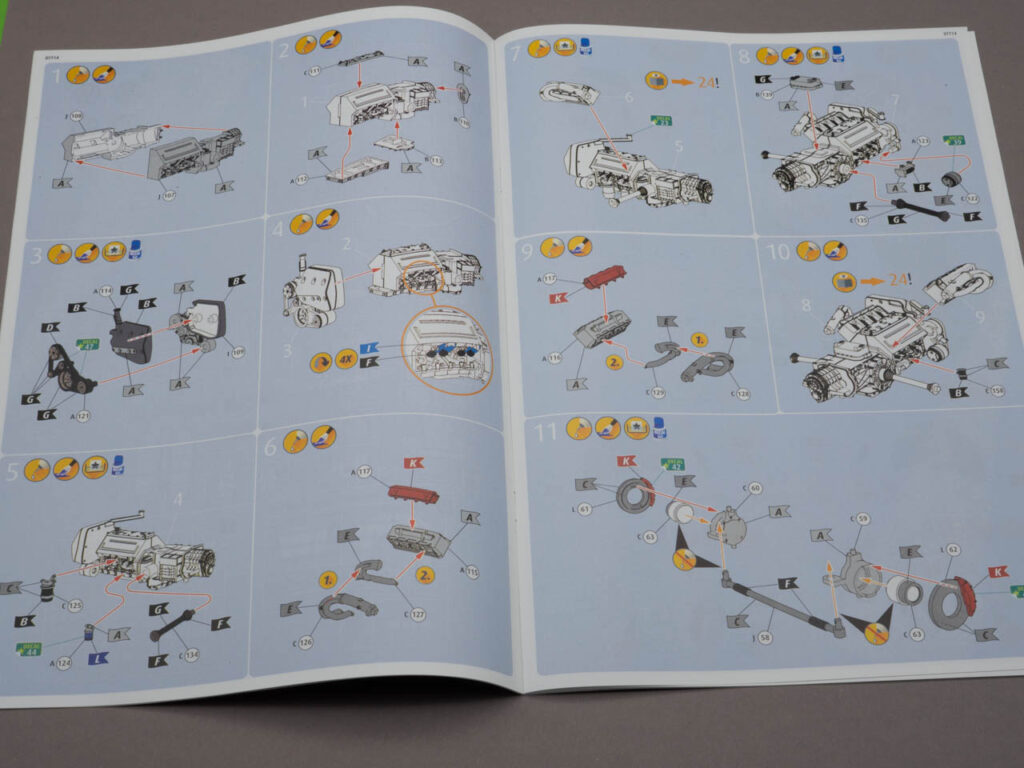
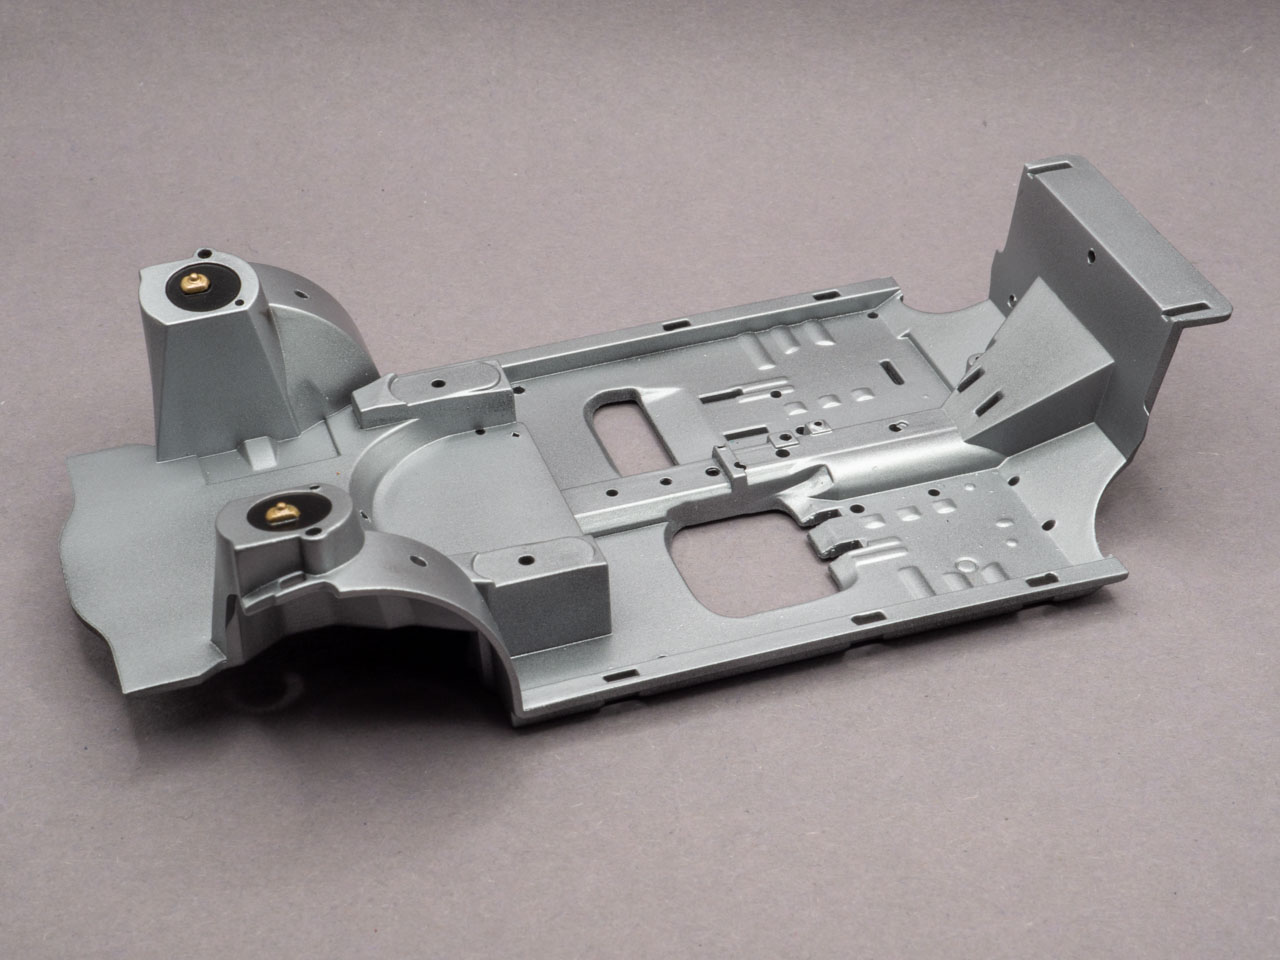
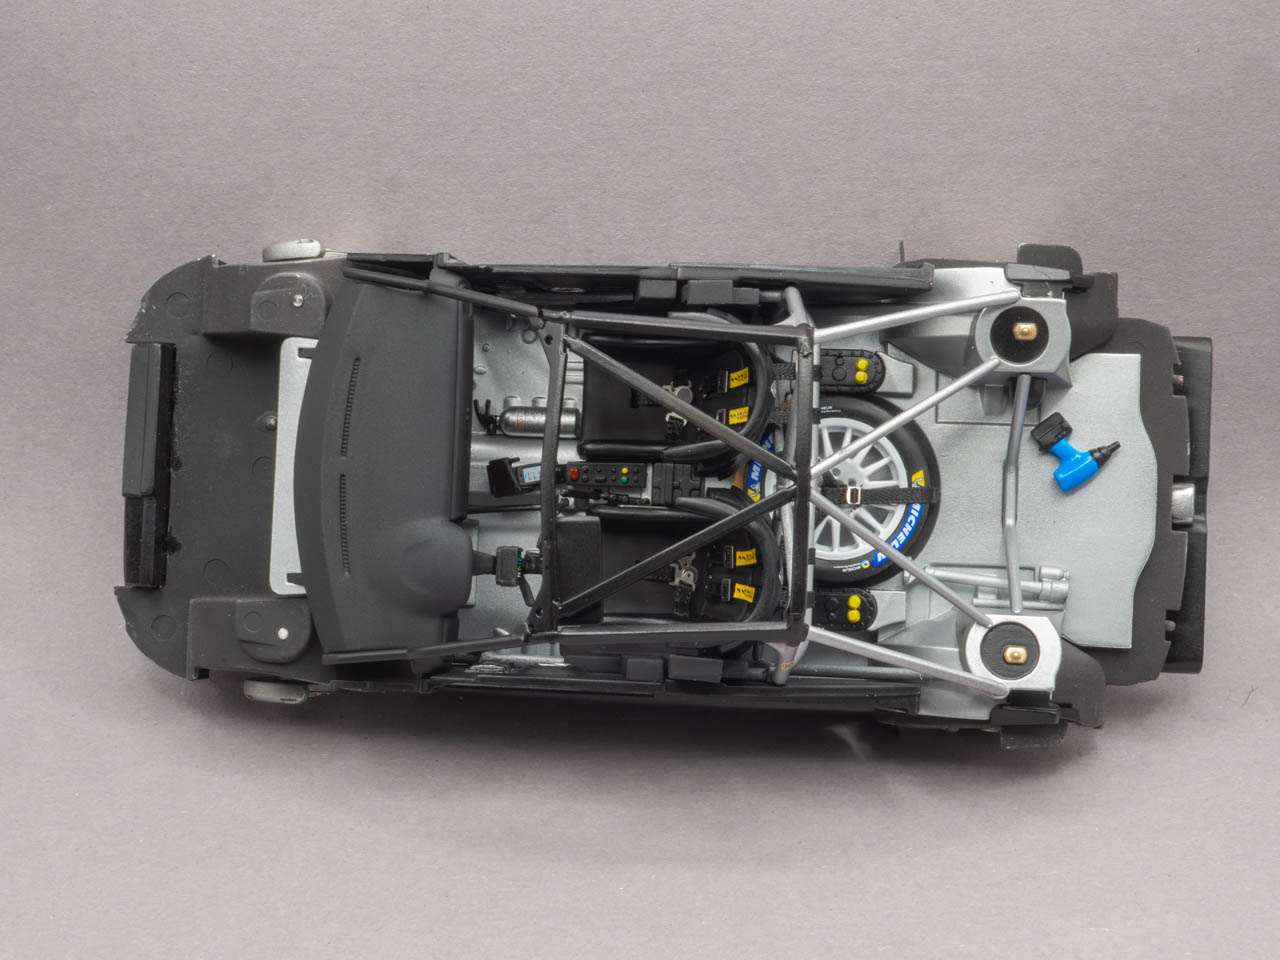
    The bottom part is similar to all Revell kits.

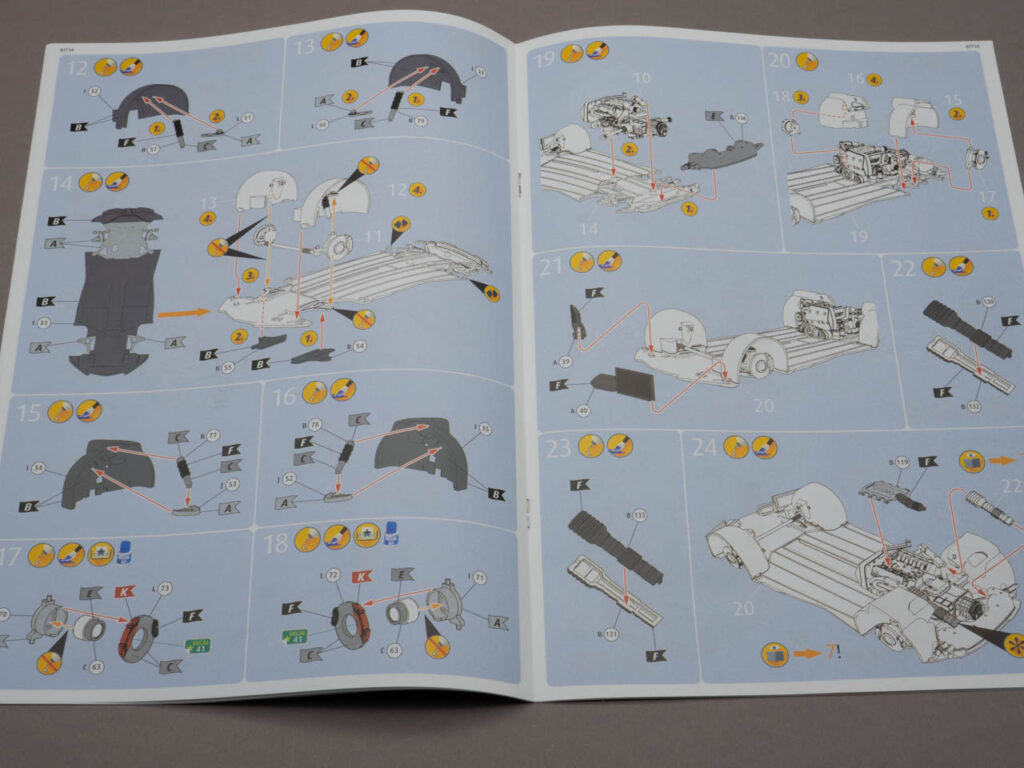
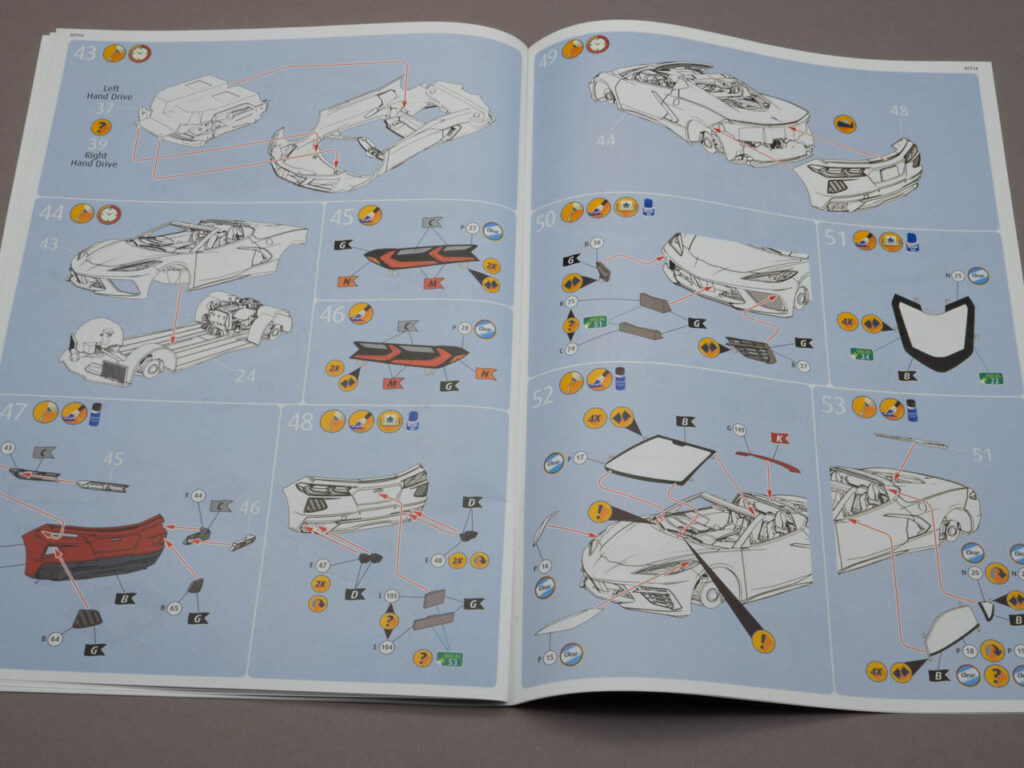
    It is proposed to assemble a left- and right-hand drive version.

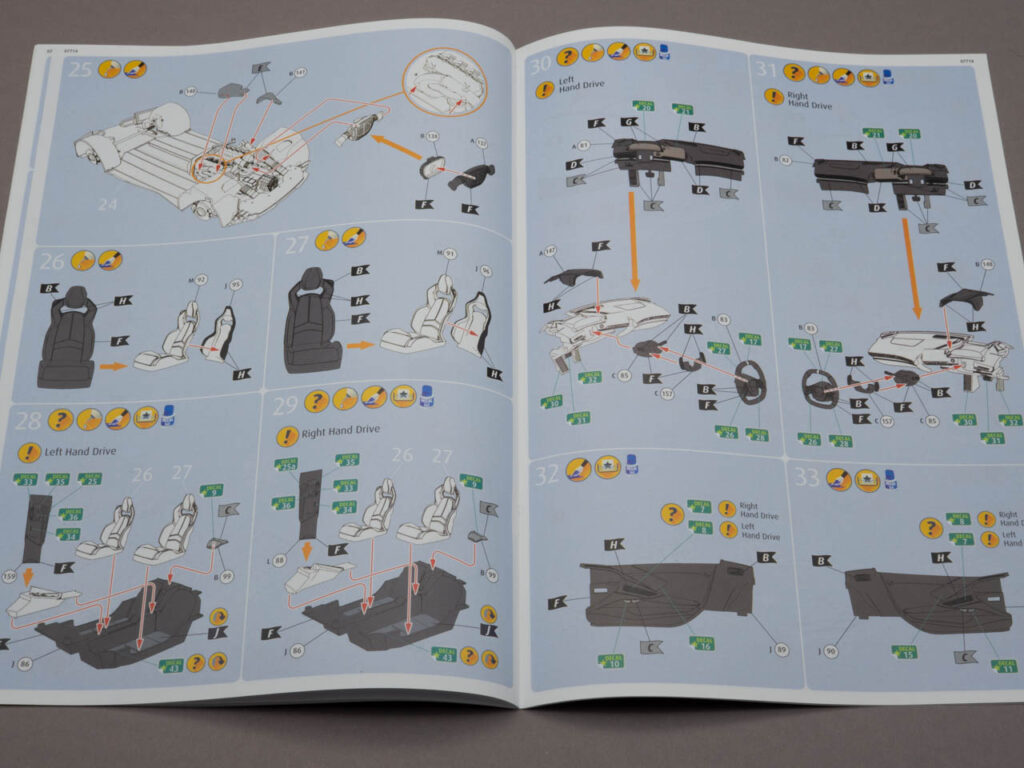
    The rear part is glued in at the end; apparently, it will not be possible to assemble the body in advance.

    Opening engine lid.

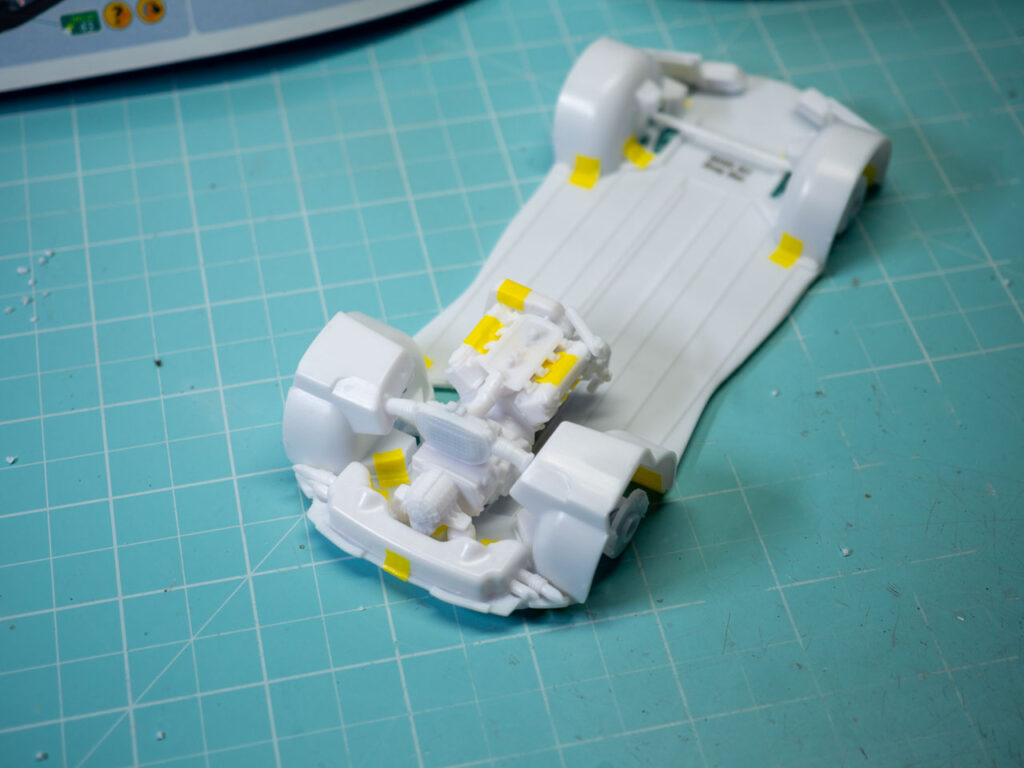
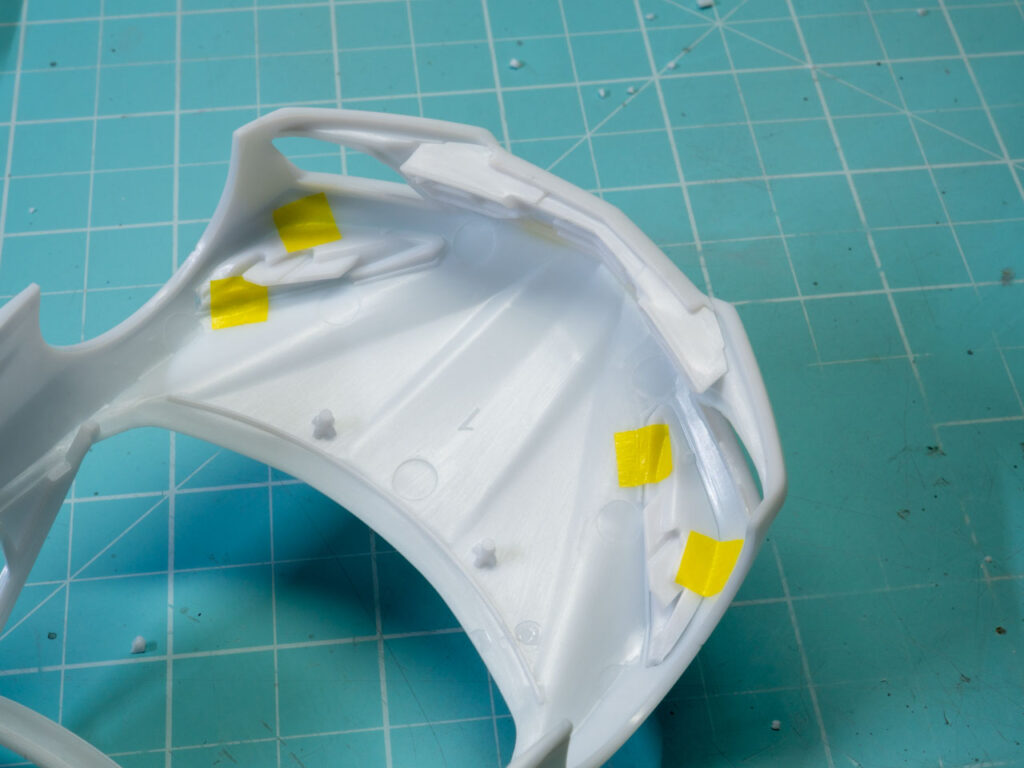
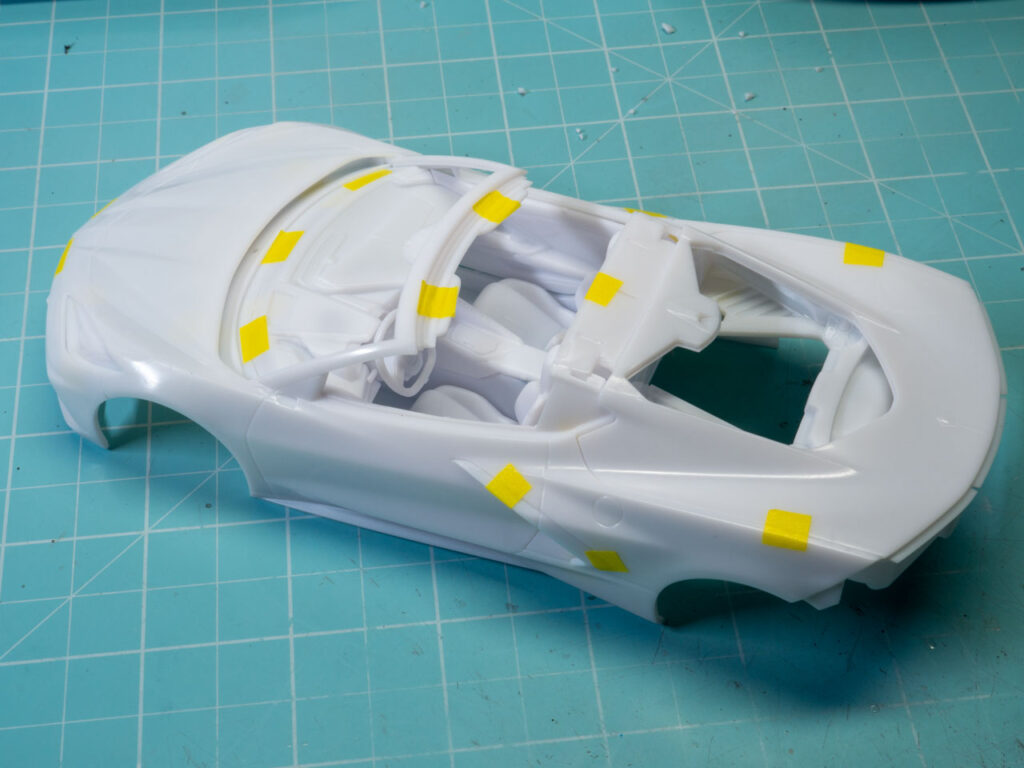
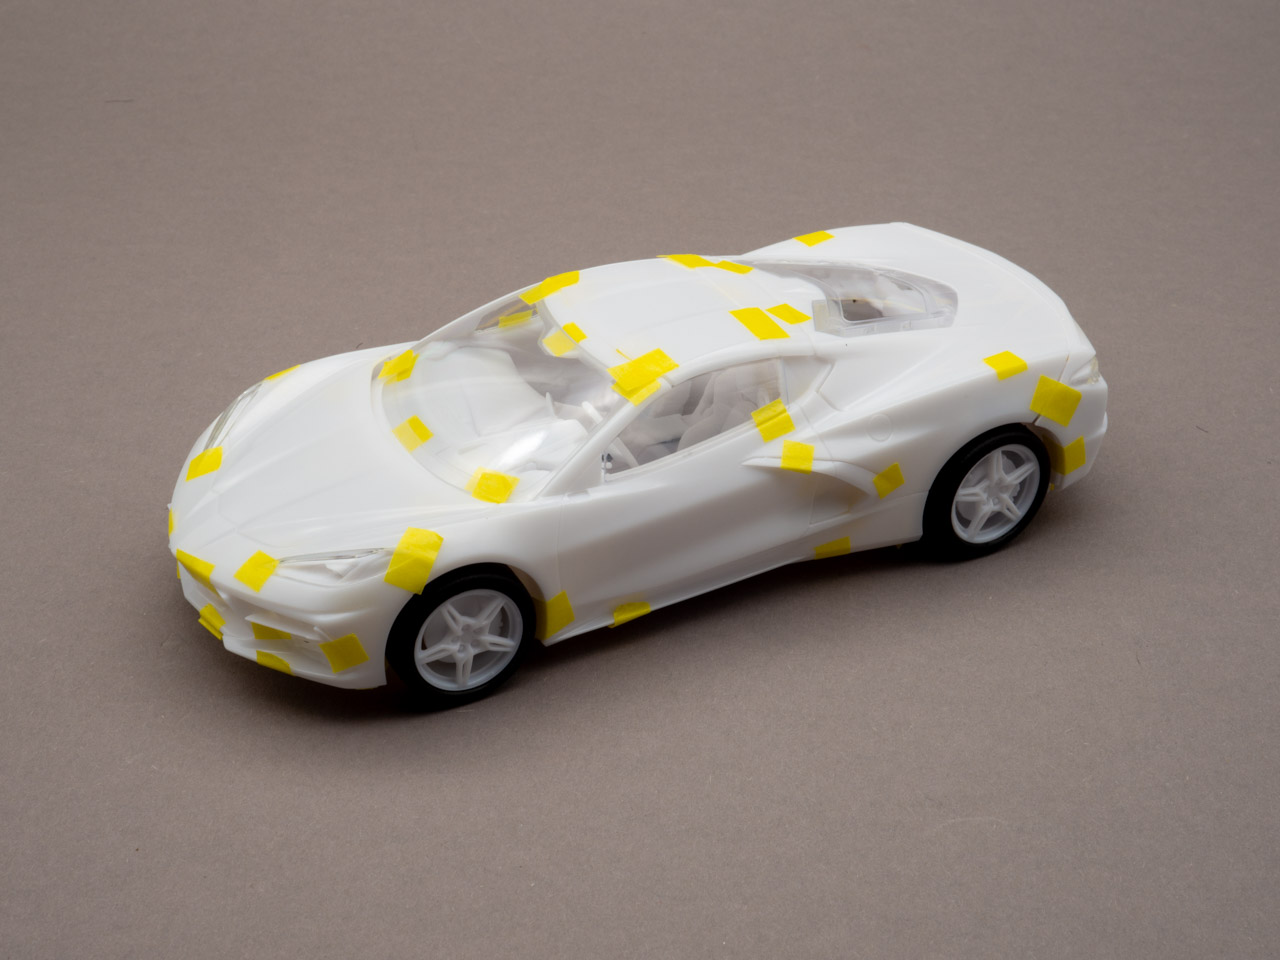
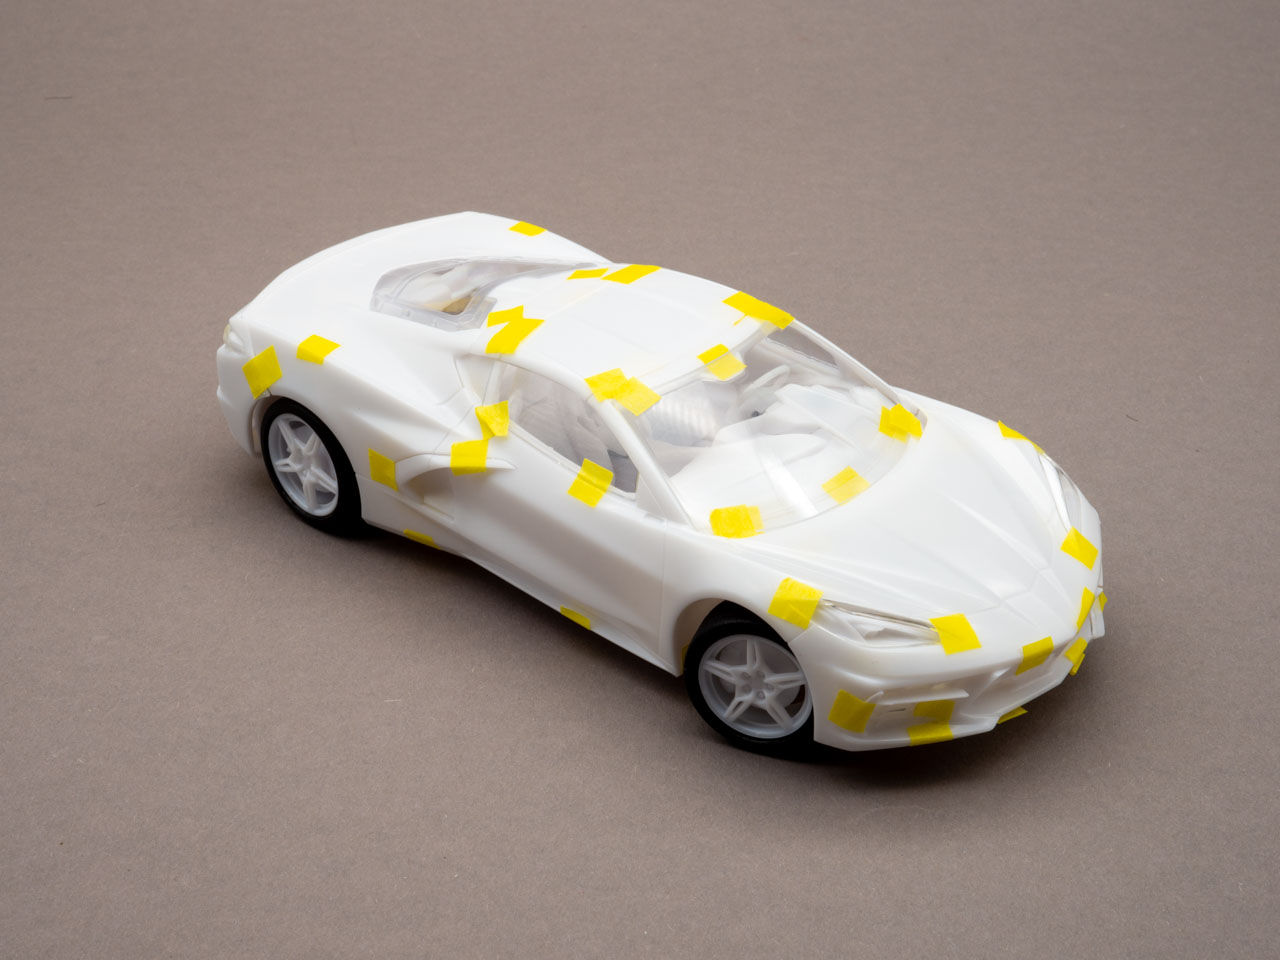
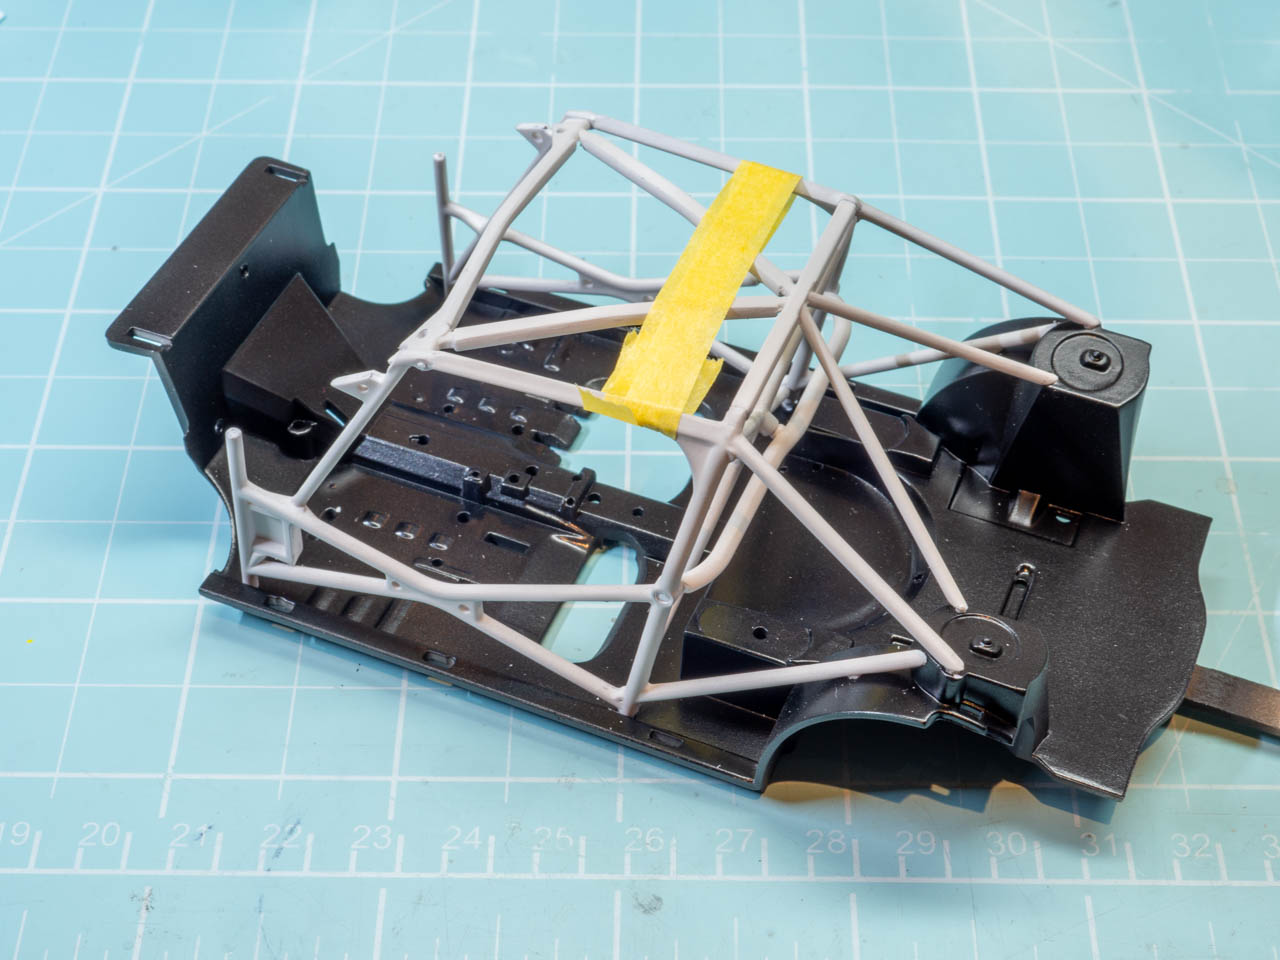
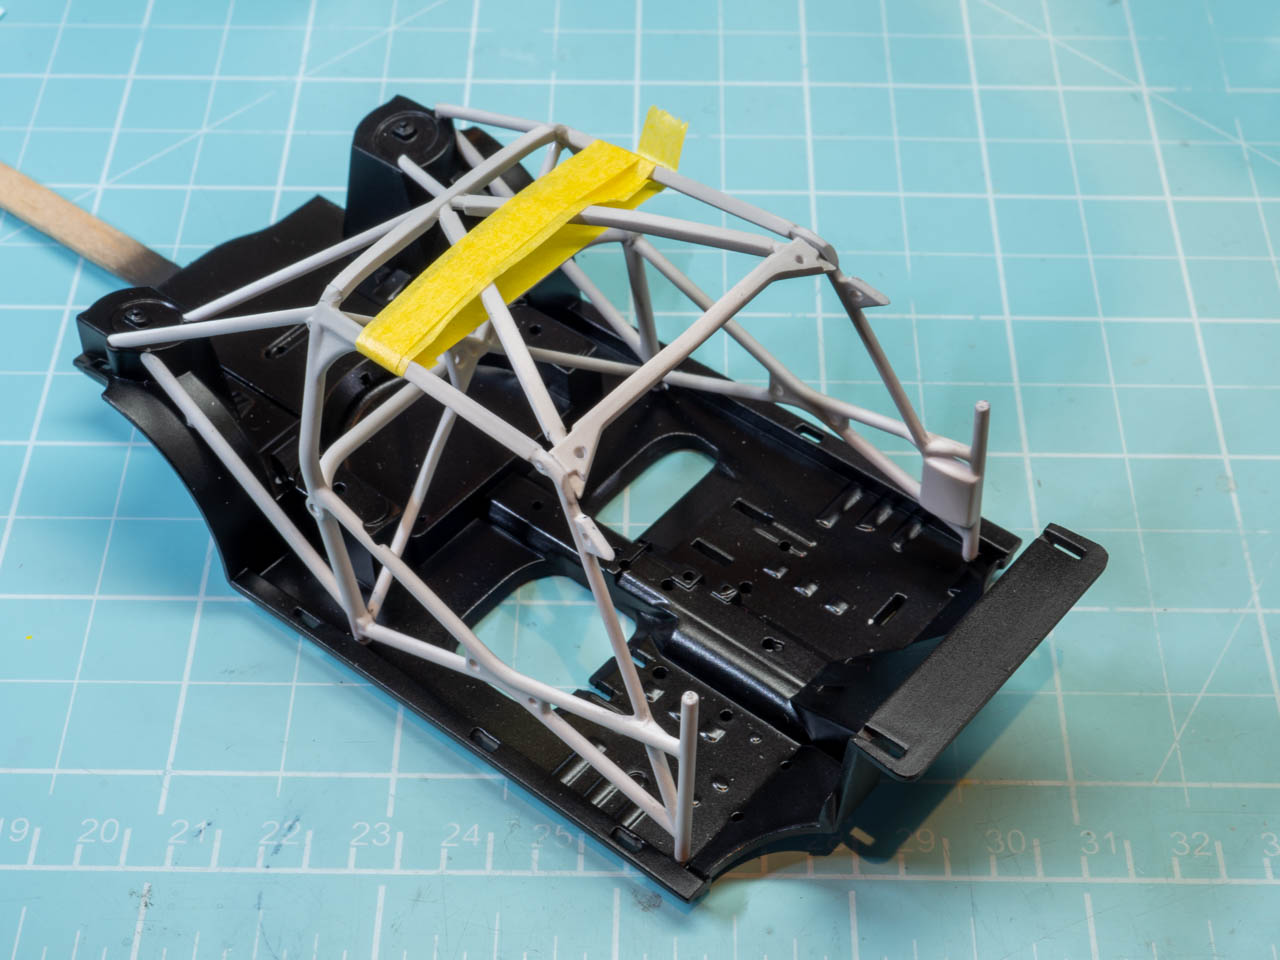
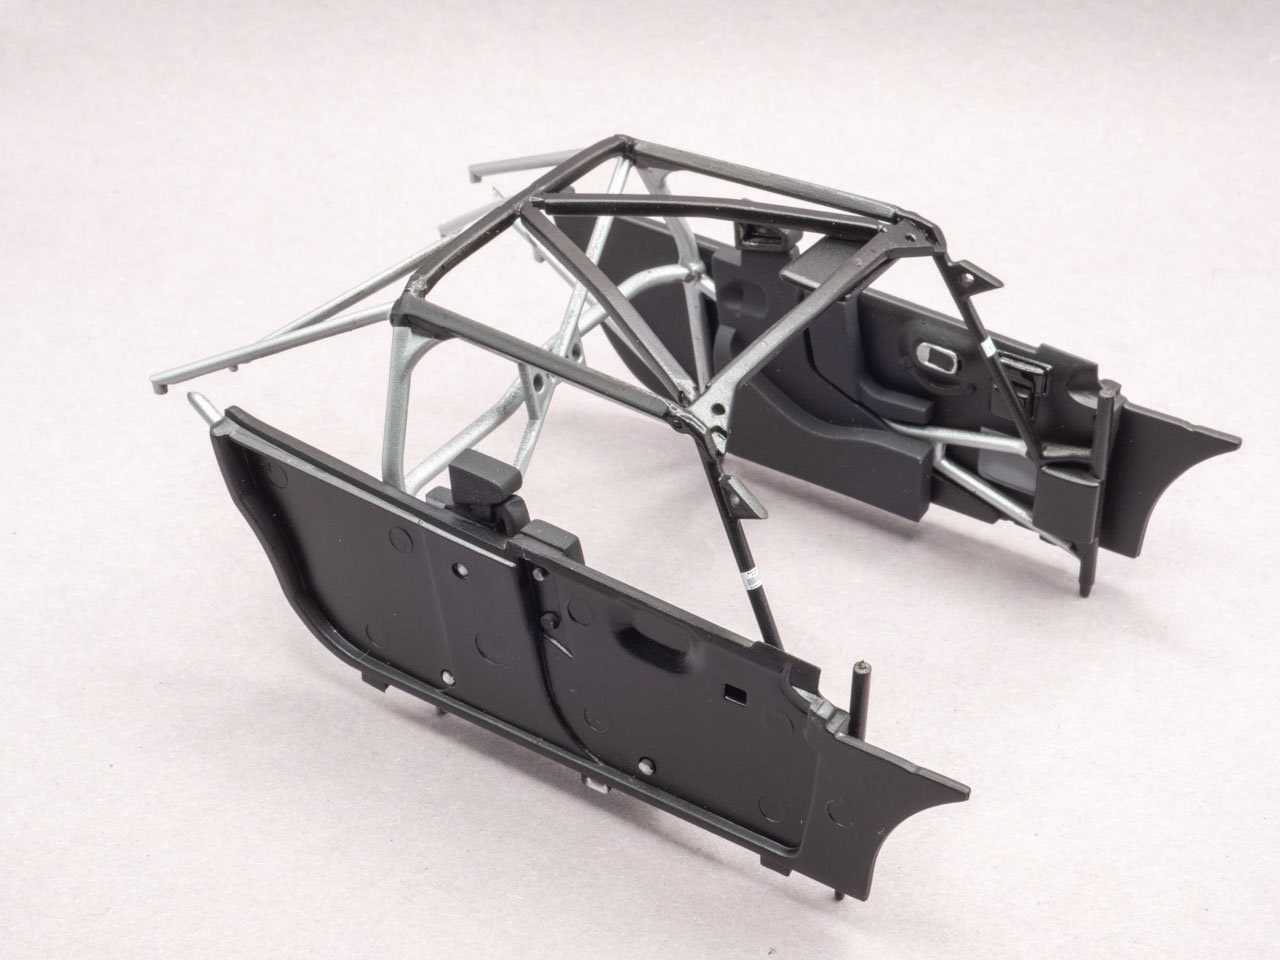
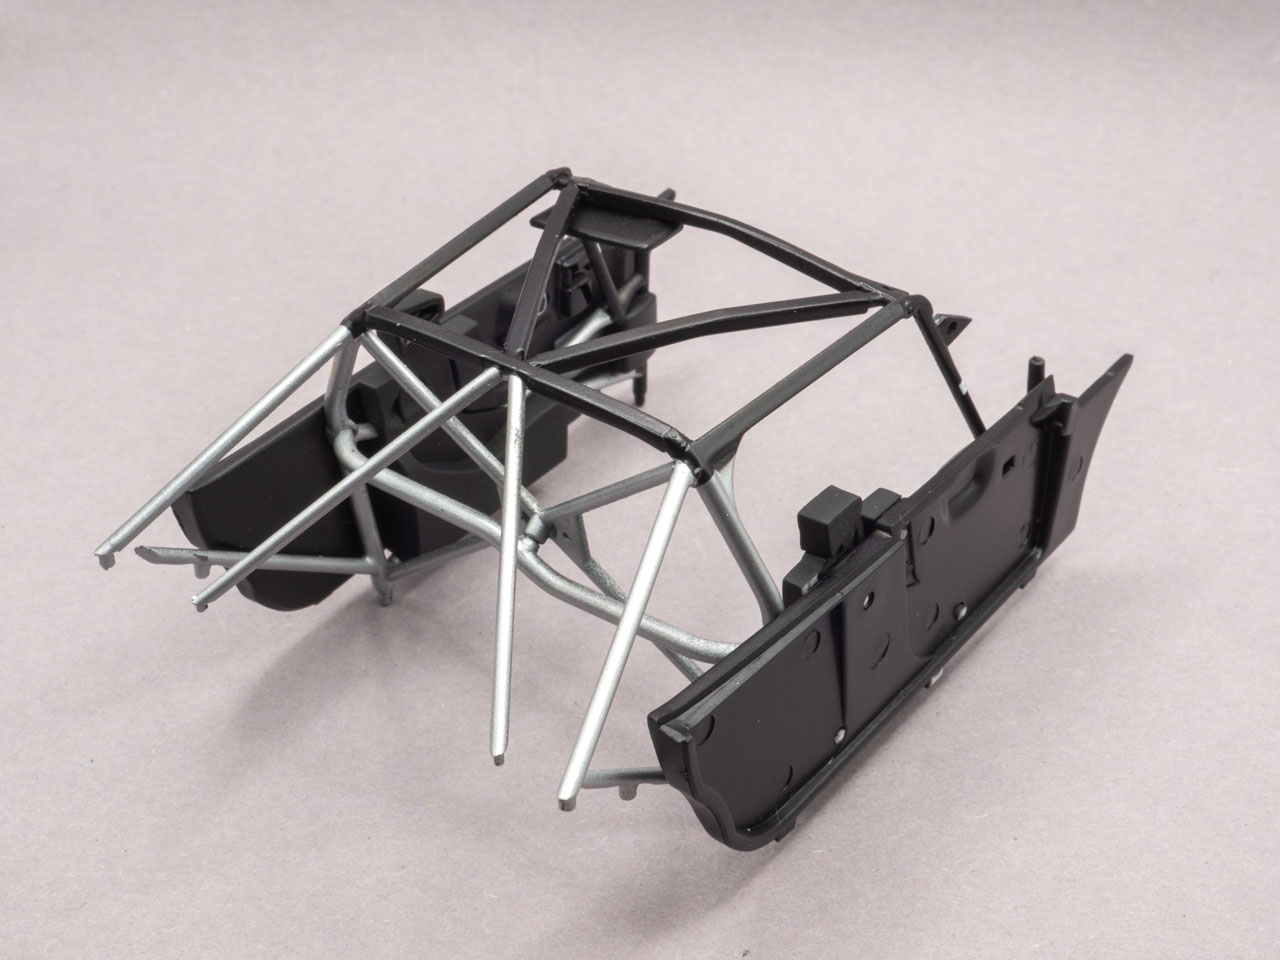
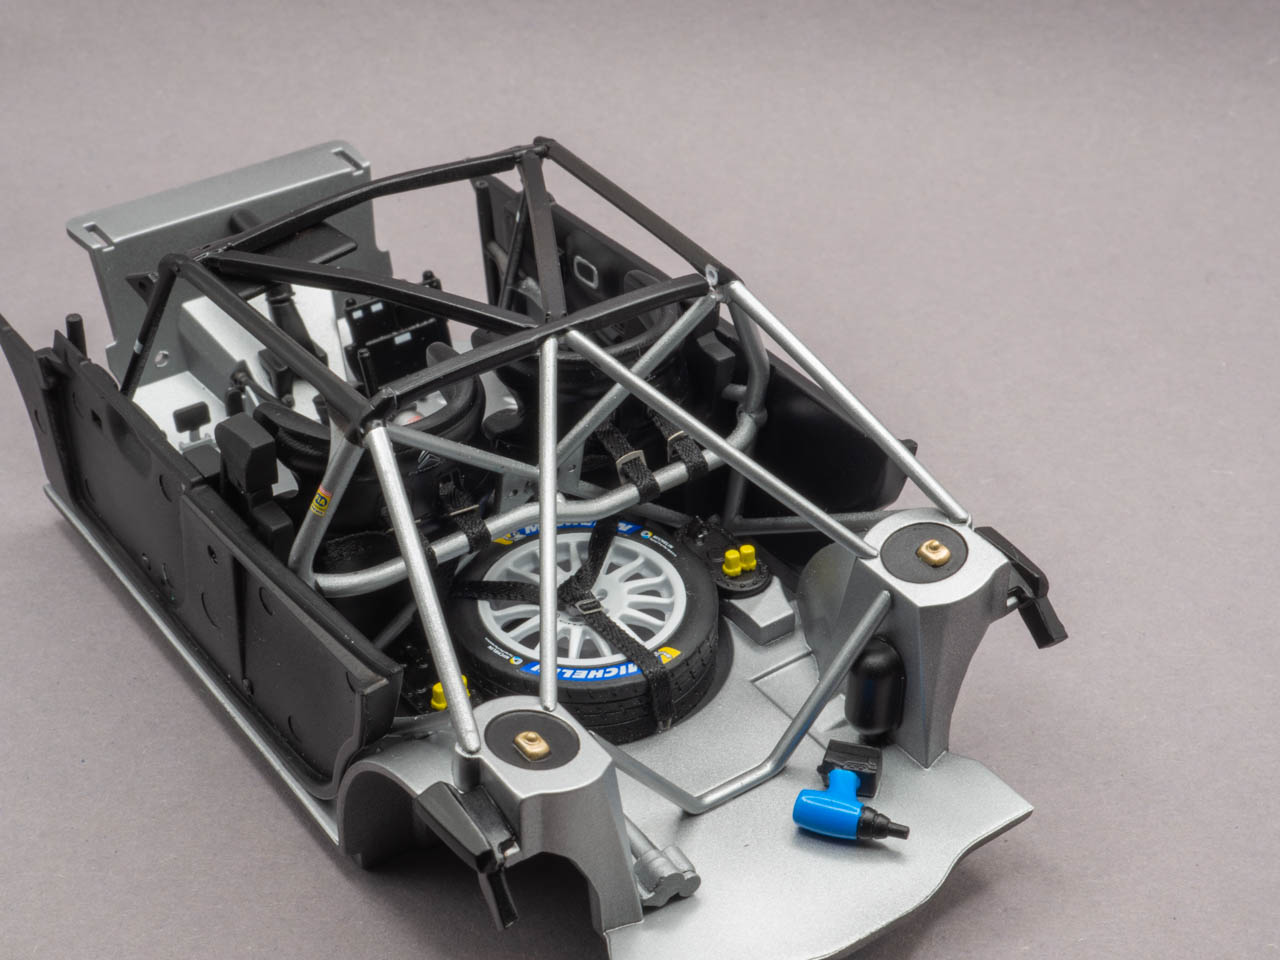
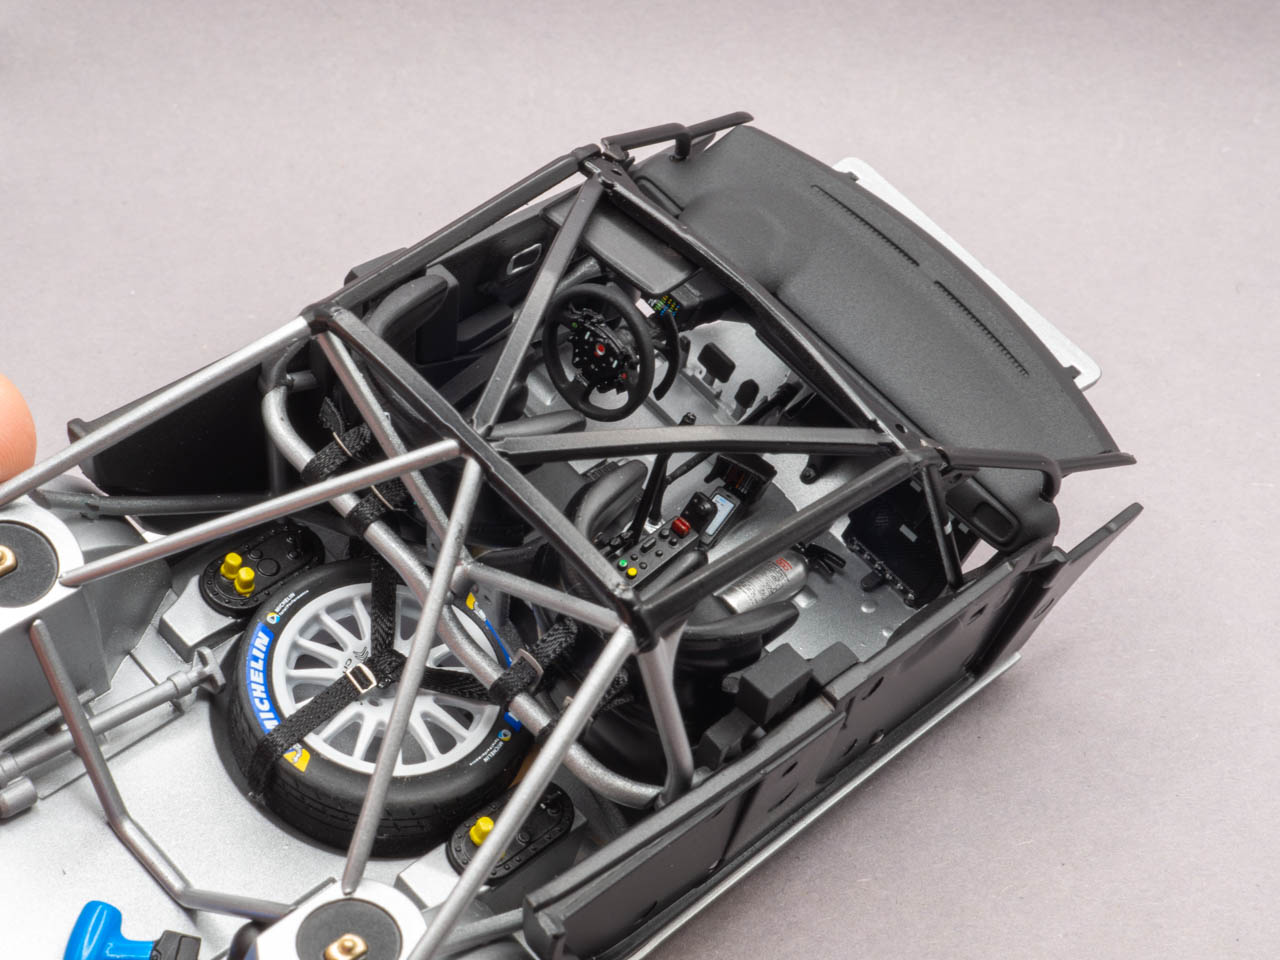
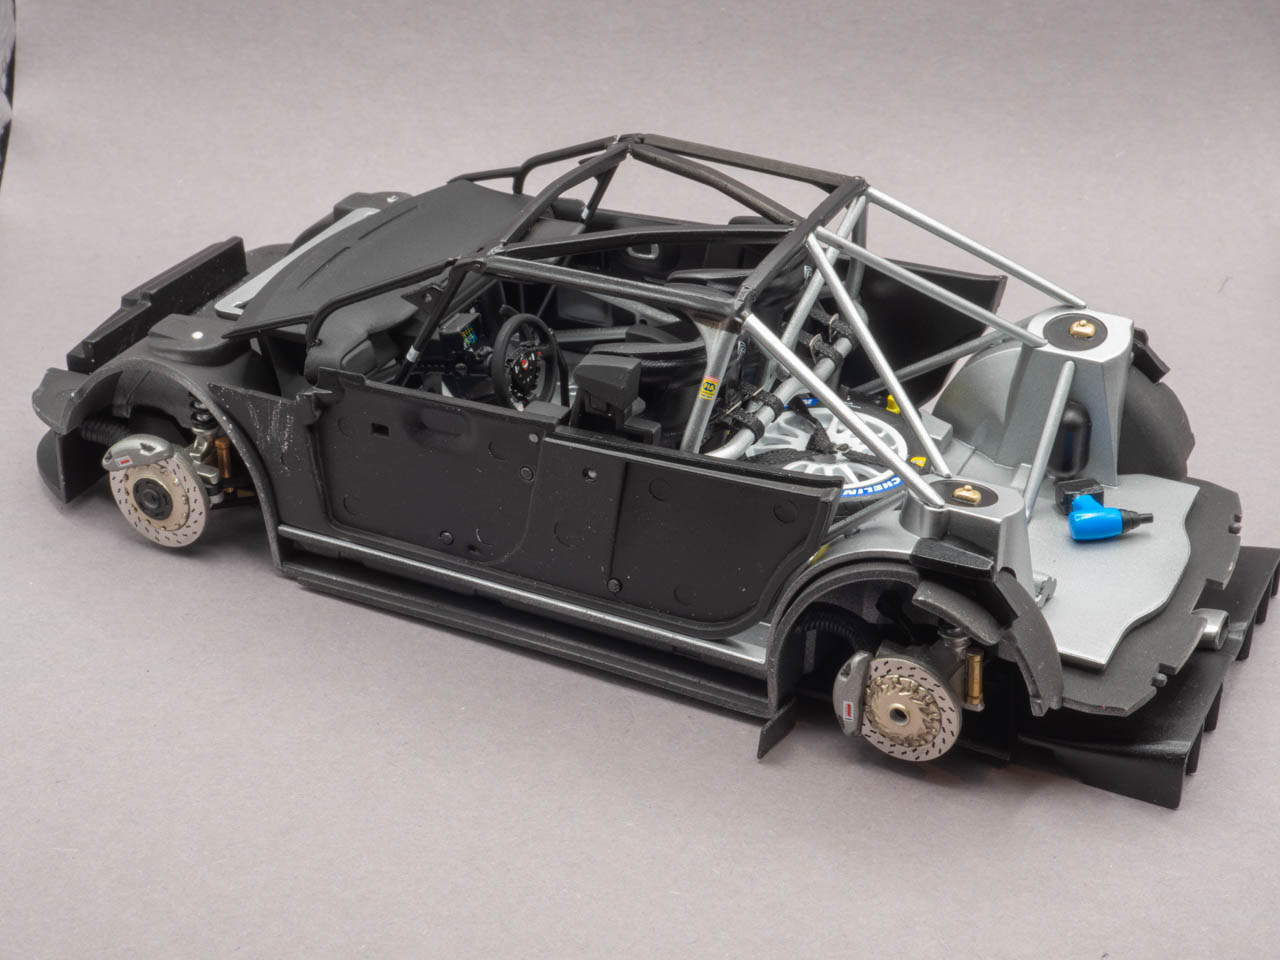
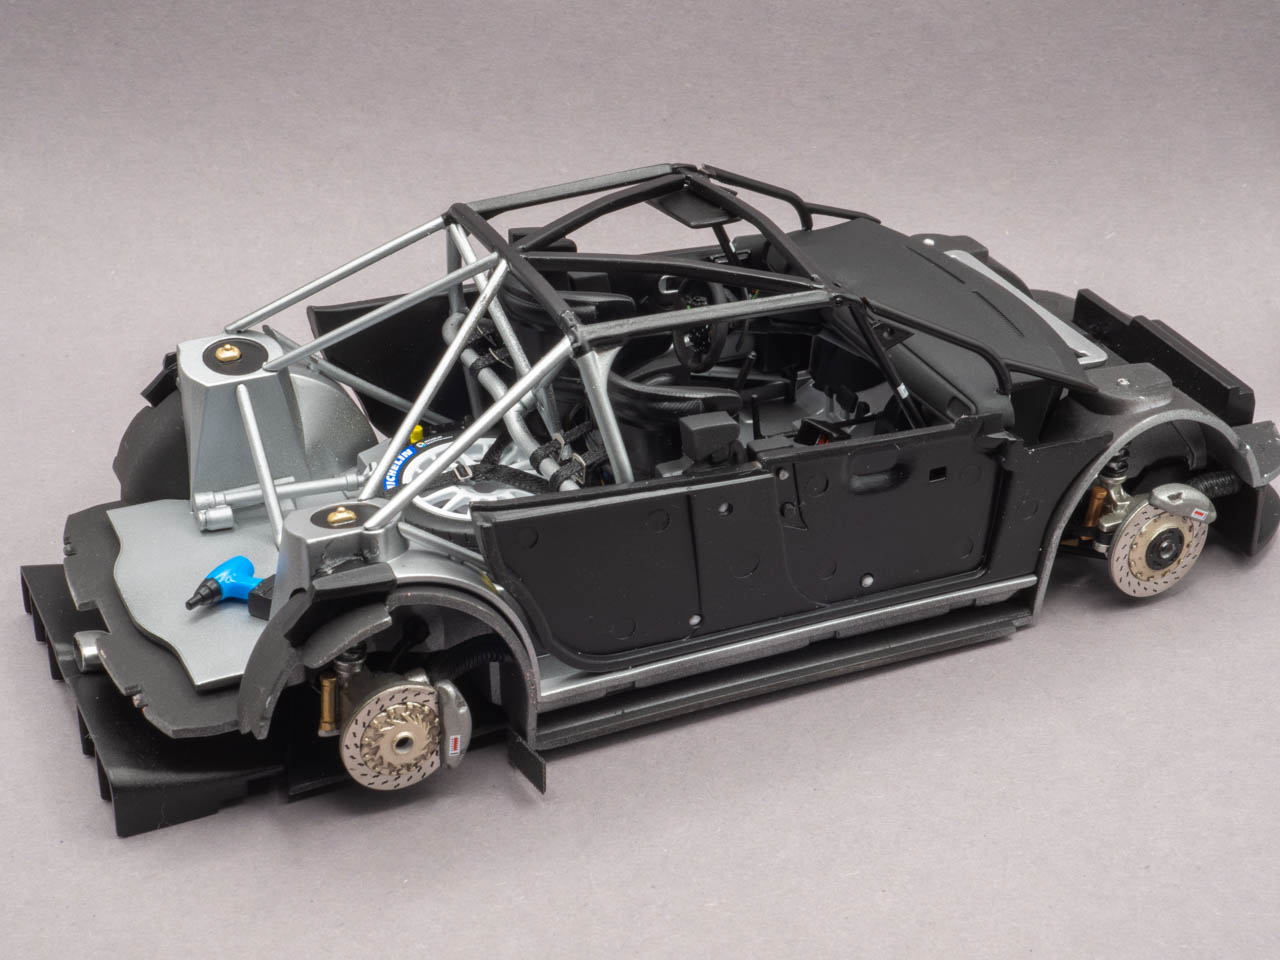
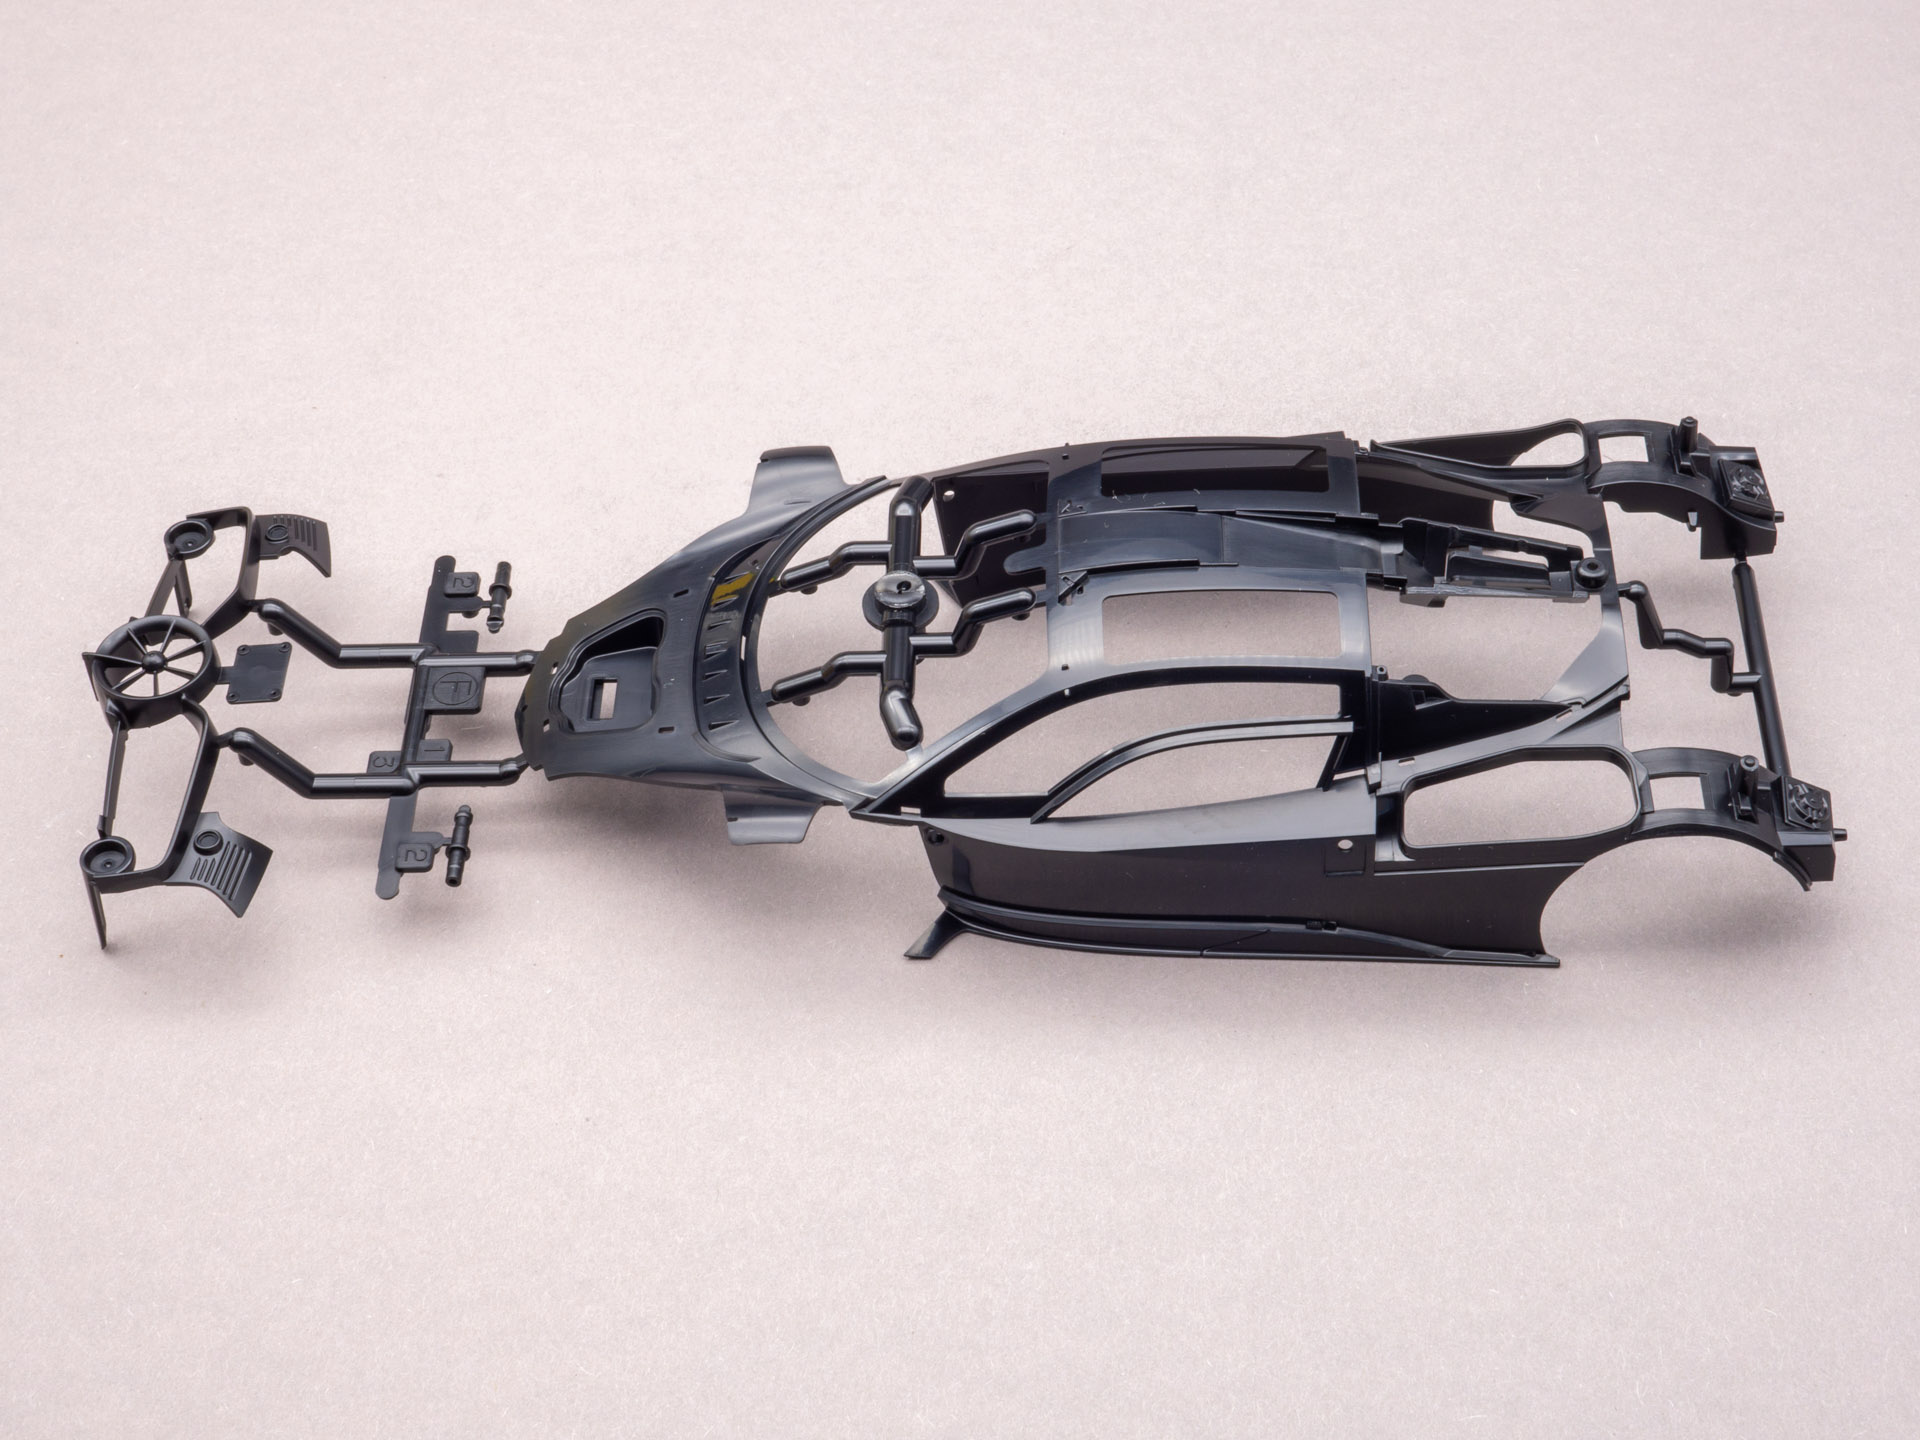
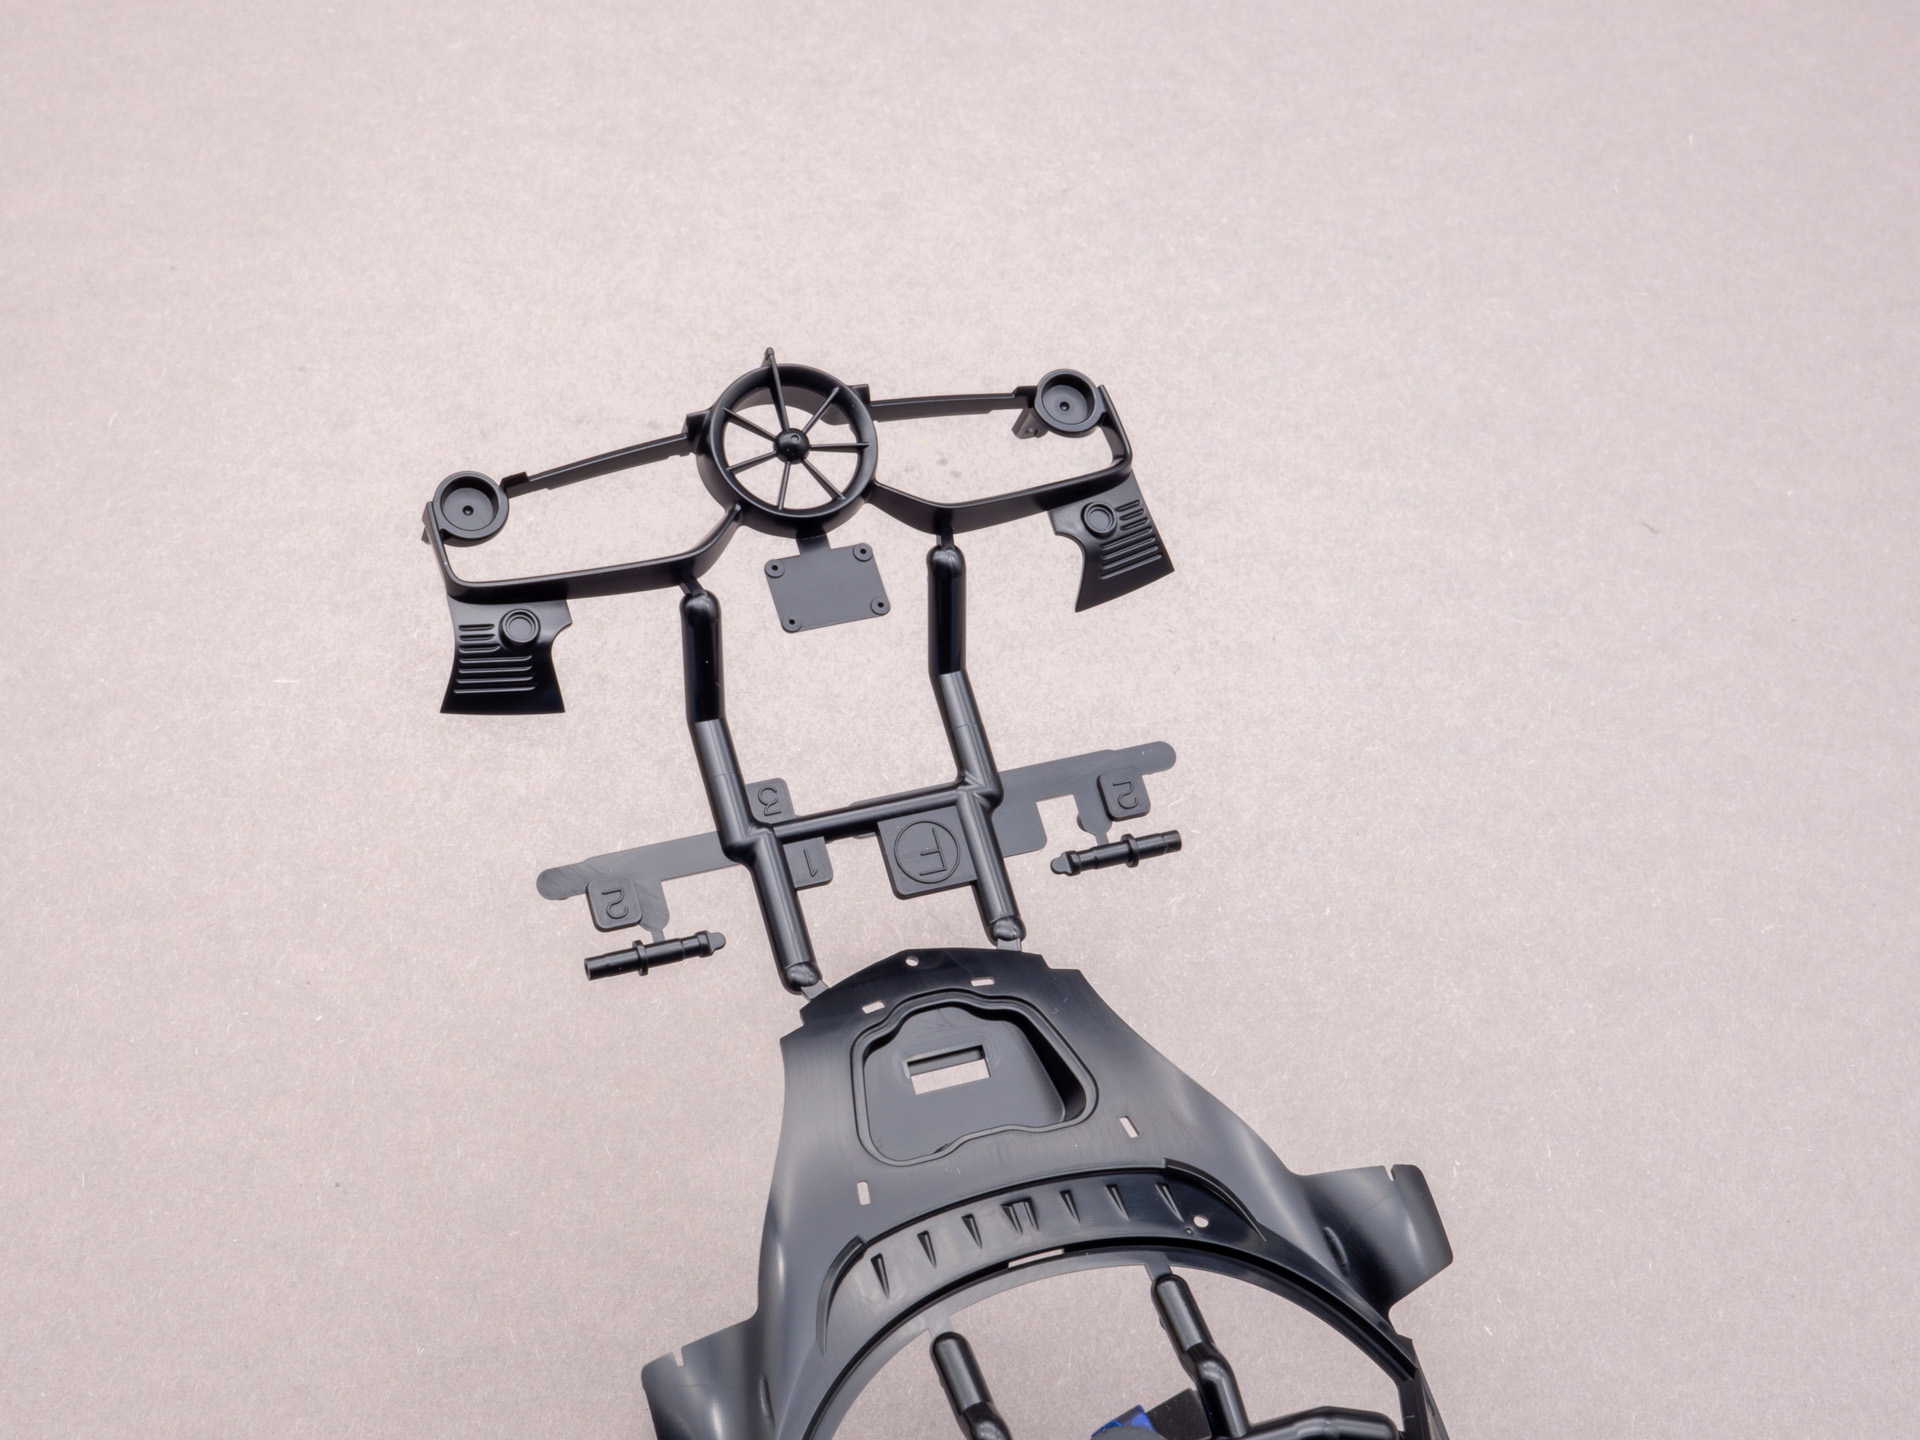
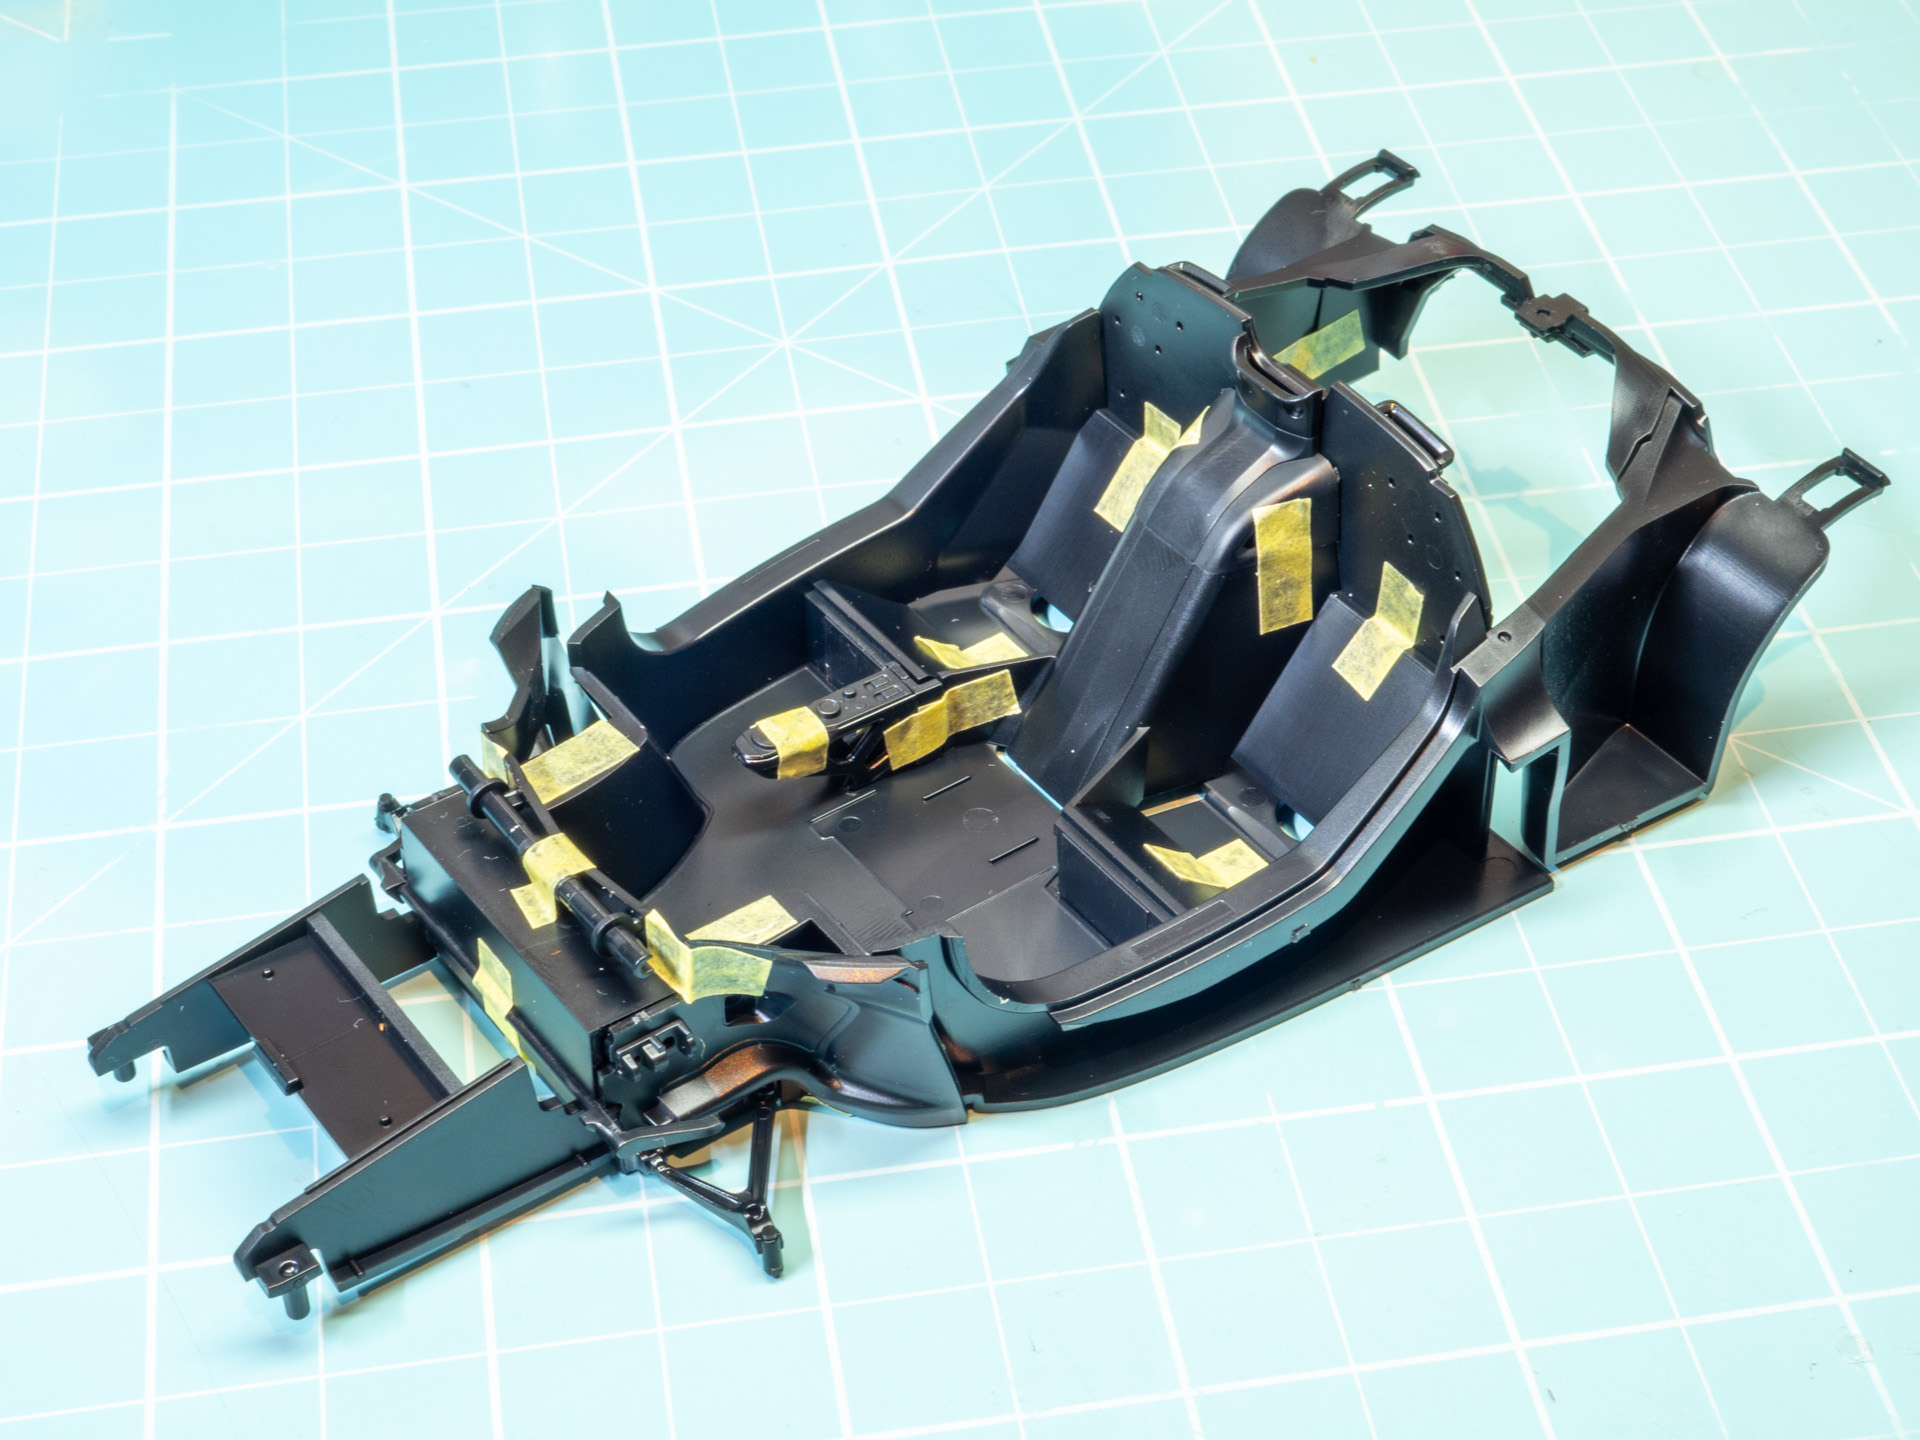
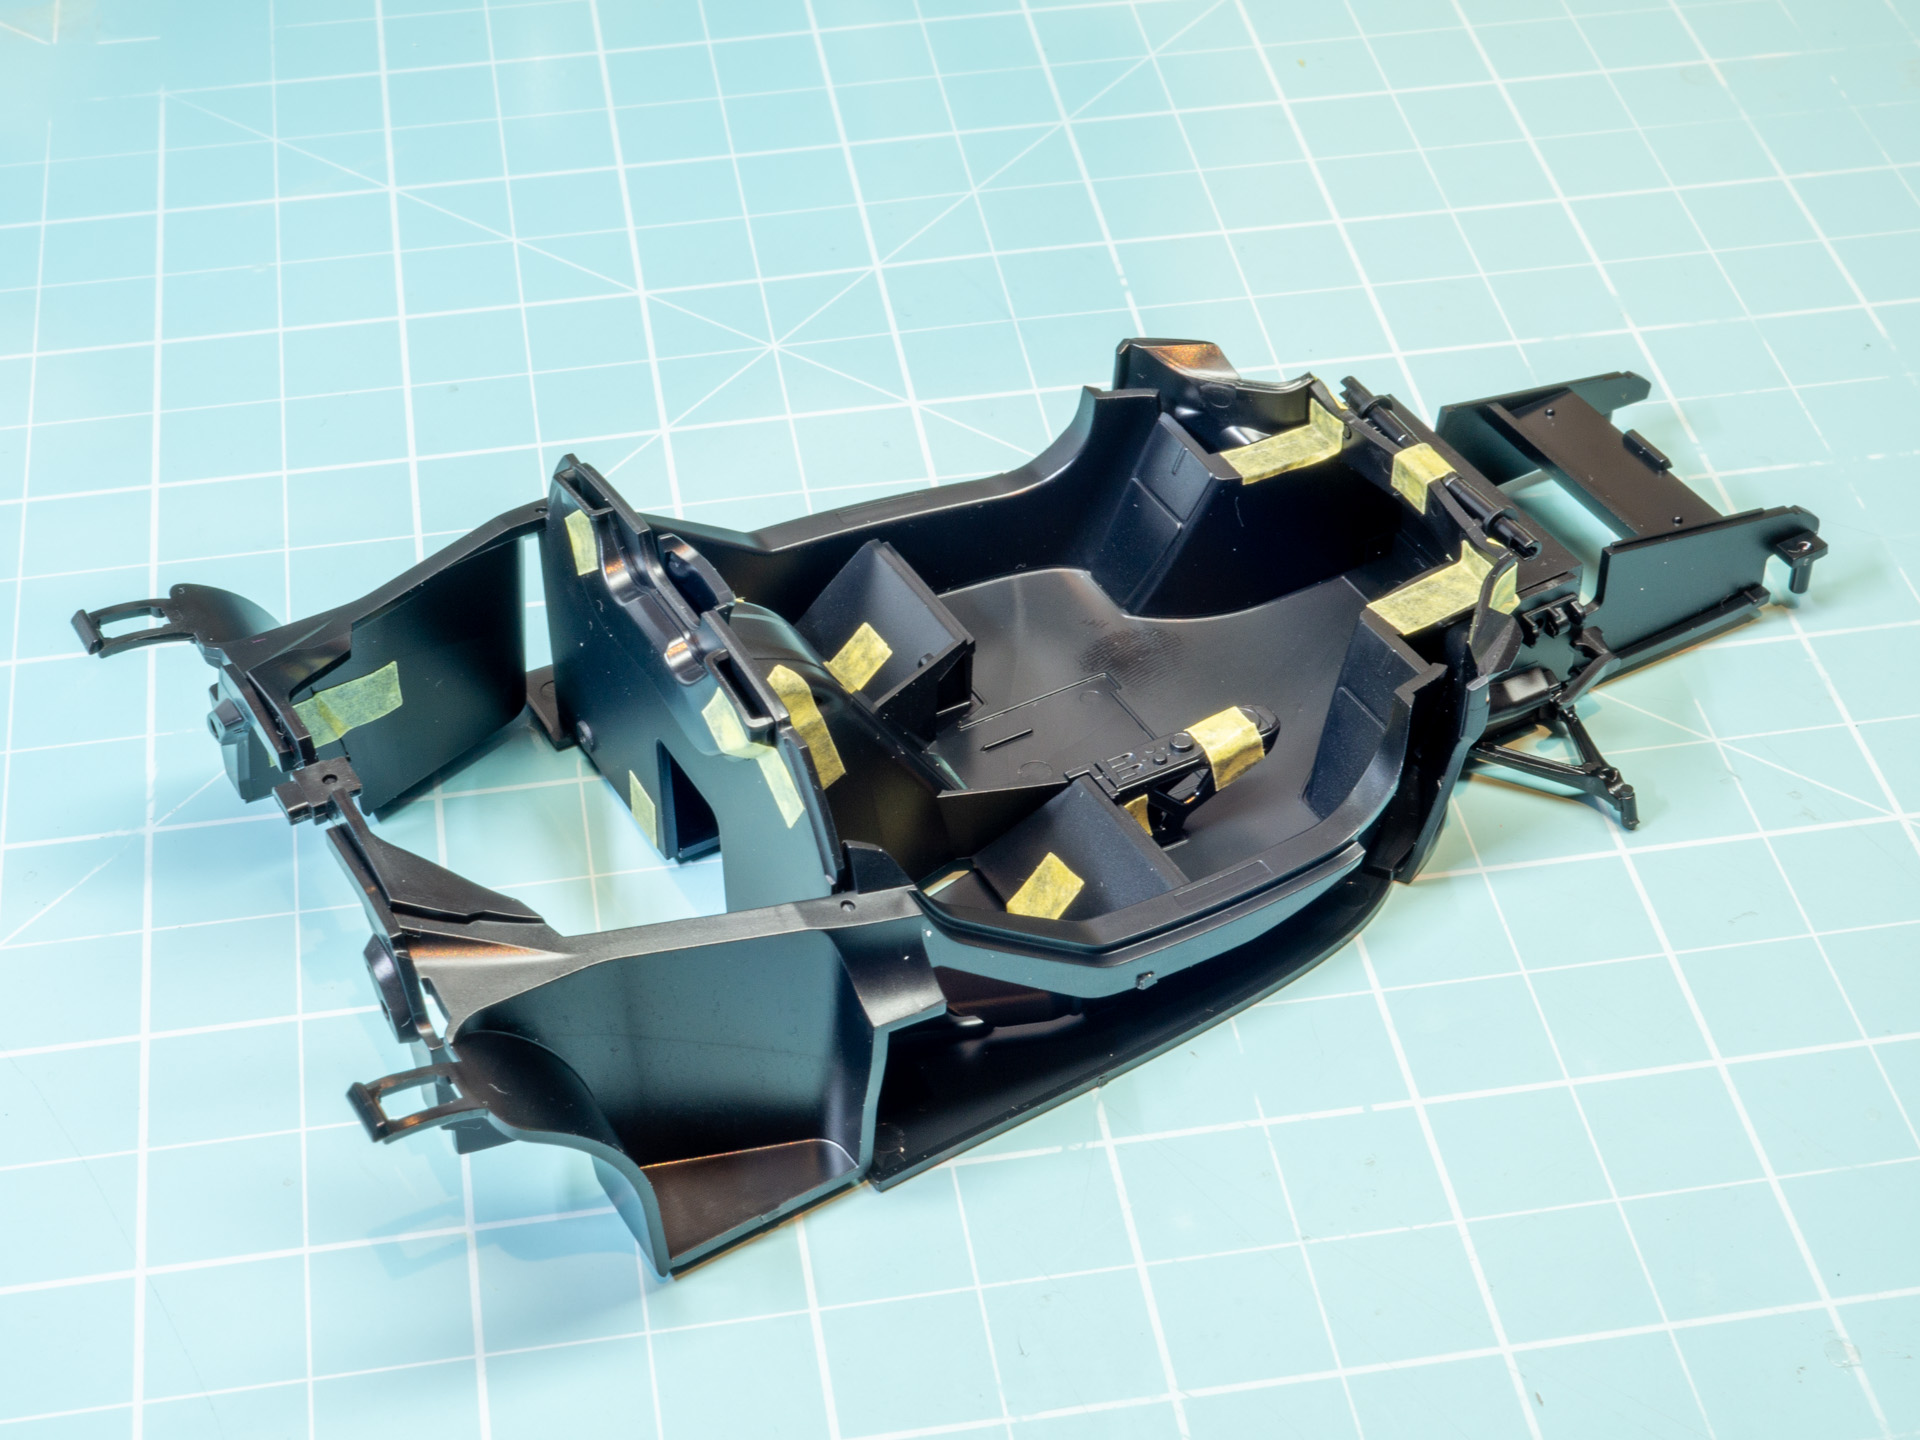
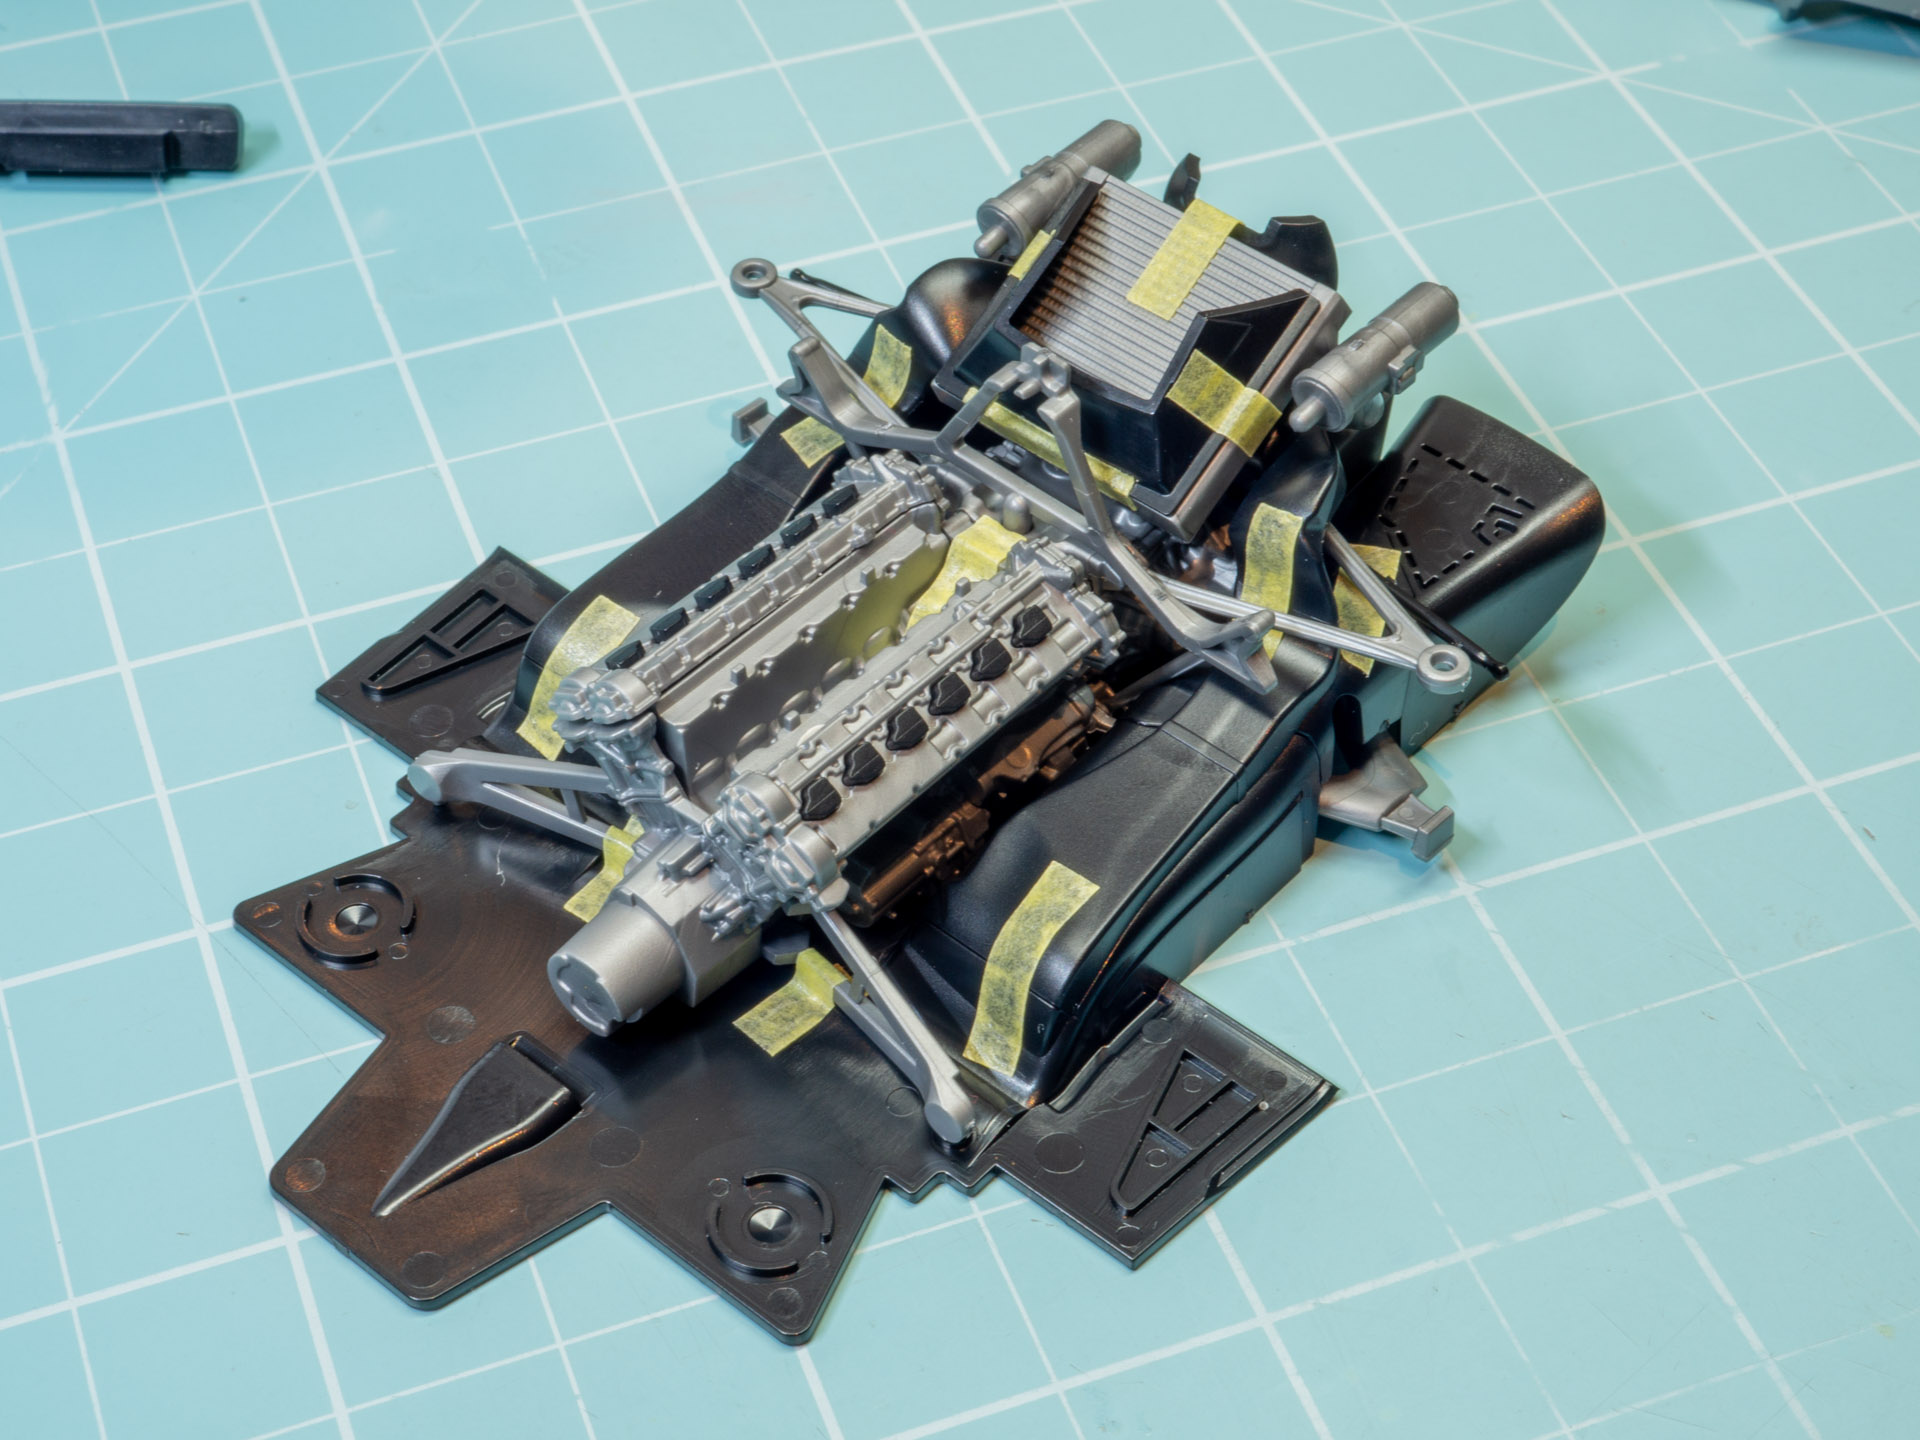
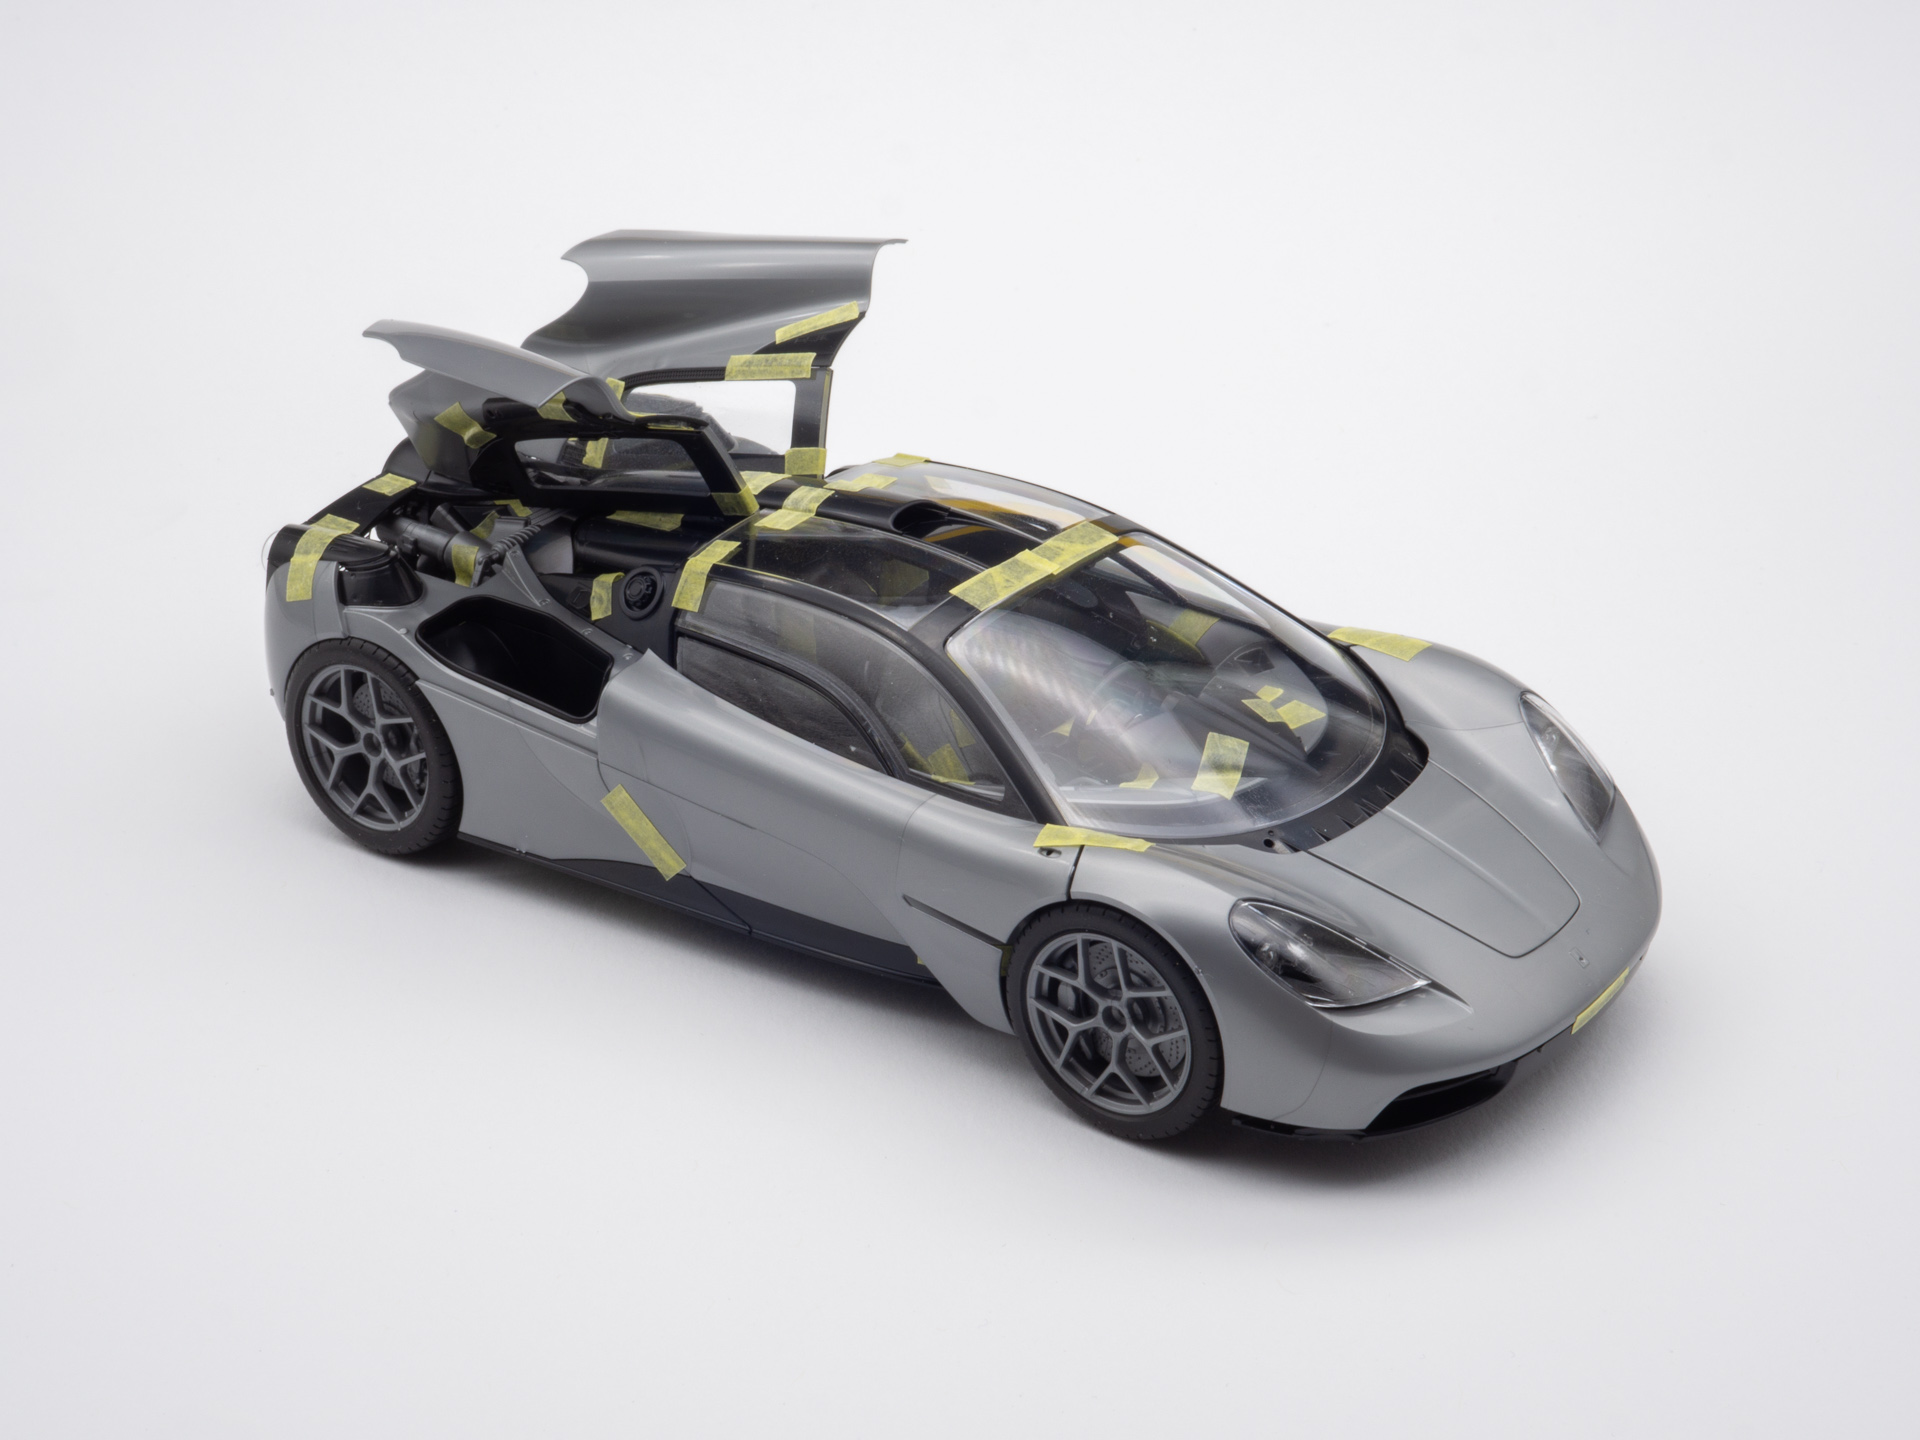
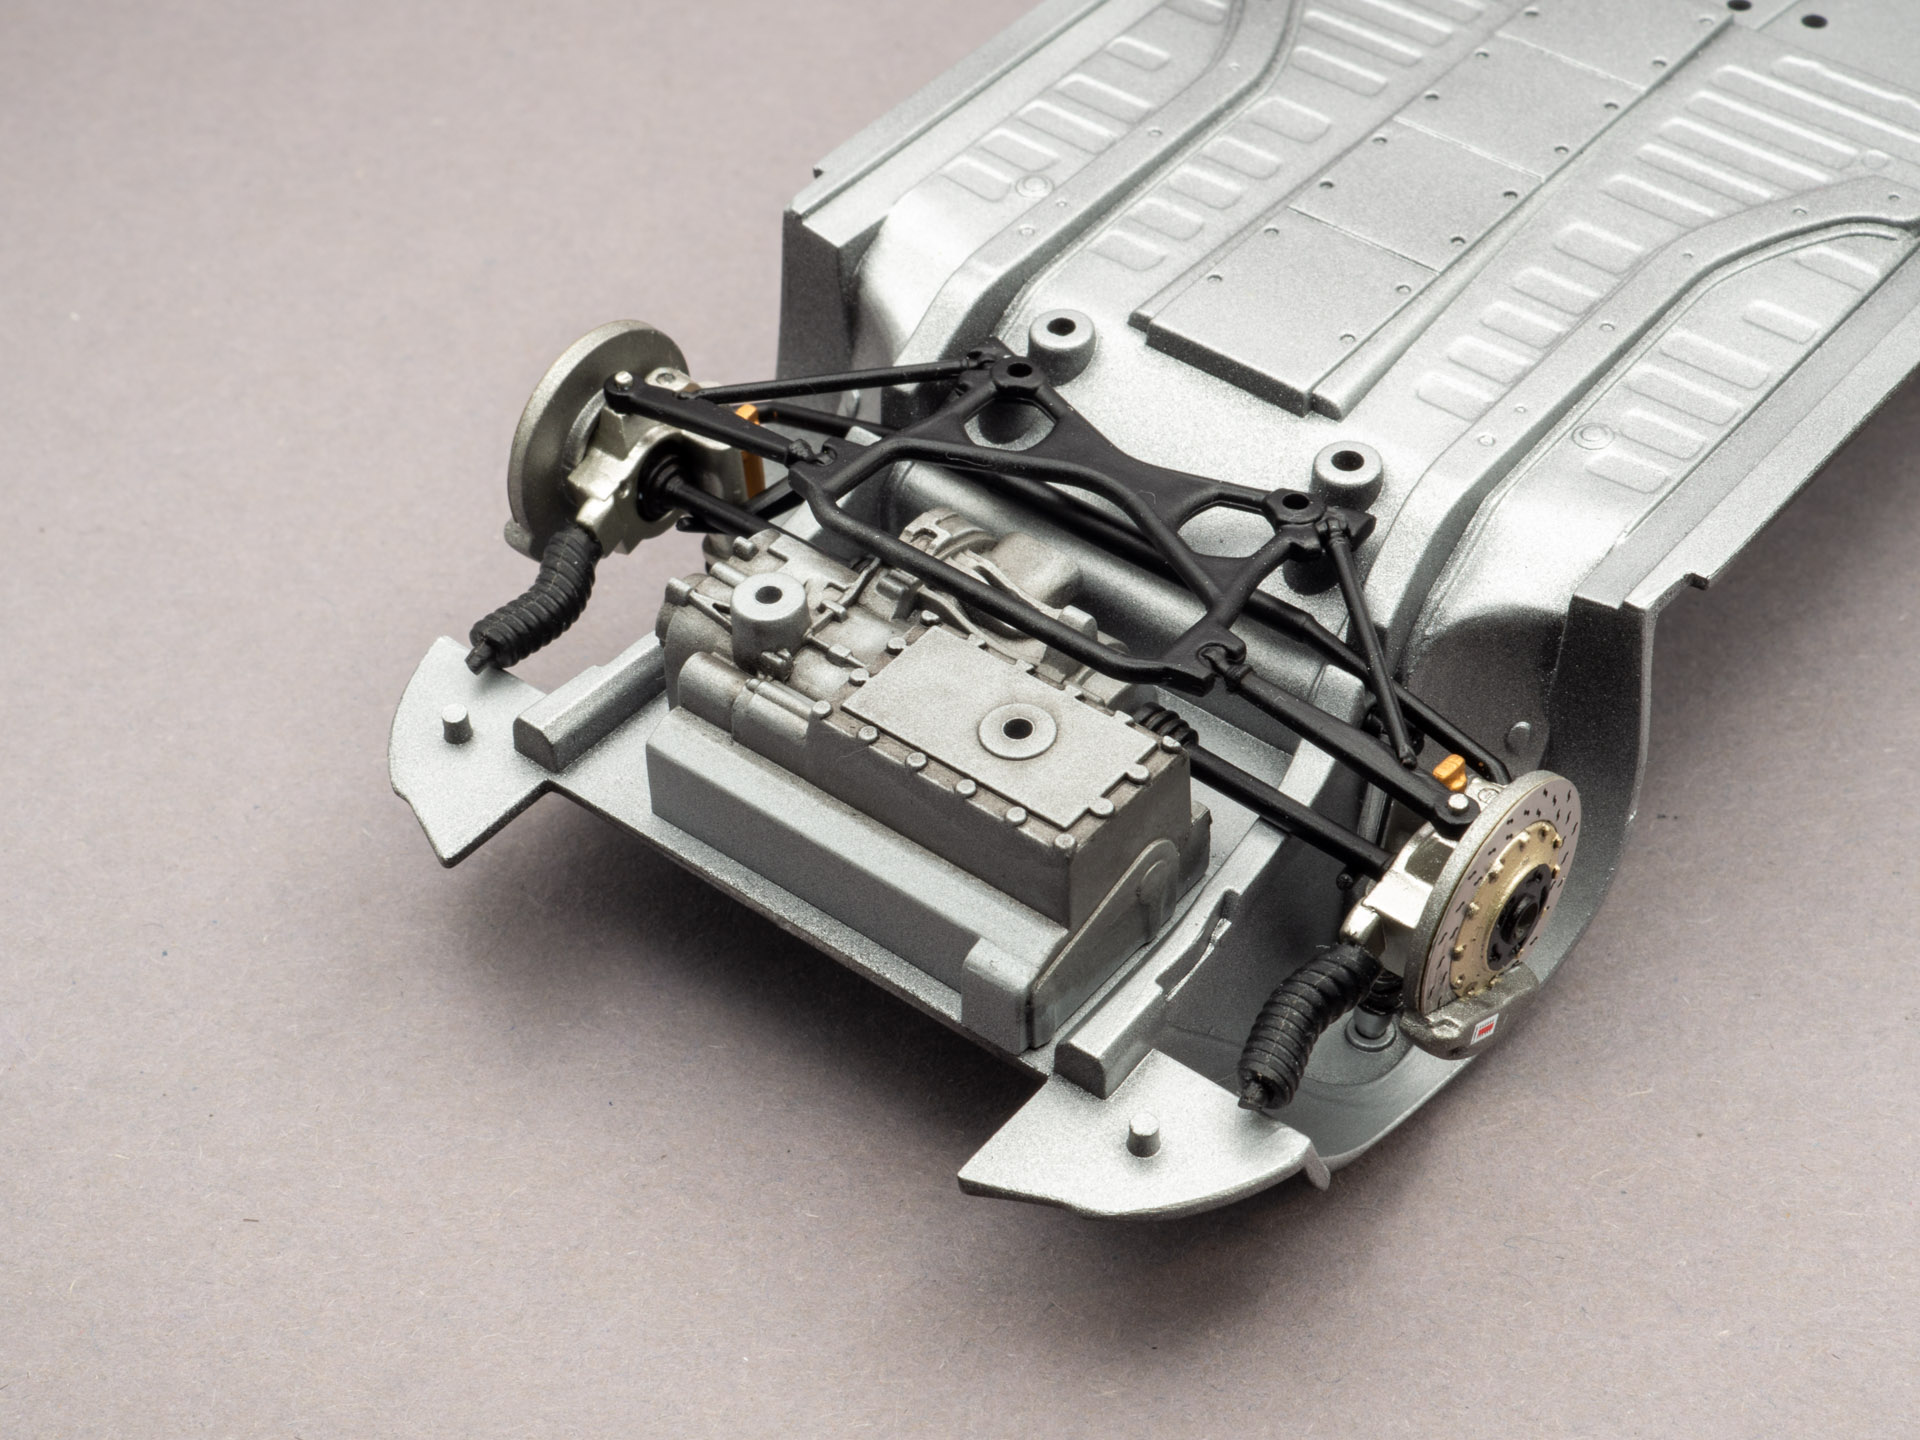
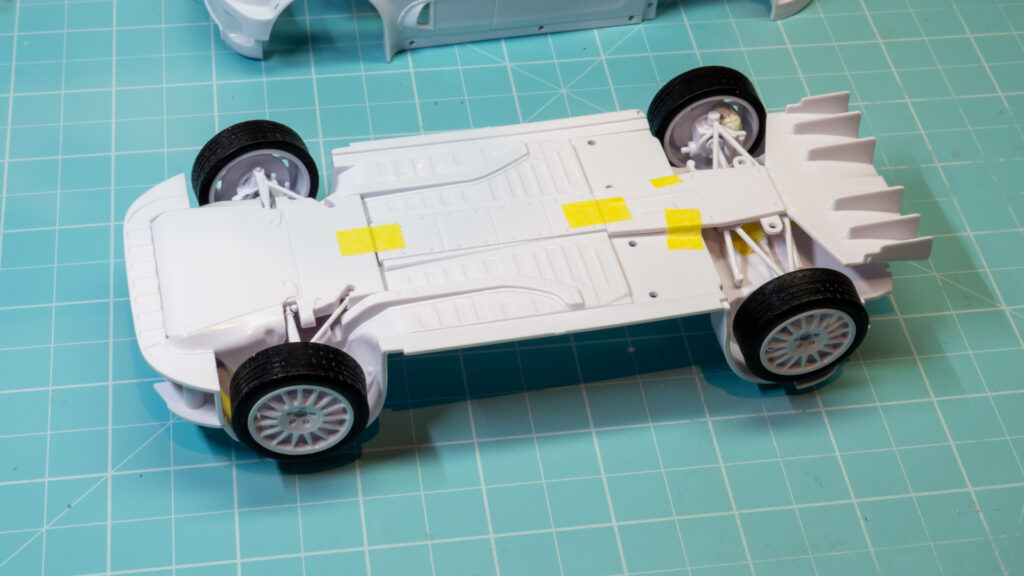
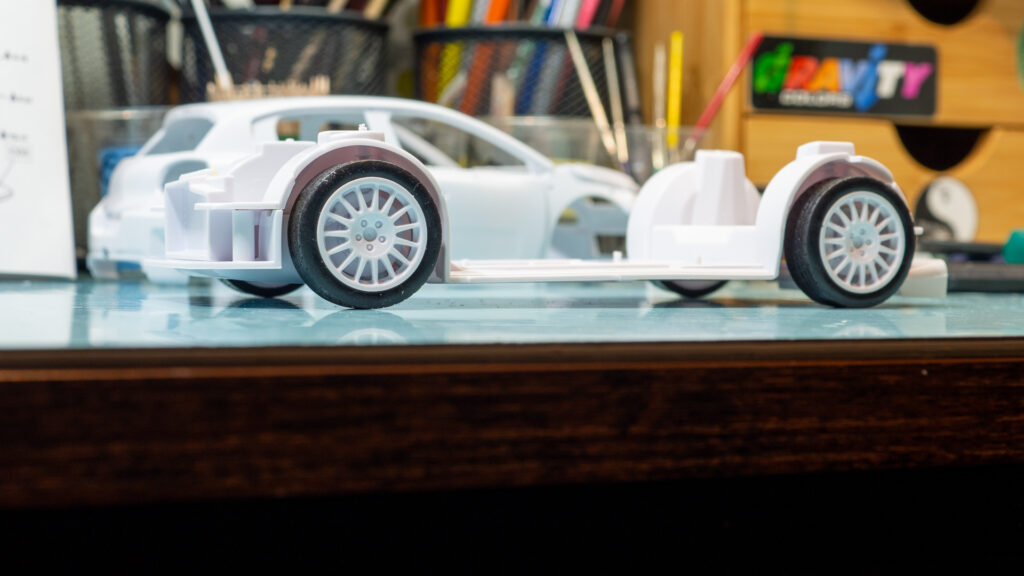
    And now quick build on the tape. Assembled the lower part. Typical Revell scheme of bottom part + arches.

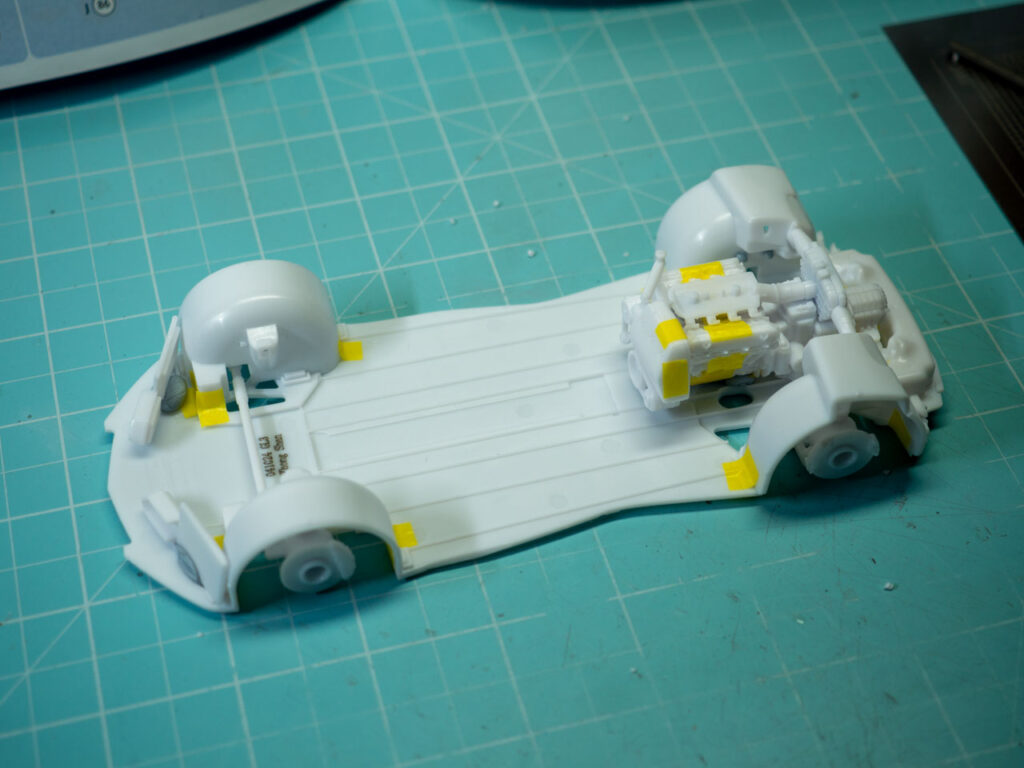
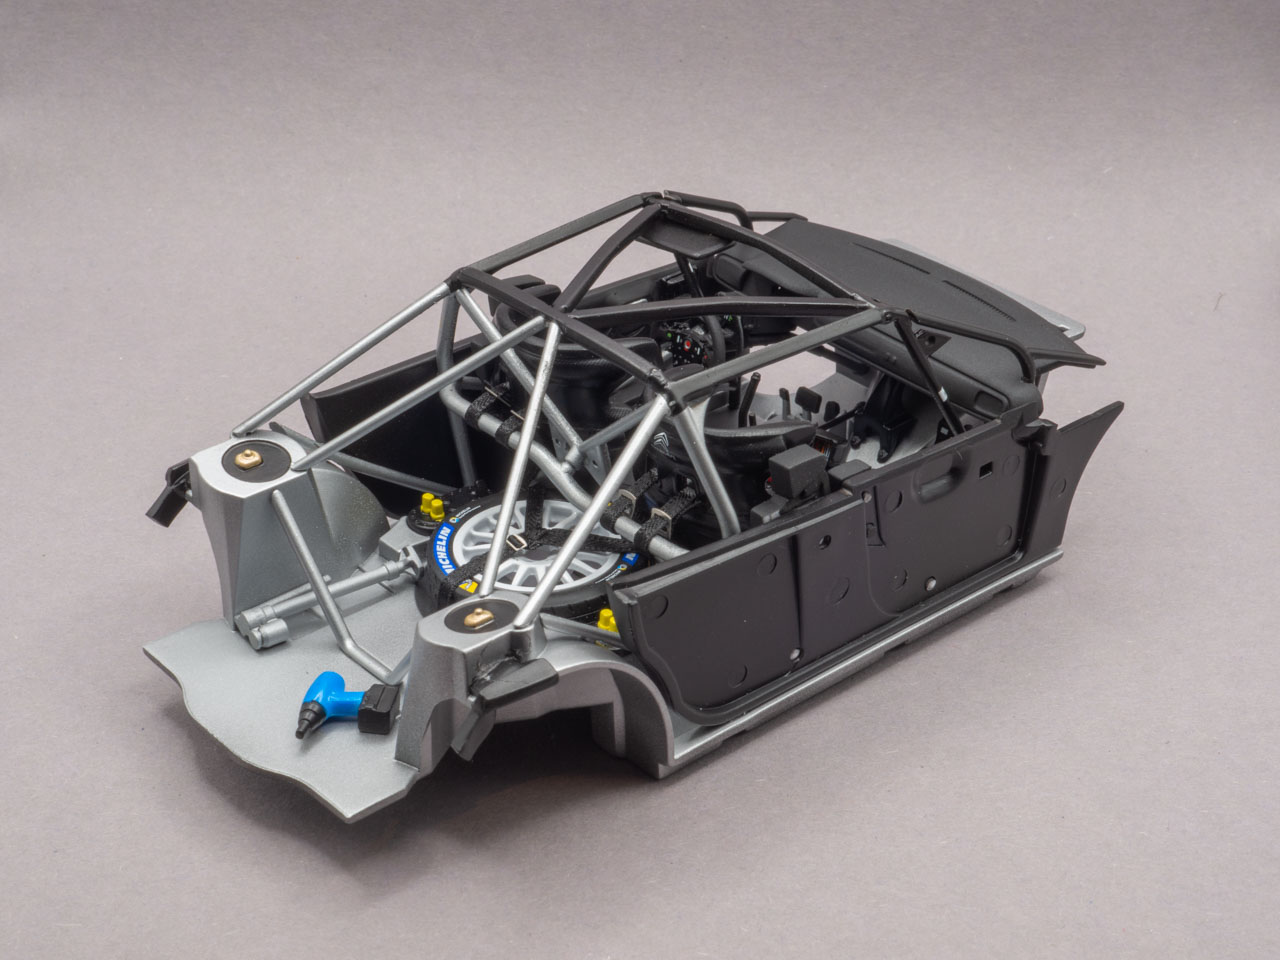
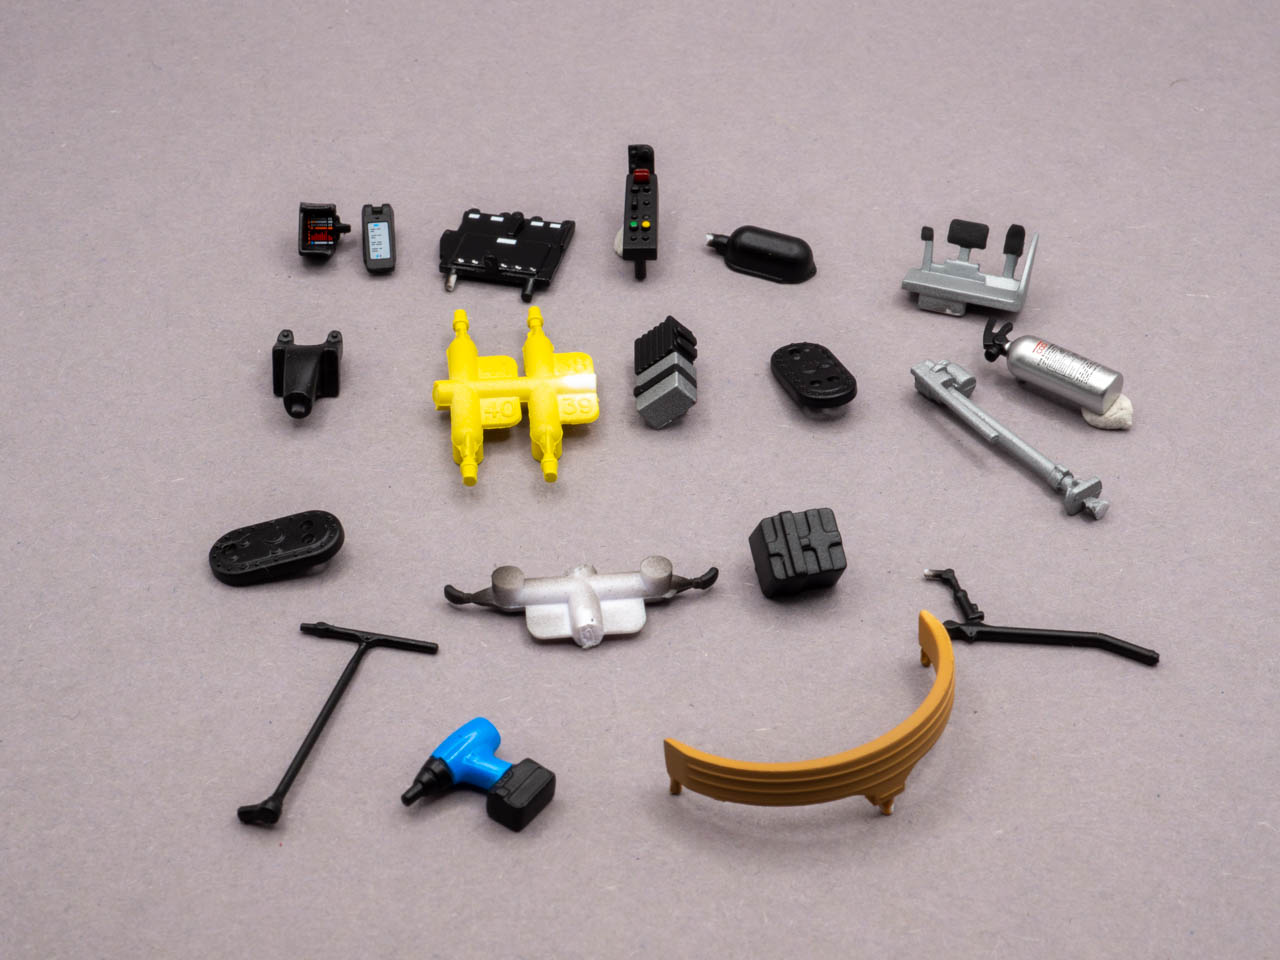
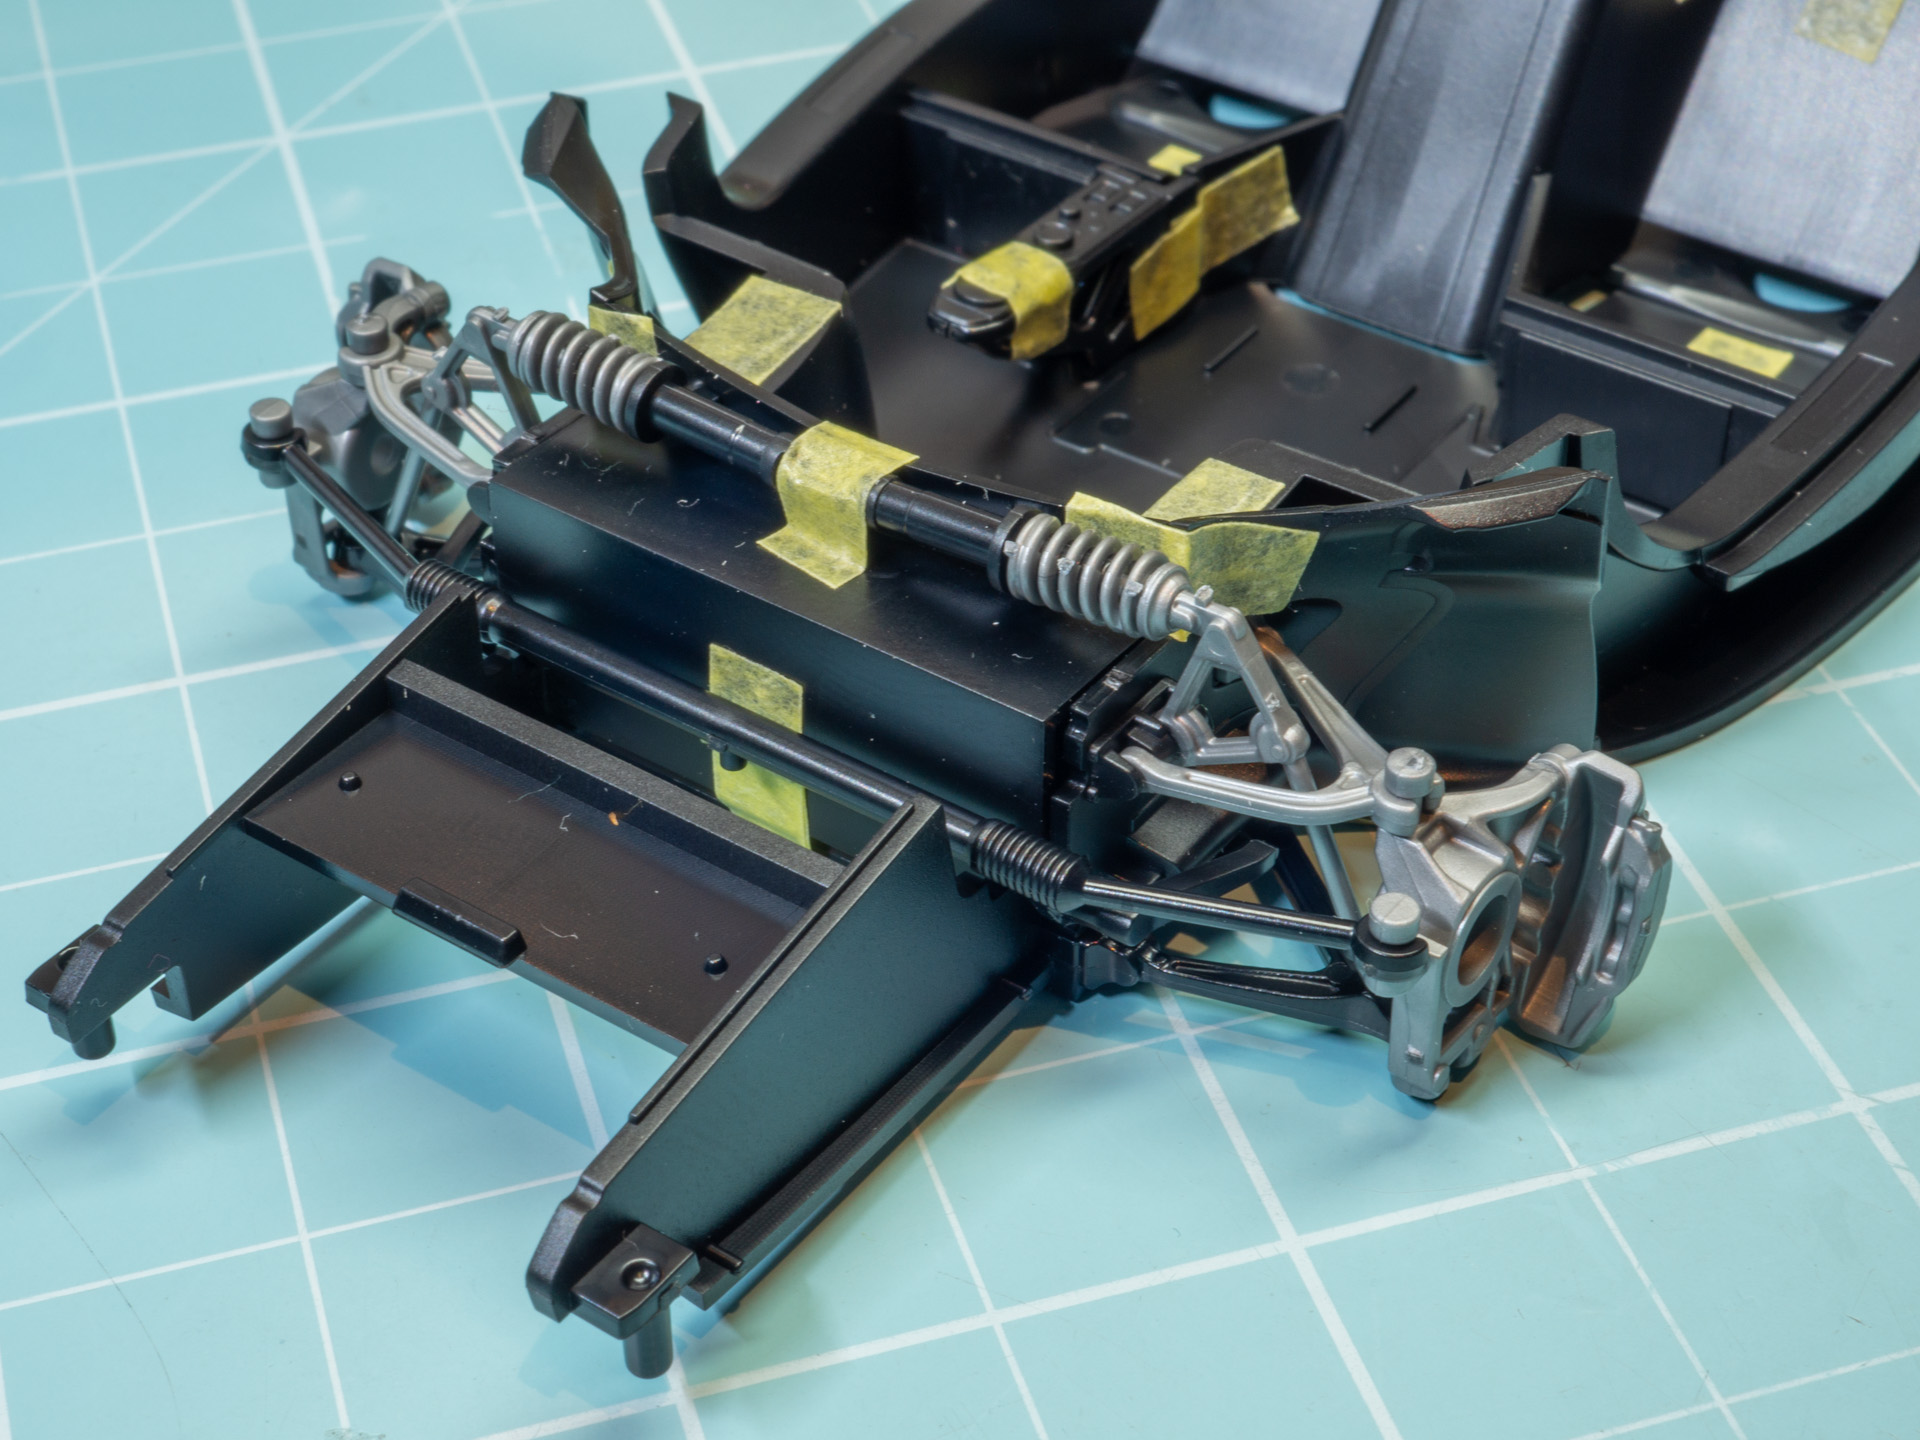
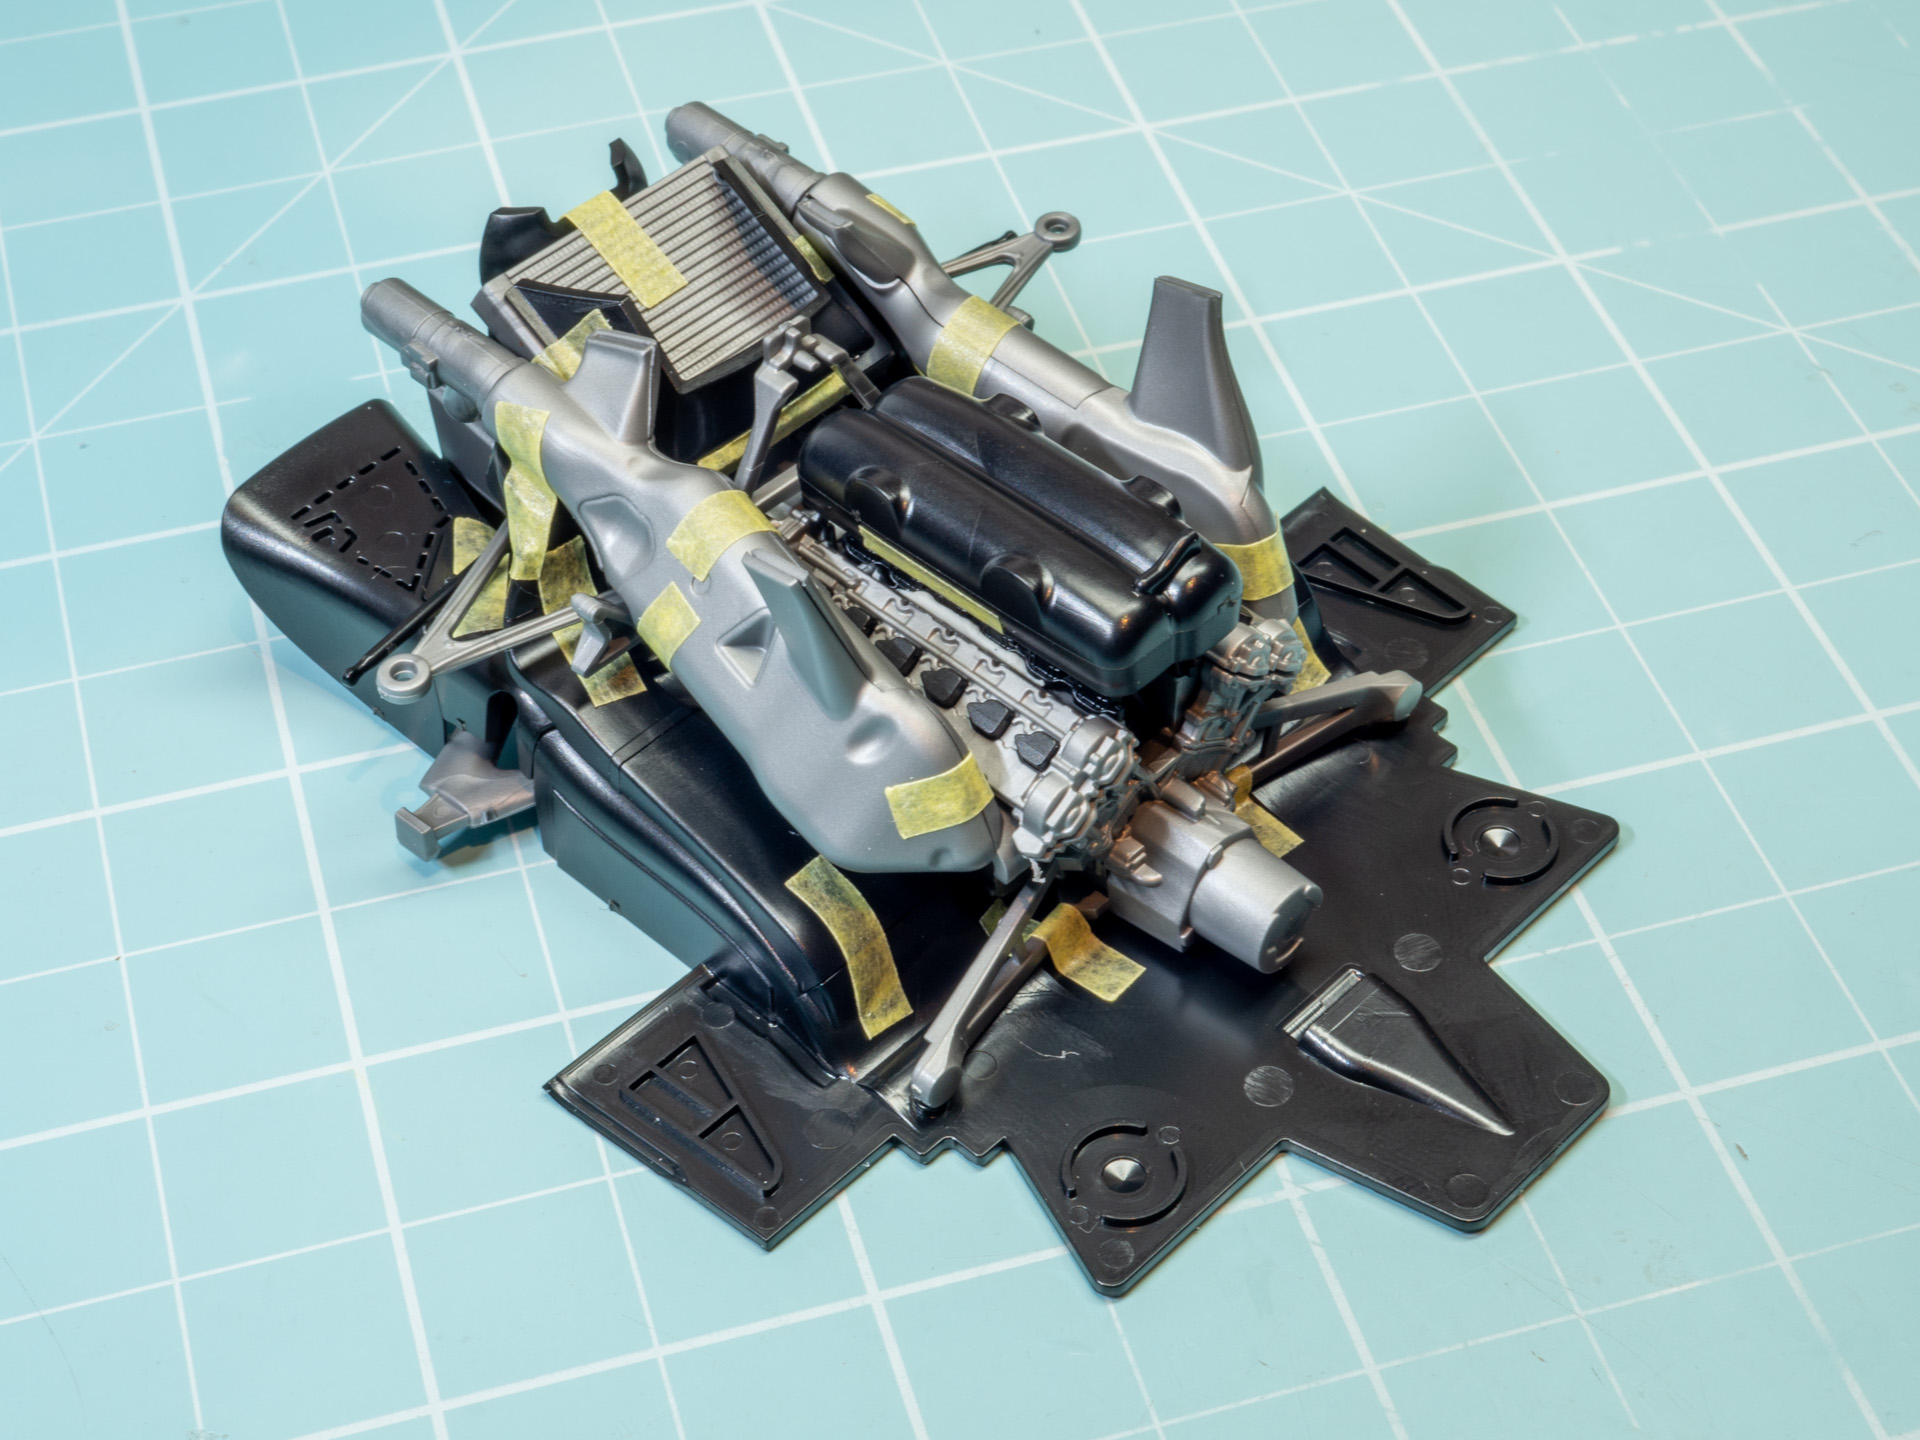
    Of course, not all the parts are on the engine here. But it is clear visible what is where.

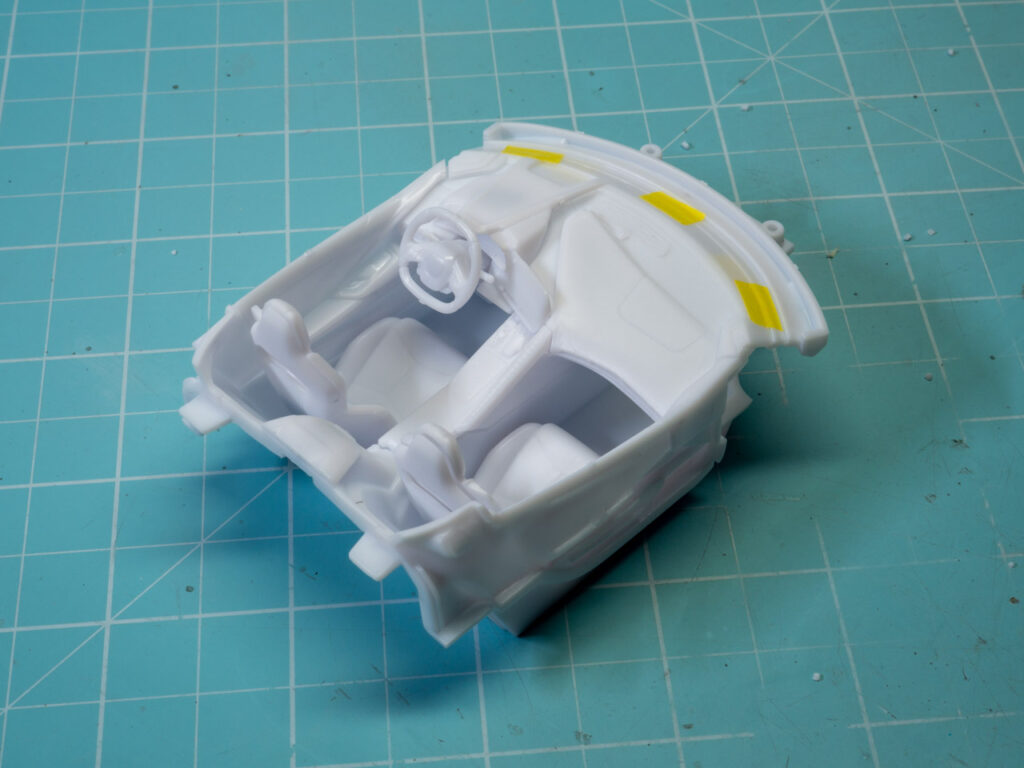
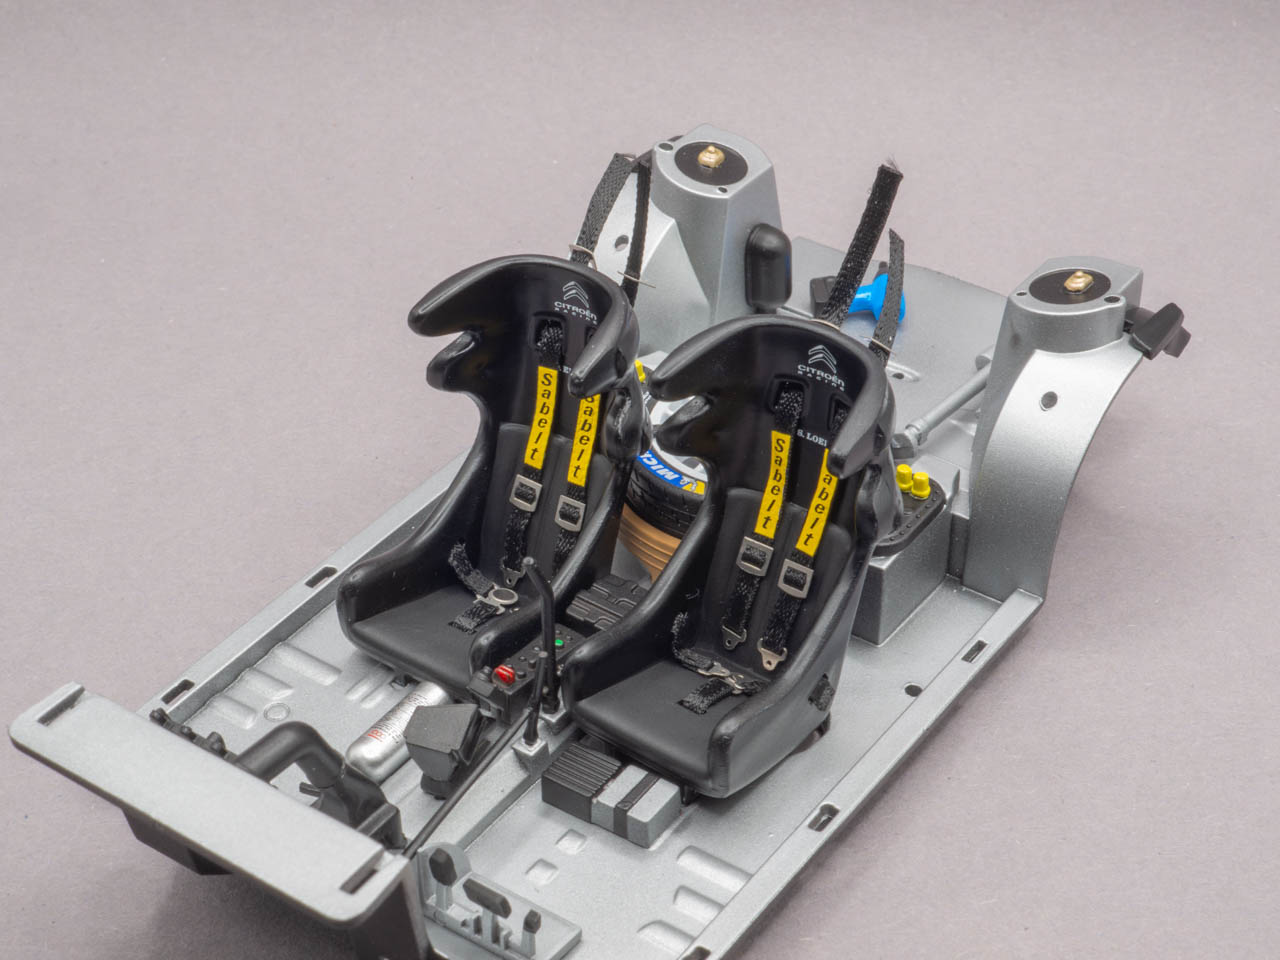
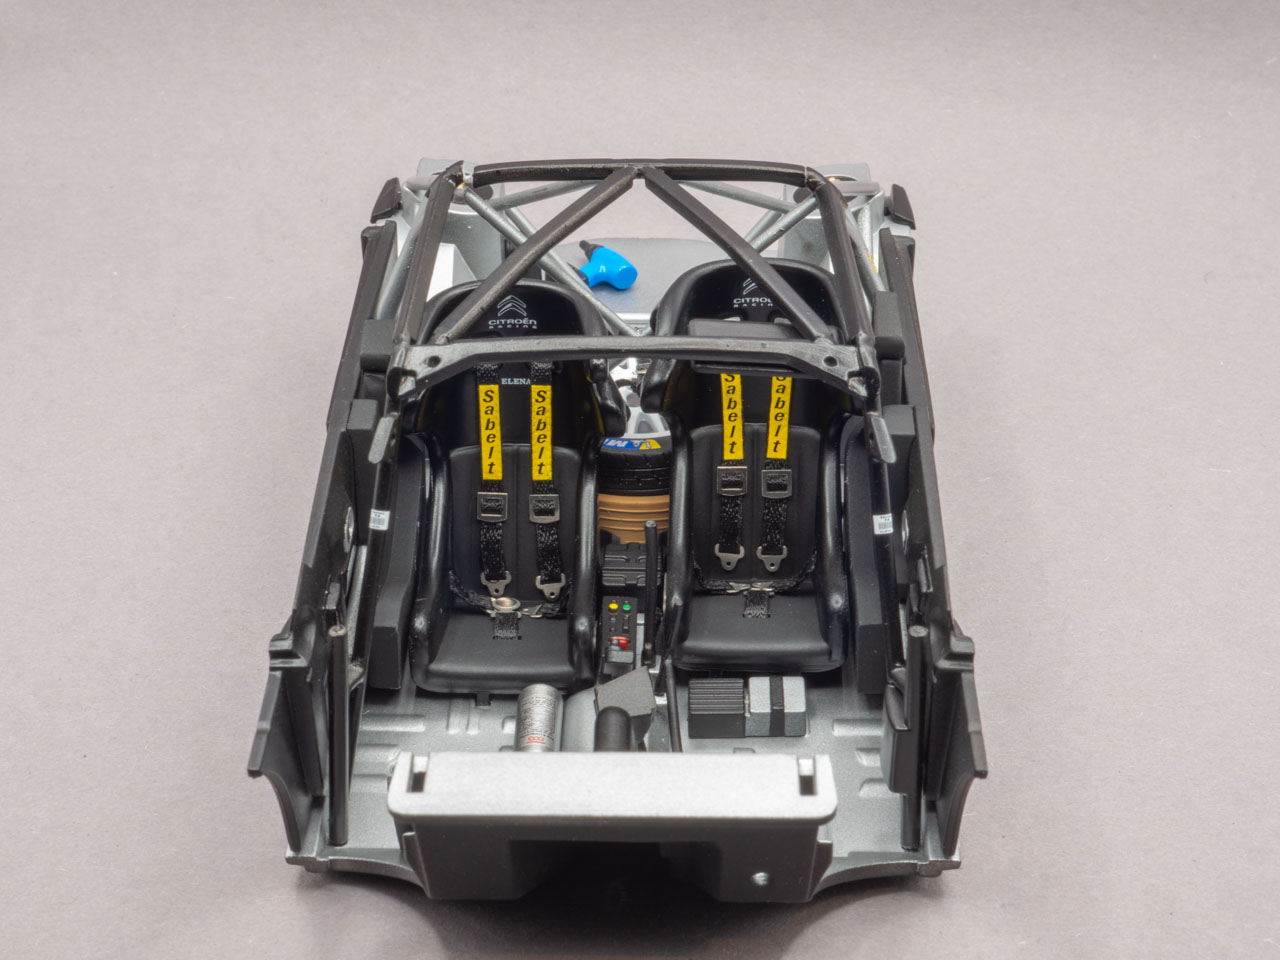
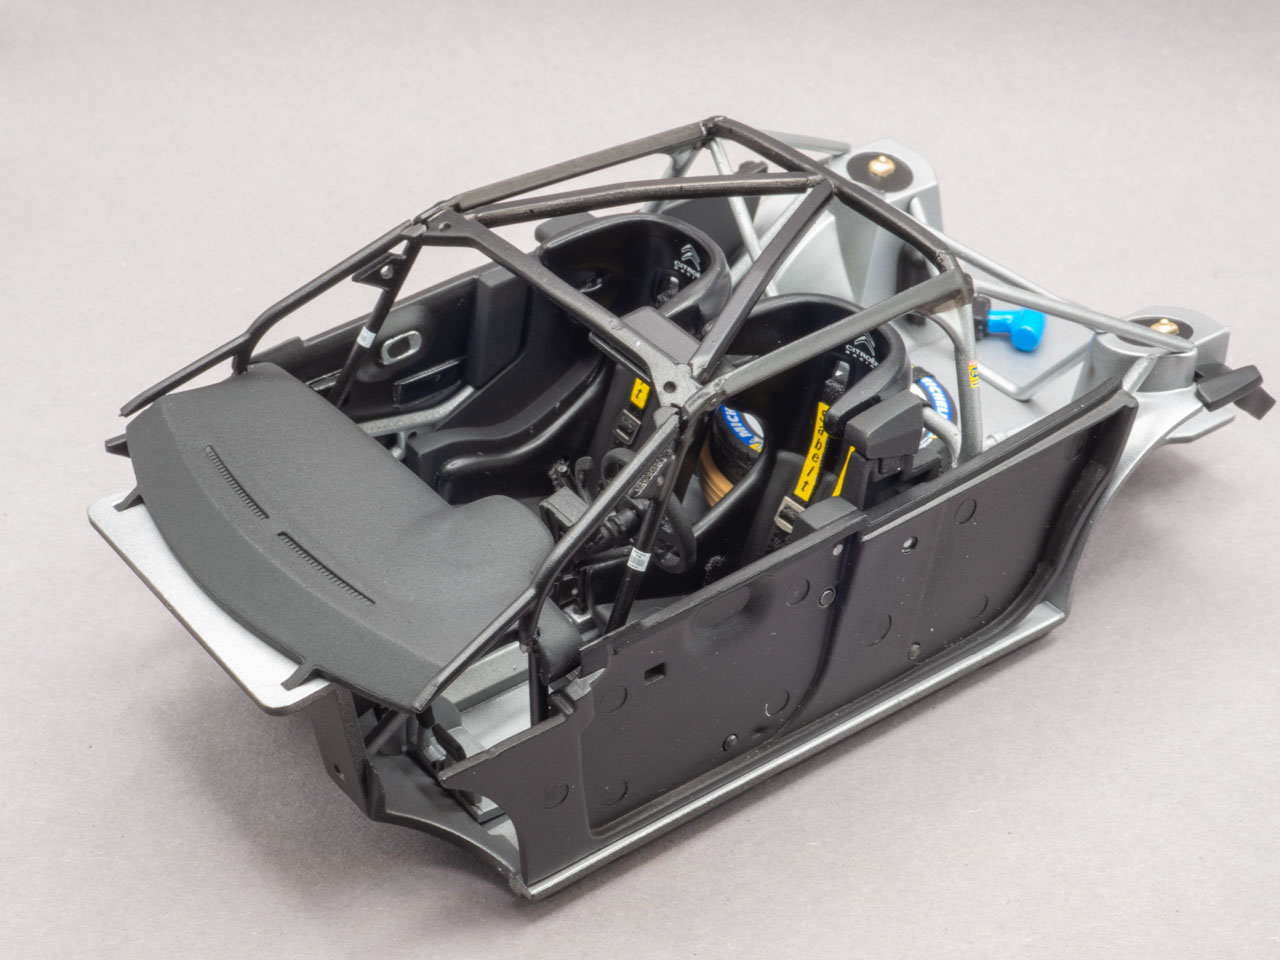
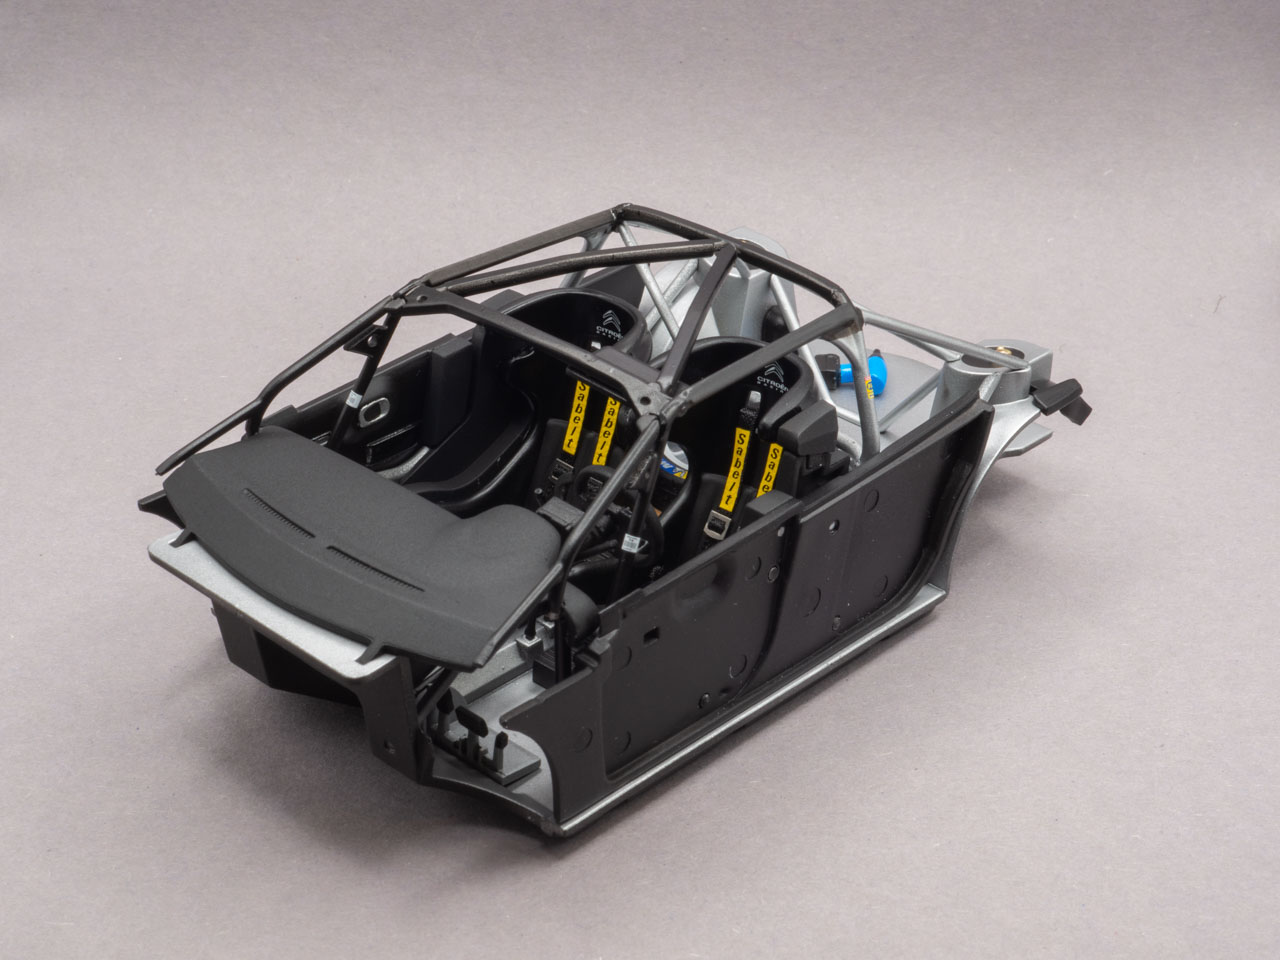
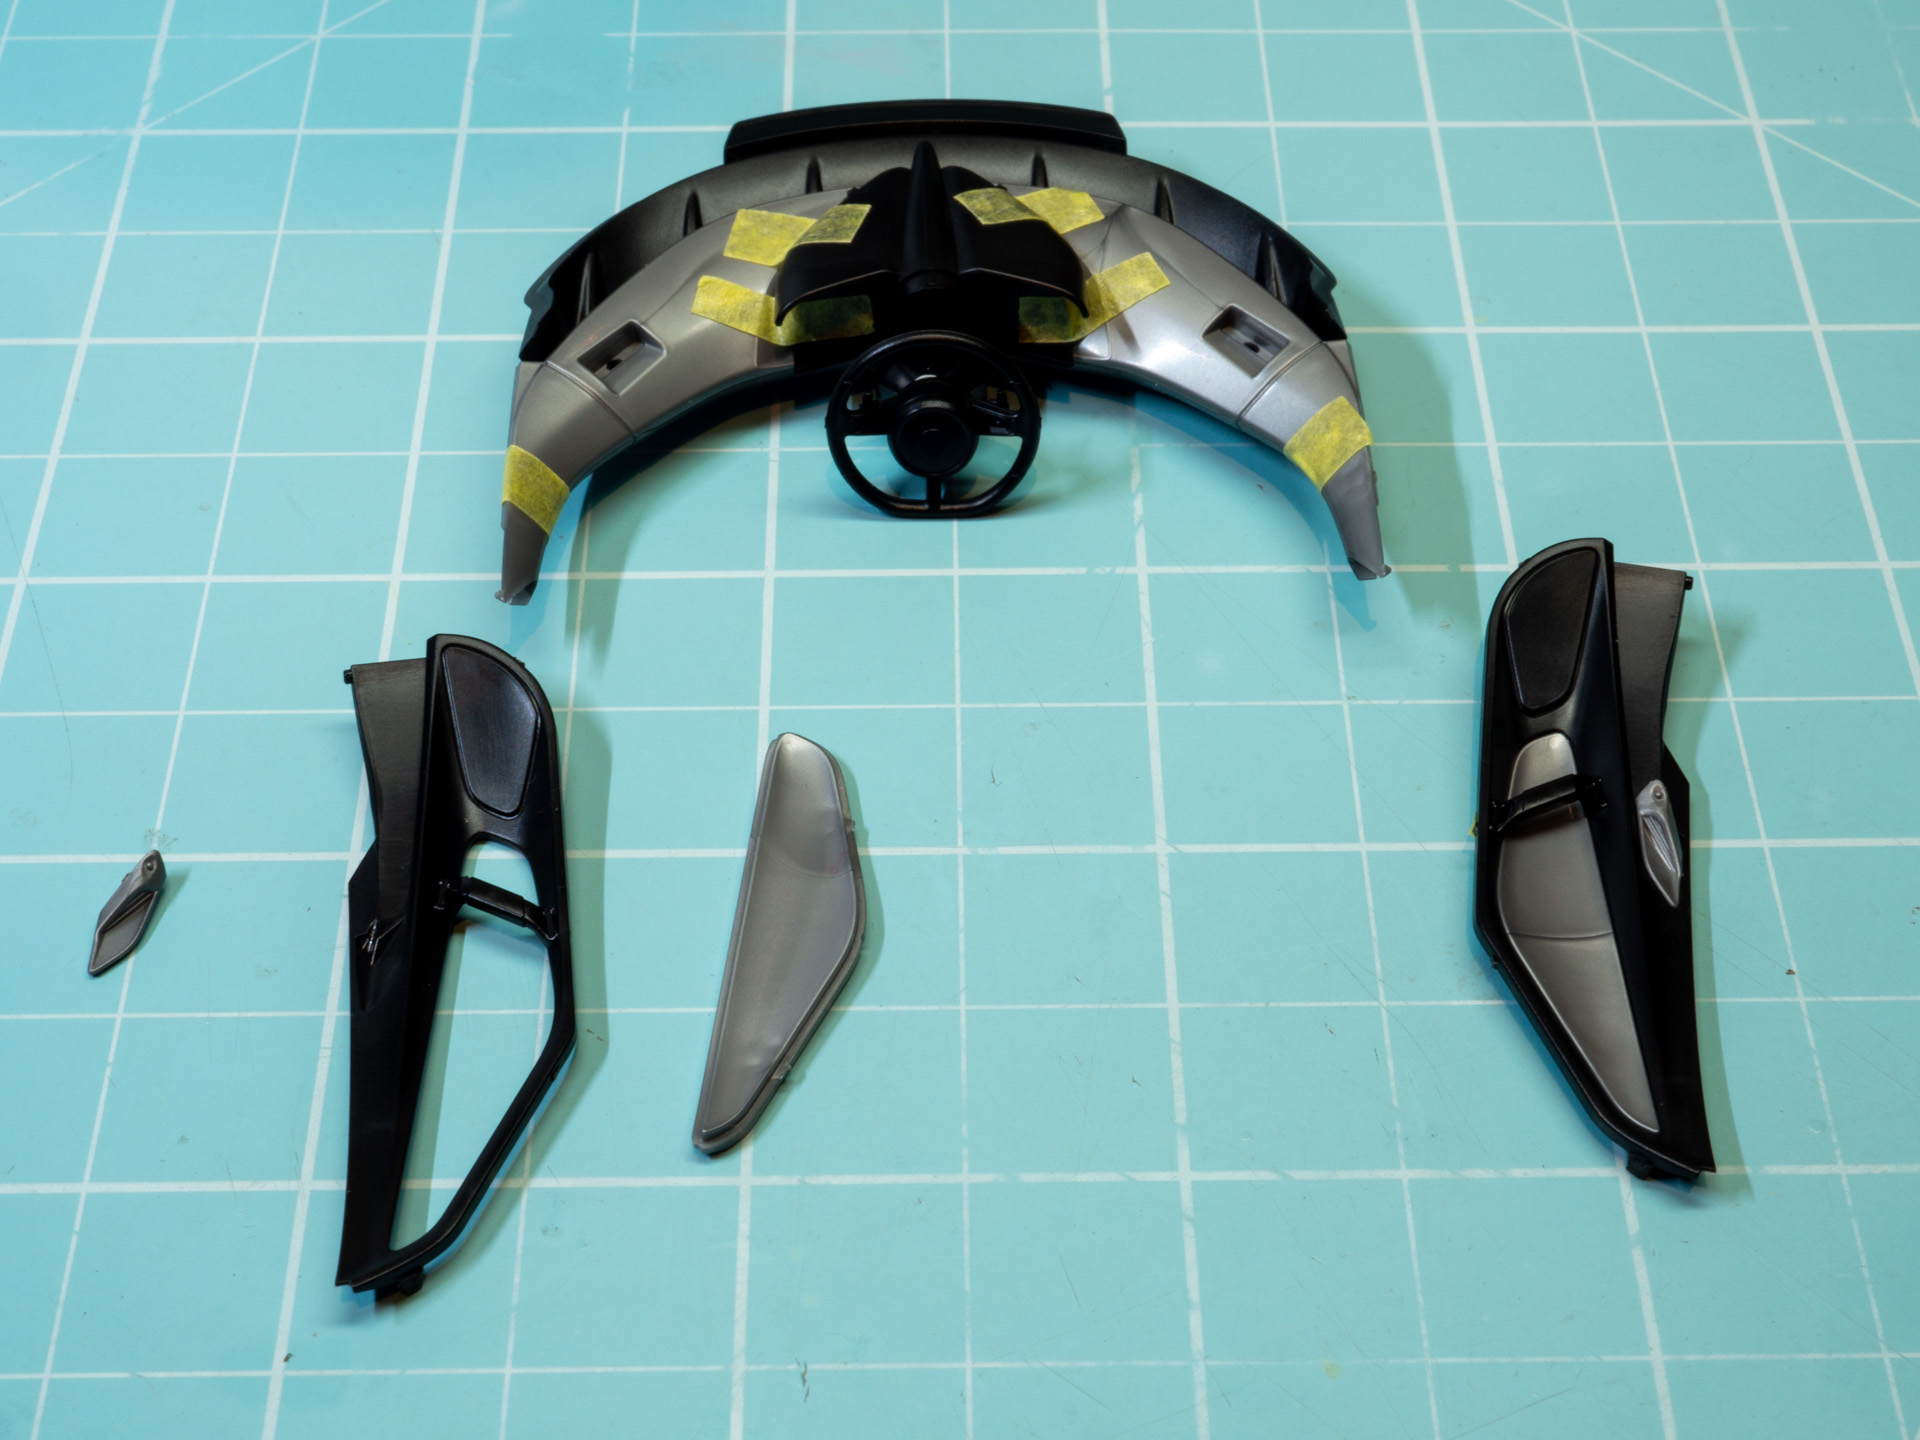
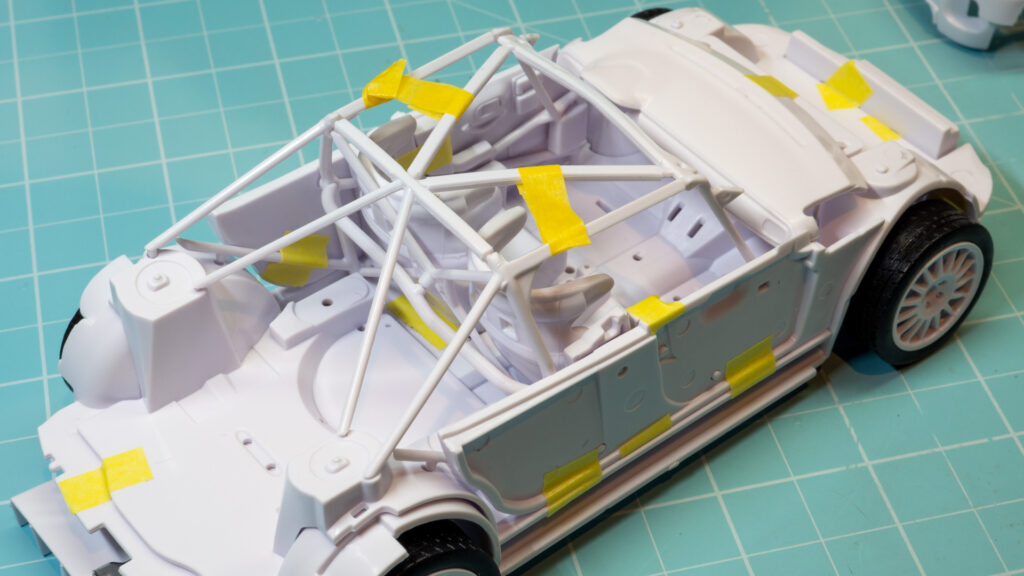
    Interior made from some parts.

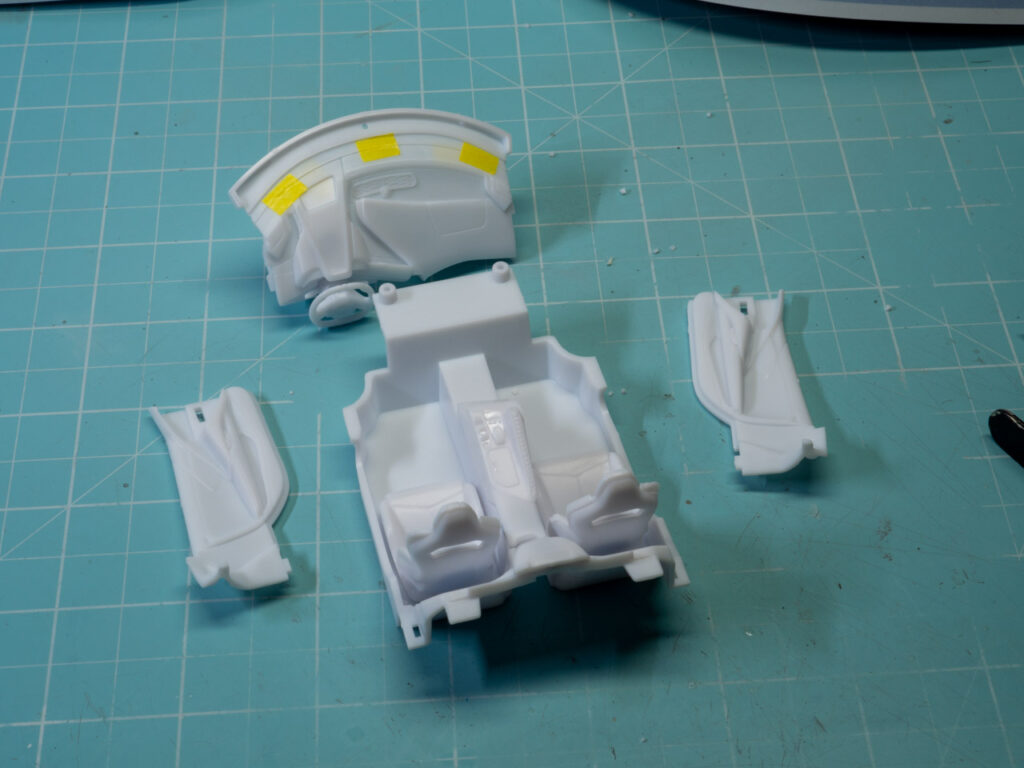
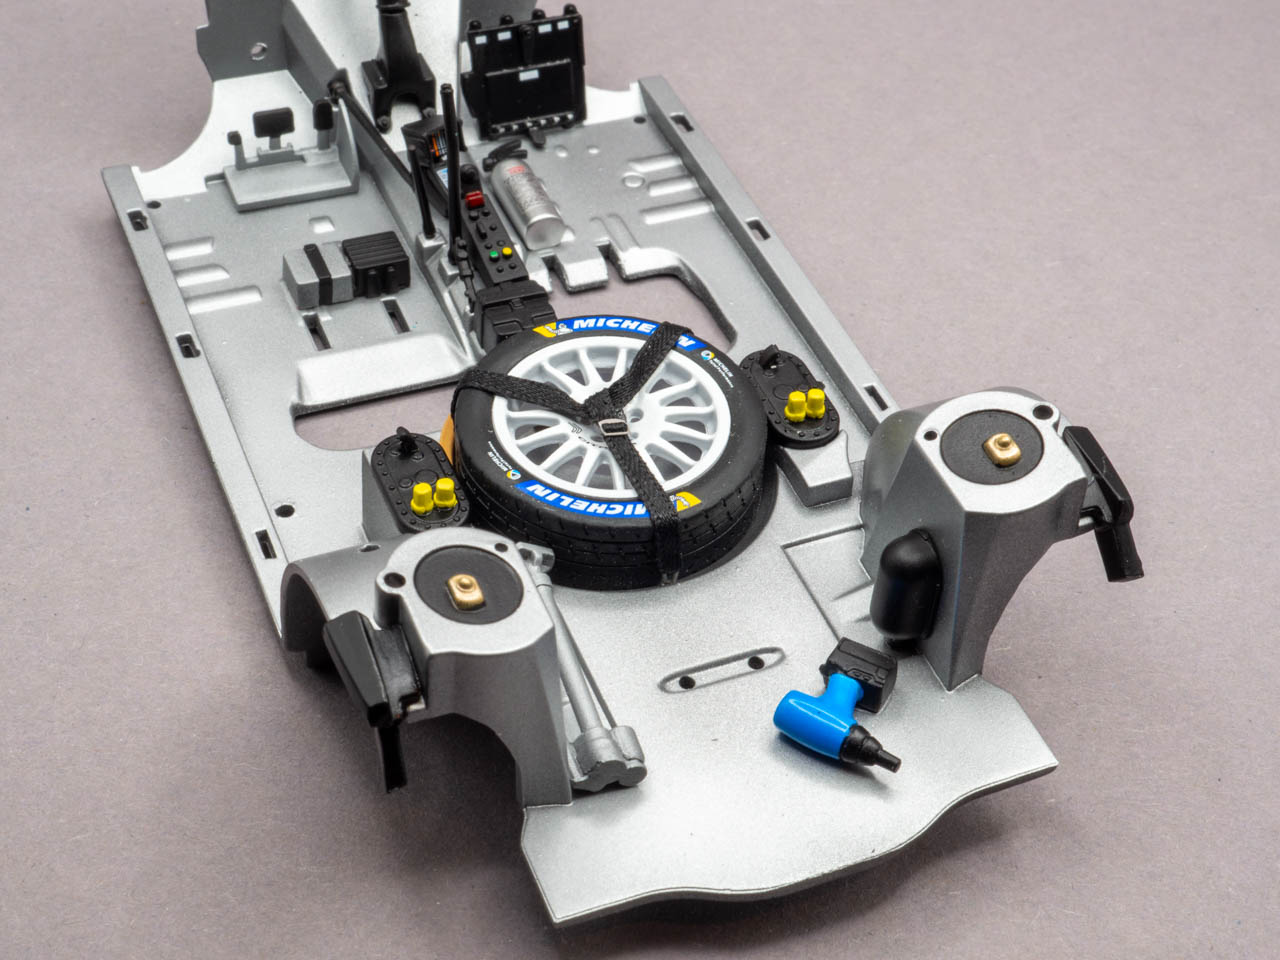
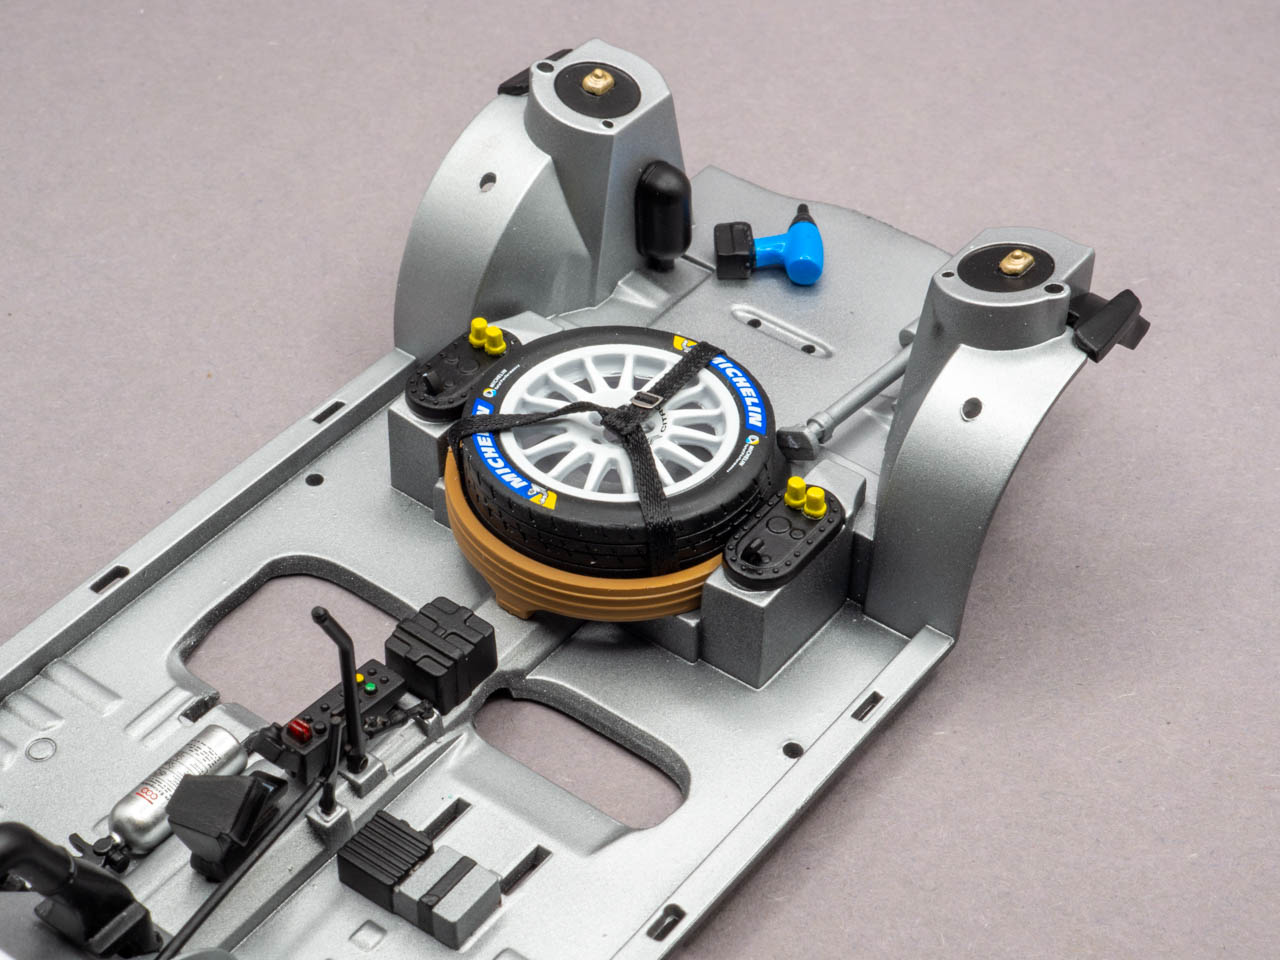
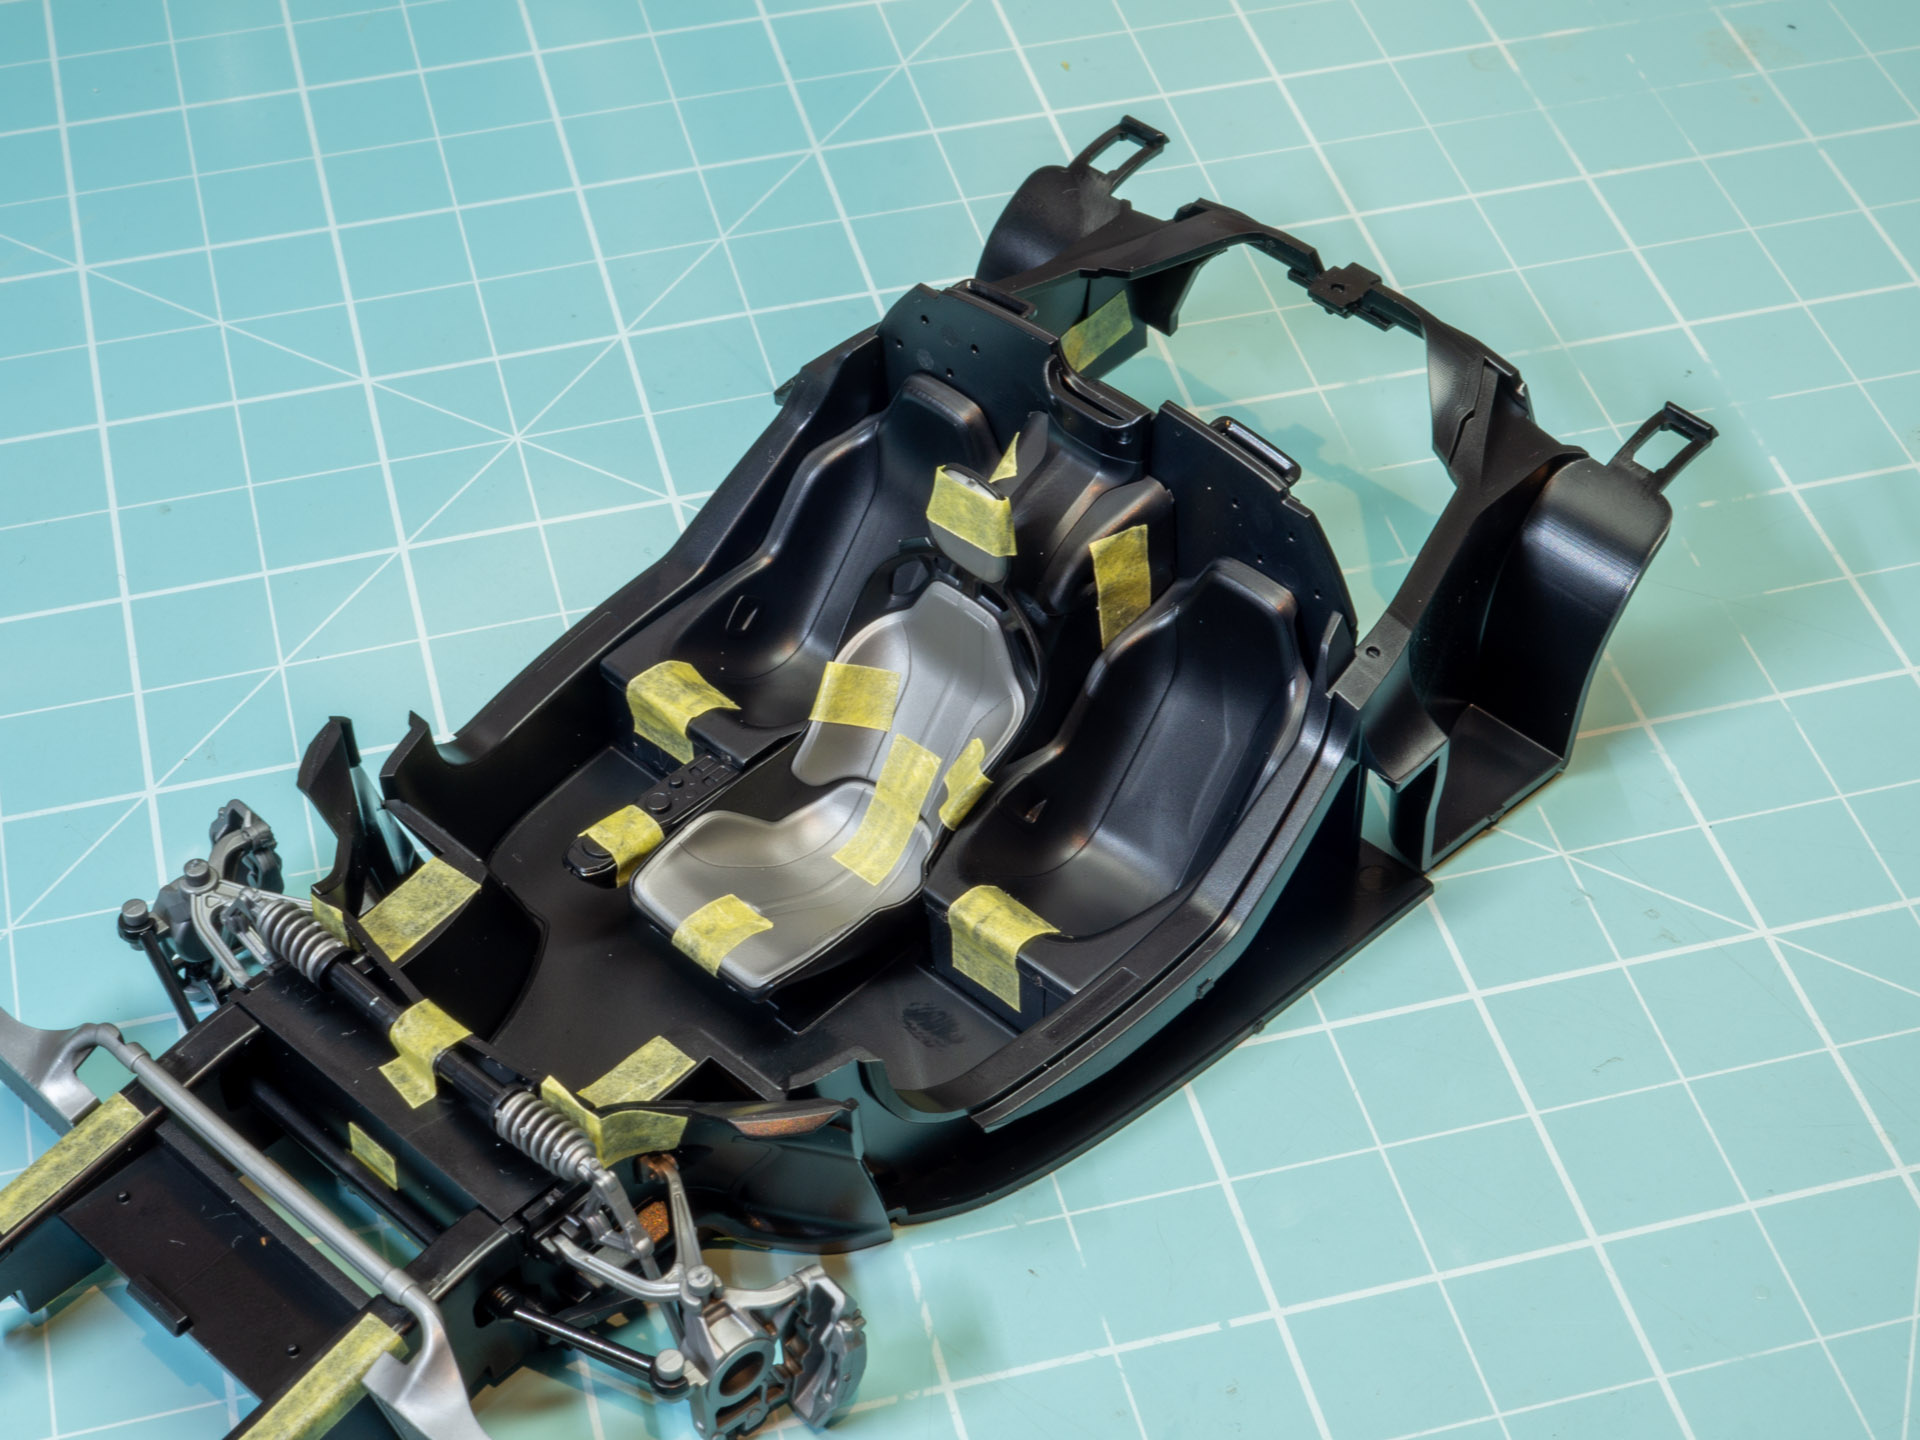
    Assembled into one unit.

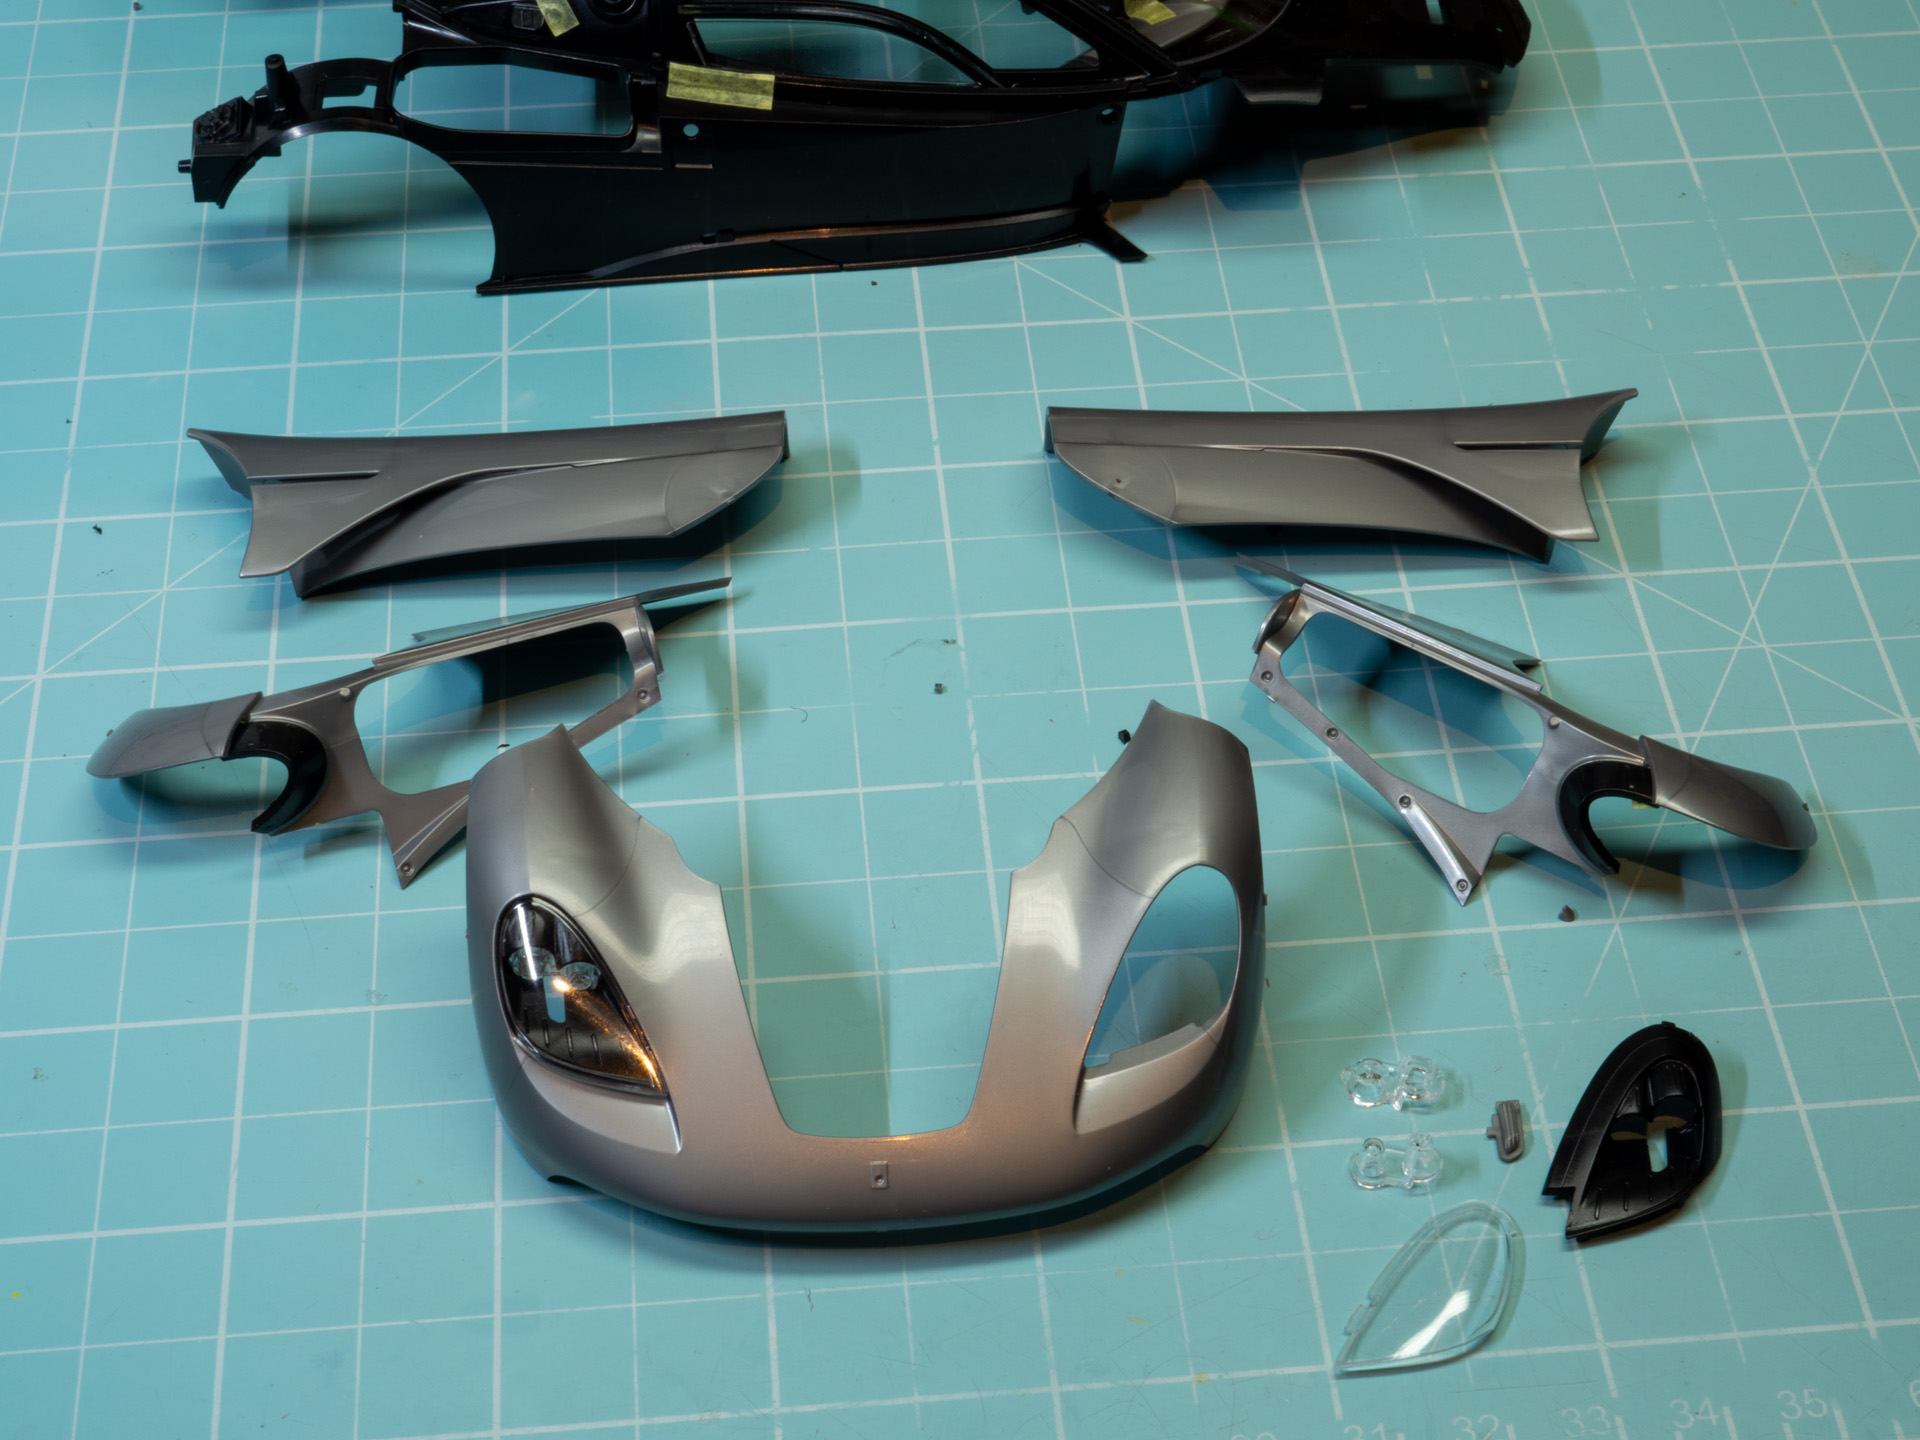
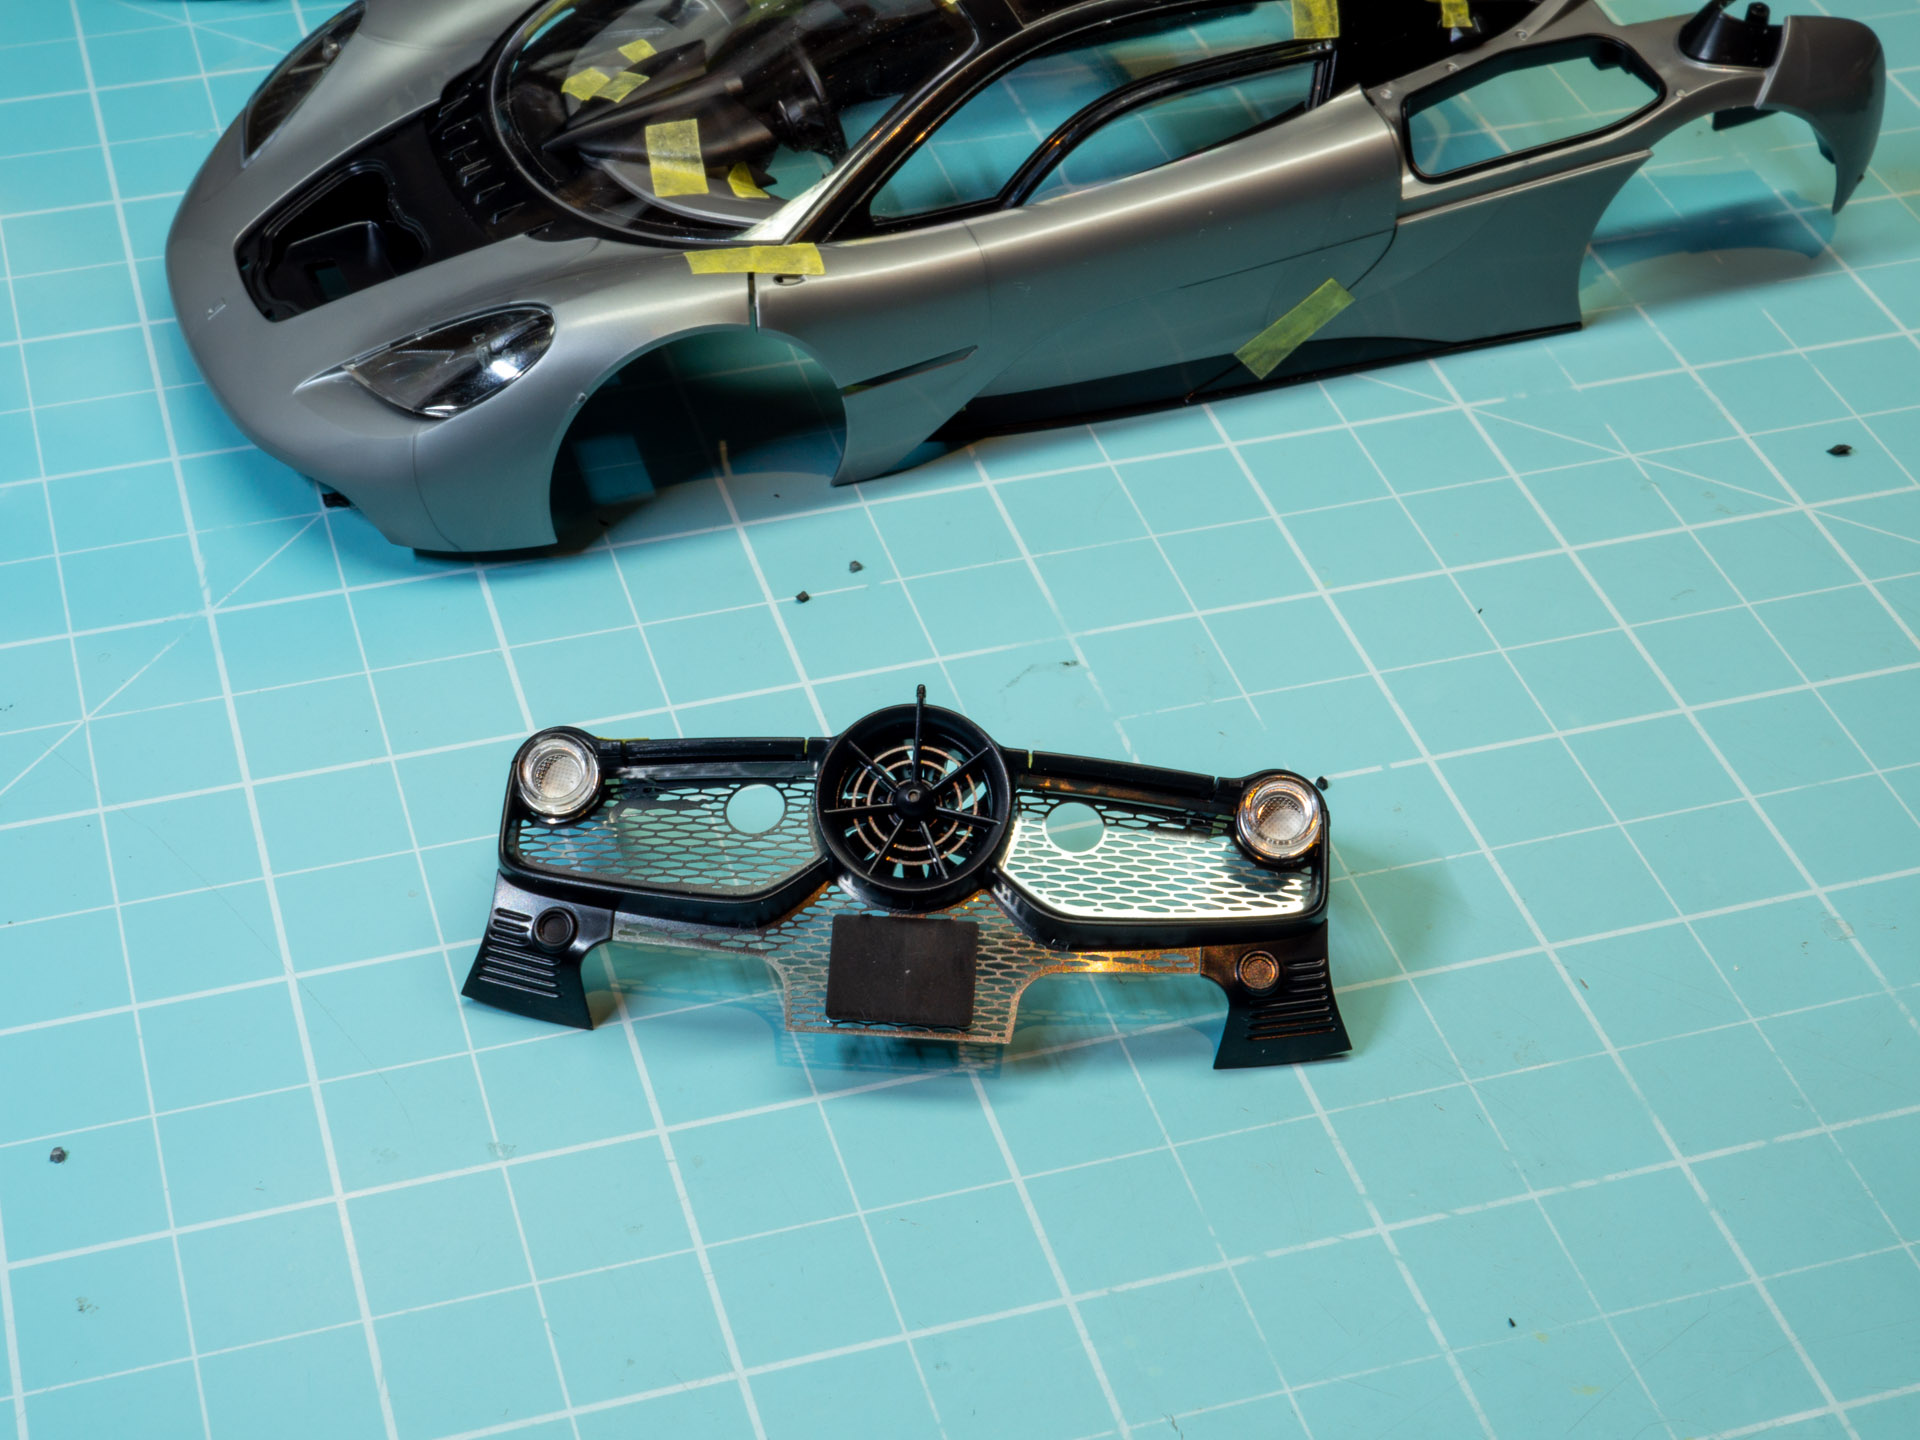
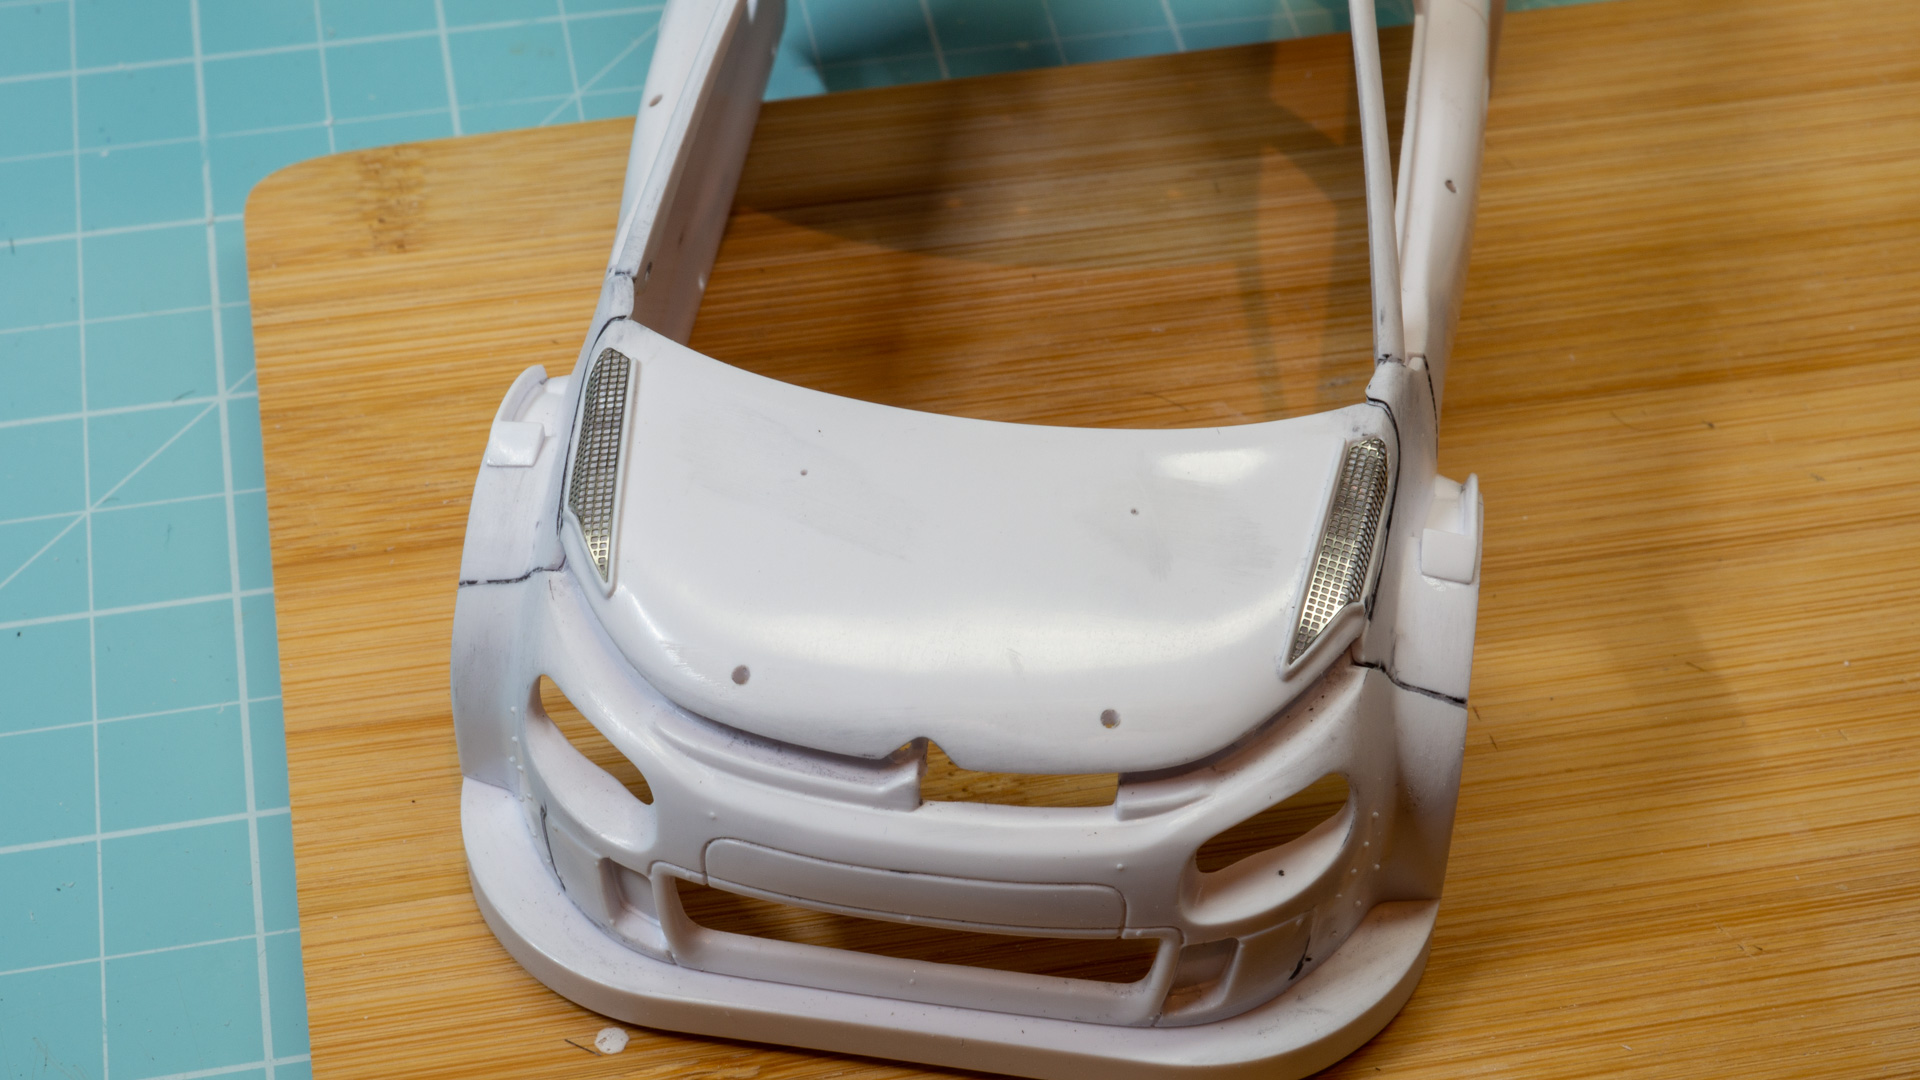
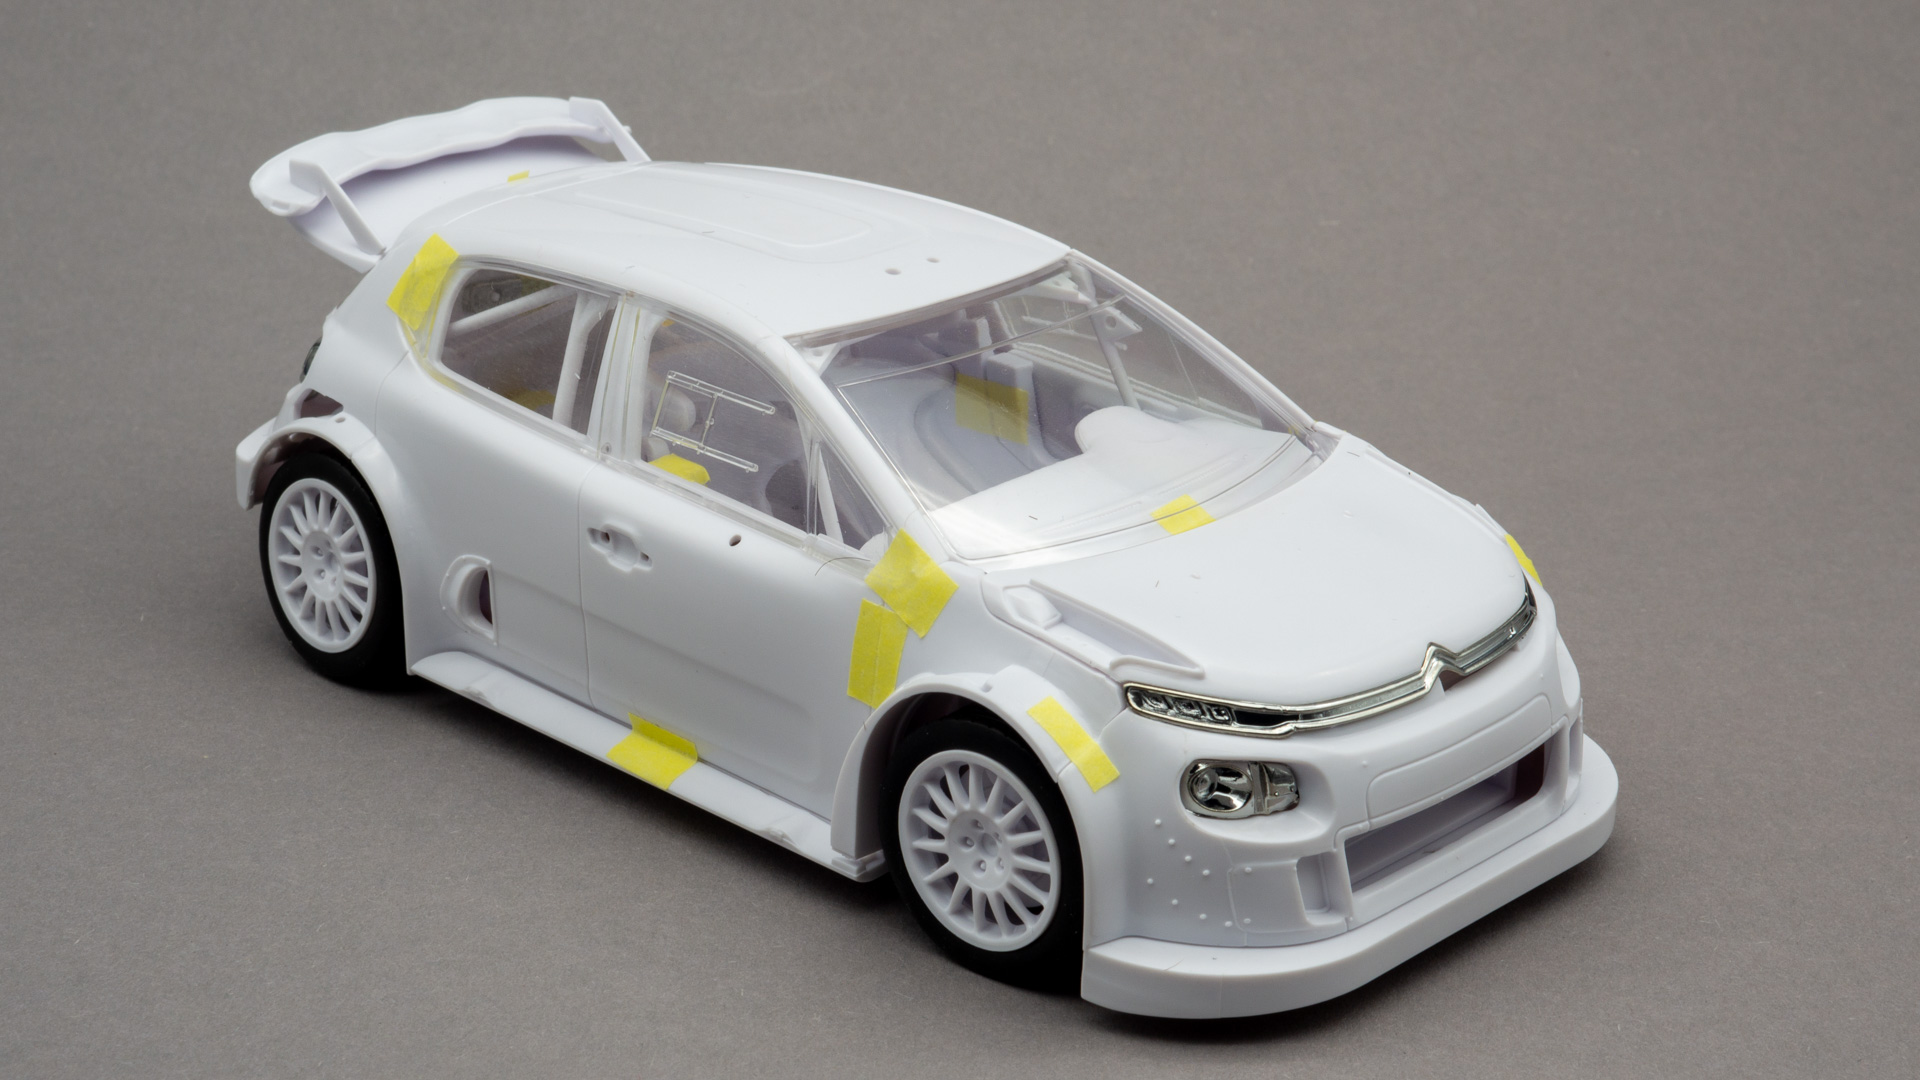
    The headlight reflectors attached and positioned without problems. It is very convenient – there are guides with sides. You can glue it and not be afraid that the glue will leak out and ruin everything there.

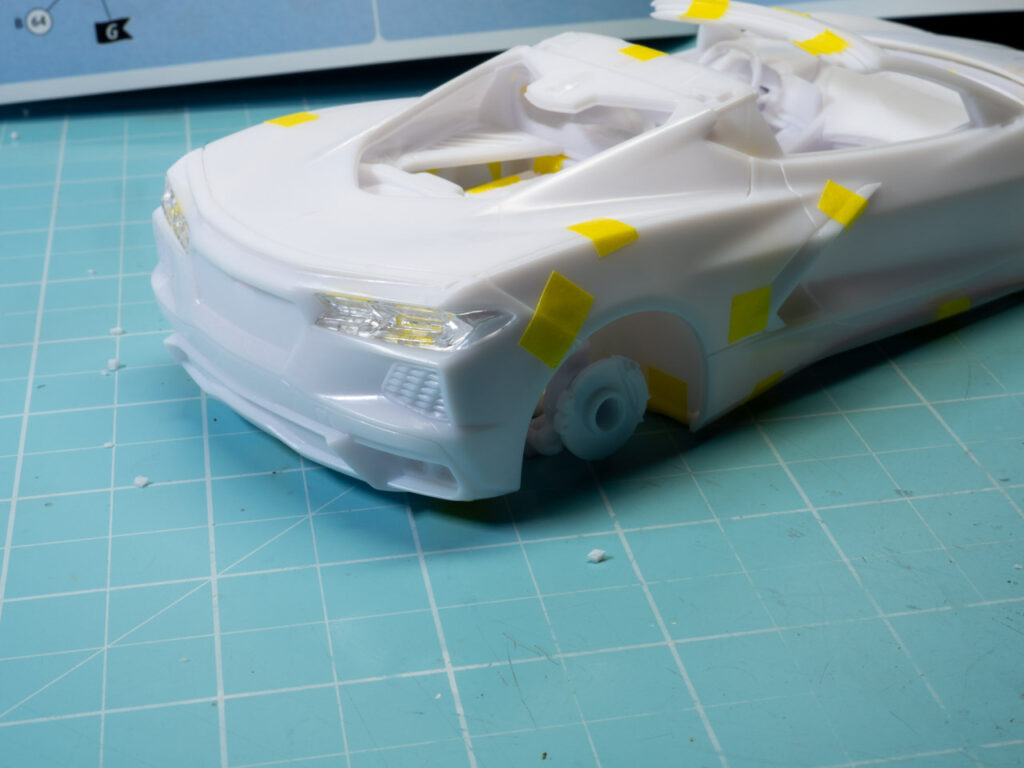
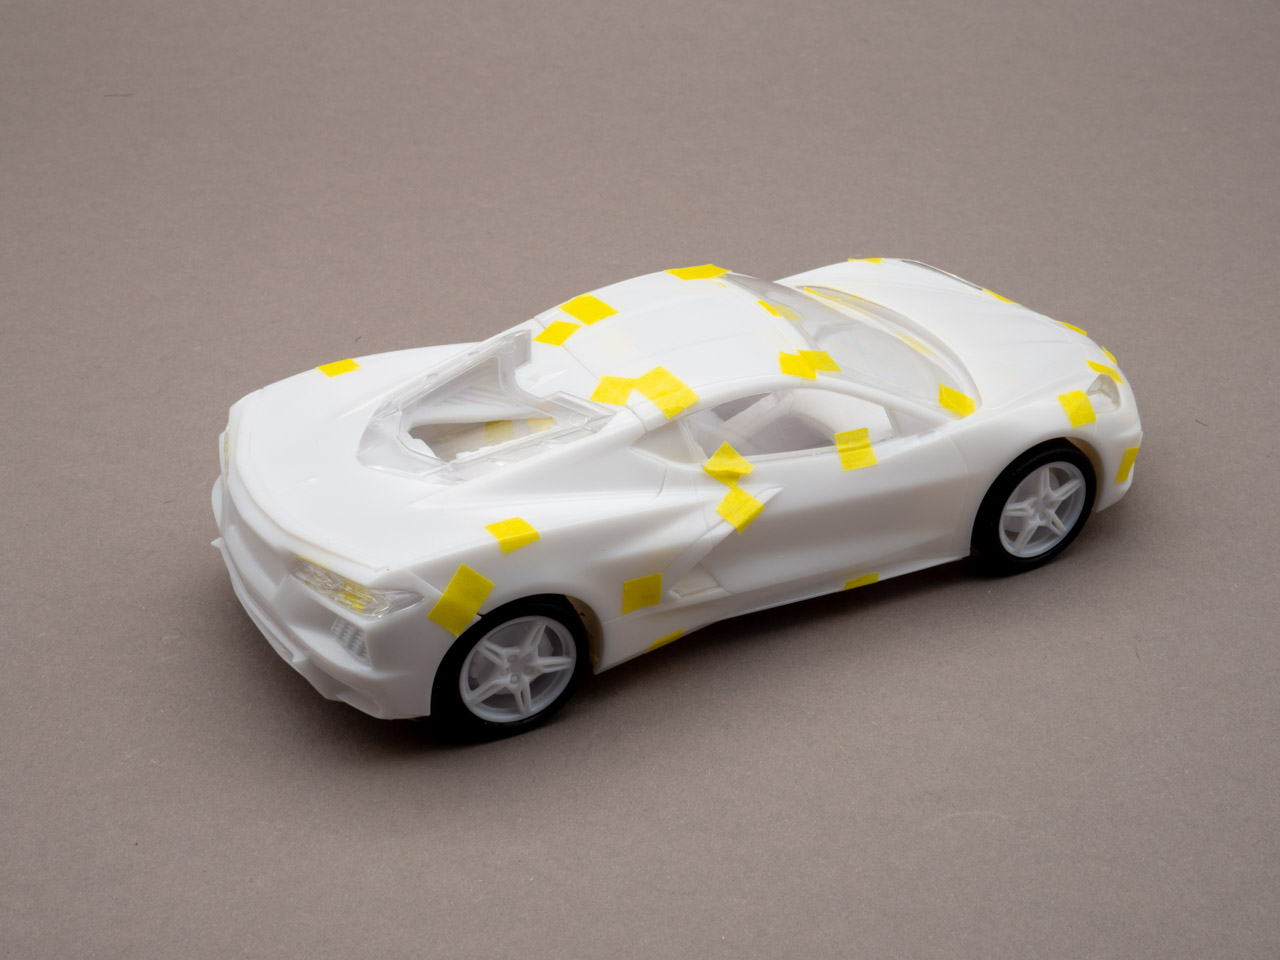
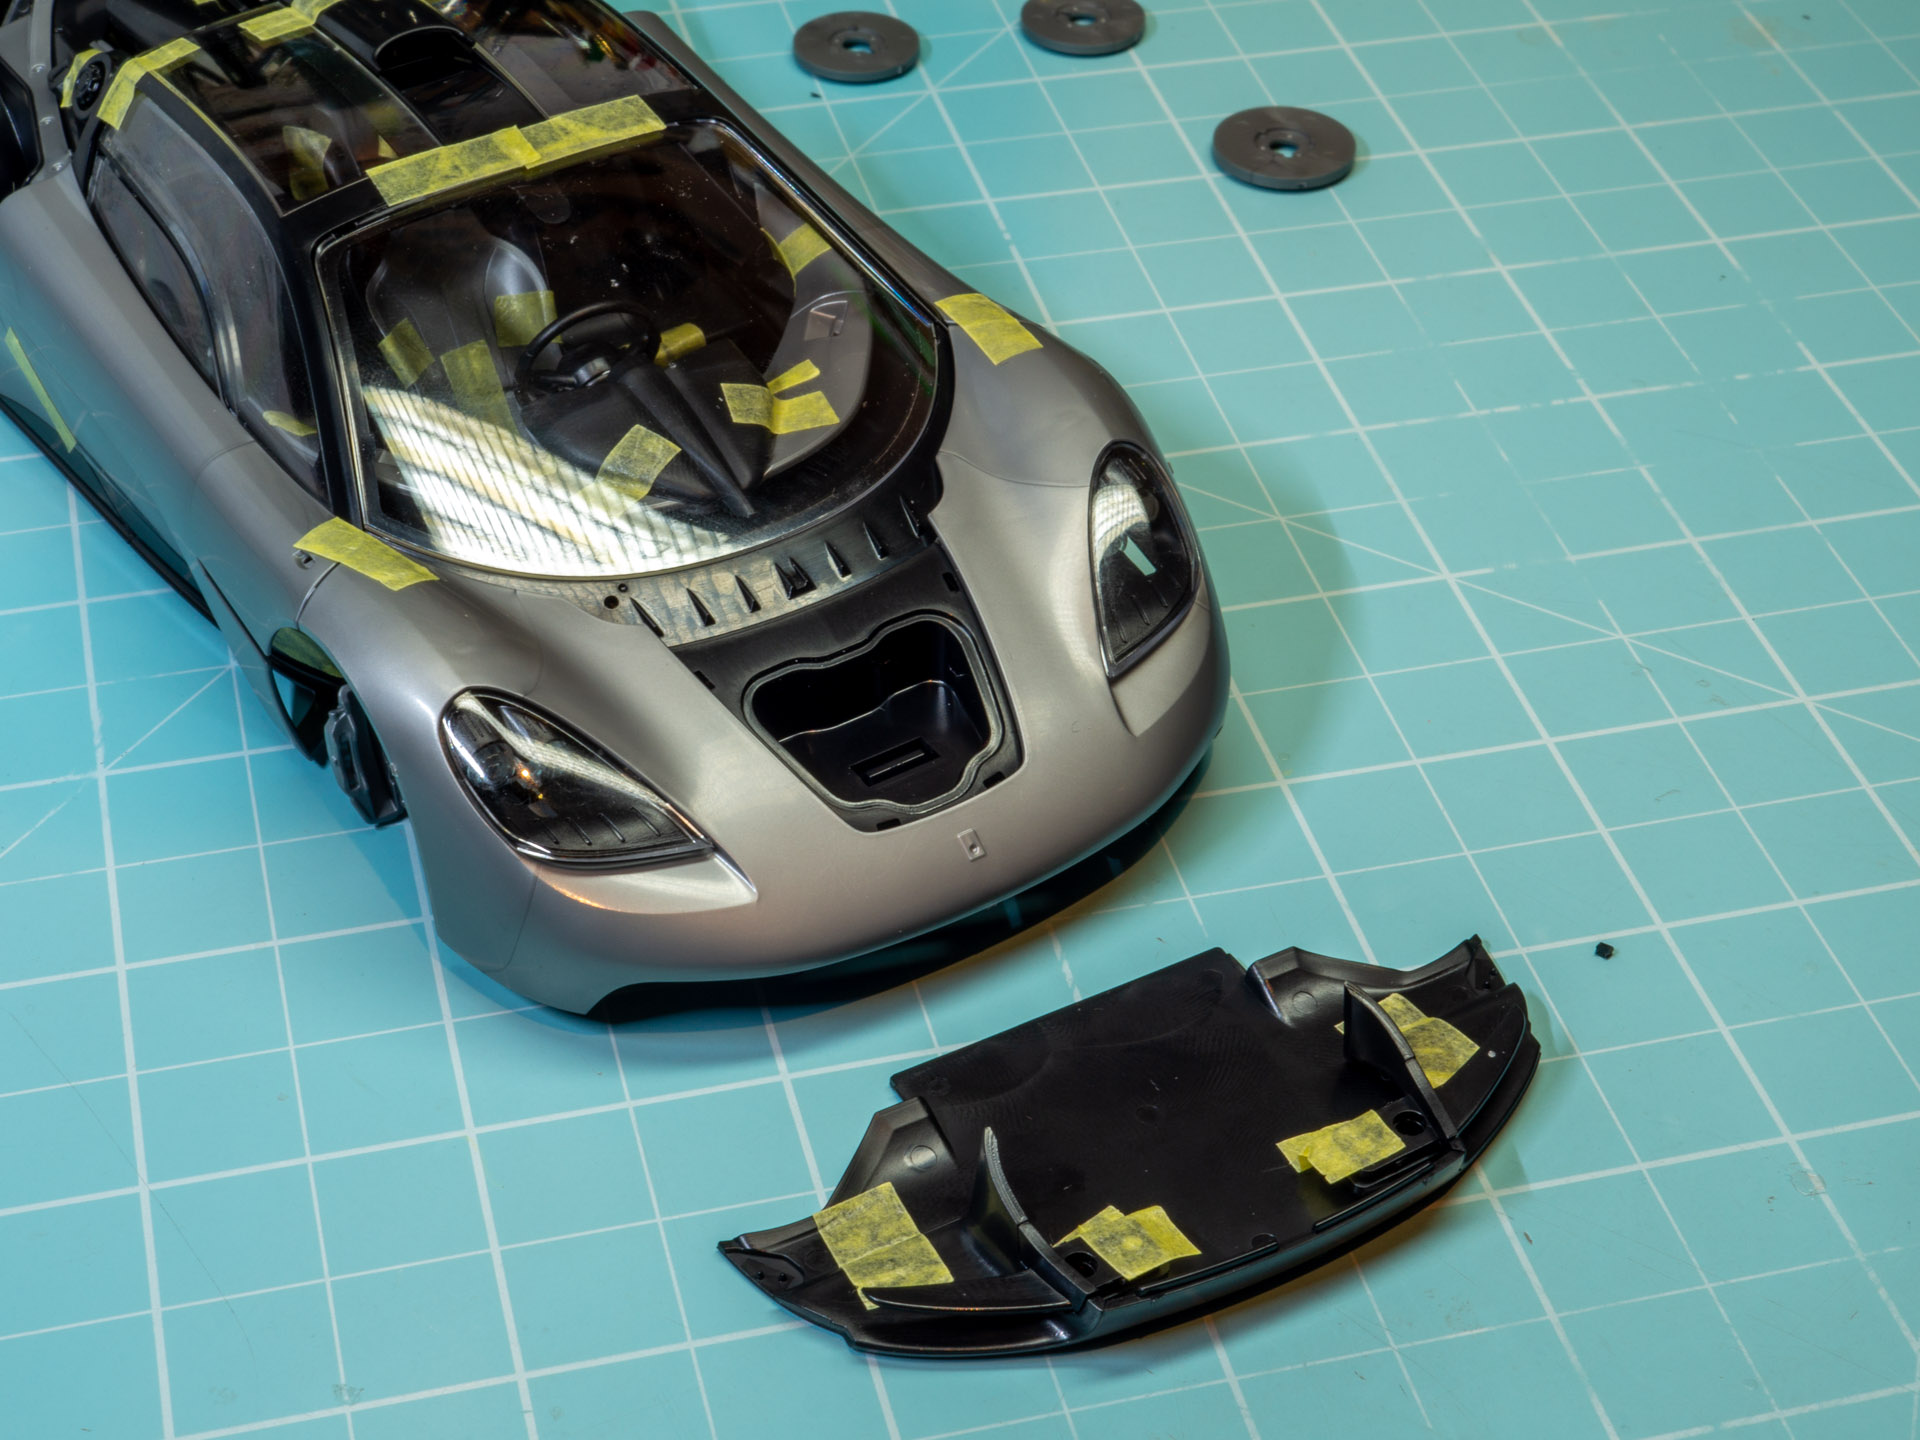
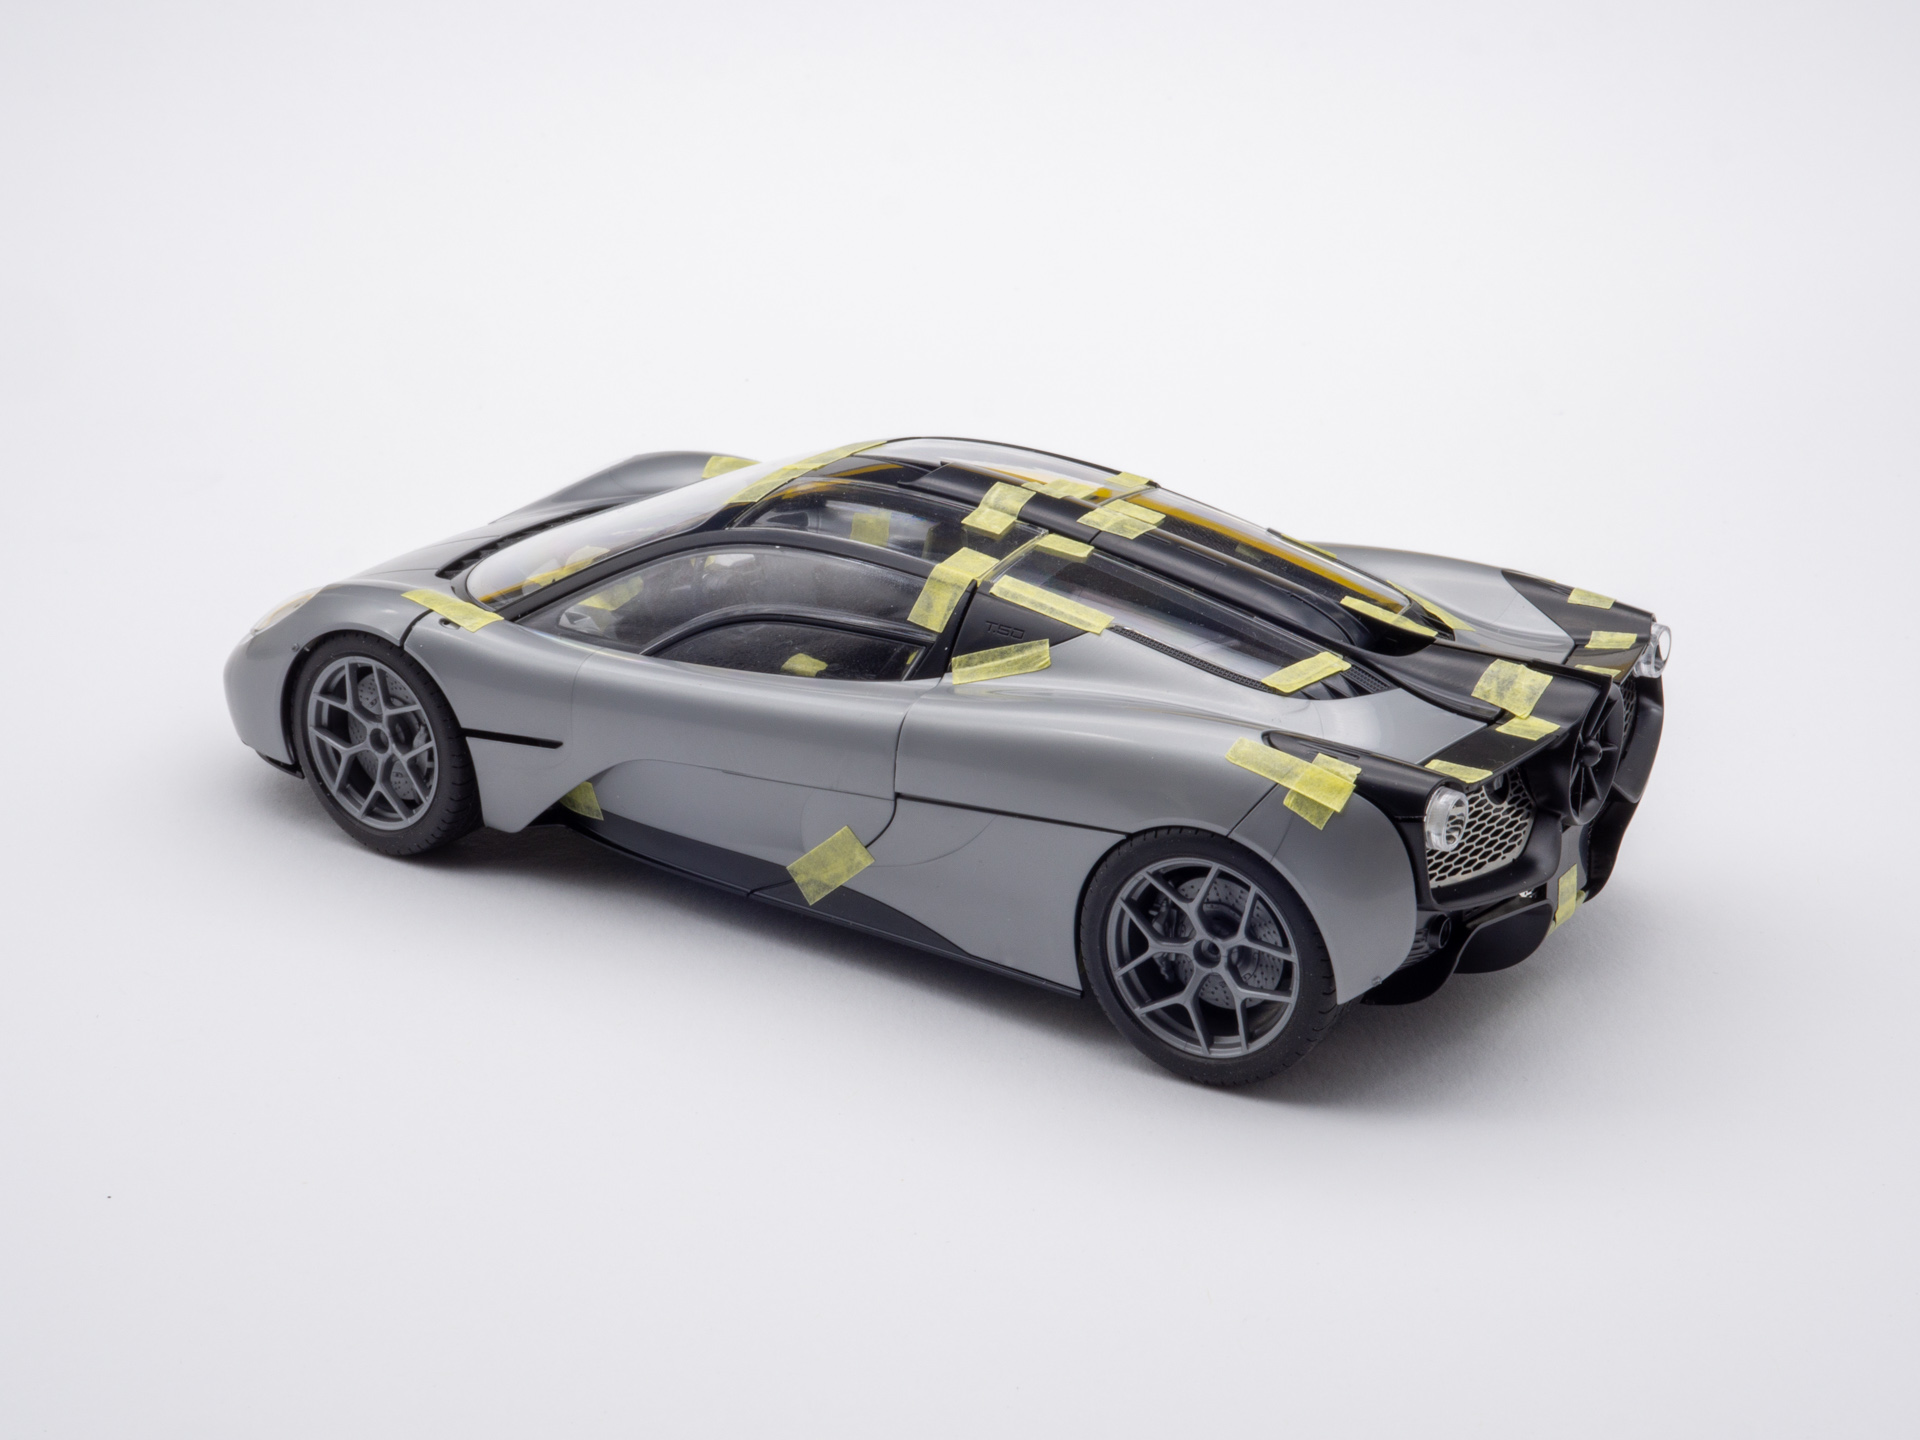
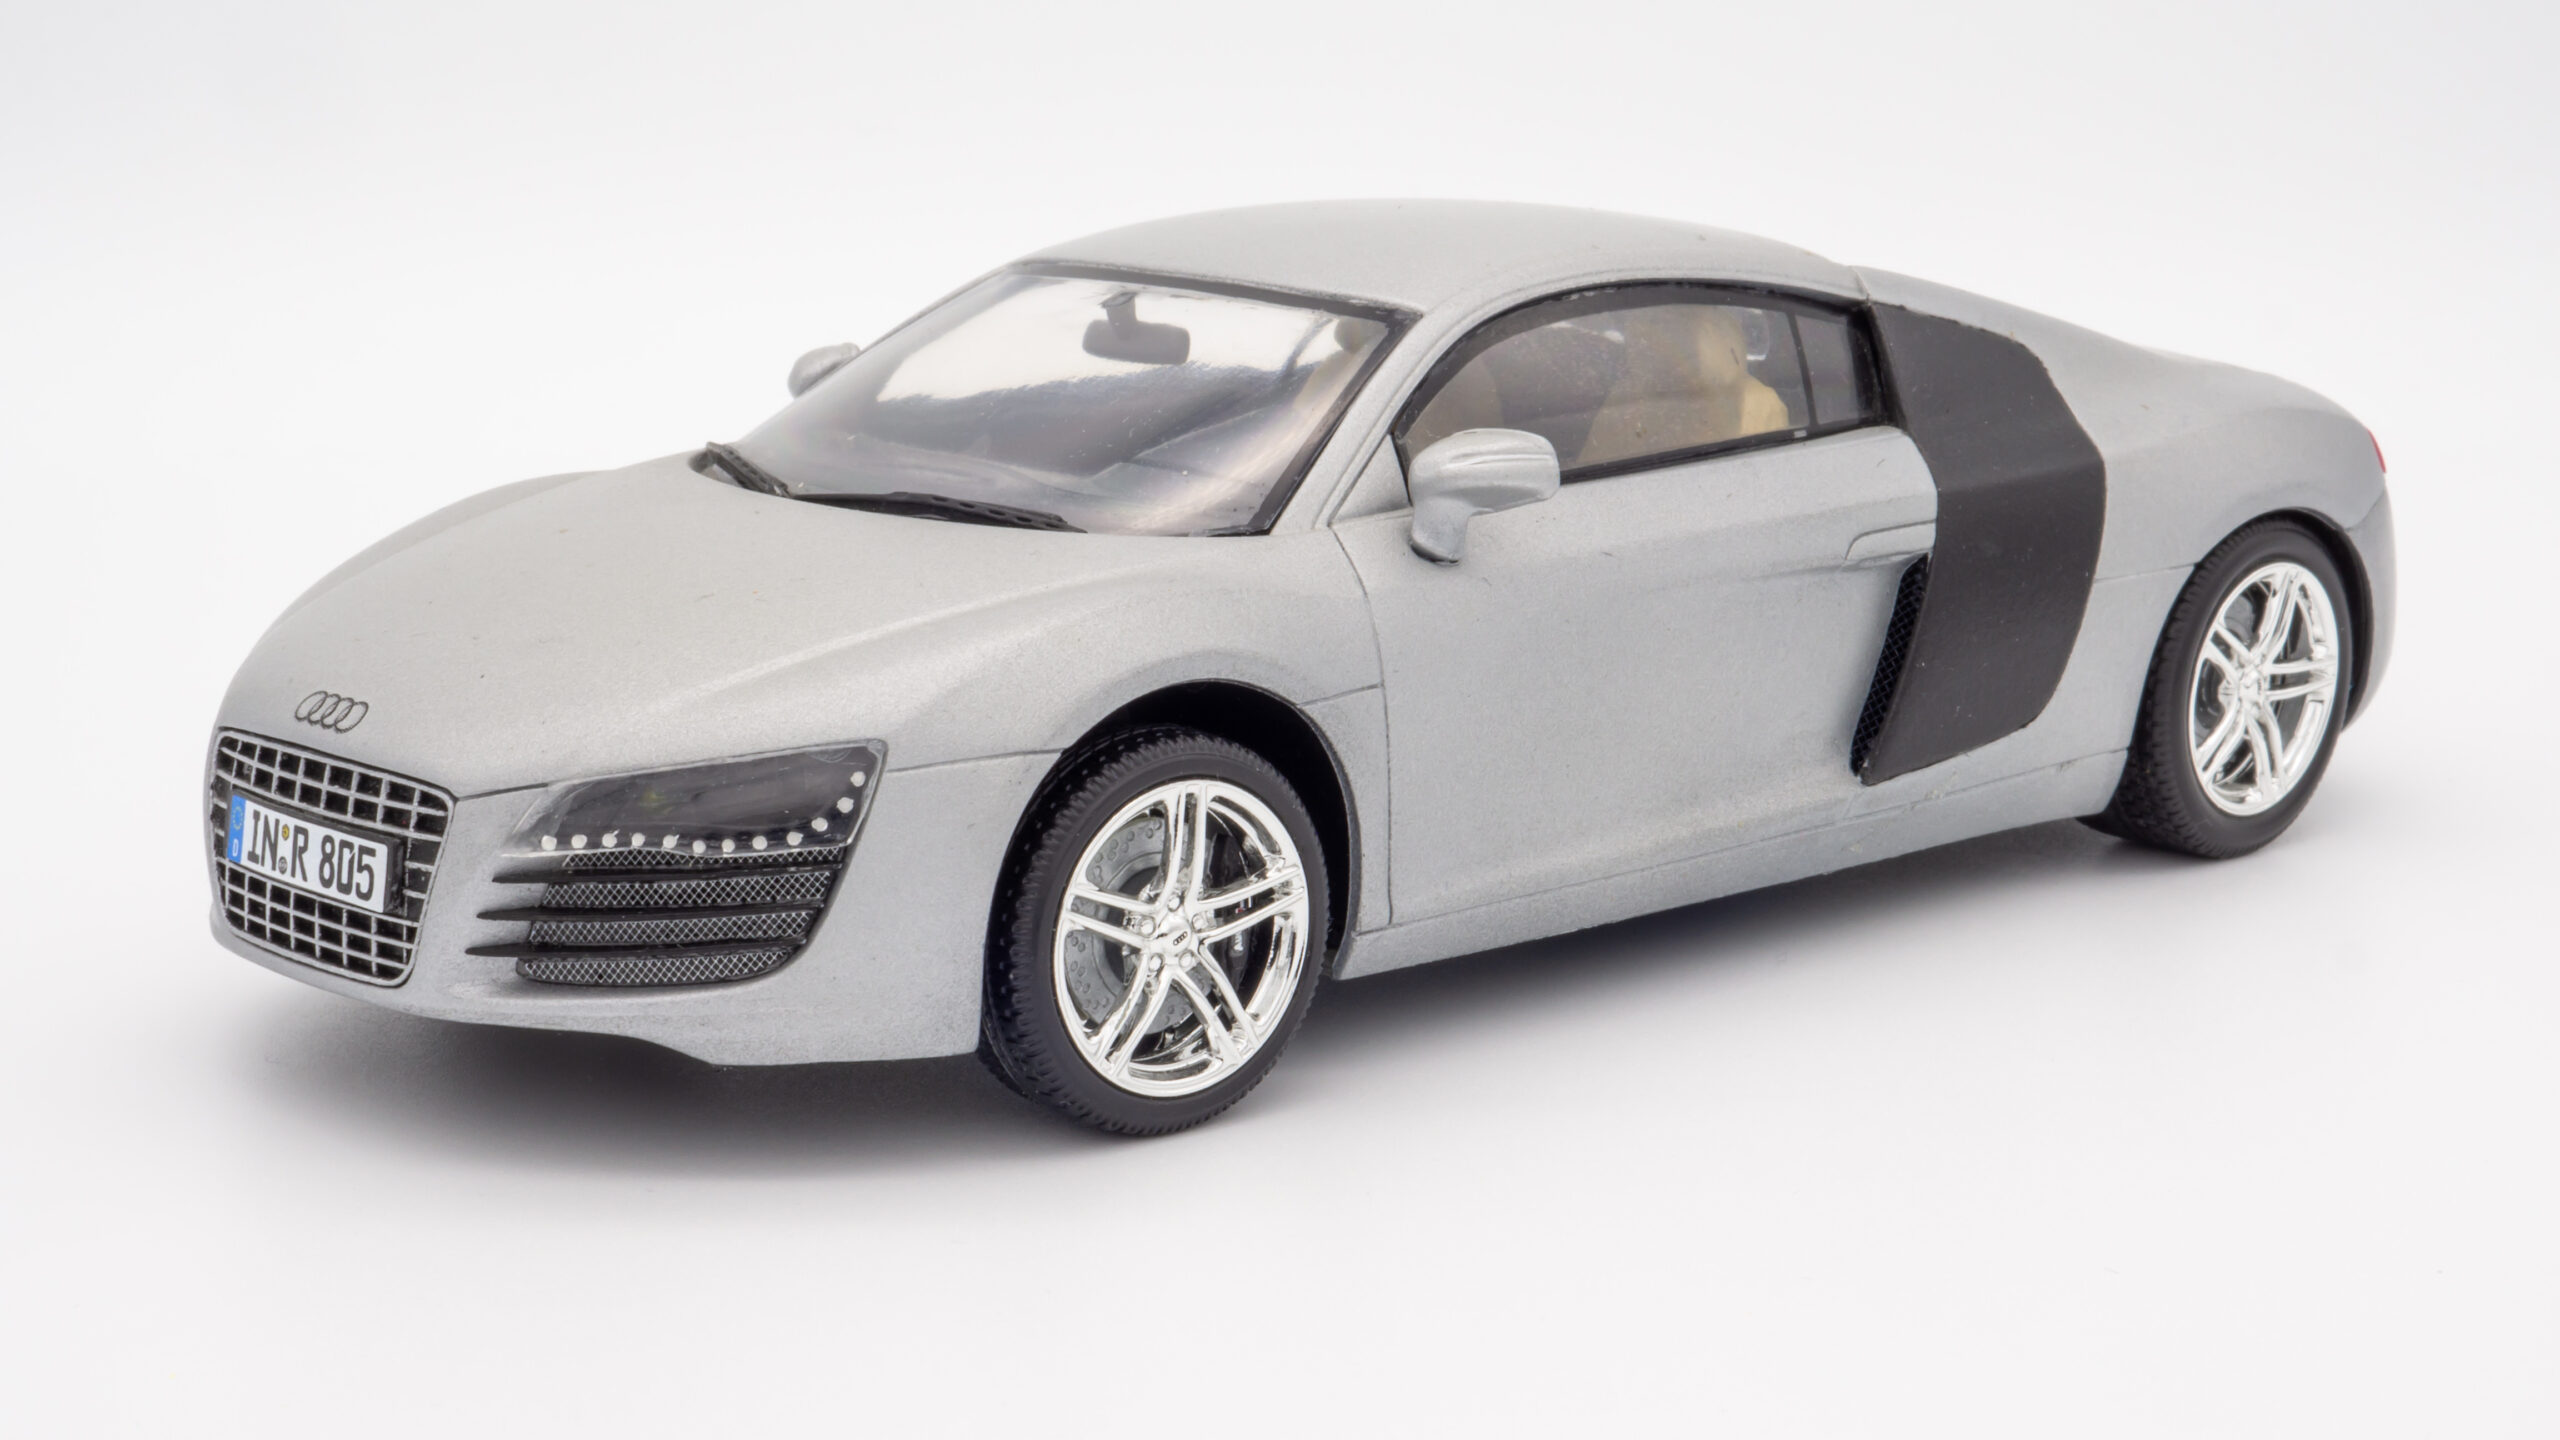
    Lateral aero elements. It also seems to fit together, although the shape of the joint is complex.

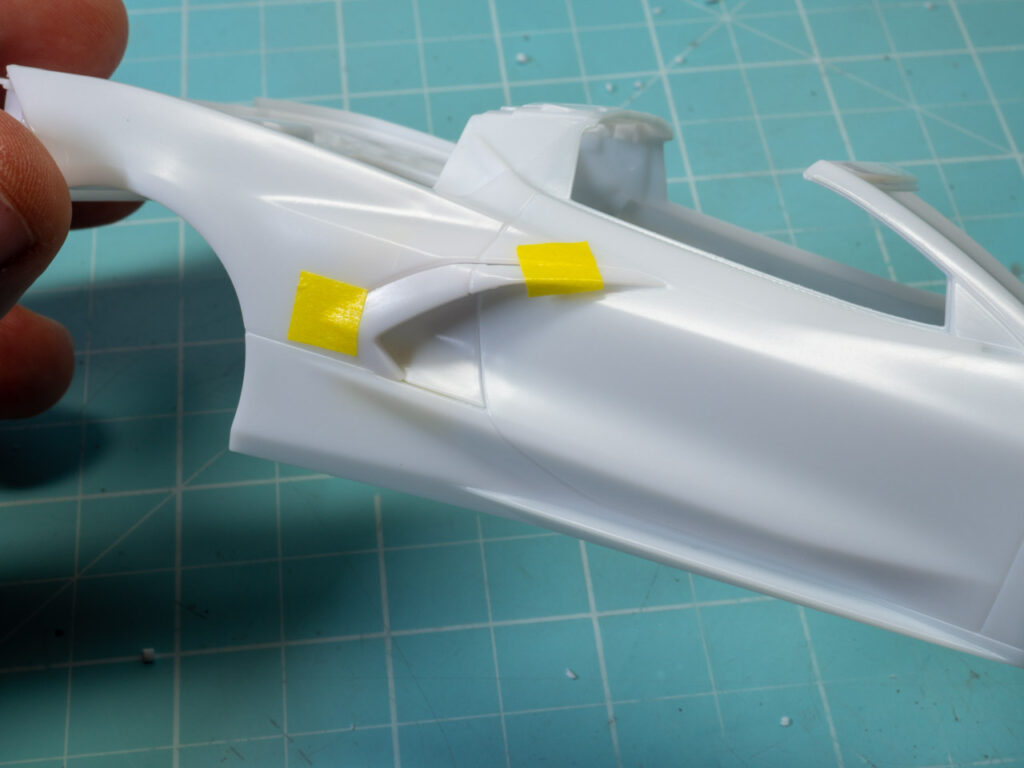
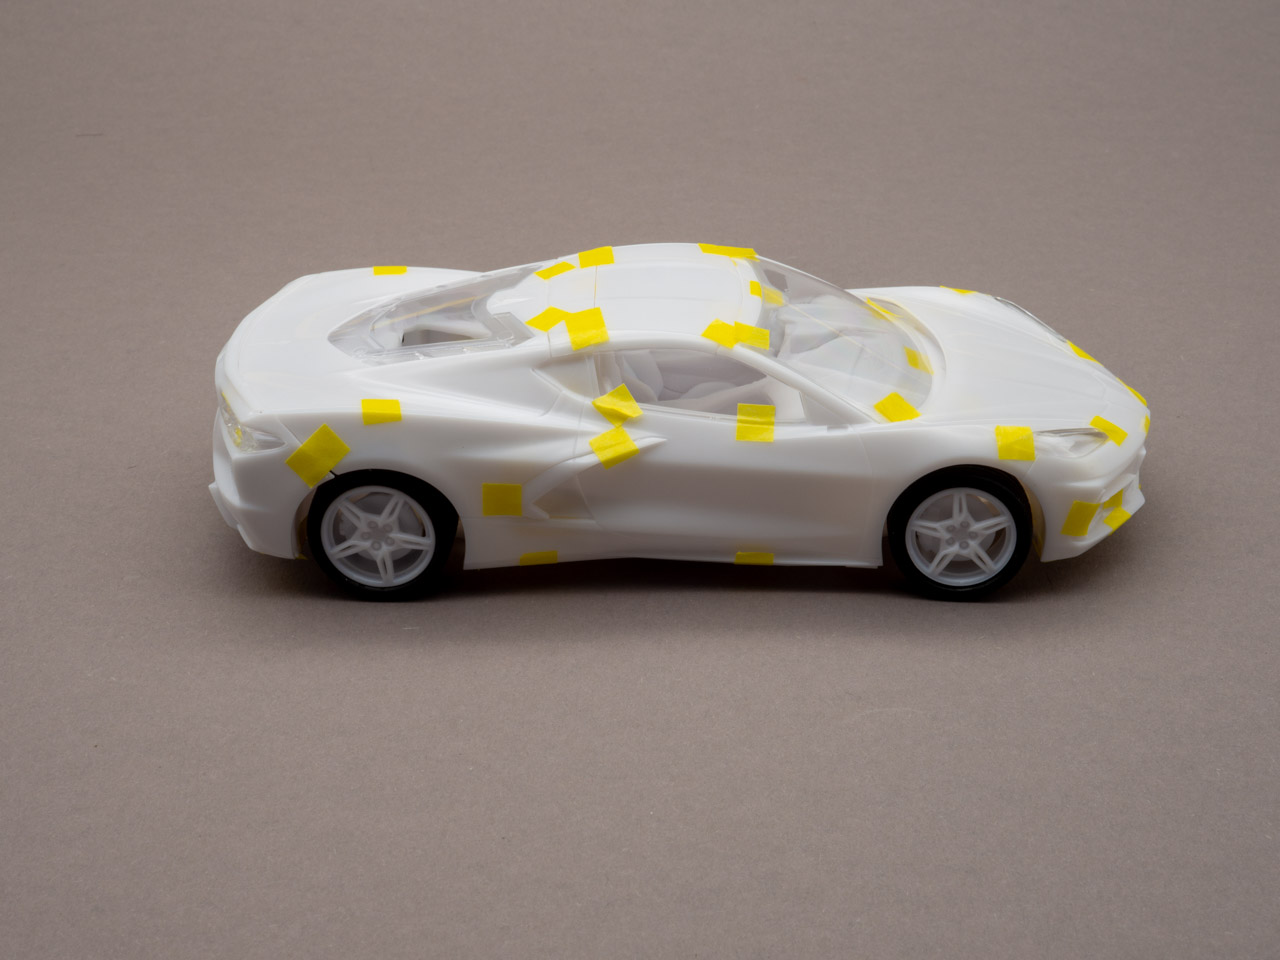
    Wow, the motor cover fits smoothly and without gaps !

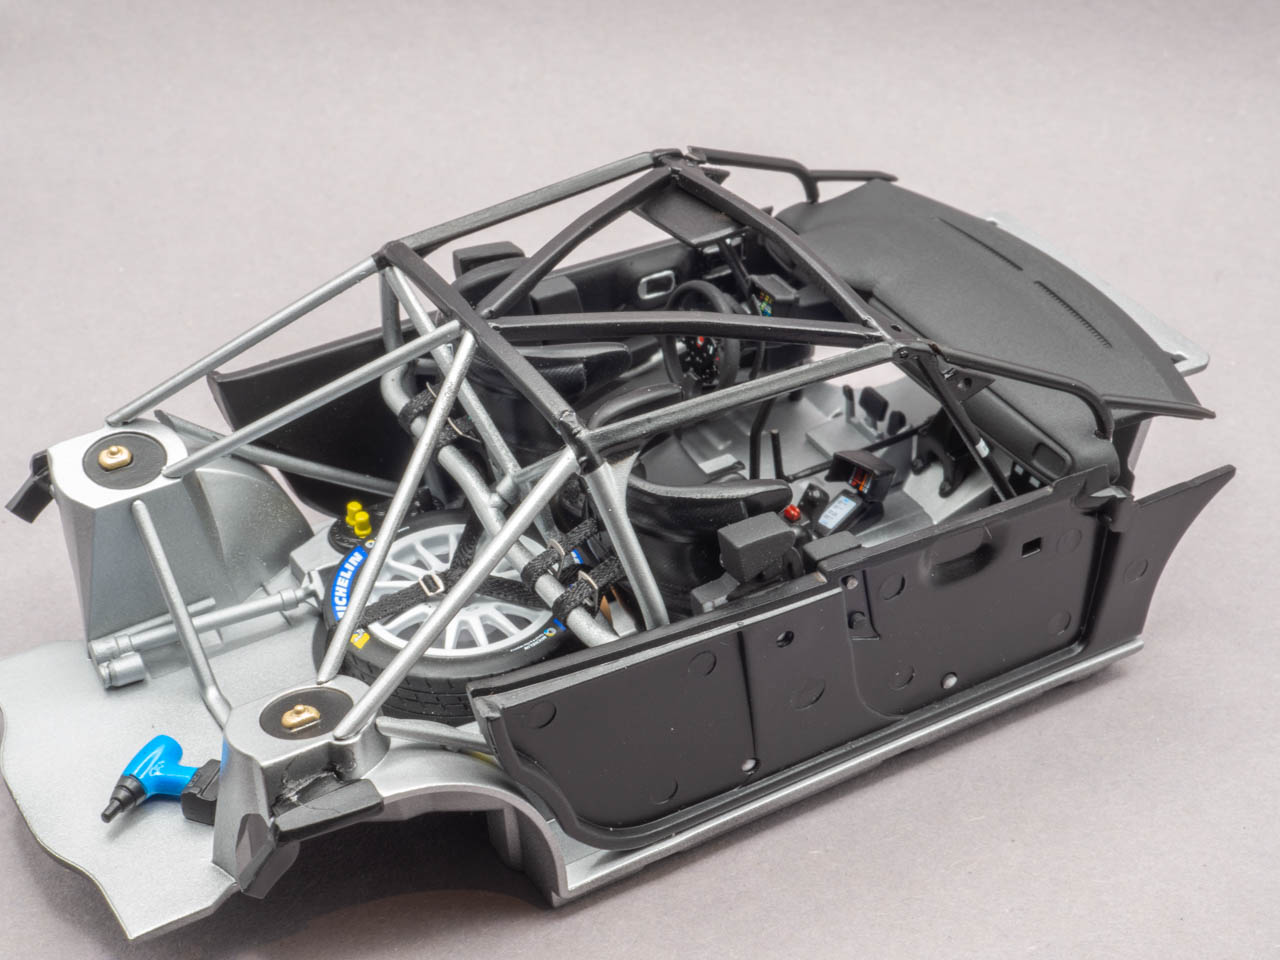
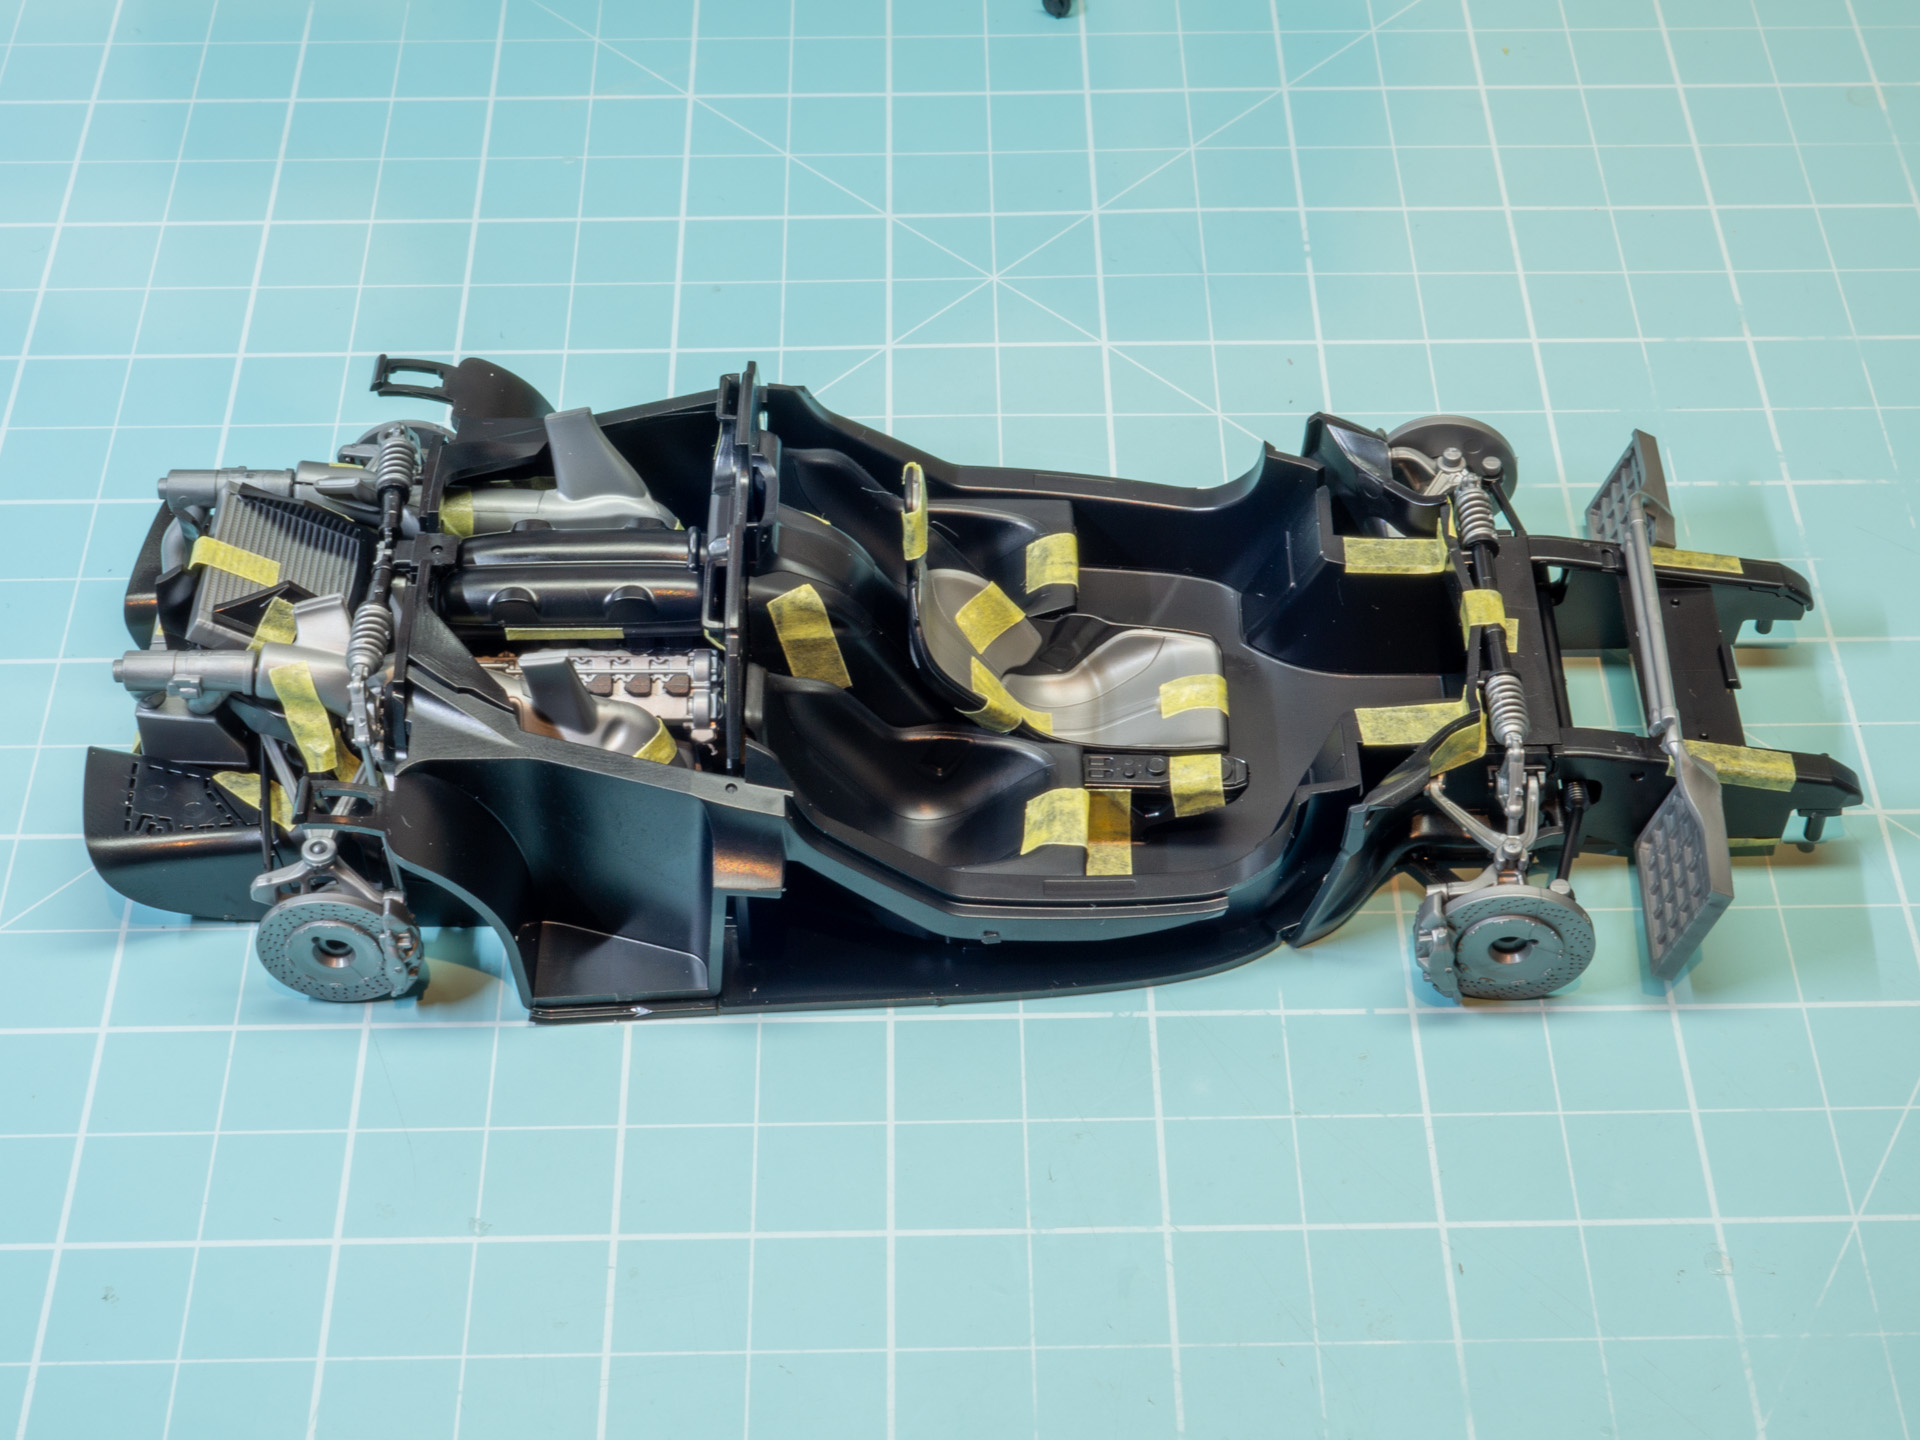
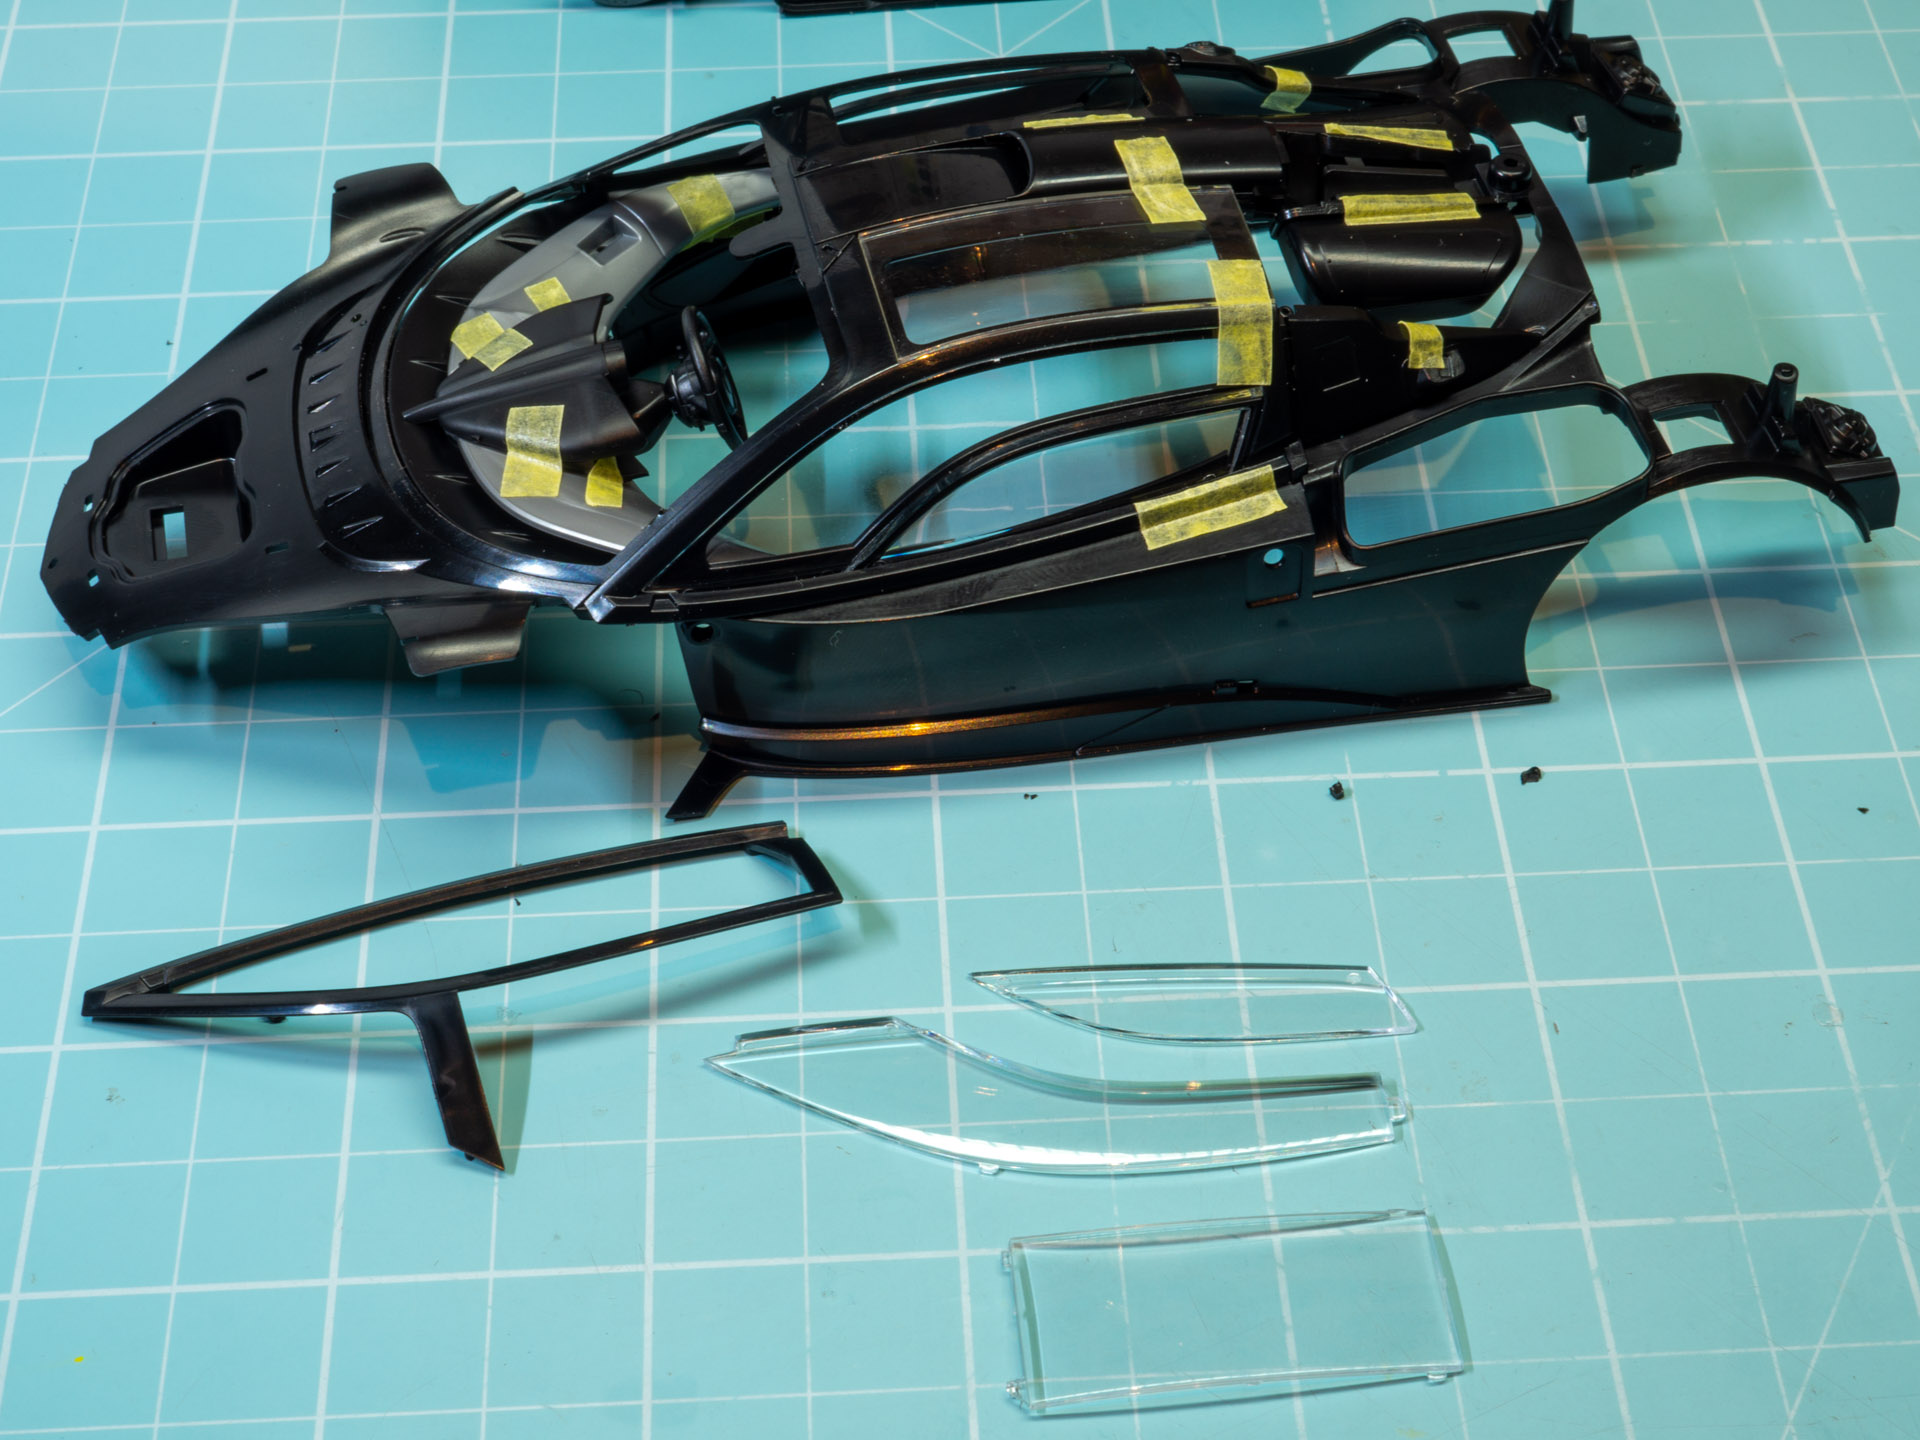
    So I attached the interior to the body. There are no gaps in the interior-body joint.

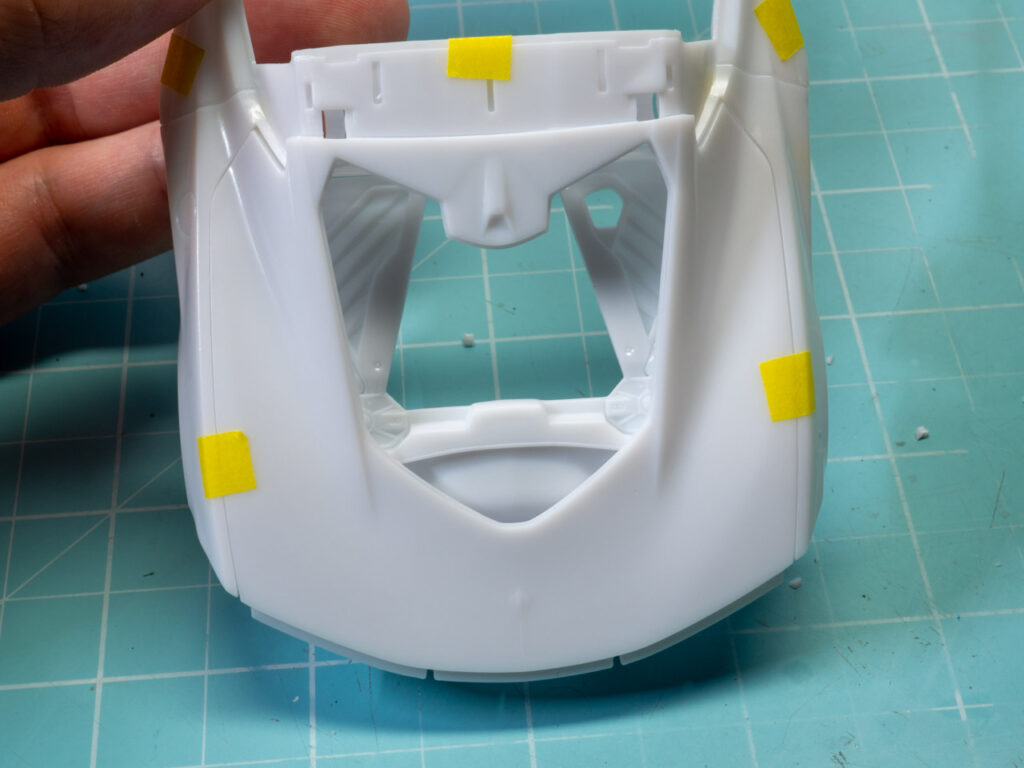
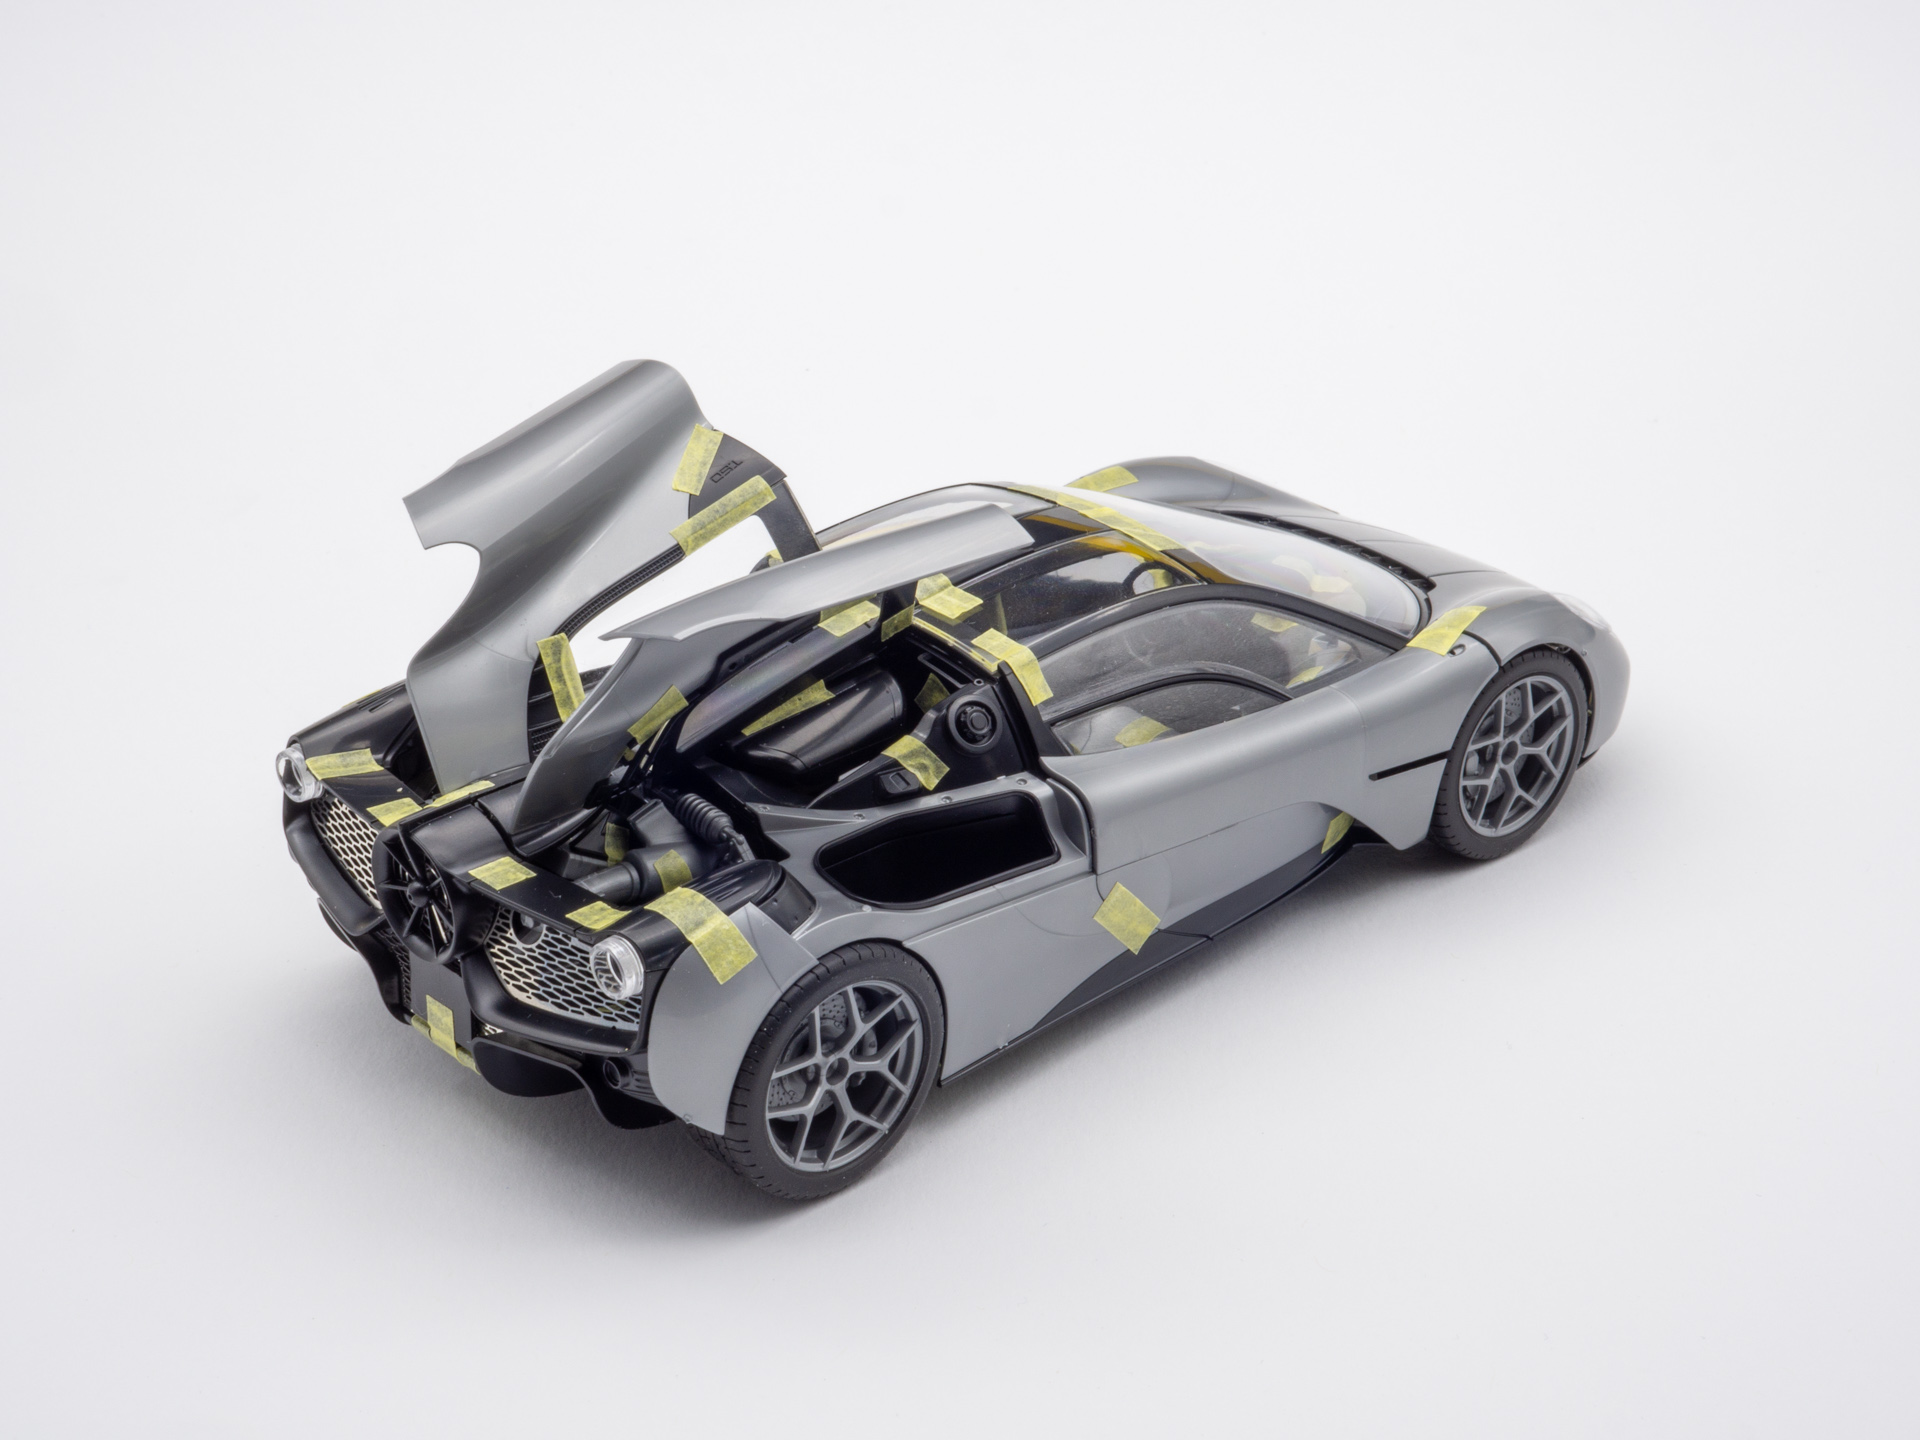
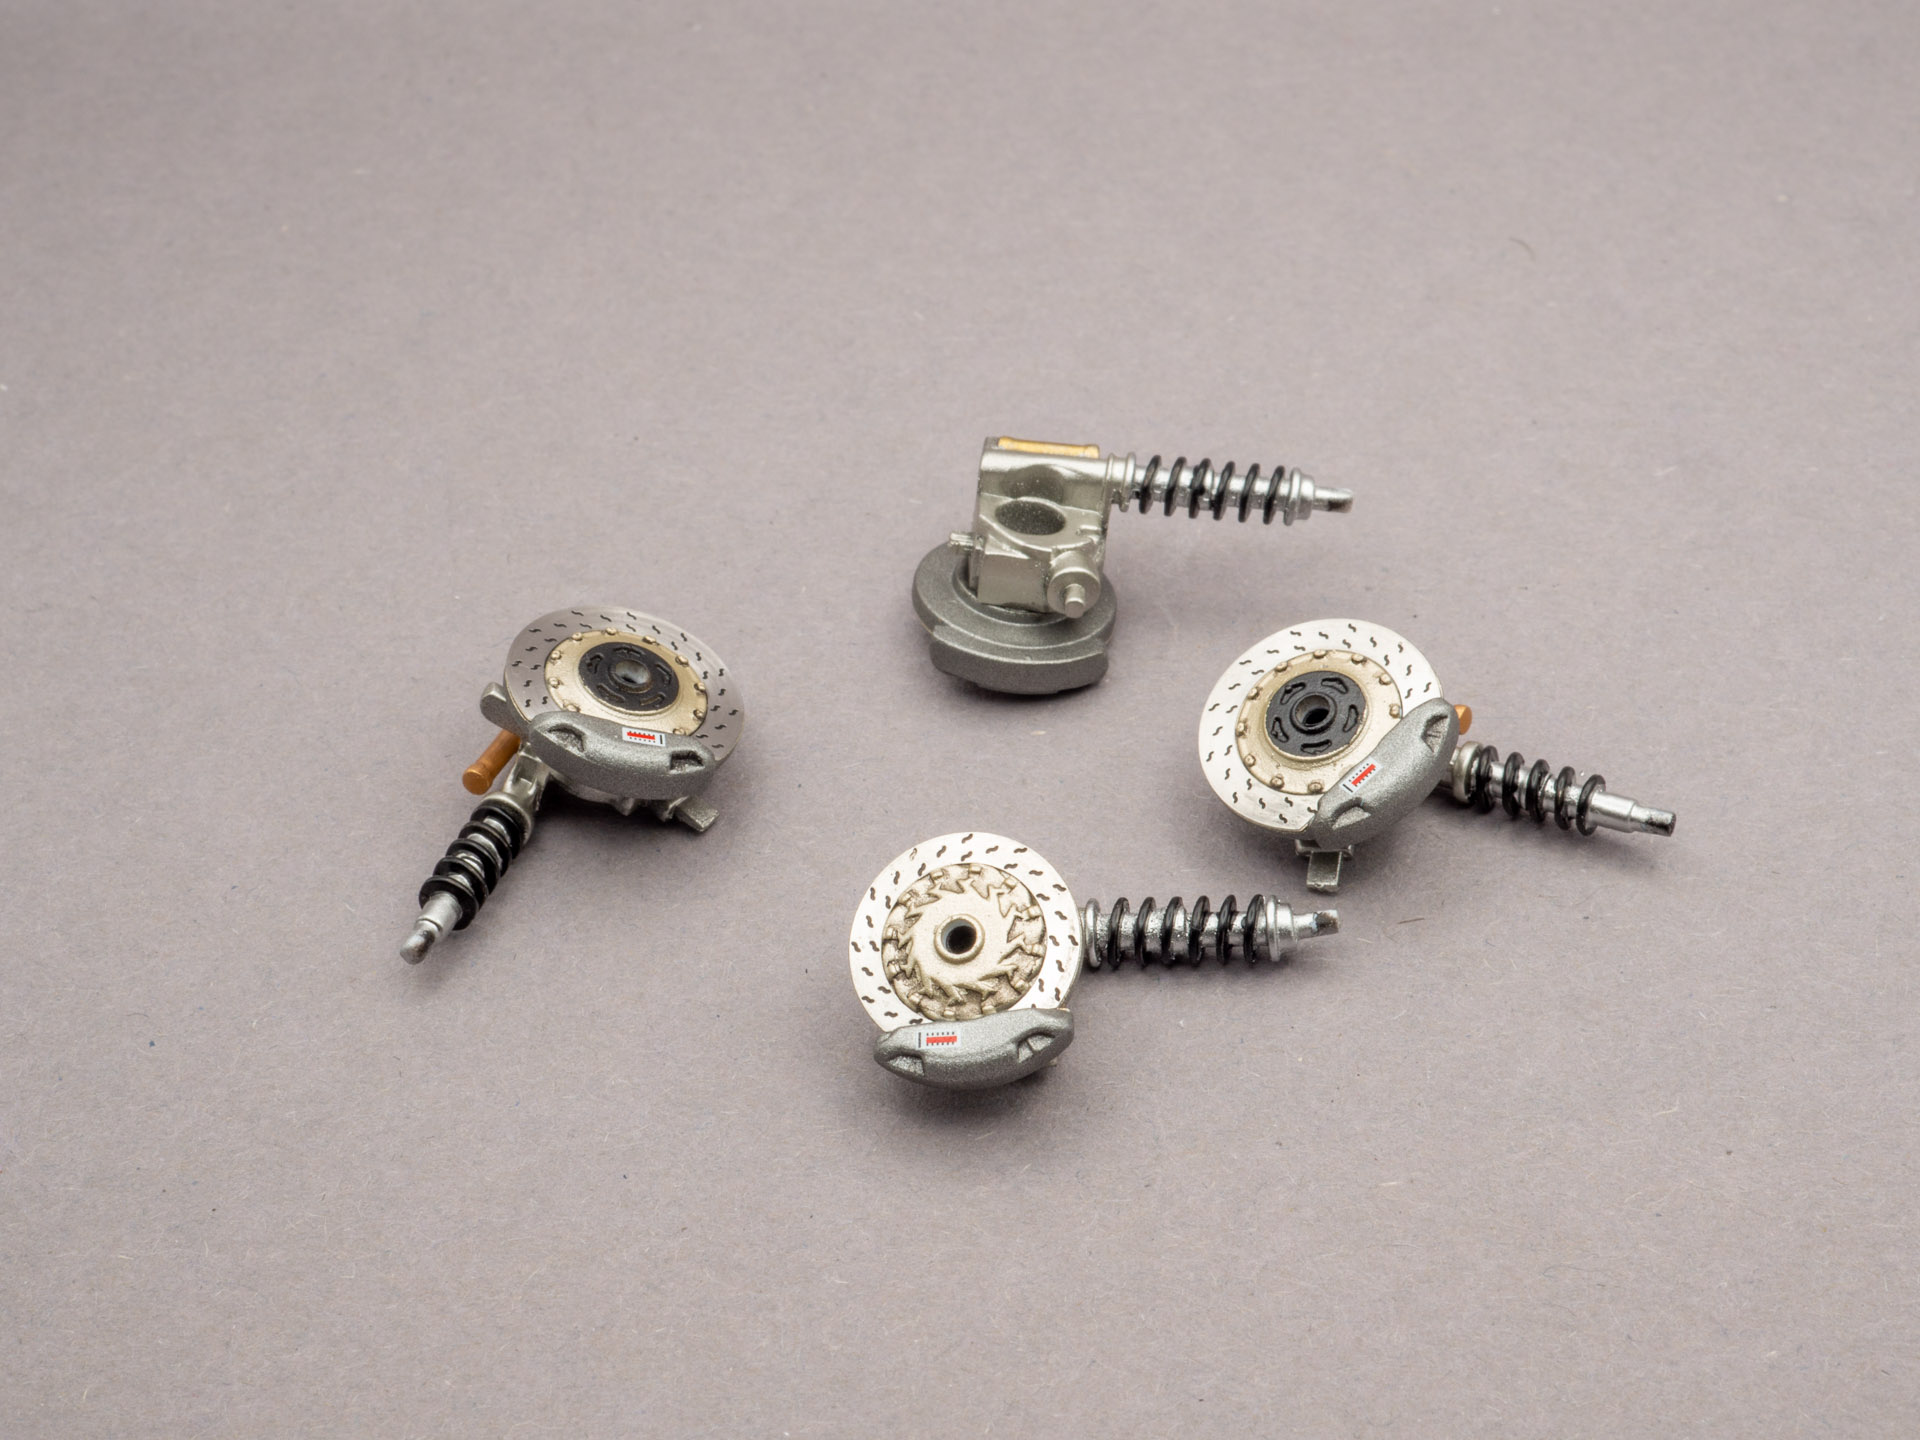
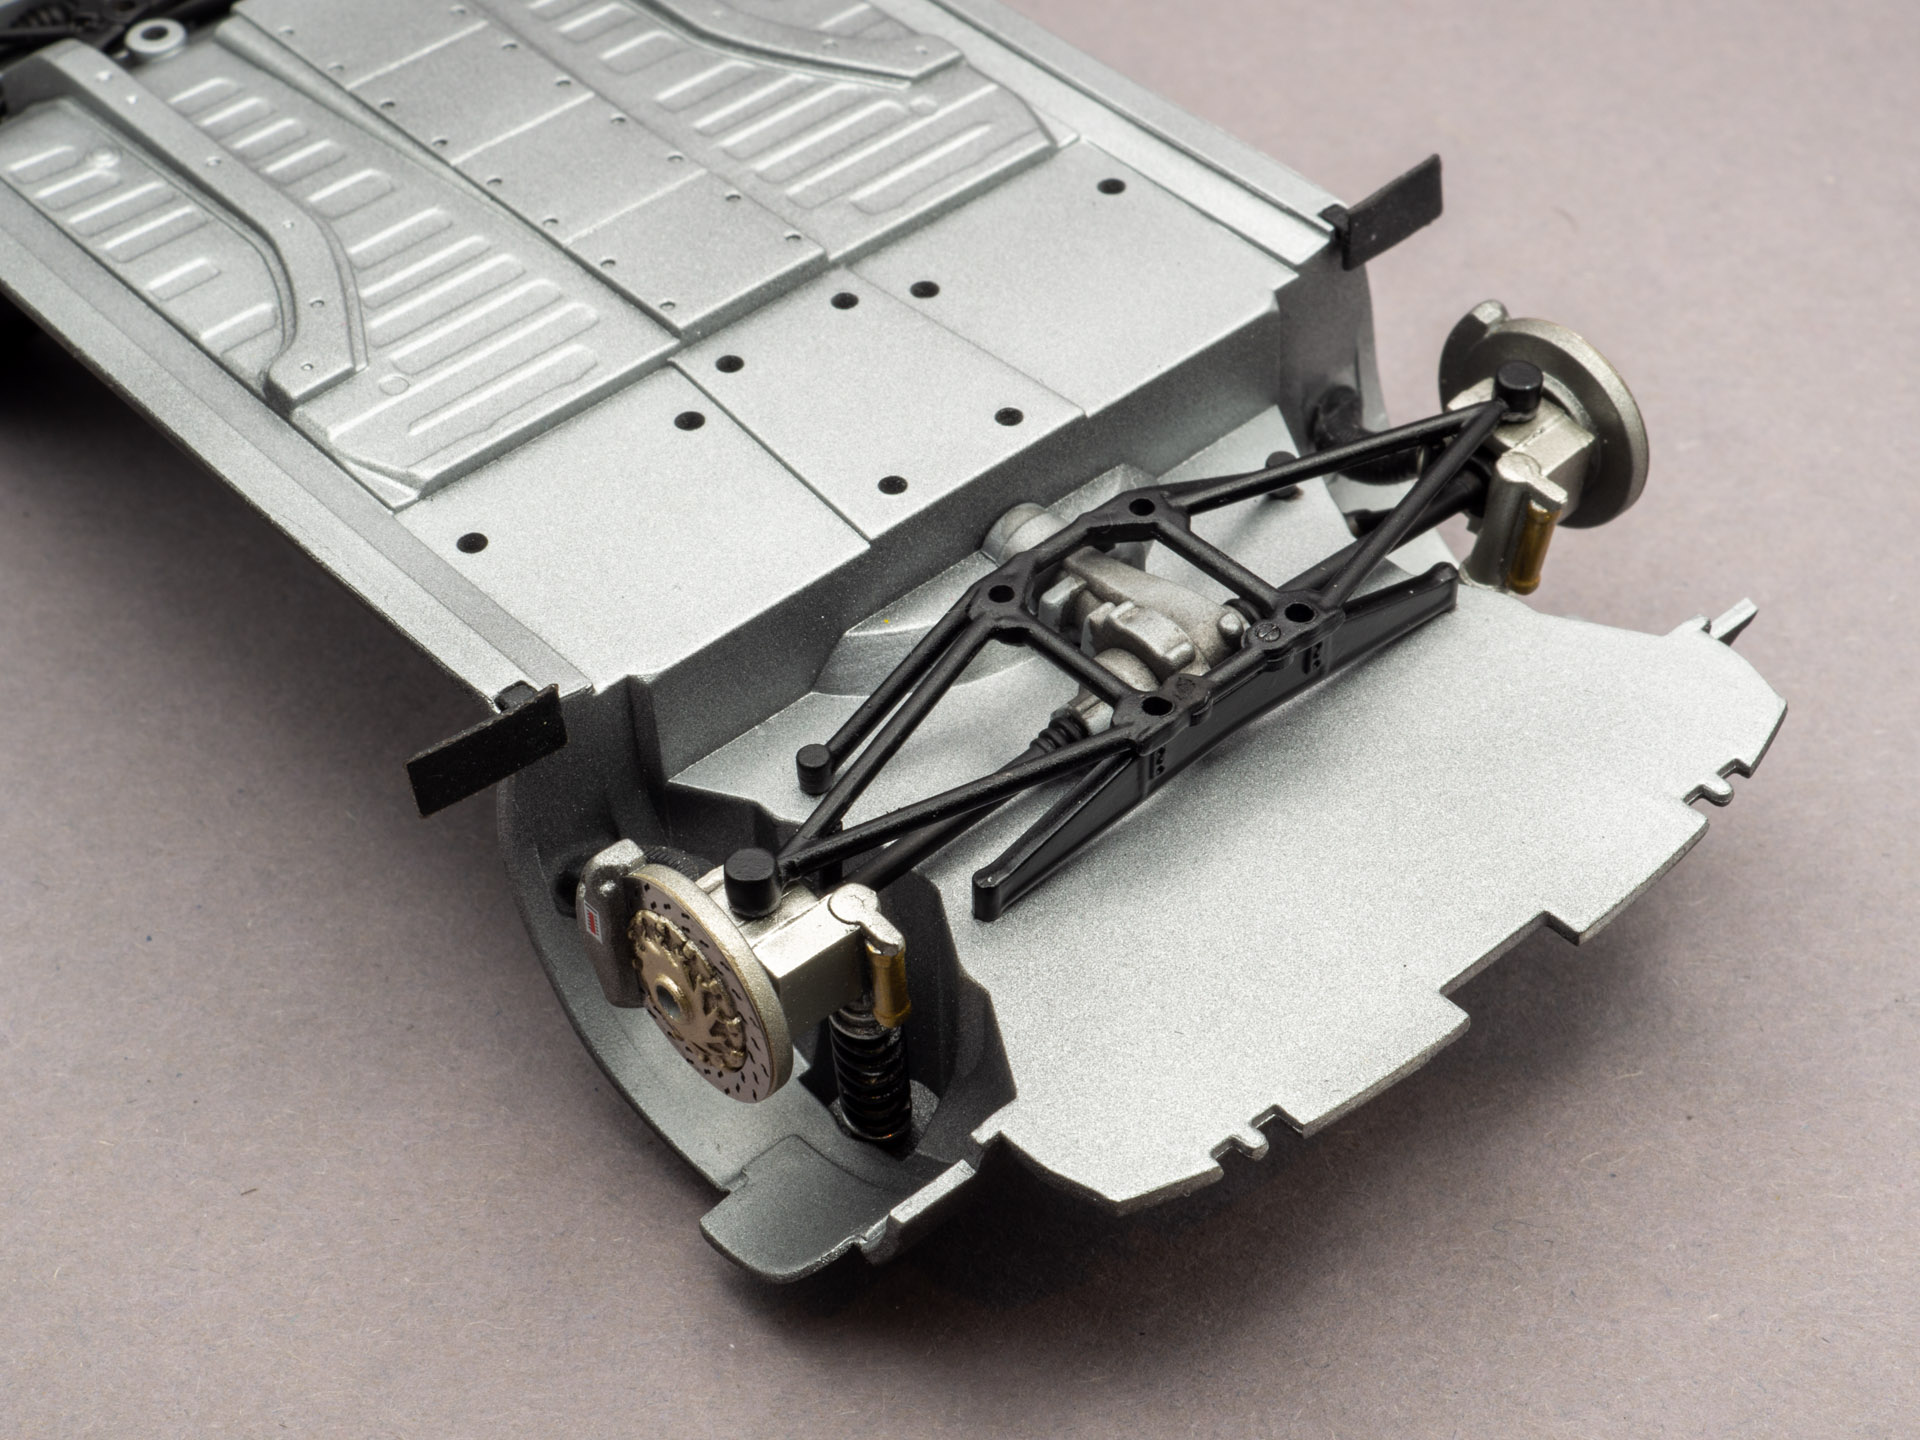
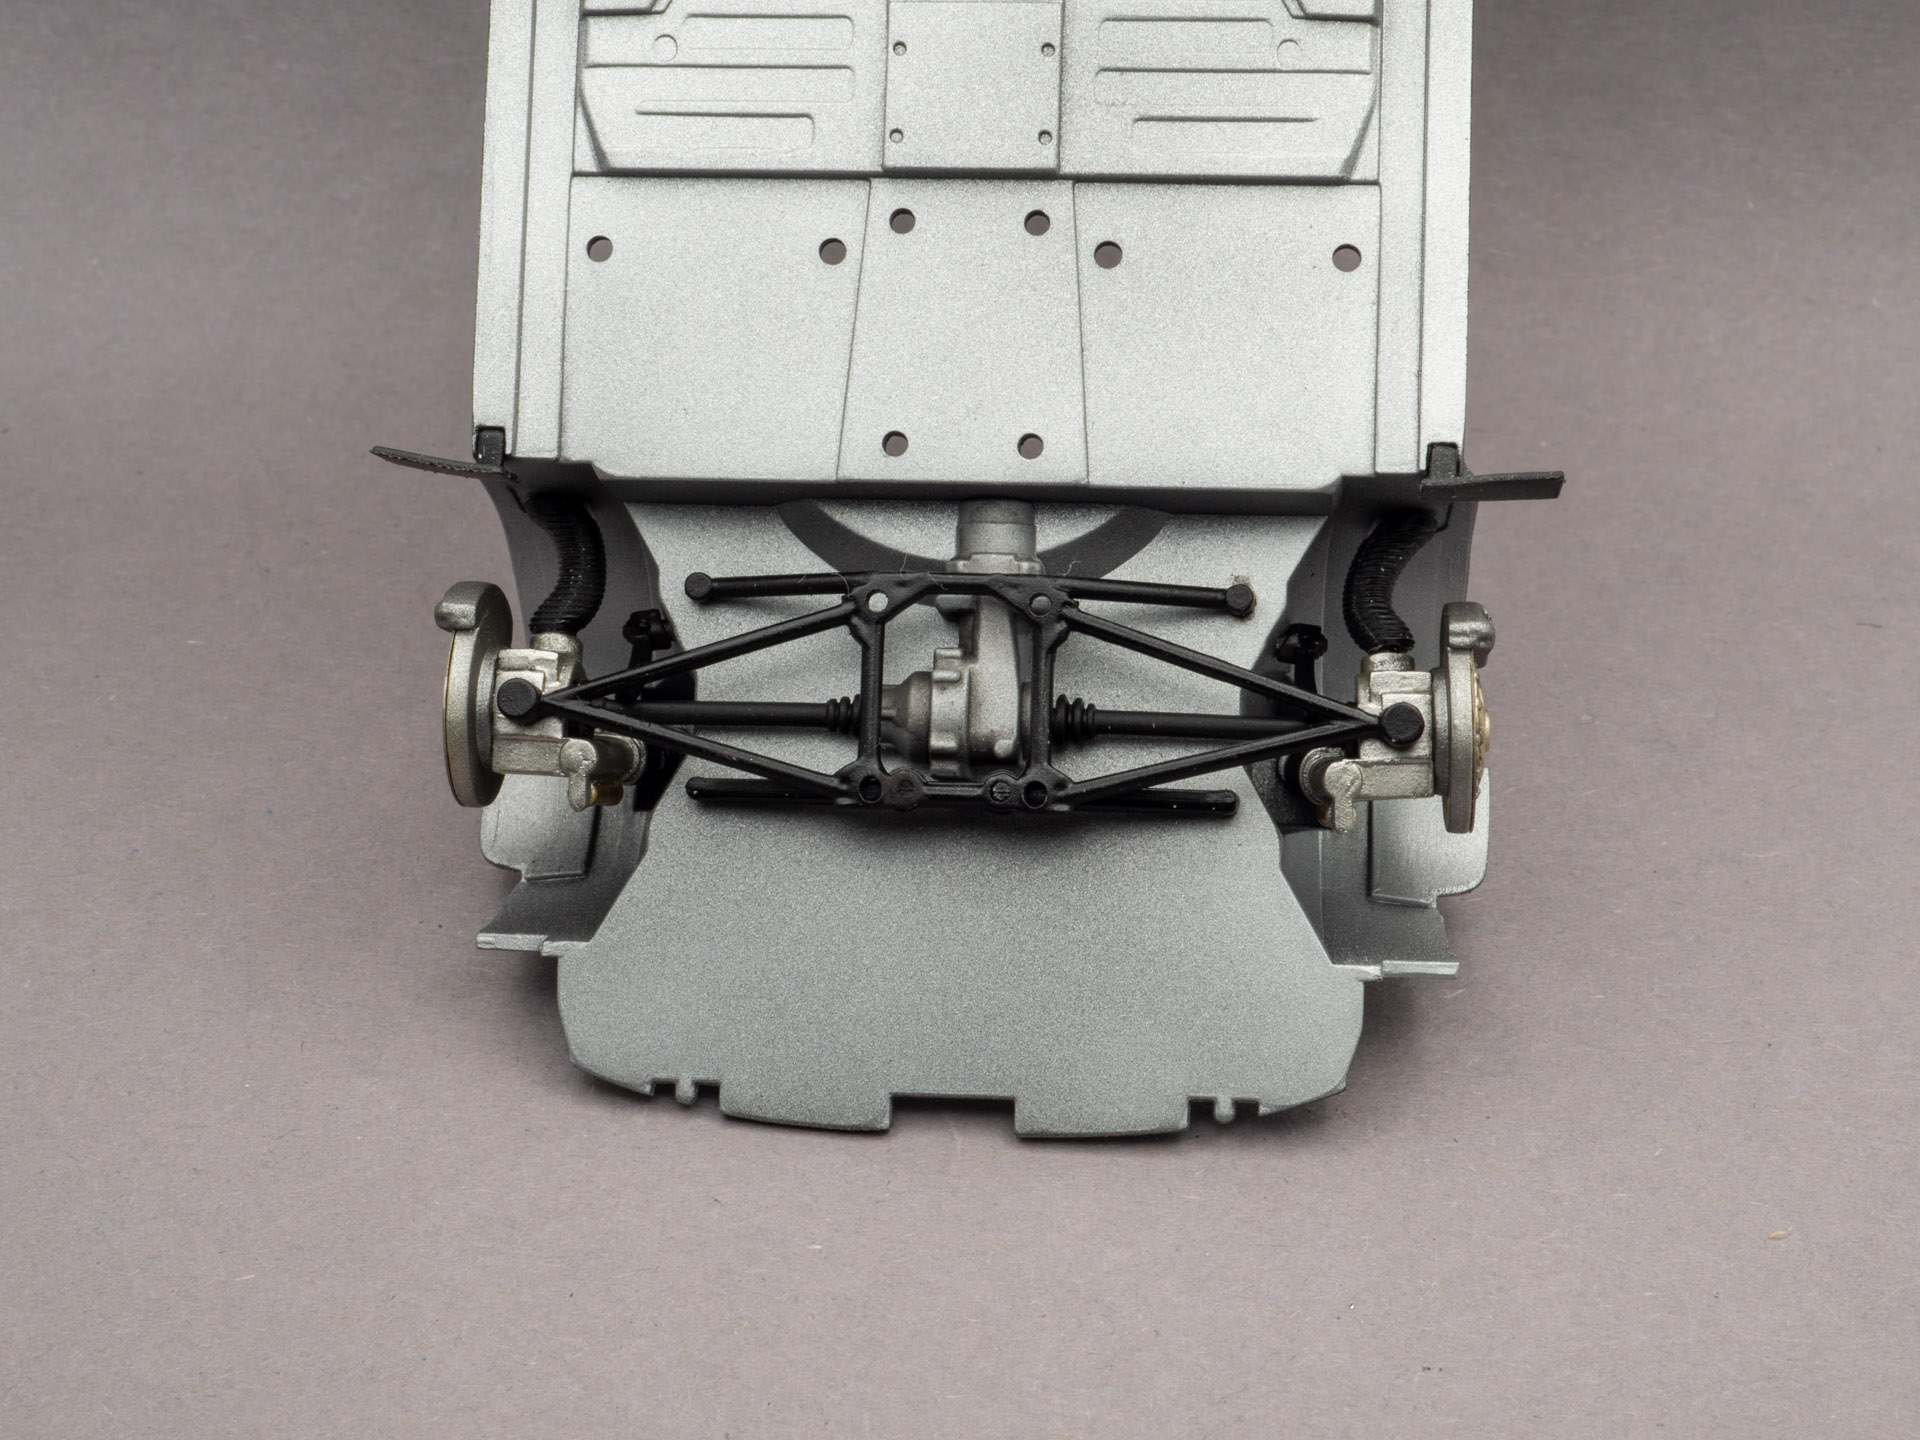
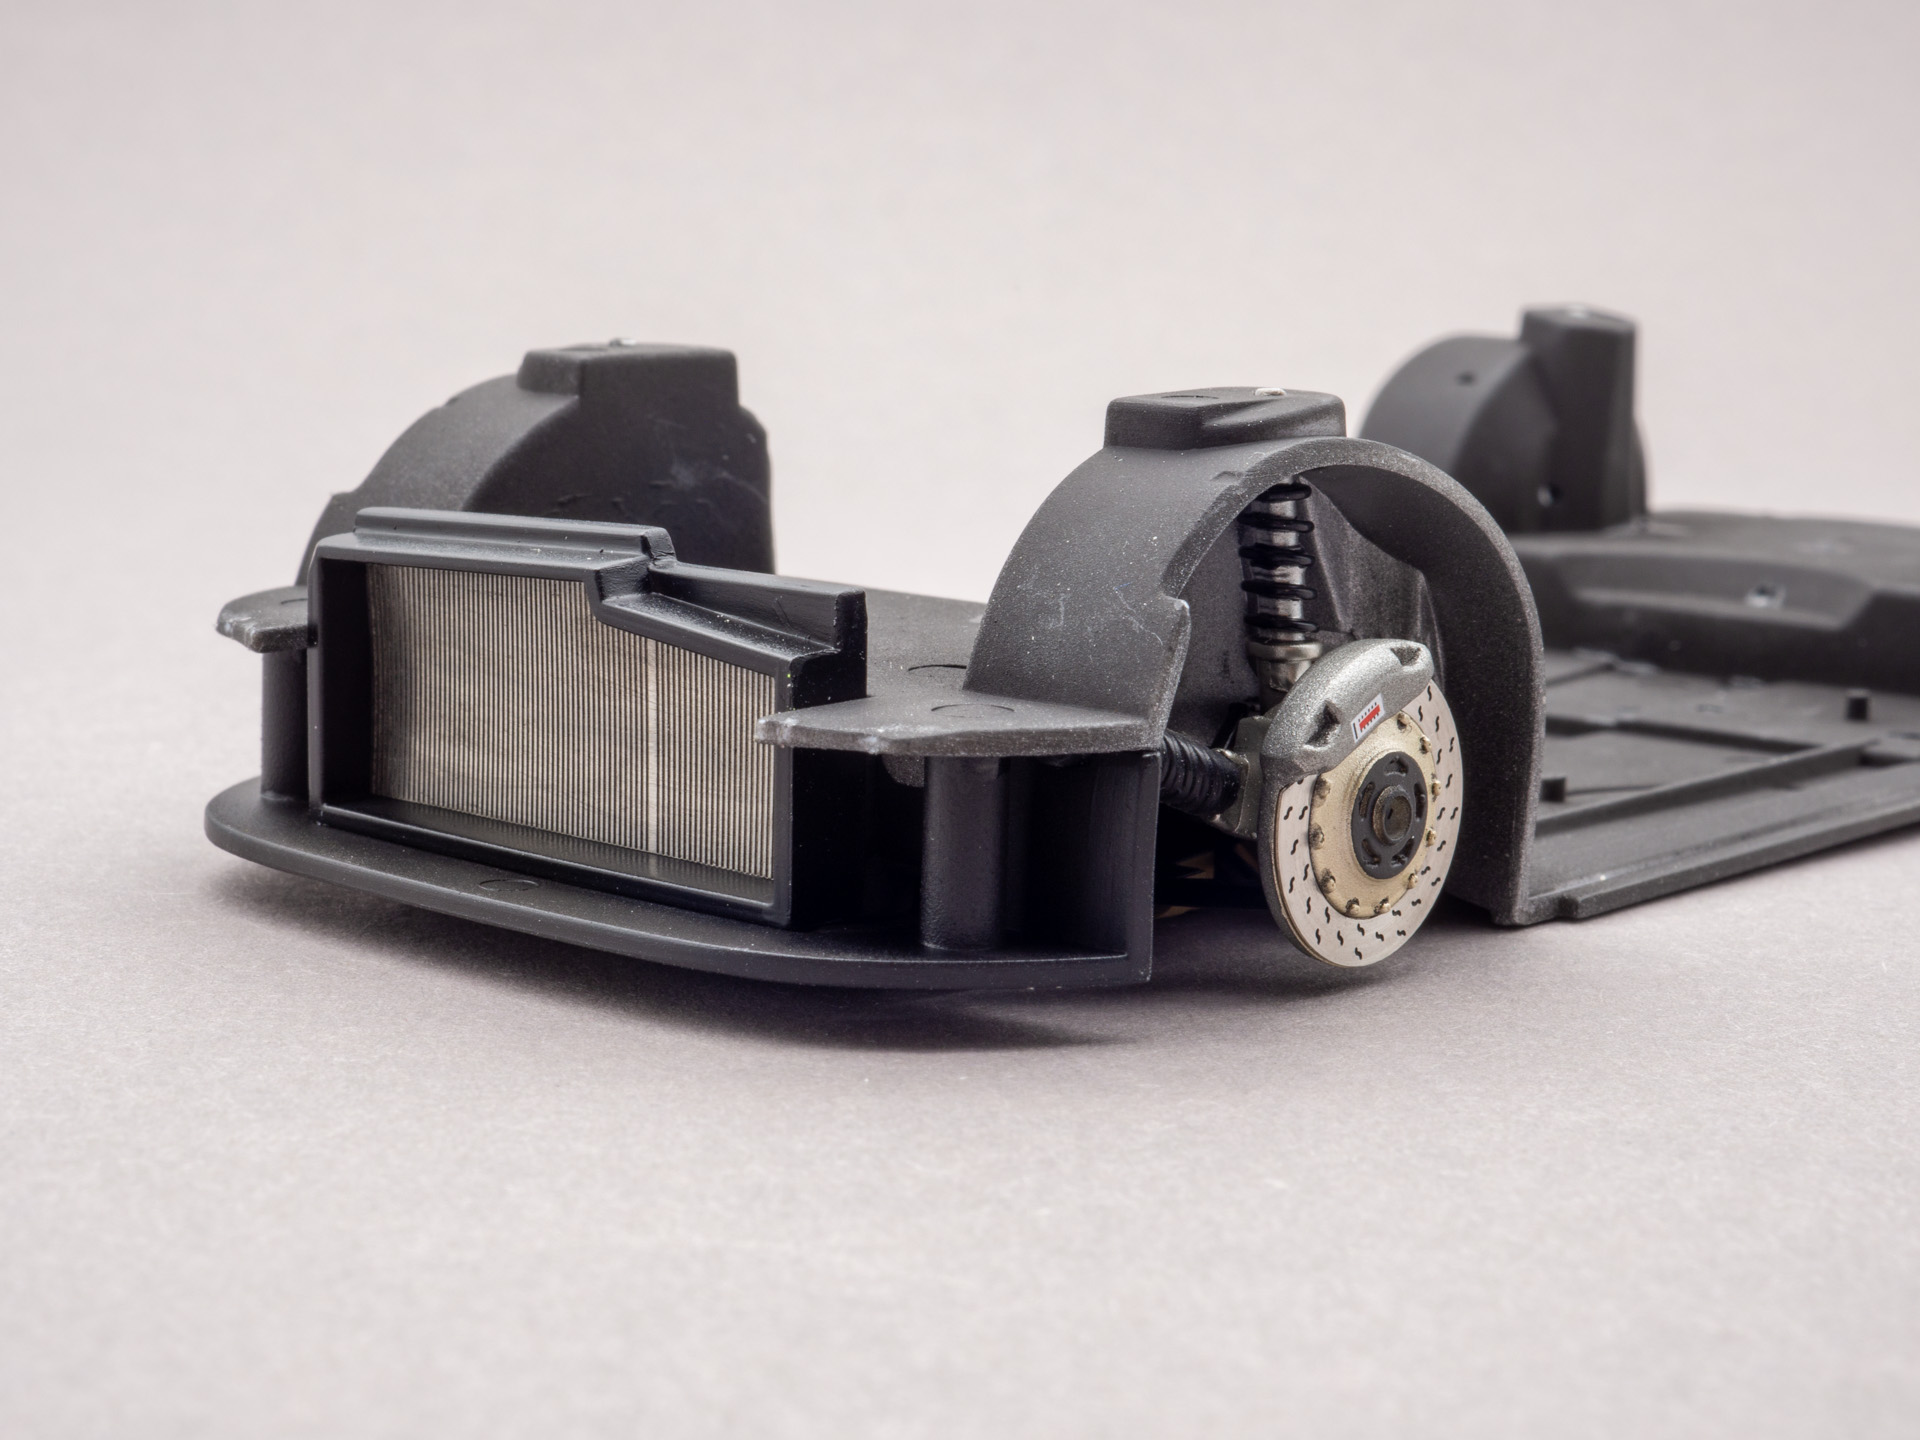
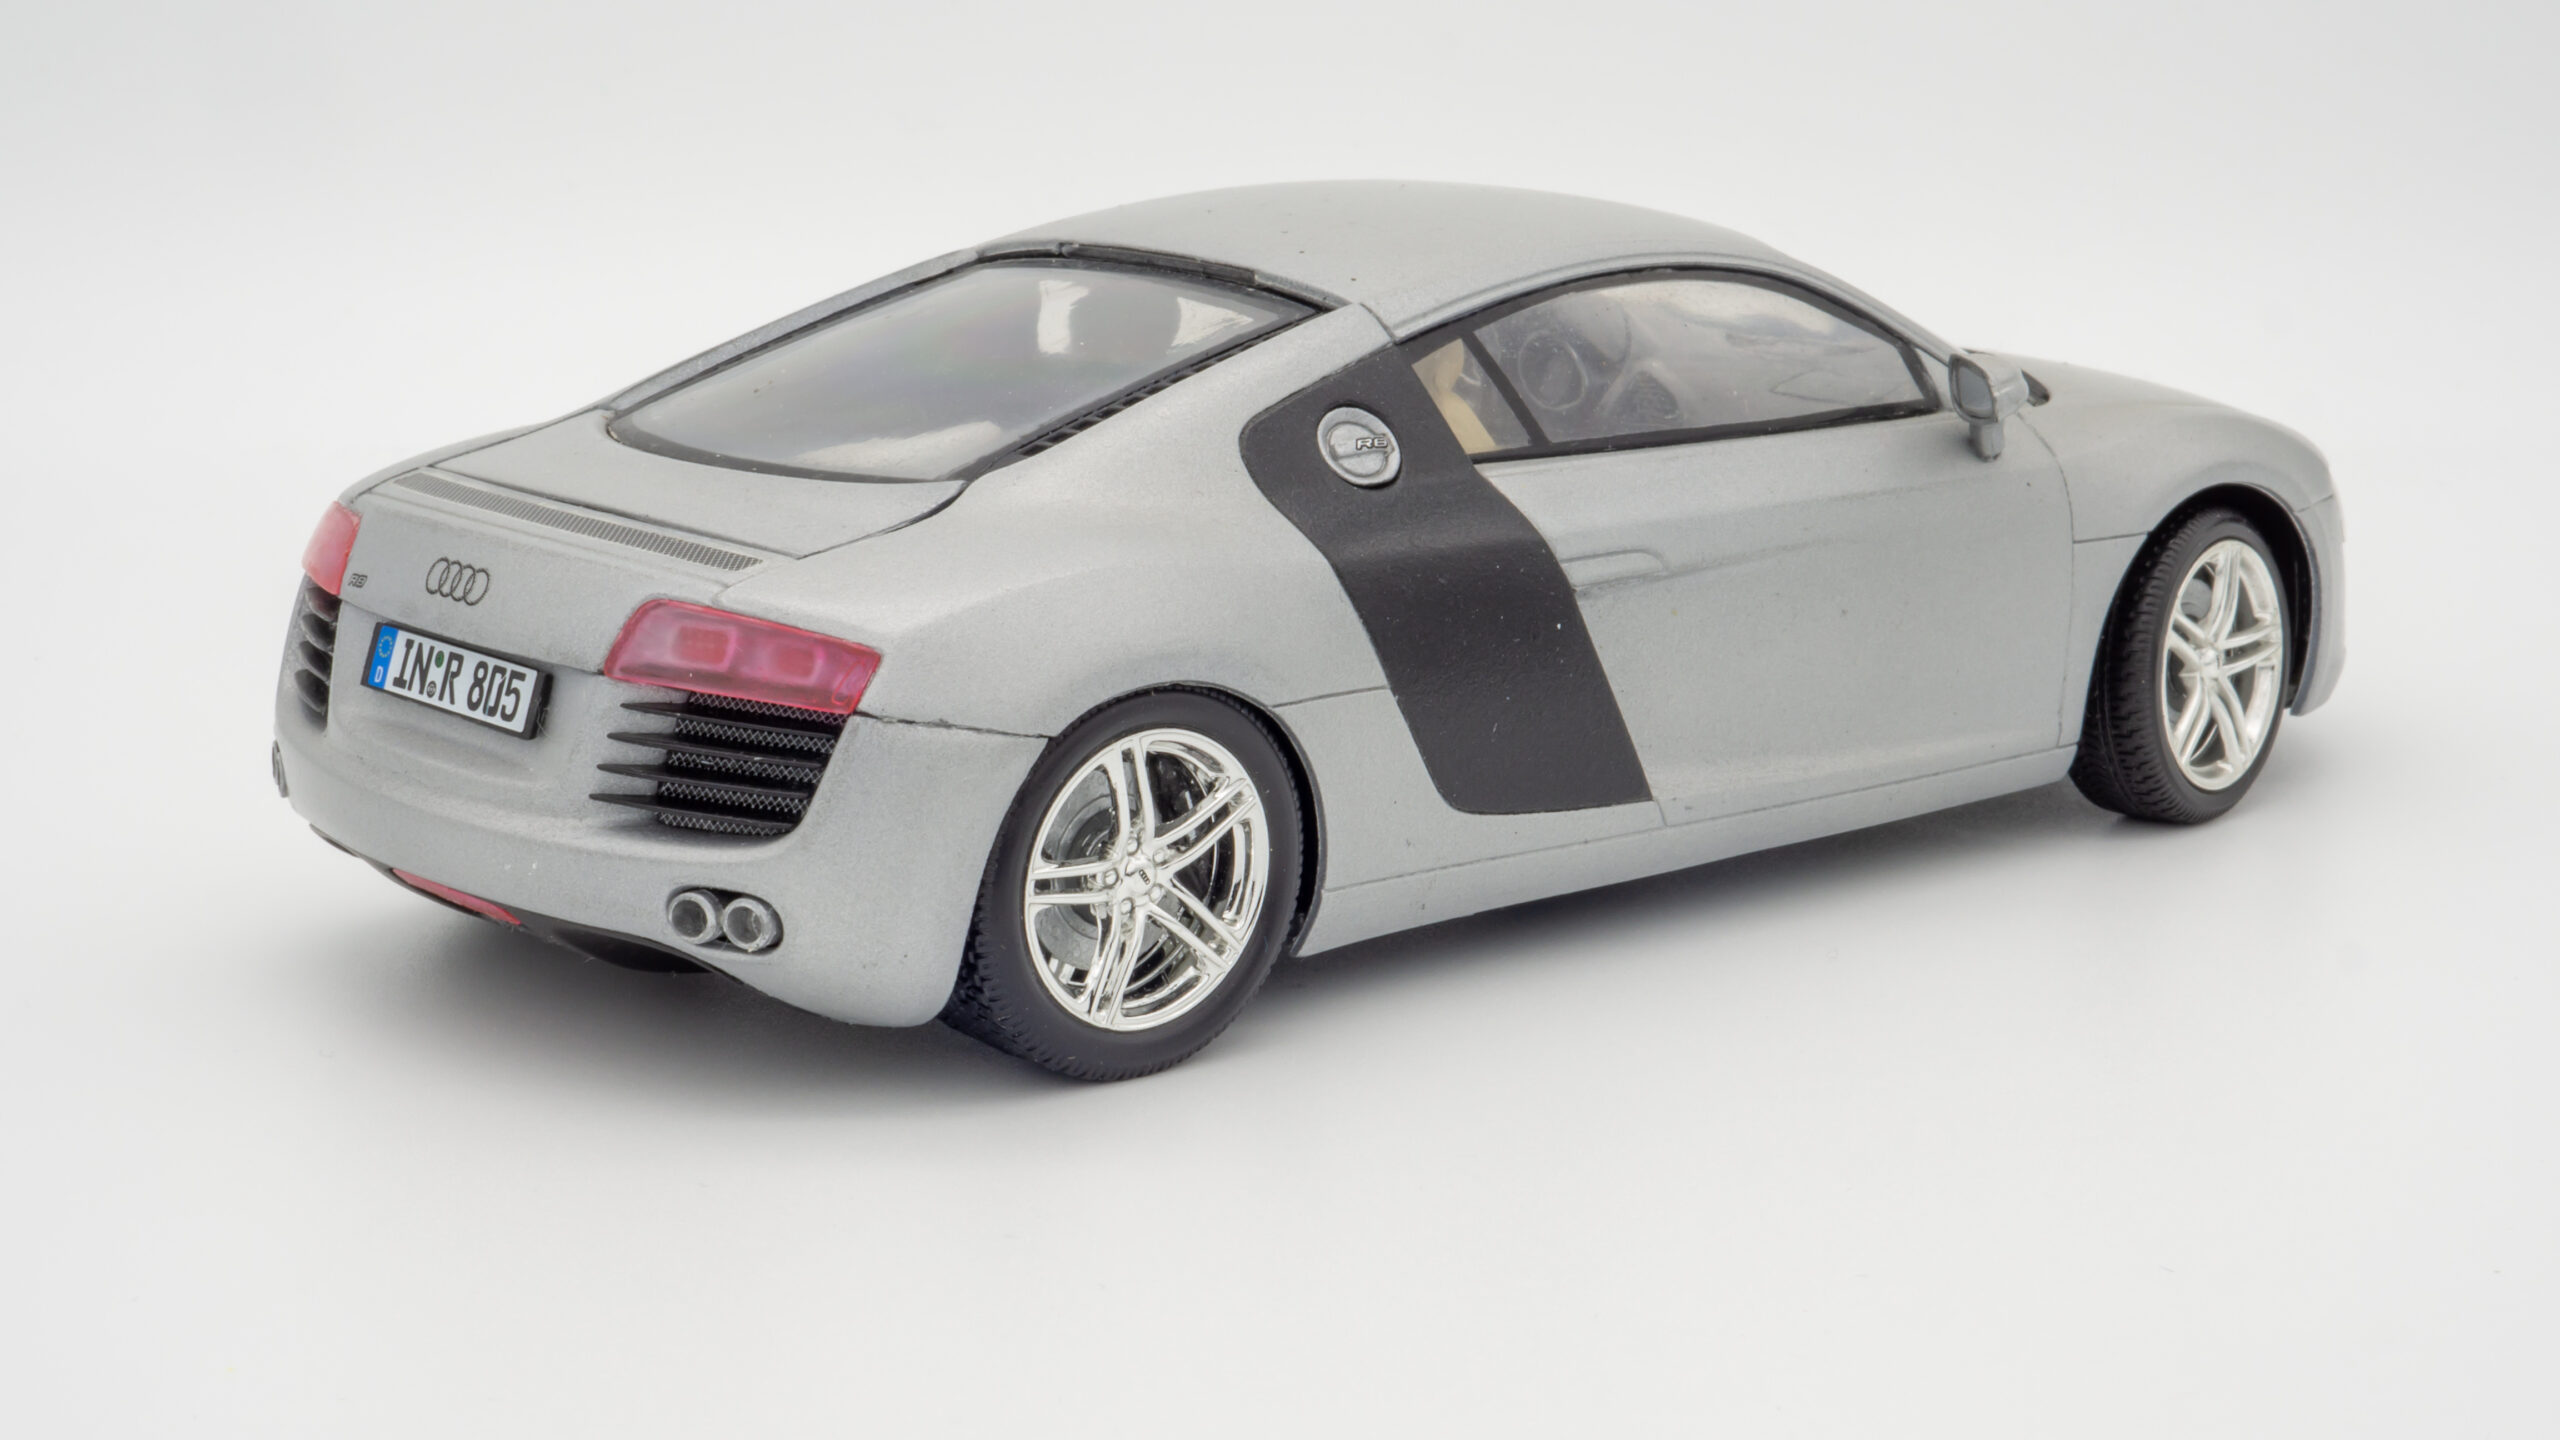
    Tail. The light reflectors and clear parts fit very smoothly. Without the back part, by the way, you can clearly see what’s inside – a resonator with a gearbox.

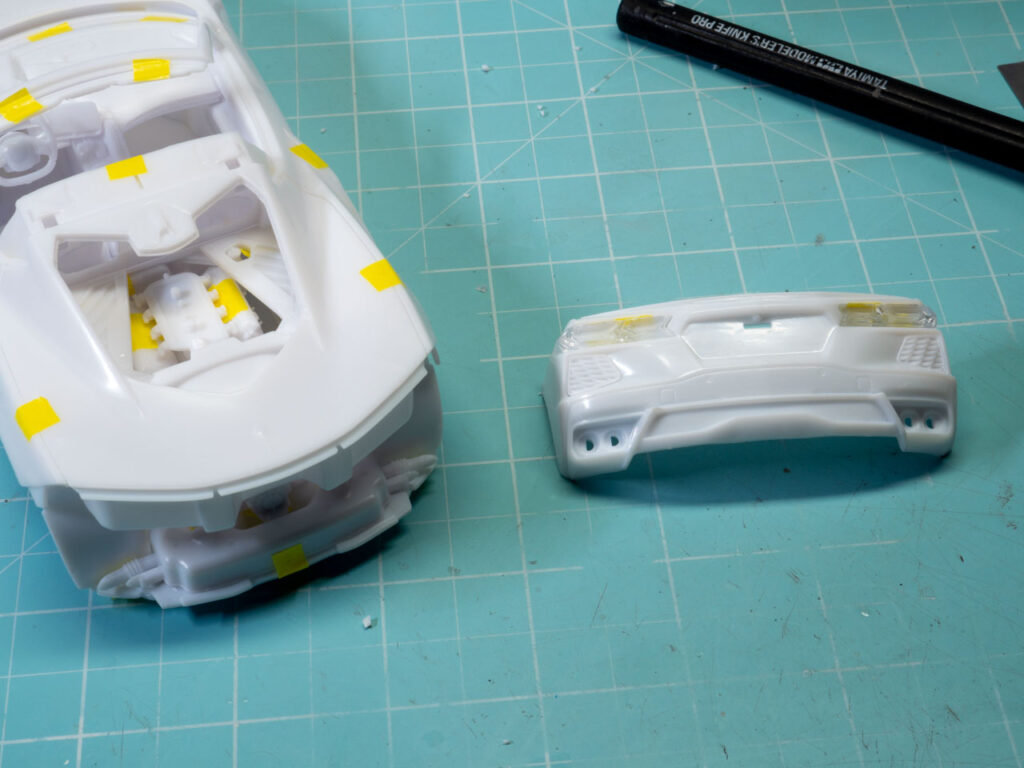
    Here the joint is smooth. But anyway, need to fit it more precise.

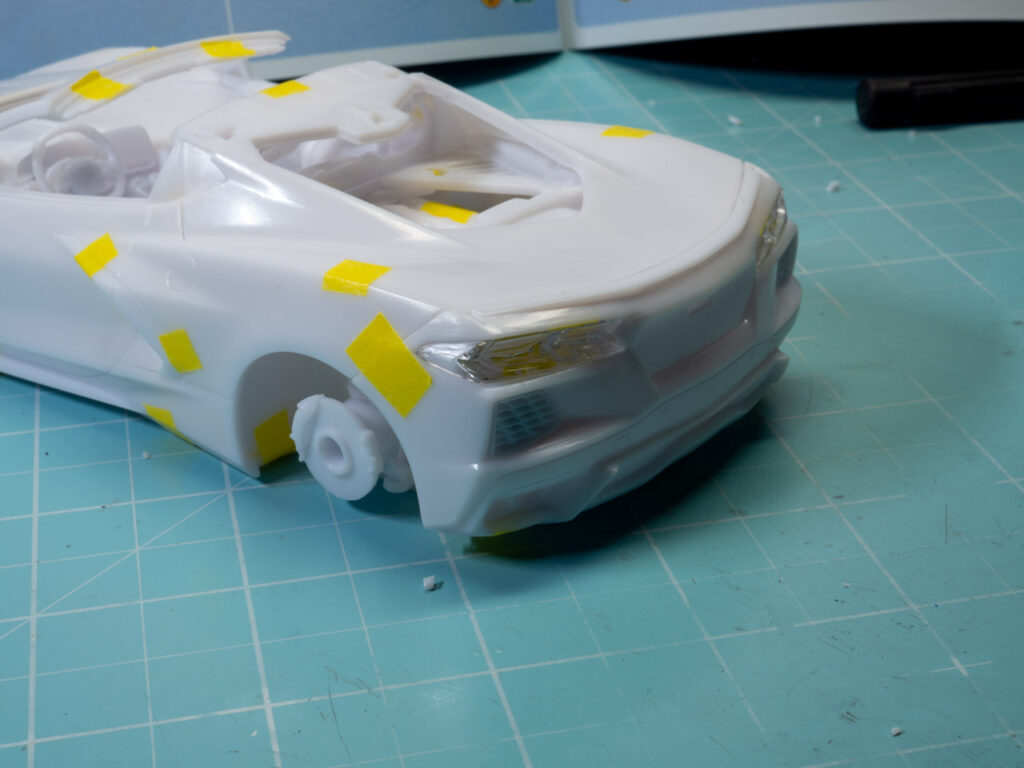
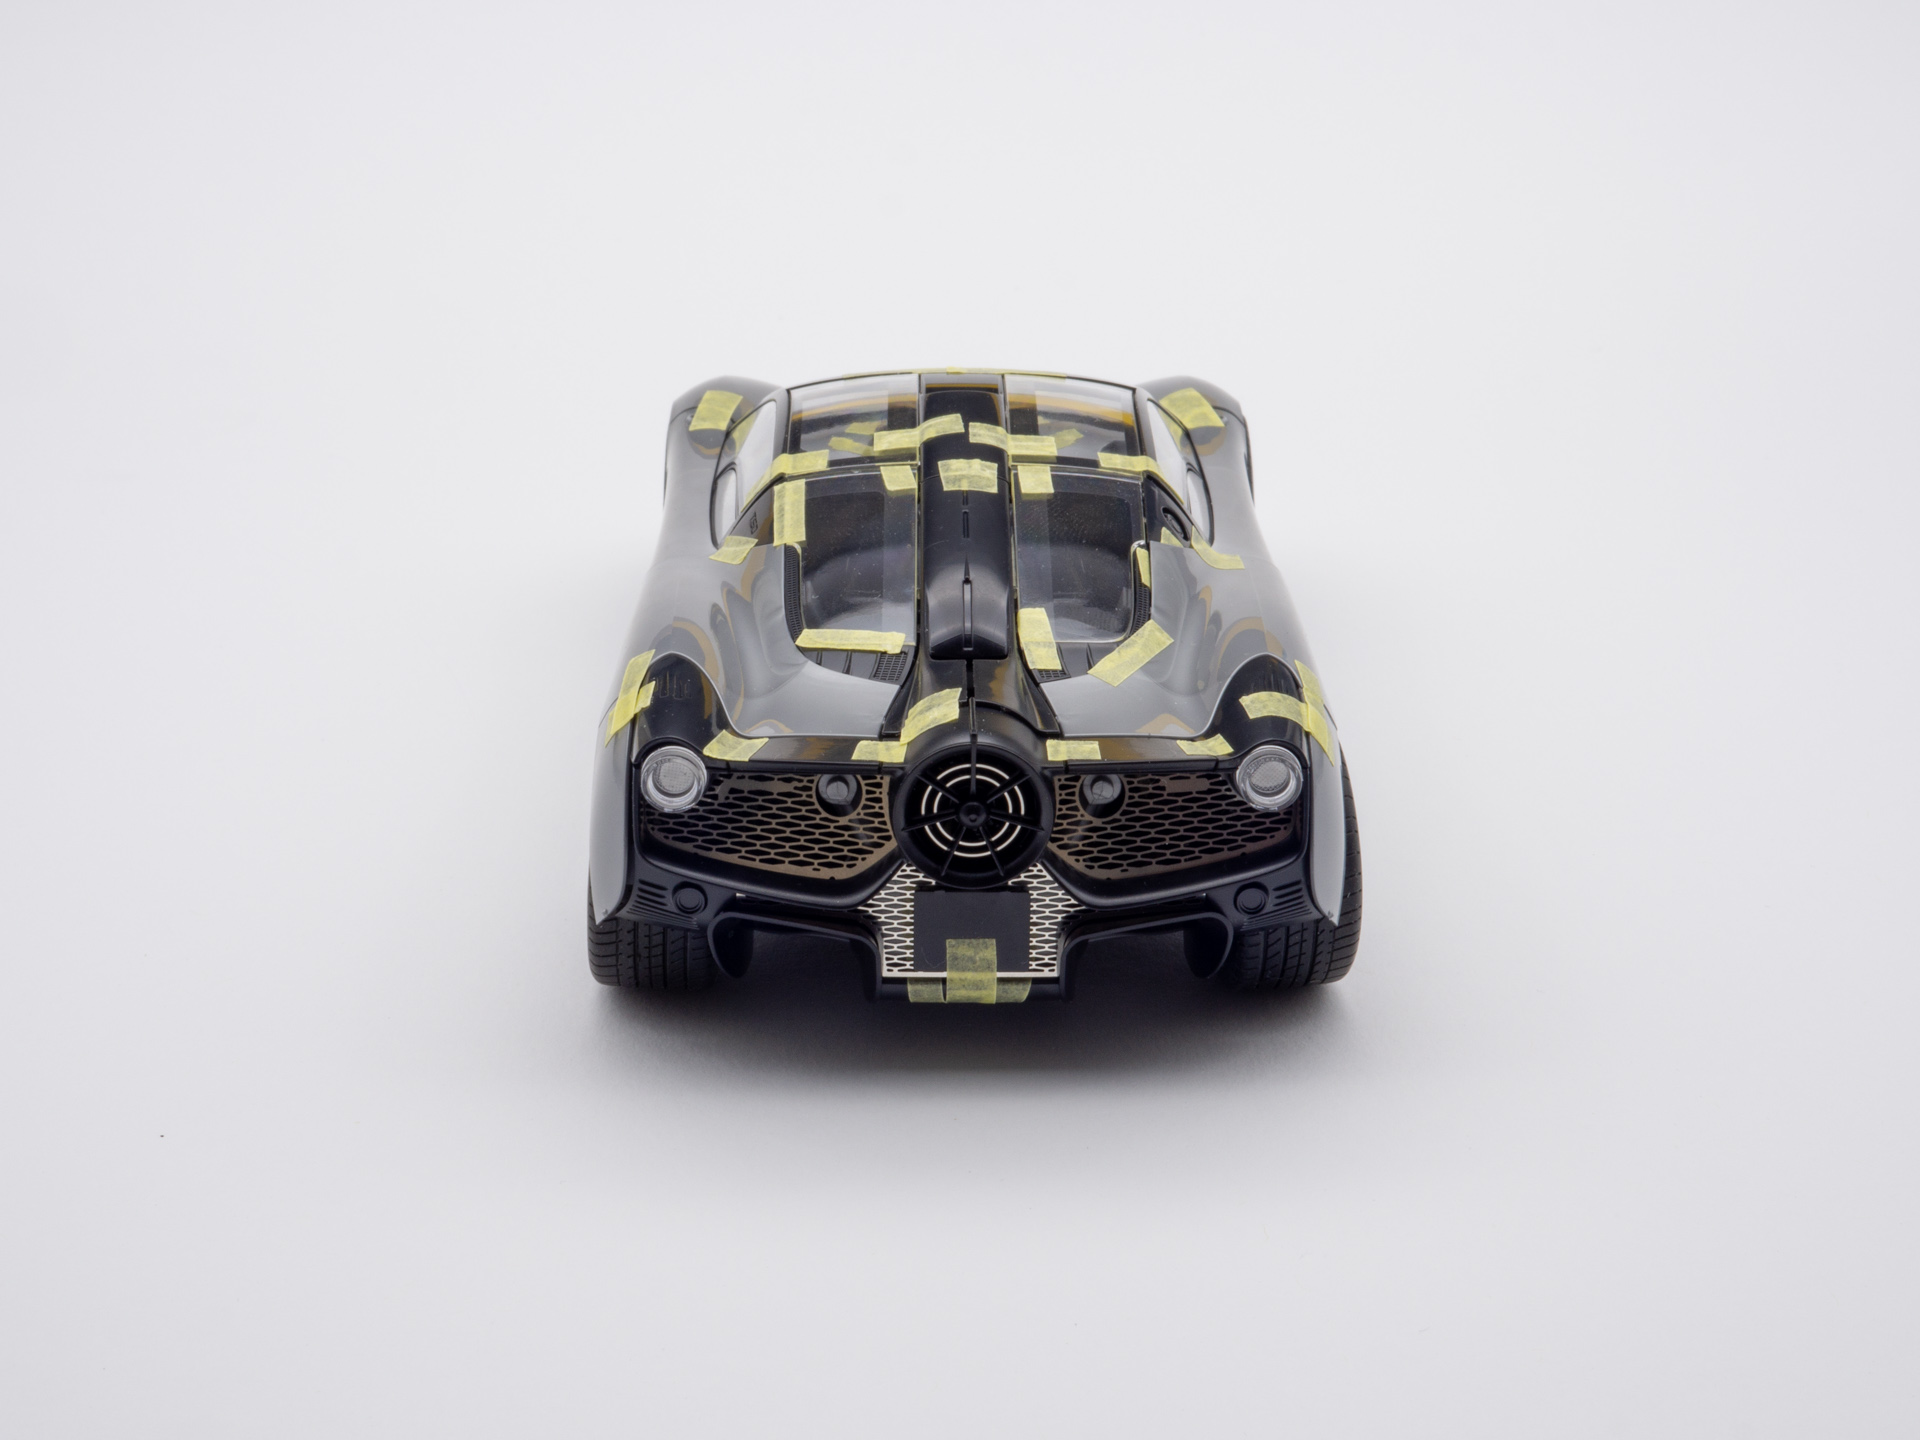
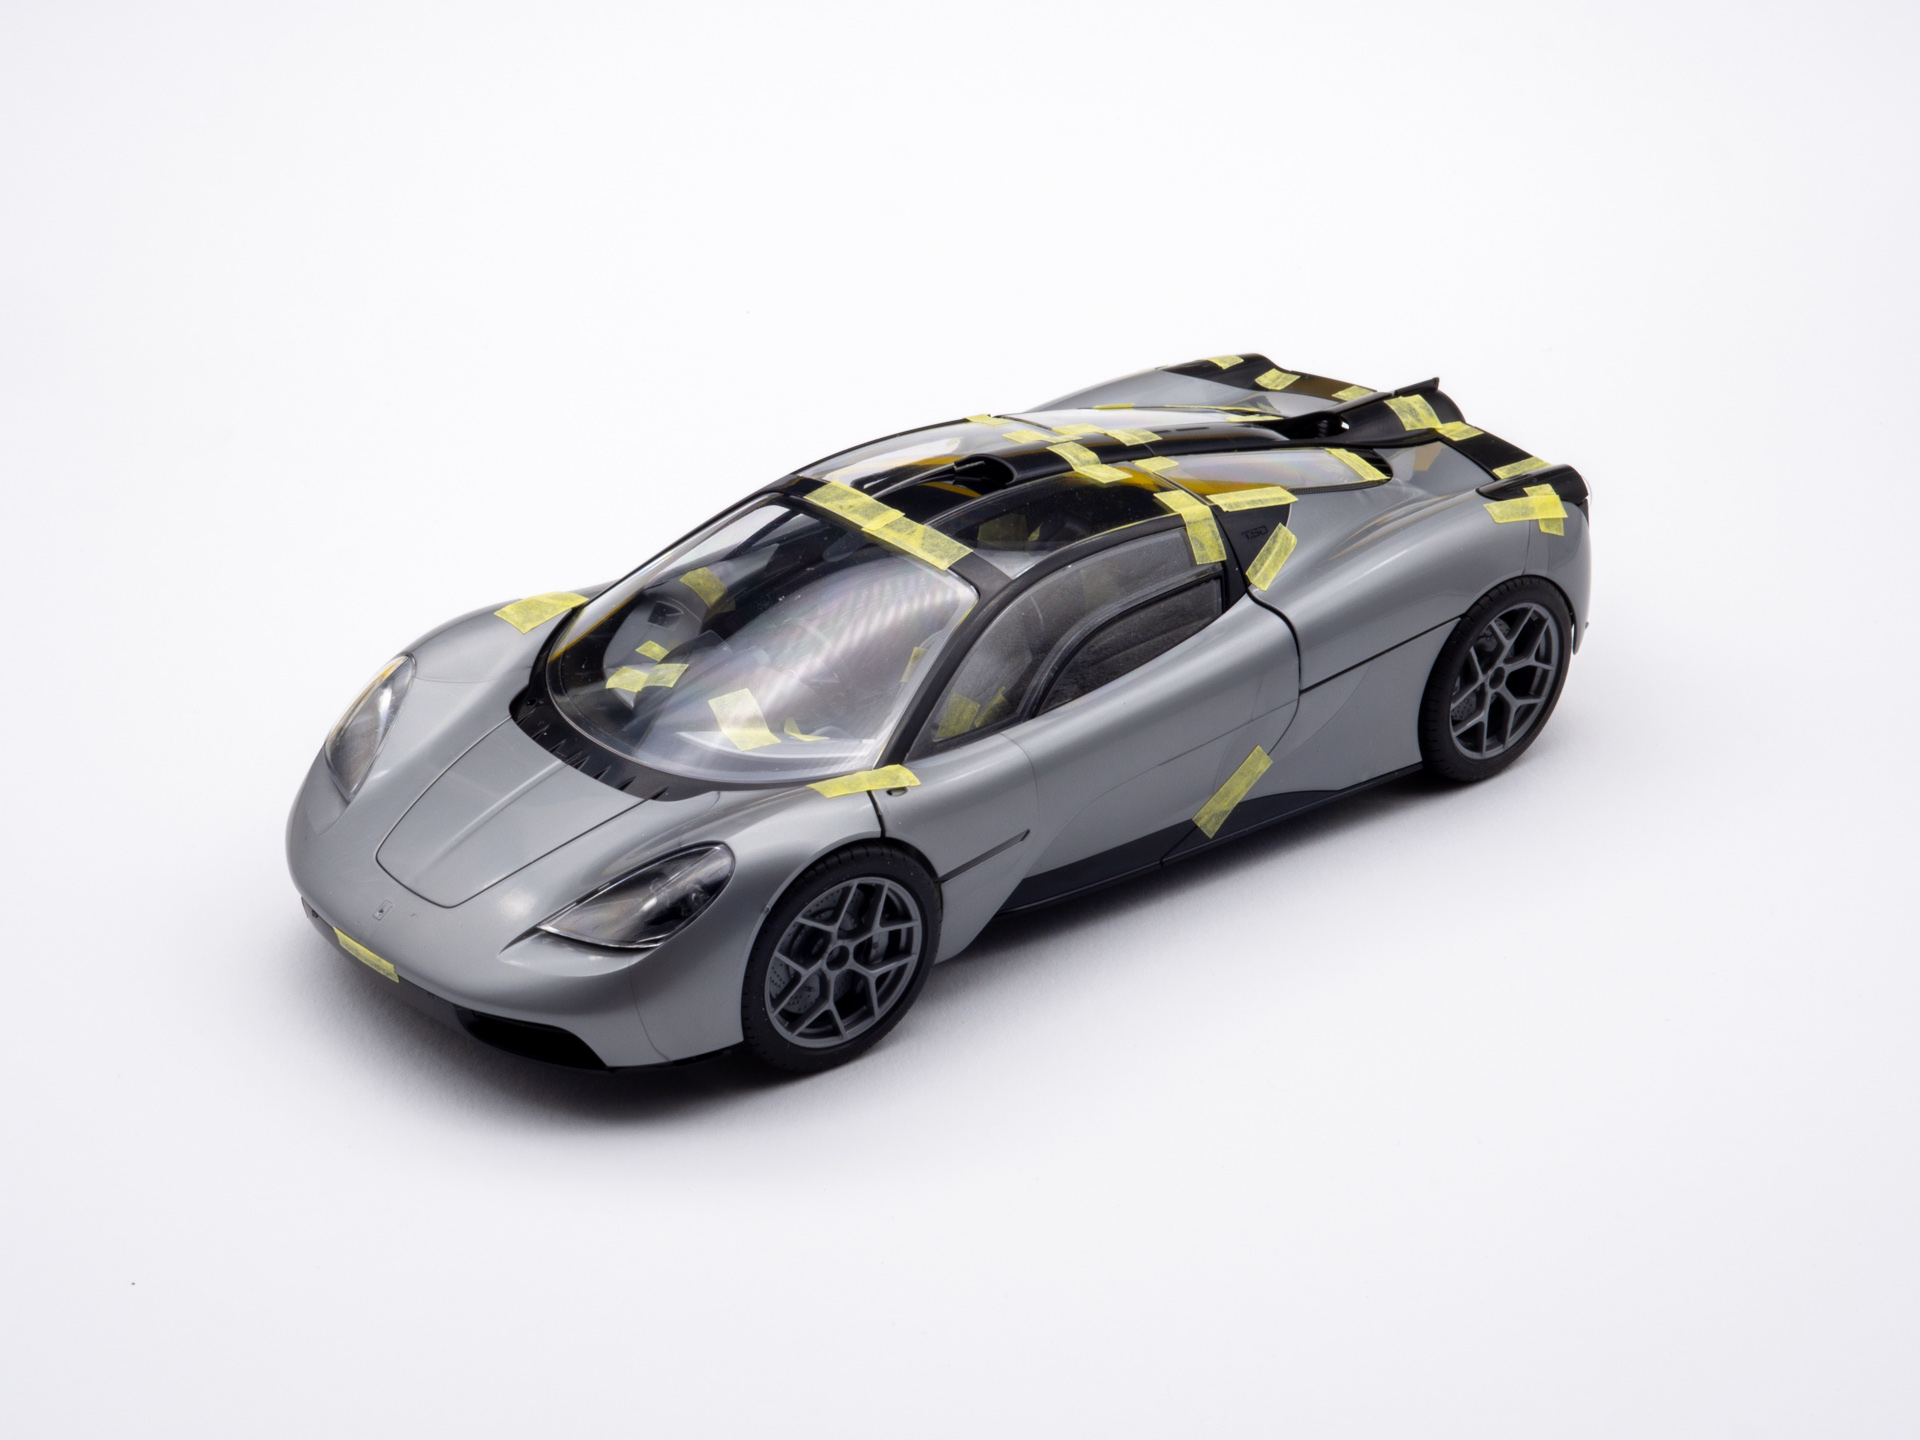
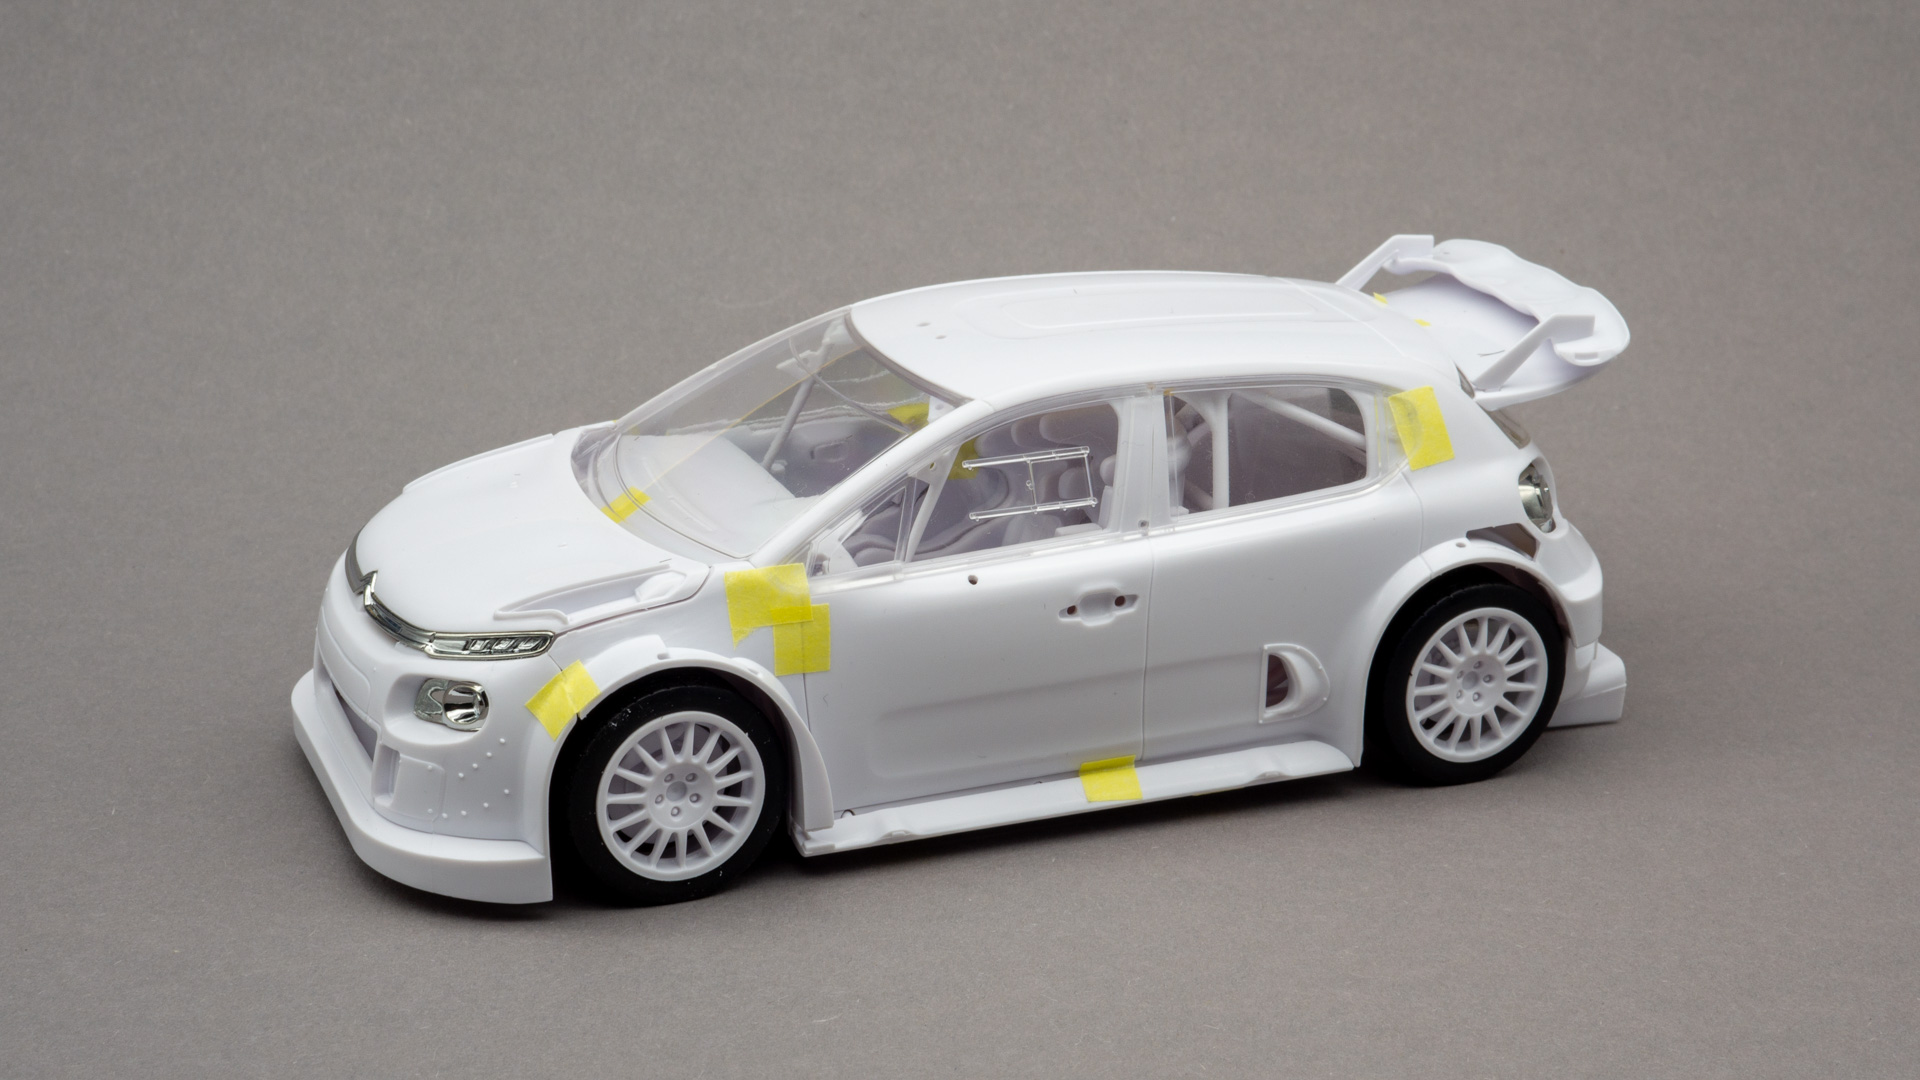
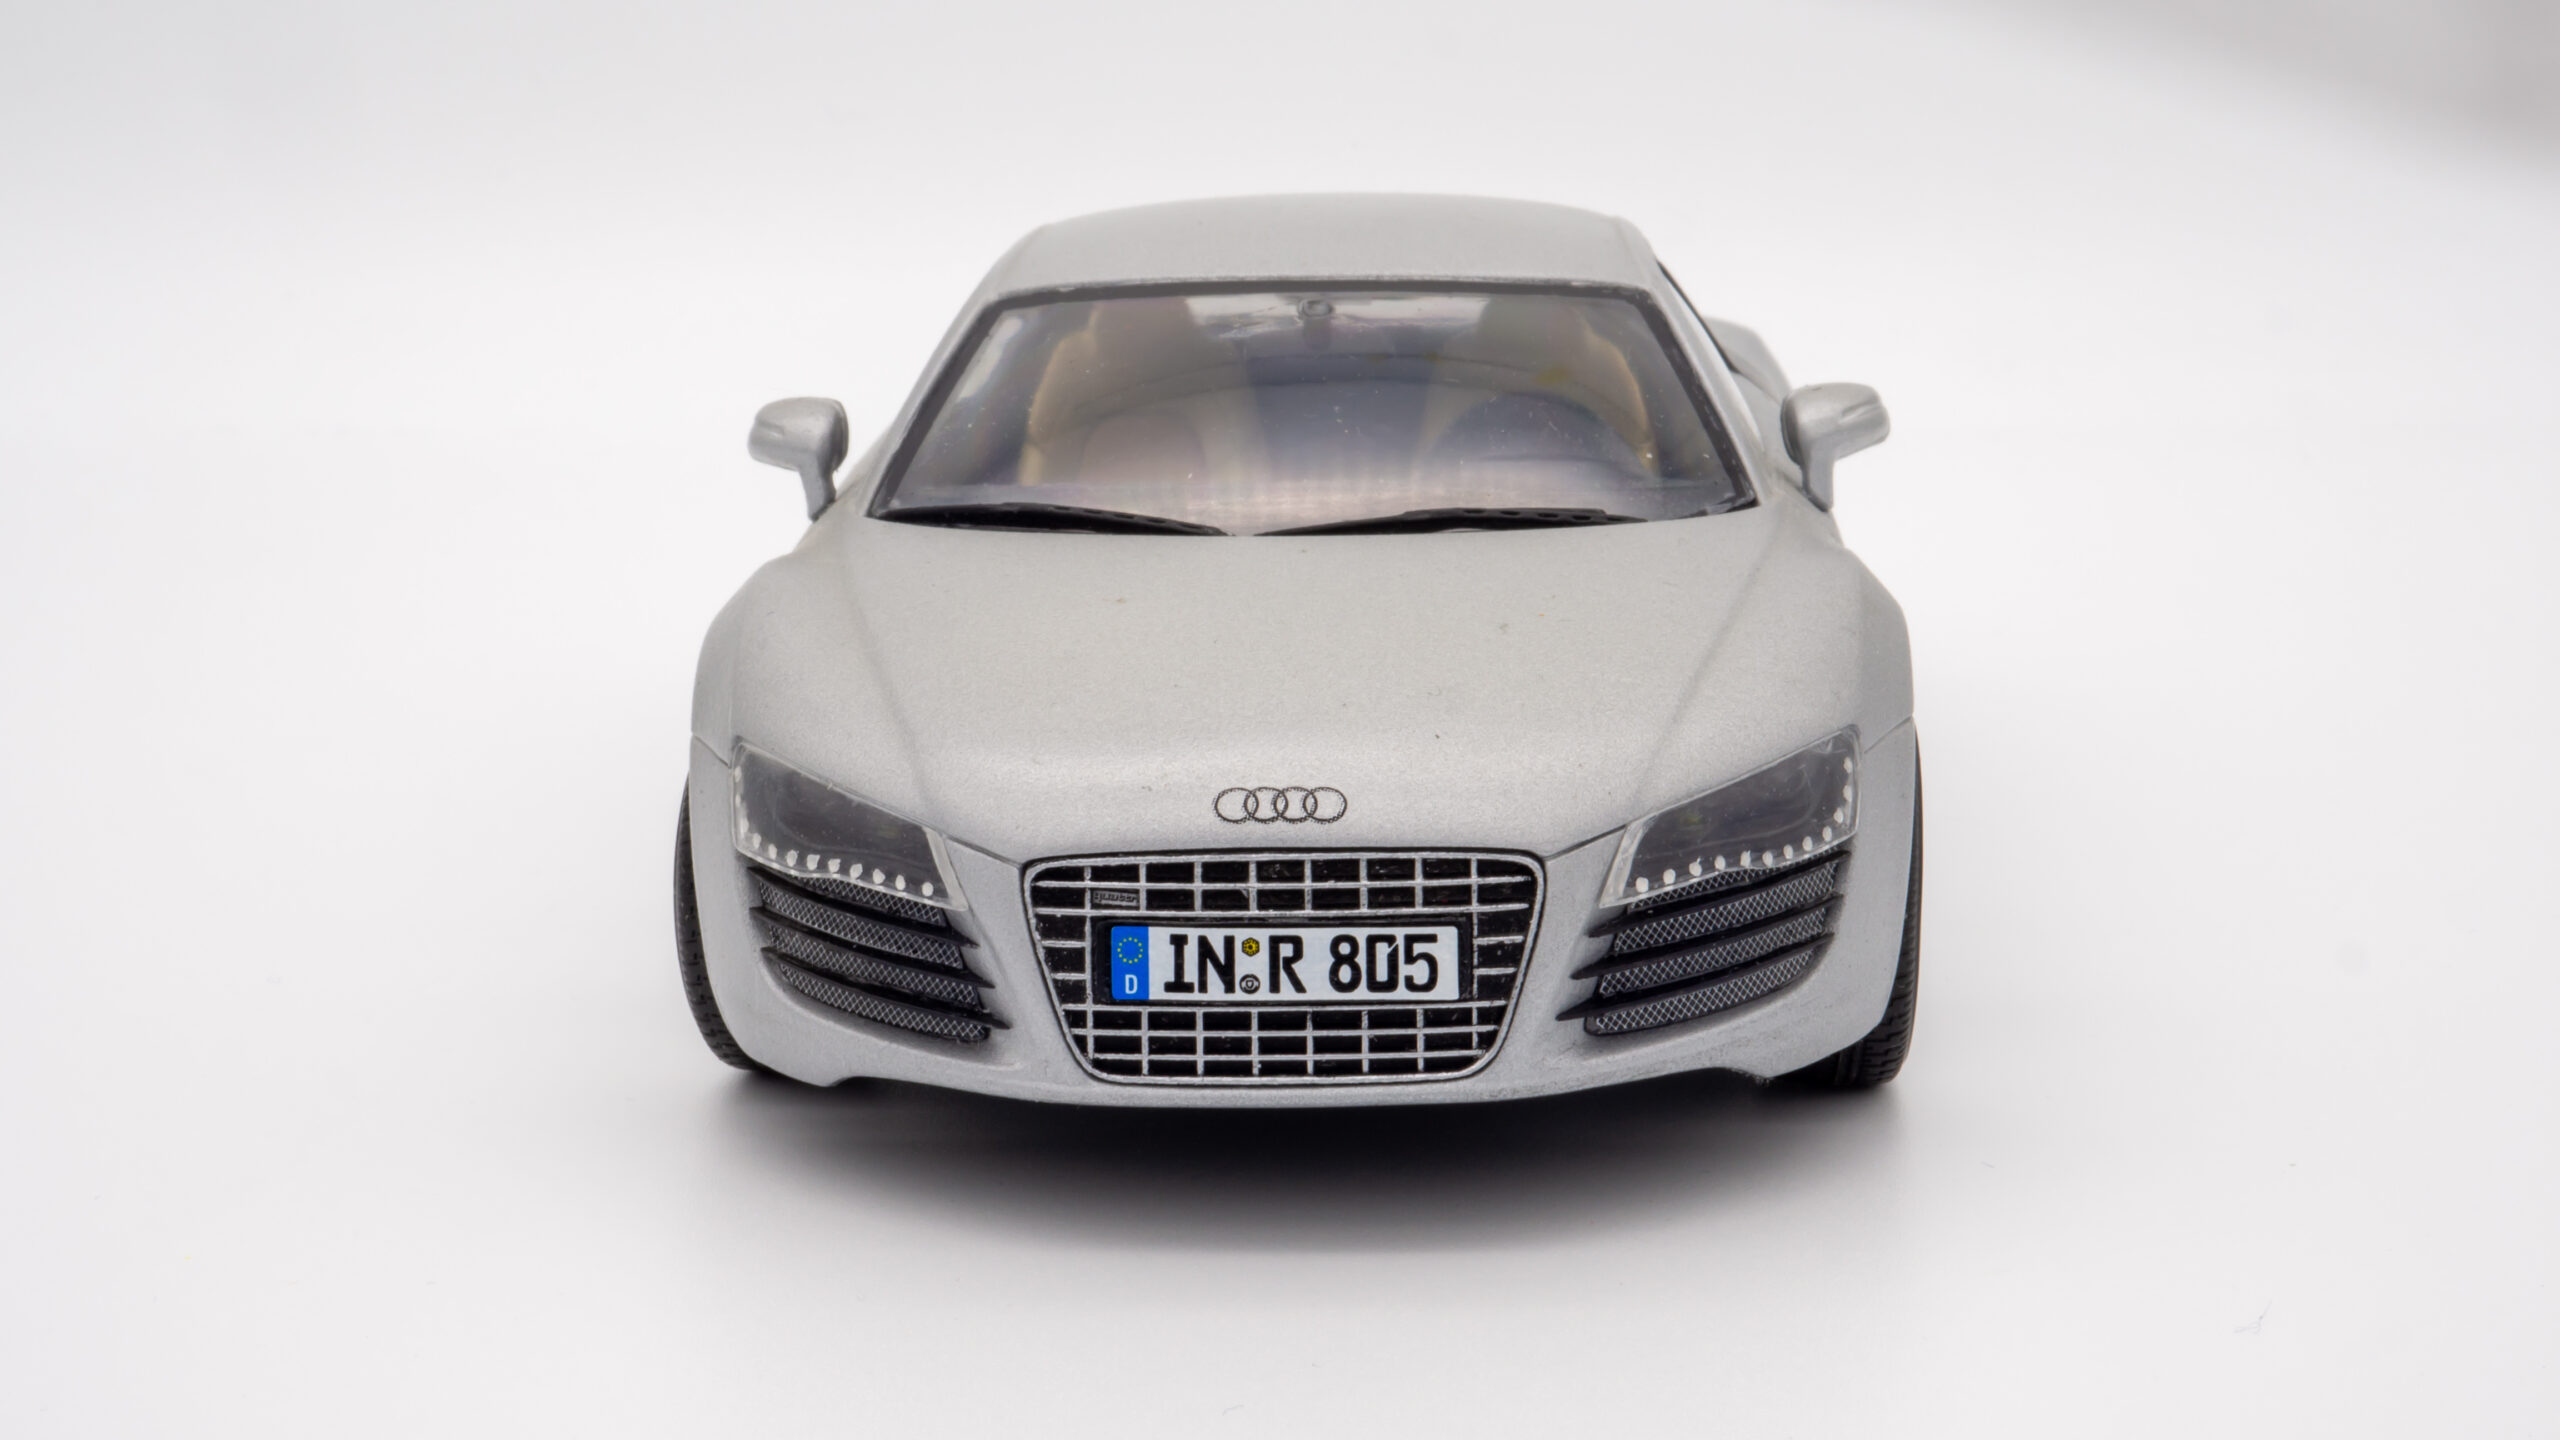
    Transparent headlight covers fit without a single gap. Fine details, fitted perfectly.

    The windshield also fits without a single gap or tension.

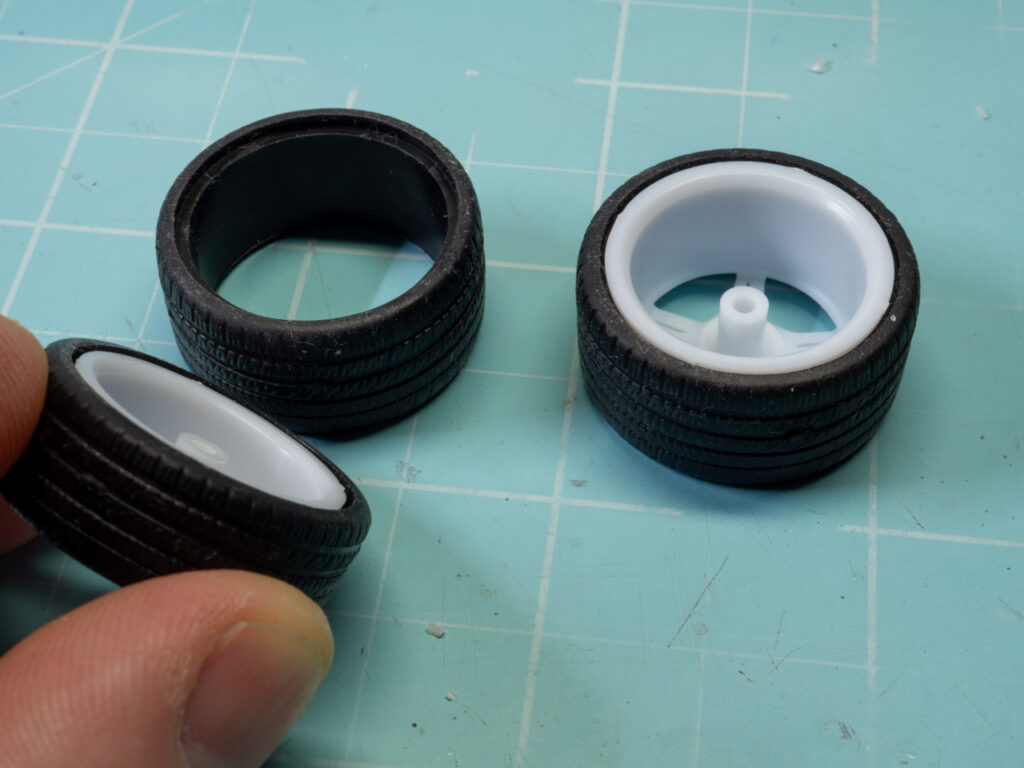
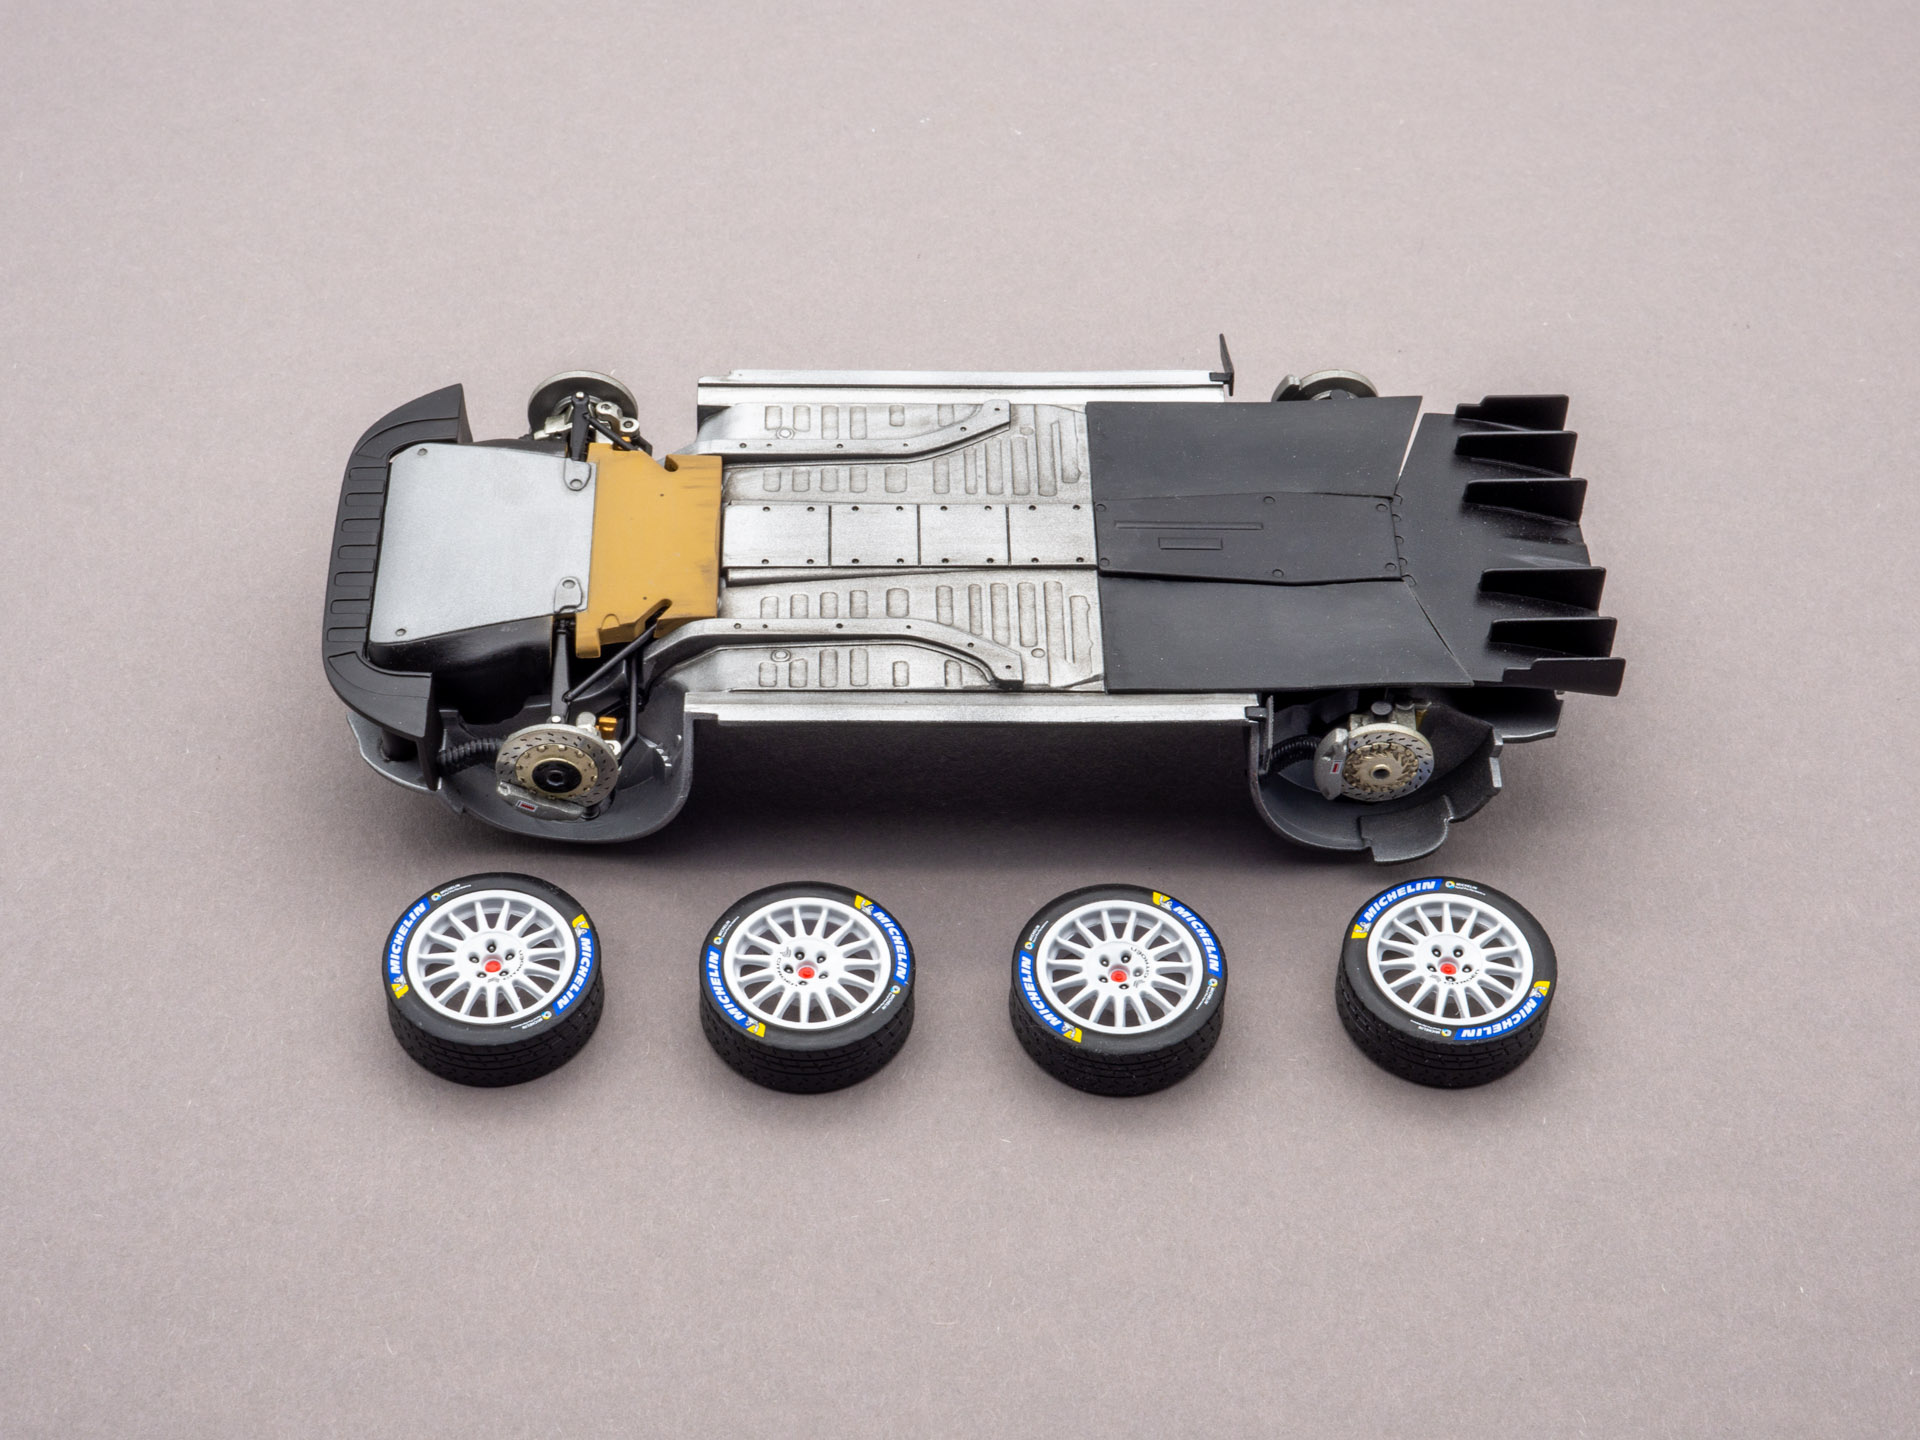
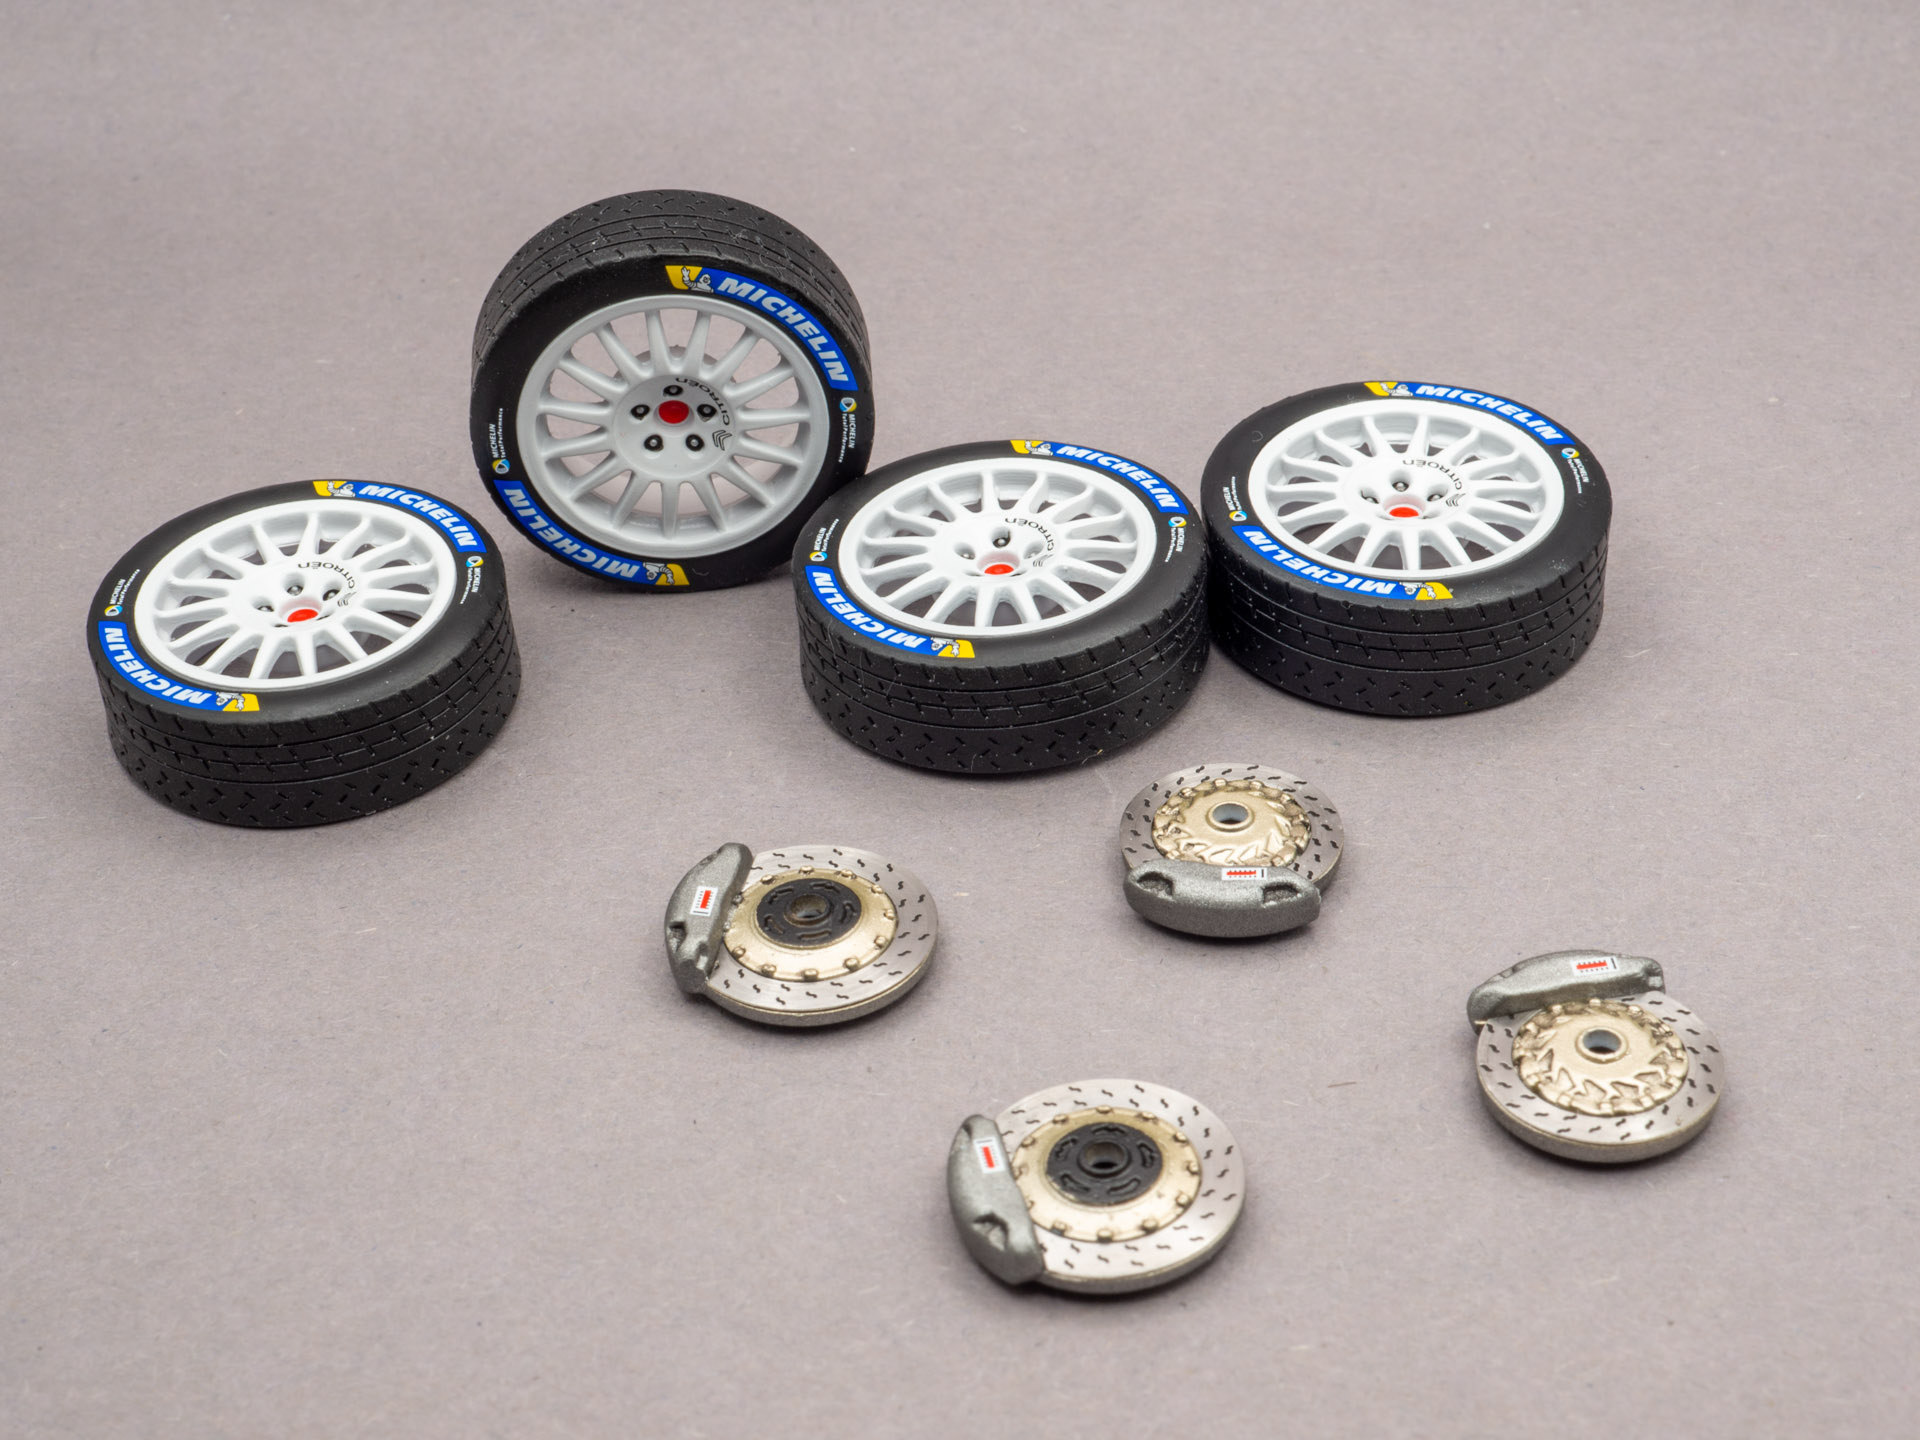
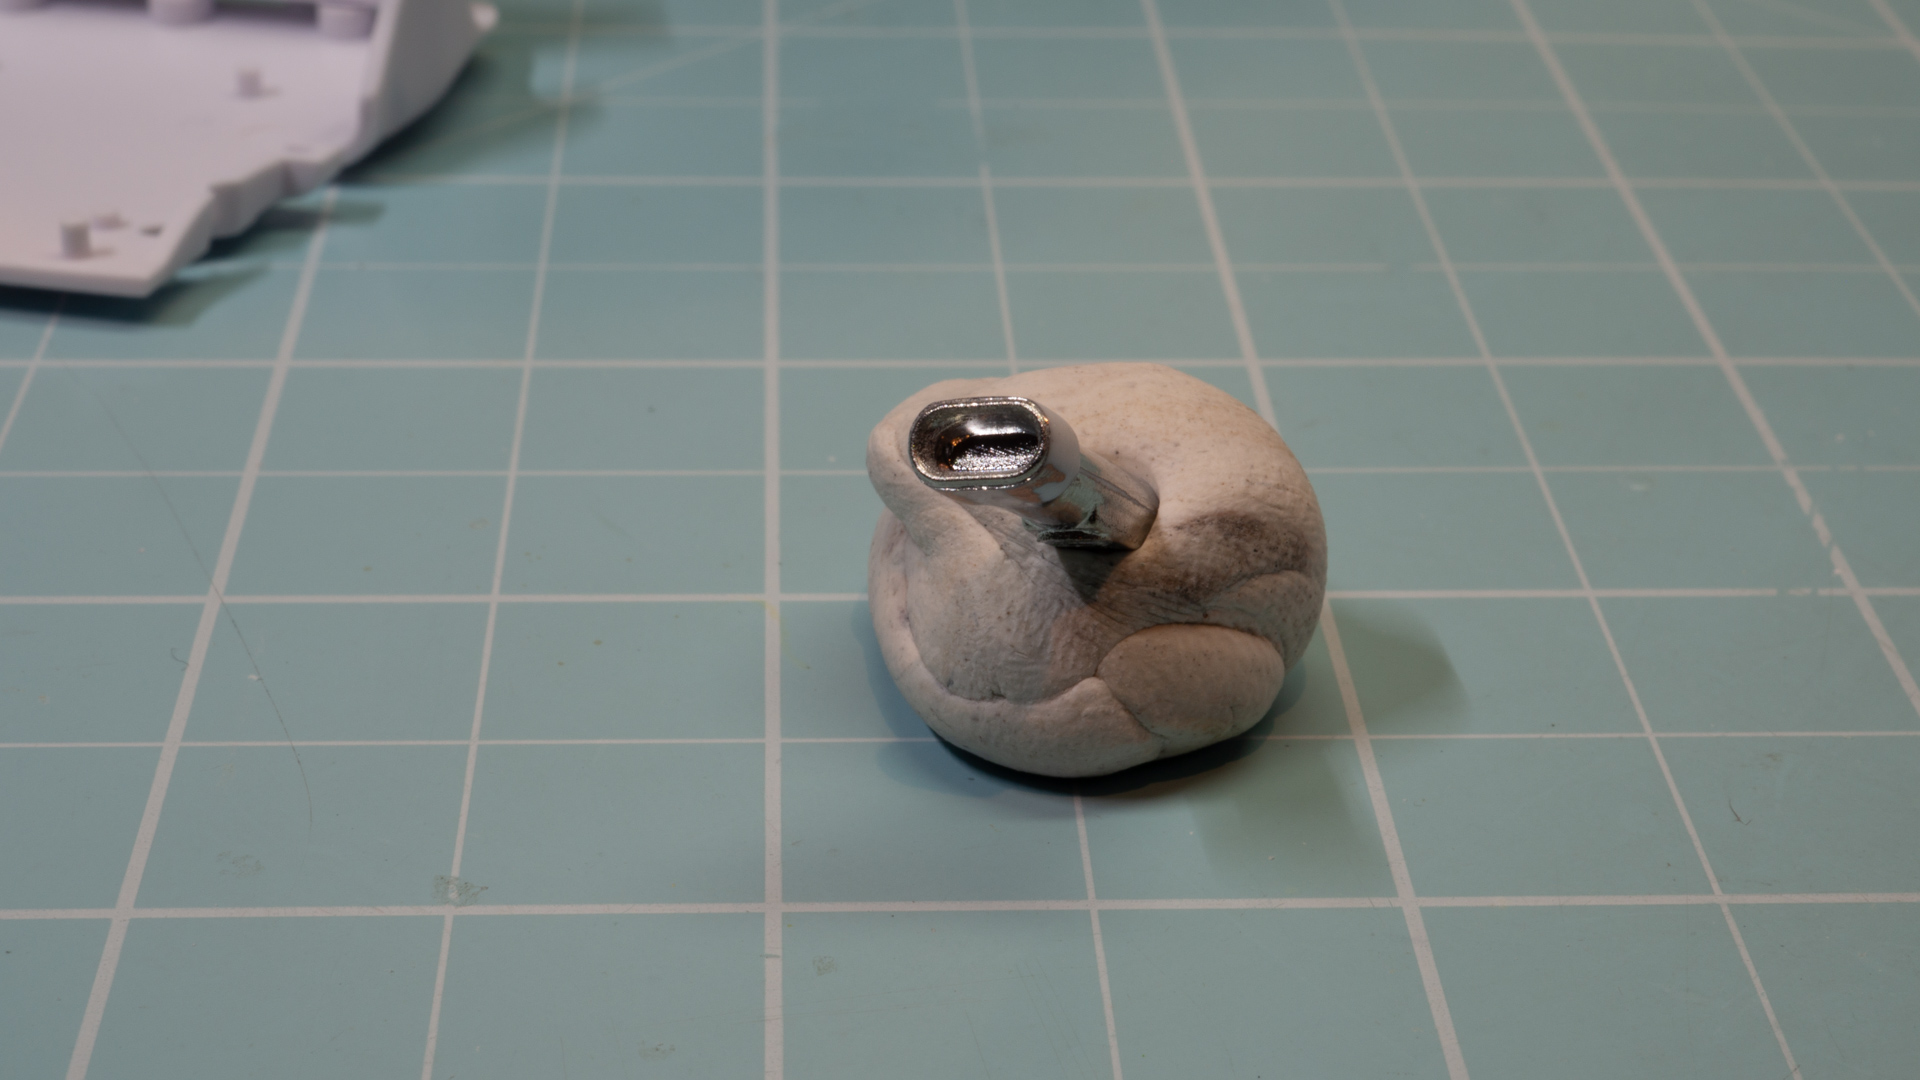
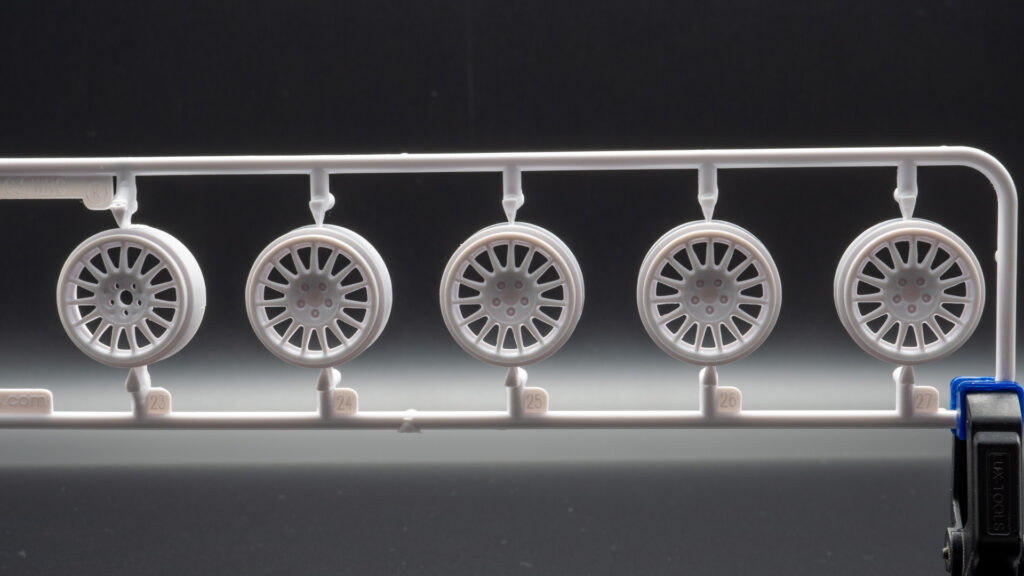
    By the way, the rubber has a groove for the rim. It’s a good solution to hide it. No need to cut off that ring on the back side. The wheels themselves do not use a rubber bushing; due to the frictional force, they sit in the hub and even rotates.

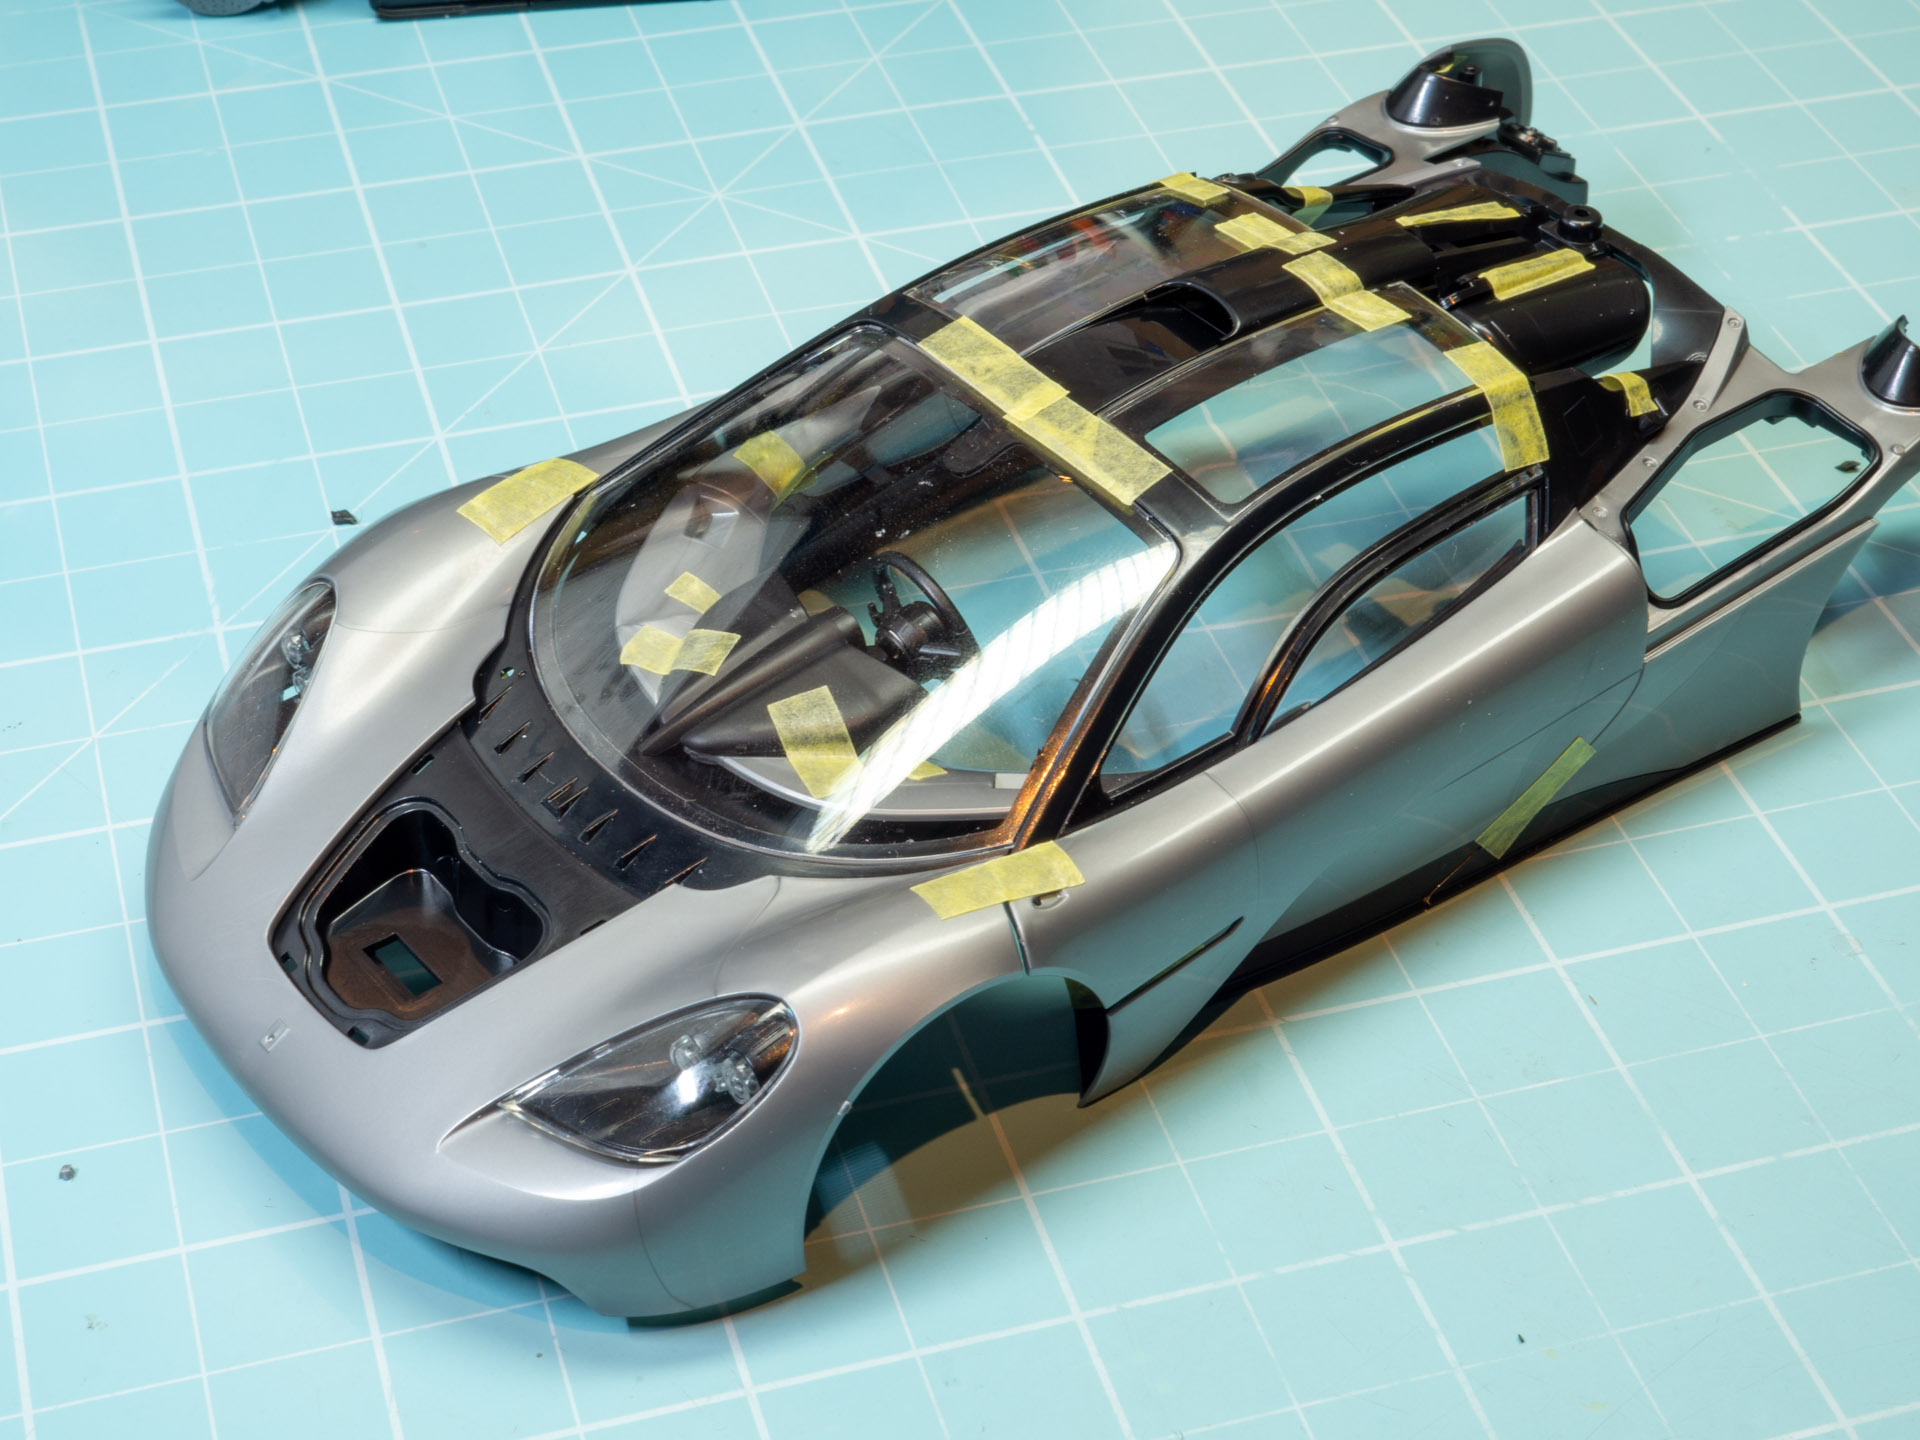
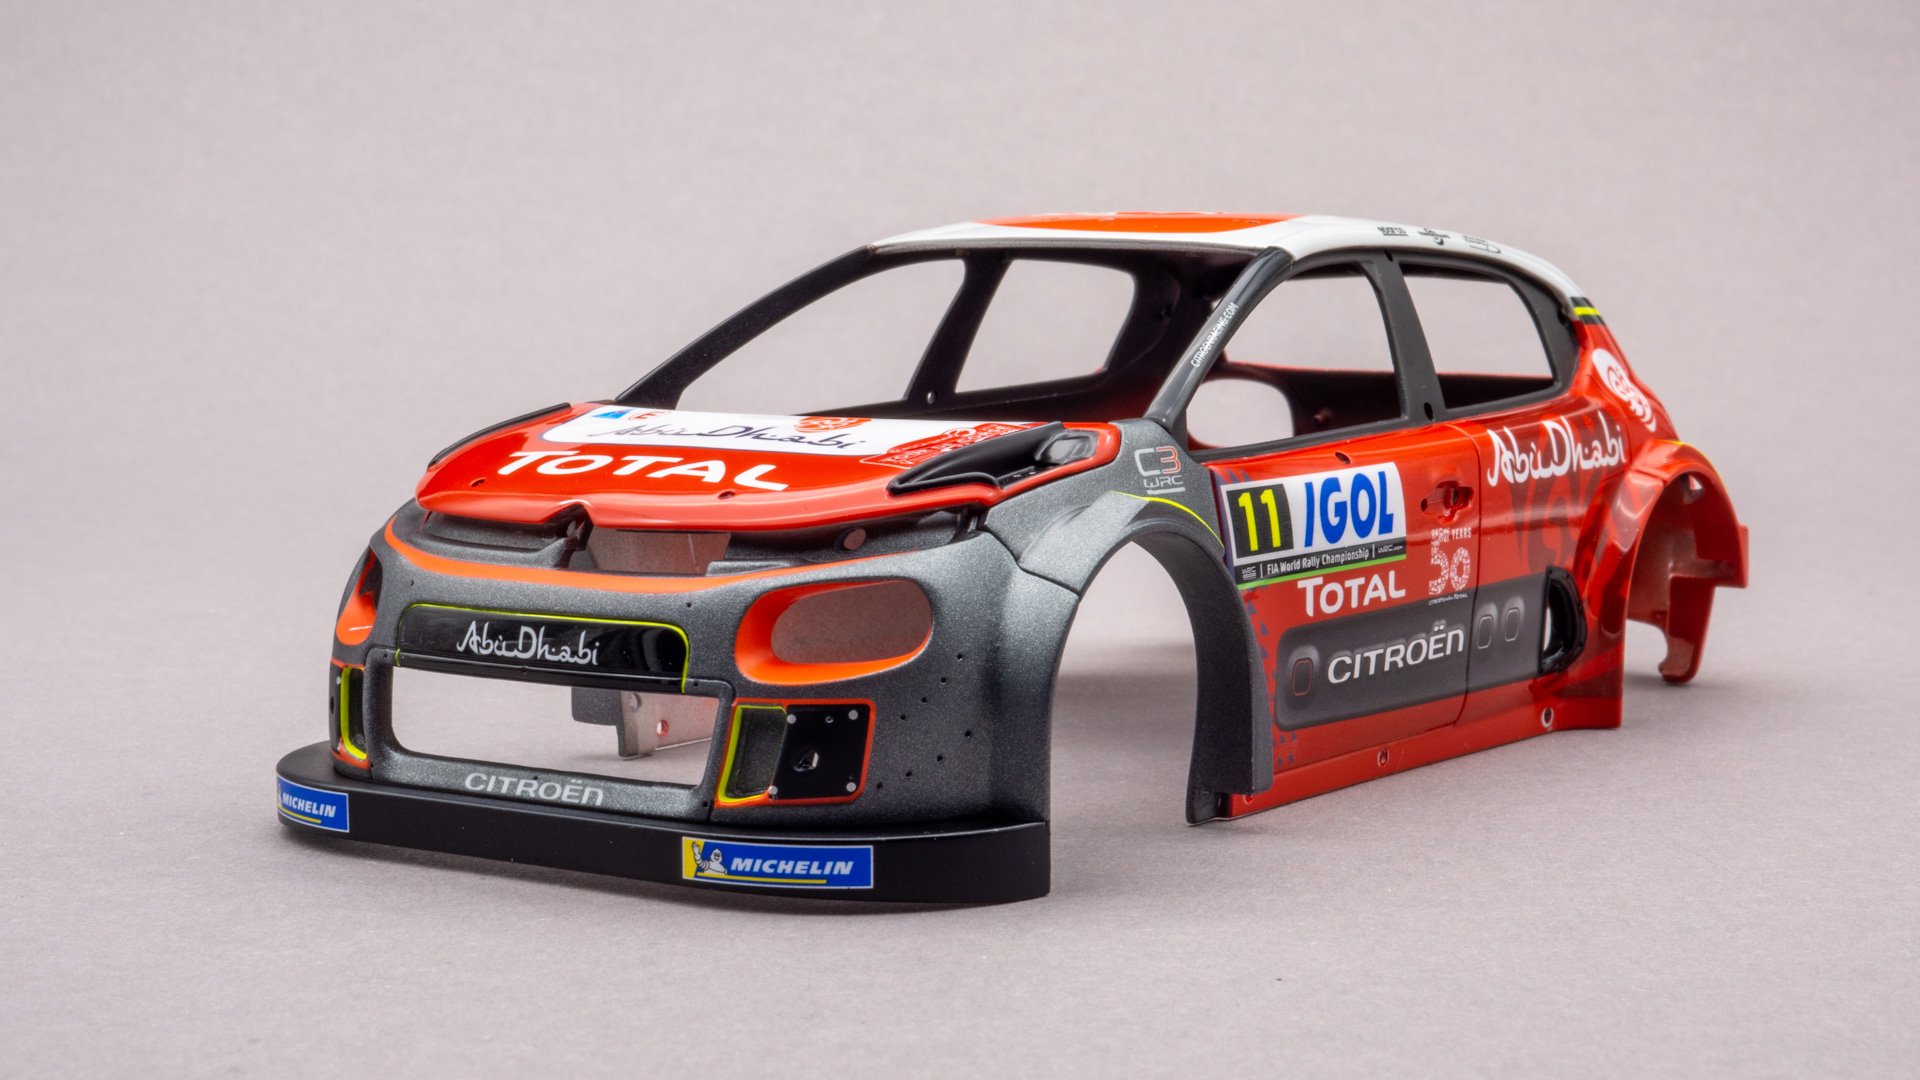
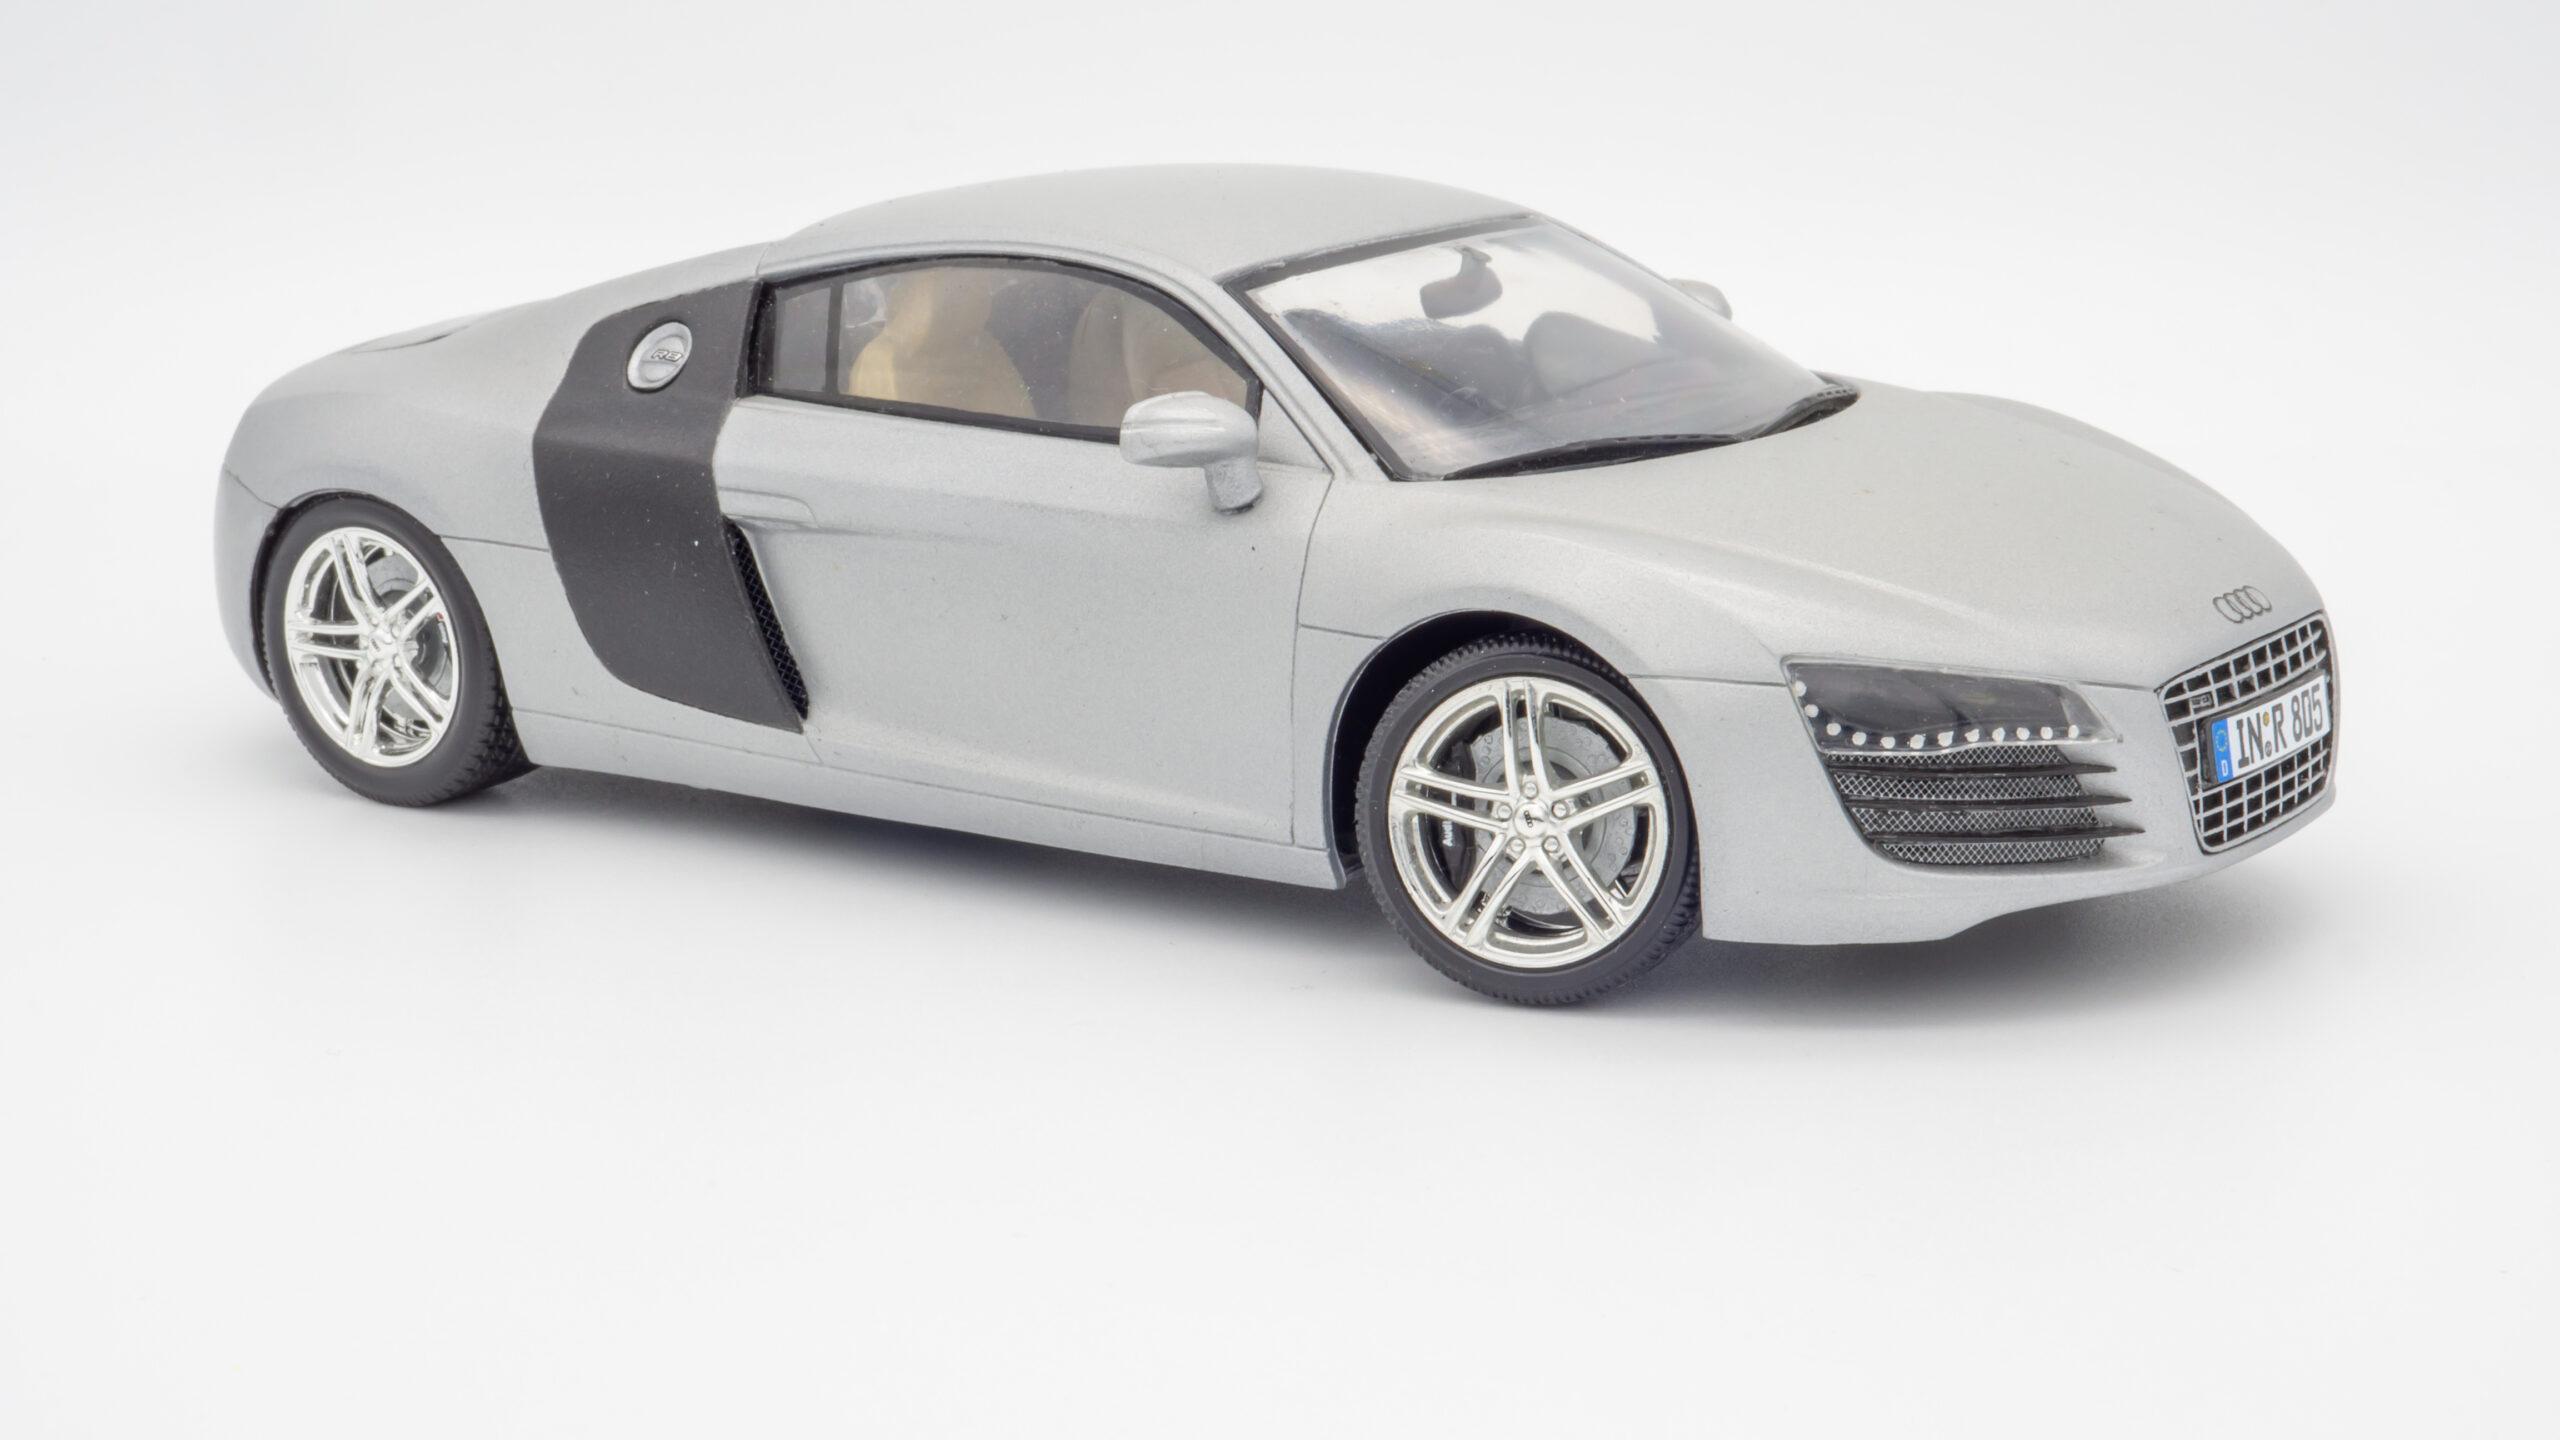
    This is the preliminary assembly. I like. I’ll probably make this Corvette in the near future, although I didn’t plan to 🤗

  • Citroen C3 tour de Corse 2018 #5

    Citroen C3 tour de Corse 2018 #5

    Now some interior work.

    Safety cage, i plan to glue it prior to paint. Do not like when seams are visible if i paint before.

    Interior tube serves as jig for easy mounting.

    Not convenient to paint it as one piece, but still ok for me. Painted in C8 silver.

    And according to manual, painted in black incl. some small decals.

    Interior tub was painted in silver.

    Lot of tools and small parts into the cabin.

    So, all these parts placed on the interior. The spare wheel in the instructions is face down, but I don’t like it that way, it will be looks face side on top. I placed the jack and screwdriver on white glue so that they would not dangle around the cabin.

    Now we can make the seats, as first remove the seams.

    Before applying carbon fiber, painted in black gloss.
    Unfortunately, carbon decals are not contrast at all, it is hard to recognize a pattern.

    Added seat belts from box.

    Seats can be installed. Ends of seat belts will mount to safety cage after its installing.

    Then prepared door panel parts.

    They can be mounted onto the safety cage.

    Now i mounted safety cage in cabin and fixed belts to the tube.

    Last part is dashboard with steering wheel. They are pretty simple. Steering shaft can be preassembled before painting.

    Ready. Most challenged was central decal on wheel. Need to check that small colored button on decal matches with the real one on the part.

    After installing dashboard i can call interior done.

    After wedding with chassis.

    Want to watch video version? welcome to youtube.

    That’s all for now.

  • GMA T50 review #1

    GMA T50 review #1

    Here i have a brand new kit from Tamiya on the table – the chic GMA T50. As usual, Tamiya is taking new steps in engineering and manufacturing new products that delight everyone and everything. The fresh kit offers us to build a sports car from almost 220 parts, which in nature exists in the amount of one hundred cars, and, of course, sold out before it was born.

    The first sprue is a bunch of body panels and something from the interior. As you can see, the biggest detail here is the front cowl of the body.

    The second sprue is full of different parts, but more recognizable are the door frames and the bottom parts. There are two of them, one for the interior, the second for the engine.

    The next sprue with many mechanical parts like engine parts etc.

    Look it more closer, you can see that the shock absorber springs are made plausibly. My personal opinion, since they separate from the shock absorber assembly, it was possible also to put in normal metal springs.

    The calipers are made separately and quite detailed. It should already be the standard.

    In the cylinder head covers, there are holes for the caps of the high voltage wires, cool.

    On this sprue is something from the interior. The tub is given without a floor.

    The steering wheel, console, gear levers and brakes looks good.

    A large part of the skeleton on which the body panels will be attached. Refers us to McLaren Senna.

    Tail section part with propeler cover.

    Sprue with clear parts. A lot of windows that does not require glue for mounting. Everything is held up with overlay panels. Thin and transparent. But not completely transparent, otherwise the sprue would not be visible in the photo.

    Different wide tires as usual without logos. There are also small polycaps, their purpose is a mystery for now. One of them is needed to secure the motor cover, I found this in the instructions.

    Decals are standard for the latest tamiya kits. There are also metal stickers. The etching set is limited to meshes for the rear. They also do not require gluing.

    Further, according to tradition, I build everything in order to determine the production plan. Picked up the monocoque a bit.

    And here is the shock absorber suspension system.

    As installed with wheel hubs.

    The seats are not as detailed as in the senna, but divided enough for easy painting. Passengers got own seats near the drivers.

    Interesting config.

    Here are the details for the engine. Pretty much parts.

    The first step in assembling an engine with a sump.

    Along with exhaust pipes.

    And this is what the assembled chassis looks like.

    Dashboard with door cards.

    The interior is attached to the skeleton, then the windows is hung and fixed with frames.

    The headlights are made up of several parts. The optics look convincing. The door panels consist of two parts, should remember to glue them and hide the seam.

    Panels and glasses fixed on the skeleton.

    Assembled the back with the propeller. Etching does not require gluing.

    The front lip has a several parts and easy fixed in its place after marriage, which, by the way, is simple and also easy.

    Engine compartment covers. Depending on the glass used, they can be either open or closed. This glass can be changed even after painting and assembly. Nothing is fixed on the glue, but simply inserted into the groove.

    Open/Closed.

    A small carousel, as it may look after assembly.

    There is also a video, give me likes if possible, thanks!

  • Citroen C3 WRC Tour de Corse 2018 #3 Chassis

    Citroen C3 WRC Tour de Corse 2018 #3 Chassis

    I am working here with chassis. As first i do some bores to be able mount small parts like levers and rubber duct part.

    citroen scale model car

    And next step is painting bottom part in black as underlayer and then aluminum gloss.

    Axles are also painted and mounted. Imitation of gearbox and rear diffirential are aluminum flat.

    Brake supports and rotors made as one part, pe disc need to be glued on it.

    And then I painted them and added a little wash to the ventilation of the disks for contrast and realism. Michelin decals on rubber are brushed with Vallejo matt acrylic varnish. It cures evenly well and has a rubber-like vinyl base. Someone asked how I made the red dots in the center of the wheel. There is no need for any masking or sloppy brush work. With the help of a punch bit, we cut 4 circles from unused red decal.

    Springs brushpainted, nothing unusual.

    The front and rear axles assembled.

    Brakes closer

    For realism reason the exhaust pipe is drilled and hole deeped.

    It will be hidden a bit, so I didn’t do any burnout or effects on it.

    Radiator made of pe and glued accordingly.

    Finally, I closed everything with plates and rubber pads, little bit weathered, and call it is done.

    Wheels do not mount so far, i left it till the end of overall build.

    That is all. The video on Youtube is also available.

  • Citroen C3 WRC Tour de Corse 2018 #2 bodywork

    Citroen C3 WRC Tour de Corse 2018 #2 bodywork

    We are going further with carbody. The first I do is marking all seams with black marker. That is because I will sand it with 400 grit sponge until black disappeared. That shows that all seams are clean. The yellow epoxy is a printed stamp of windscreen washer nozzle. Moulded in body I will sand off.

    Fenders can be glued after paint work, but I decided to fix it before painting. Moreover, they need to be aligned with the rest of body.

    Scribed new panel lines in the trunk door area.

    I also glued small parts over the fenders.

    Fenders glued and aligned with the body. And holes for night lighting made.

    Also fitted PE-meshes to hood. They have a double curvature, and it is difficult to bend them. Having worked with pliers and got something.

    Screws in the side air intakes were cutted off and new holes made. I’ll put there metal screws later.

    Fill the seams on the small parts on the fenders and drilled holes for canards.

    Now it is time for painting. As first, sprued automotive 1k primer filler, sanded 2000 grit and painted roof in white. Body has three main colours. Here are white areas masked and we can continue.

    Then body got red and grey anthracite colours. A-Pillars and front lip are black.

    Next is decaling step by step. I recommend to paint body with gloss clearcoat before put decals. But I neglected my own advice and some decals were silvering, few of them though.

    Front part
    Top view
    Rear part

    So, the whole body is decaled. On the doors there is no large gray strip. Since it must be matte, I left it for the last step.

    And then 2k clearcoat was added.

    Here is orange peel sanded with godhand sponge 4000. Clearcoat was left on 3 days before I started to sand.

    Further sanding with 6000 sponge.

    Further 8000 sponge. The difference is not so noticeable, but I recommend do not skip this step.

    And finally 10000 grid.

    And then polishing with proxxon and meguiars scratch-x. After that polishing by hand with step 2 meguiars medium.

    After polishing masked all areas but the front part. This must be not so glossy.

    Semi-gloss Alclad 2 clearcoat was applied.

    Front part semi-gloss

    Then applied the rest decals – big gray stripe with Citroёn logo. Windows area painted brush in black.

    Logo Citroёn with text was taken from box. This is metal stickers. Black decal over that.

    On this step i would say the bodywork is finished.

    You can also find video build on my YouTube channel.

  • Citroen C3 WRC Tour de Corse 2018 #1 unboxing

    Citroen C3 WRC Tour de Corse 2018 #1 unboxing

    Here i will start the next build. This is a rally car Citroen C3 WRC version 2018 by Belkits with article number BEL-017. By the way, this kit was kindly given to me by webstore Domino.be. I recommend it, since I use this shop very often myself and buy there a lot of stuff.

    The car body is complex, with many different imitations of bolts and other details. To the kit i have got some paint jars for basic coloring. Number 5 is excellent paint, they do not eat plastic and are absolutely friendly for any surface.

    Sprue with undercarriage and suspension elements. The brake calipers are molded into the discs.

    Sprue related to the bottom parts. There are covers that close everything from below, and the side sills.

    Sprue with wheel rims. The one without bolts is a reserve rim. It will be placed in the cockpit.

    The interior tub is as a separate part with many holes – to position accessoires. I like when such parts are separate, and not moulded into the body, you do not need to waste time to mask it during painting. The imitation of the engine is simple, it seems to me that they insert it into all models. Doors cards are separate and with a small detailing in it.

    On the next sprue, the parts of the safety cage, the dashboard and some small parts for in the interior.

    Various small parts for the exterior and rear wing parts.

    Sprue with clear parts. There is some distortions, but still ok.

    Chrome plated parts.

    And this is a cool sprue, all the parts of the rubber. Mudflaps, air cooling ducts and other things. The tires are simple, with a tread.

    Also was given stamped canards made of metal, a couple of PE plates with meshes, disk rotors on each side and various seatbelts things. Also painted masks and metal sticker mirrors with Citroen emblem.

    The sheet with decals is very large. Made by cartograph, this means that there will be few problems with them.

    Before starting work, I make dry fit with the main parts to check the further building process.

    All four wheels touch the surface of the table, which means the bottom part is straight flat, without distortions.

    I prefer to glue safety cage before painting. Marked which parts can be assembled before painting. Almost everything except two front beams. I will show them during the WIP.

    This is what the final option will look like. Me like it.

    That is all for a while, see you.

  • 1/24 Audi R8 Revell 07398

    1/24 Audi R8 Revell 07398

    Hey all, this is the very first entry on this personal blog, which I wanted to start for so long, but could not because of some reason. As this is the first post, I will show my first model, where it all began.

    This is a Revell‘s Audi R8 (art. 07398), which i random buyed when I was looking something in the web in 2015. Just from interest reason, I bought this box, it was a gift set with a brush, glue and several colors inside. It seemed to me that this would be enough to build and paint the model 🙂 
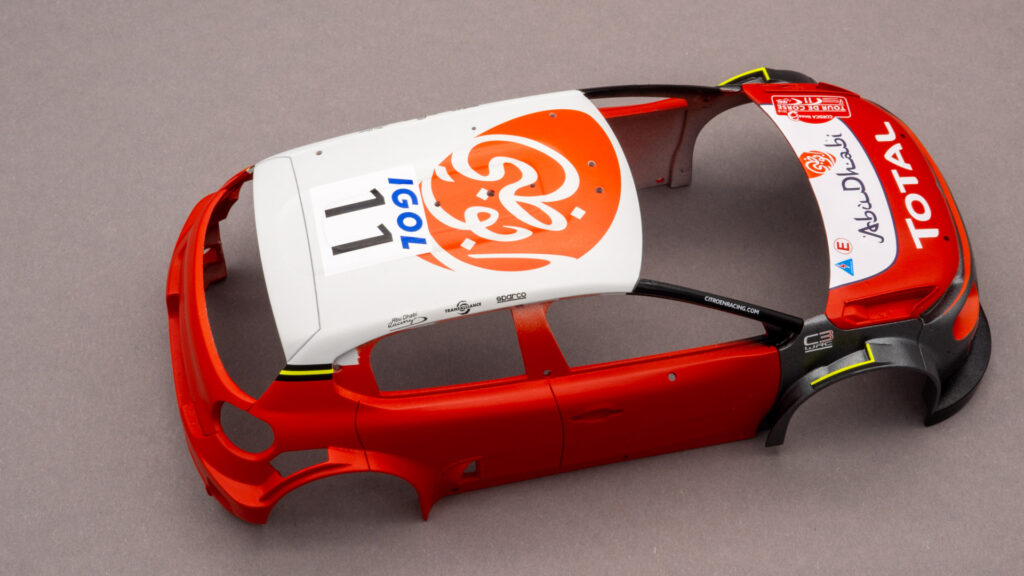
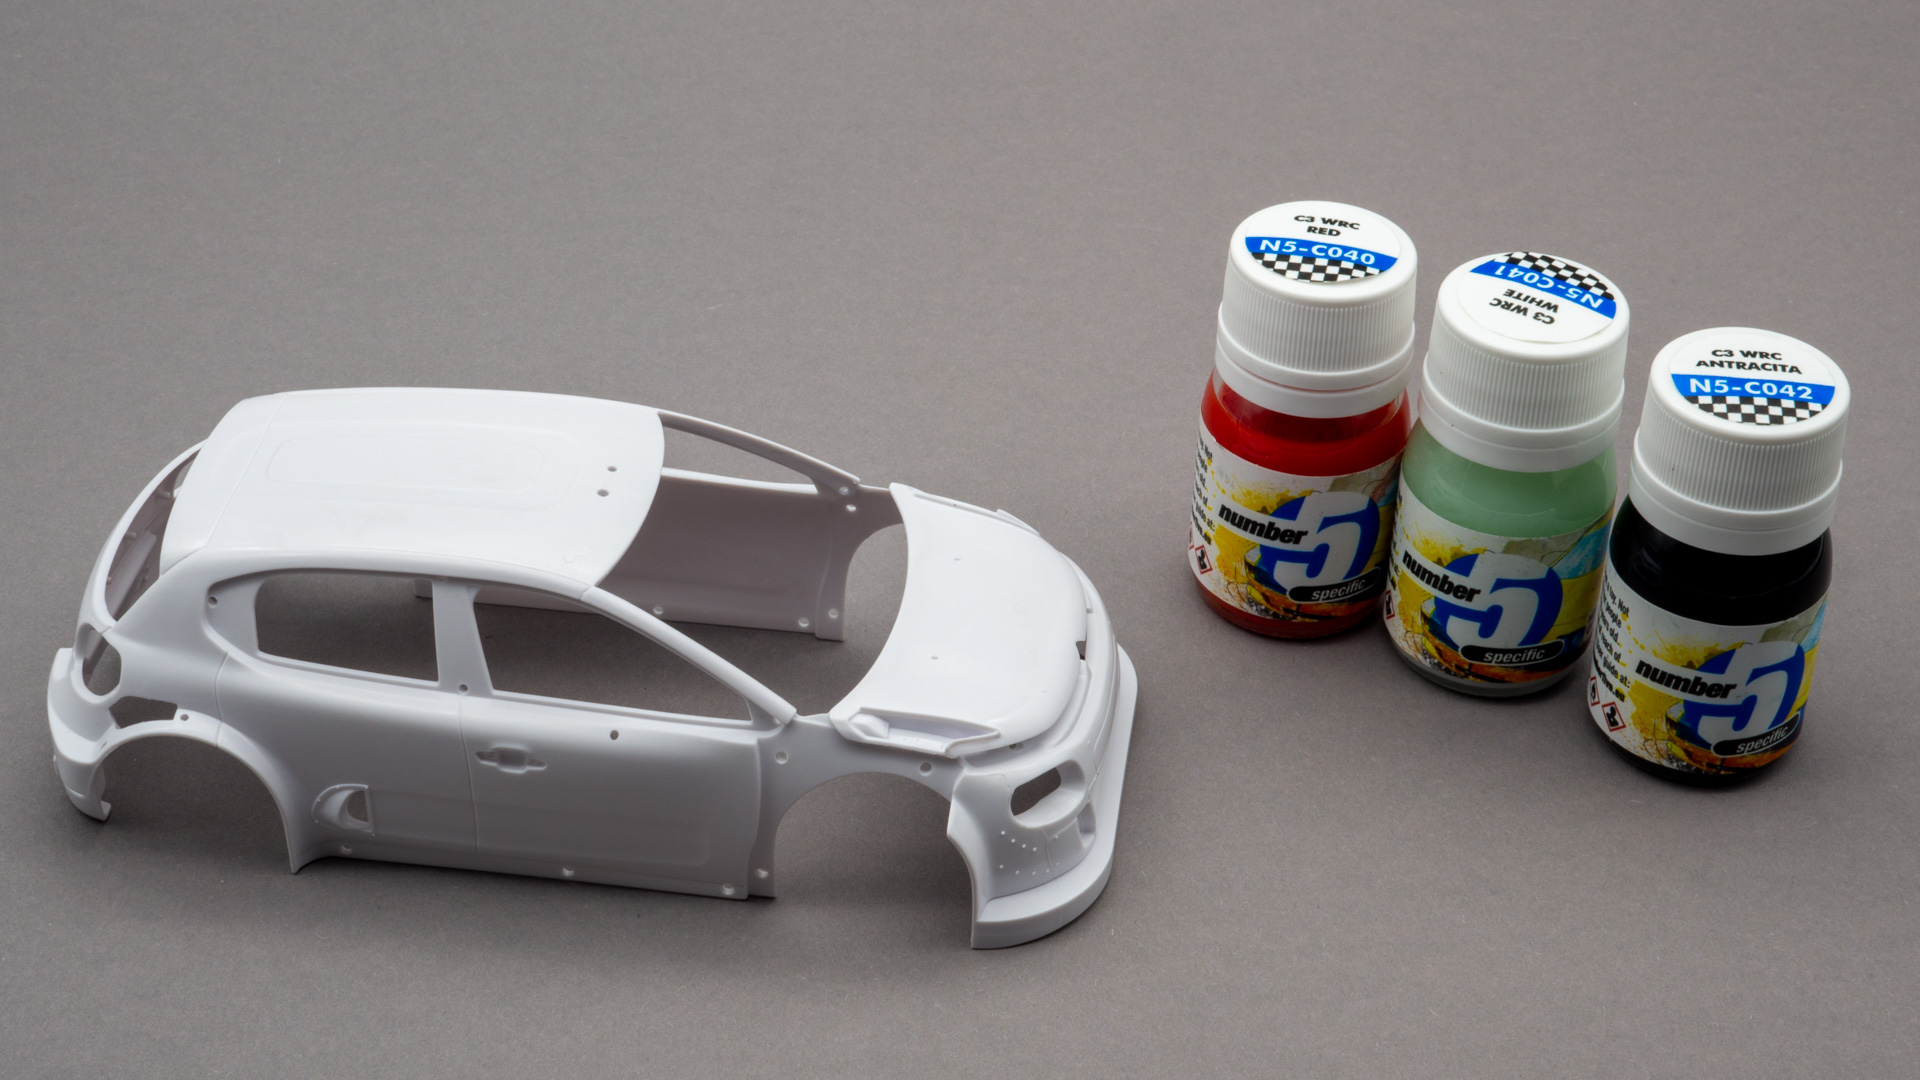
Began to build step by step according to the instructions and paint with the brush with existing colors. I had to buy some colors, these were Acrylic water -soluble Revell paints in square bottles 18 ml. Before proceeding to the body, I found out that it was best to paint it with an airbrush, after which a simple single -acting airbrush set was purchased from the same Revell company. However, painting still left much to be desired. Despite of that i was very pleased with the first result and got more desire to go further.

    You can also find more photos in gallery.